Custom Integrations in Applications Manager
In addition to built-in integrations, Applications Manager supports Custom Integrations, enabling users to connect with any third-party application that accepts incoming webhooks or REST API calls. Use Custom Integrations to automatically forward alarms to the tool of your choice, accelerate incident response, and maintain application uptime and performance.
To create a new custom integration, go to Settings → Integrations (Add-On Settings) and click on New Custom Integration.
Note: This feature is available in Applications Manager versions 177200 and above.
- Configuring Custom Integrations in Applications Manager
- How Custom Integrations Work in Applications Manager
Configuring Custom Integrations in Applications Manager
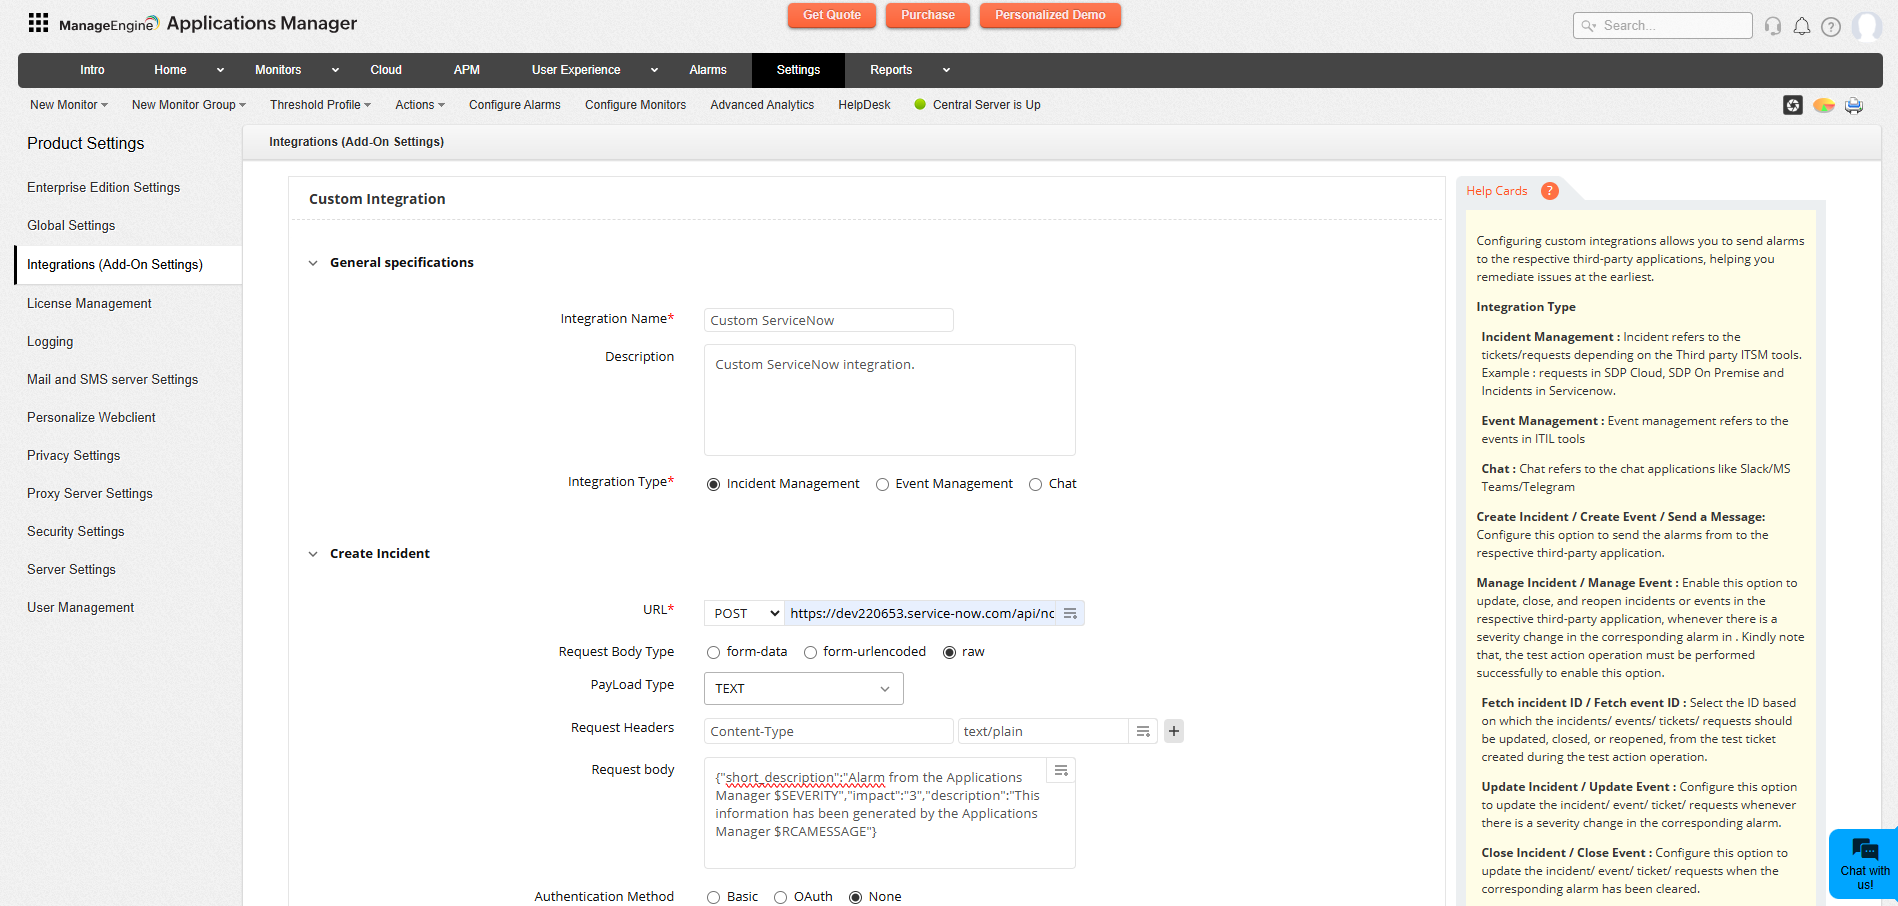
After clicking on New Custom Integration, you will land on the integration configuration page. Enter the following details:
- Integration Name & Description — A name and optional description for the integration.
- Integration Type — Choose one of the following:
For Incident and Event Management
Configure the actions that will create, update, close or reopen incidents/events in the target system.
- Create Incident / Create Event
- See HTTPS parameters to learn how to configure the HTTP request body, headers and payload.
- Advanced Configuration
- User Agent — Optional. Provide the originating agent/user agent string if required by the target API.
- Timeout — Request timeout in seconds.
- Authentication Method— Select Basic, OAuth or None.
- Basic — Use username/password authentication if required by the endpoint.
- OAuth — Use OAuth if the endpoint requires it. Configure the OAuth provider settings using Add New OAuth. Learn More
- None — Use when the endpoint is unauthenticated or uses header/body tokens.
- Use Test Configuration to check connectivity and verify that your webhook configuration is correct before saving.
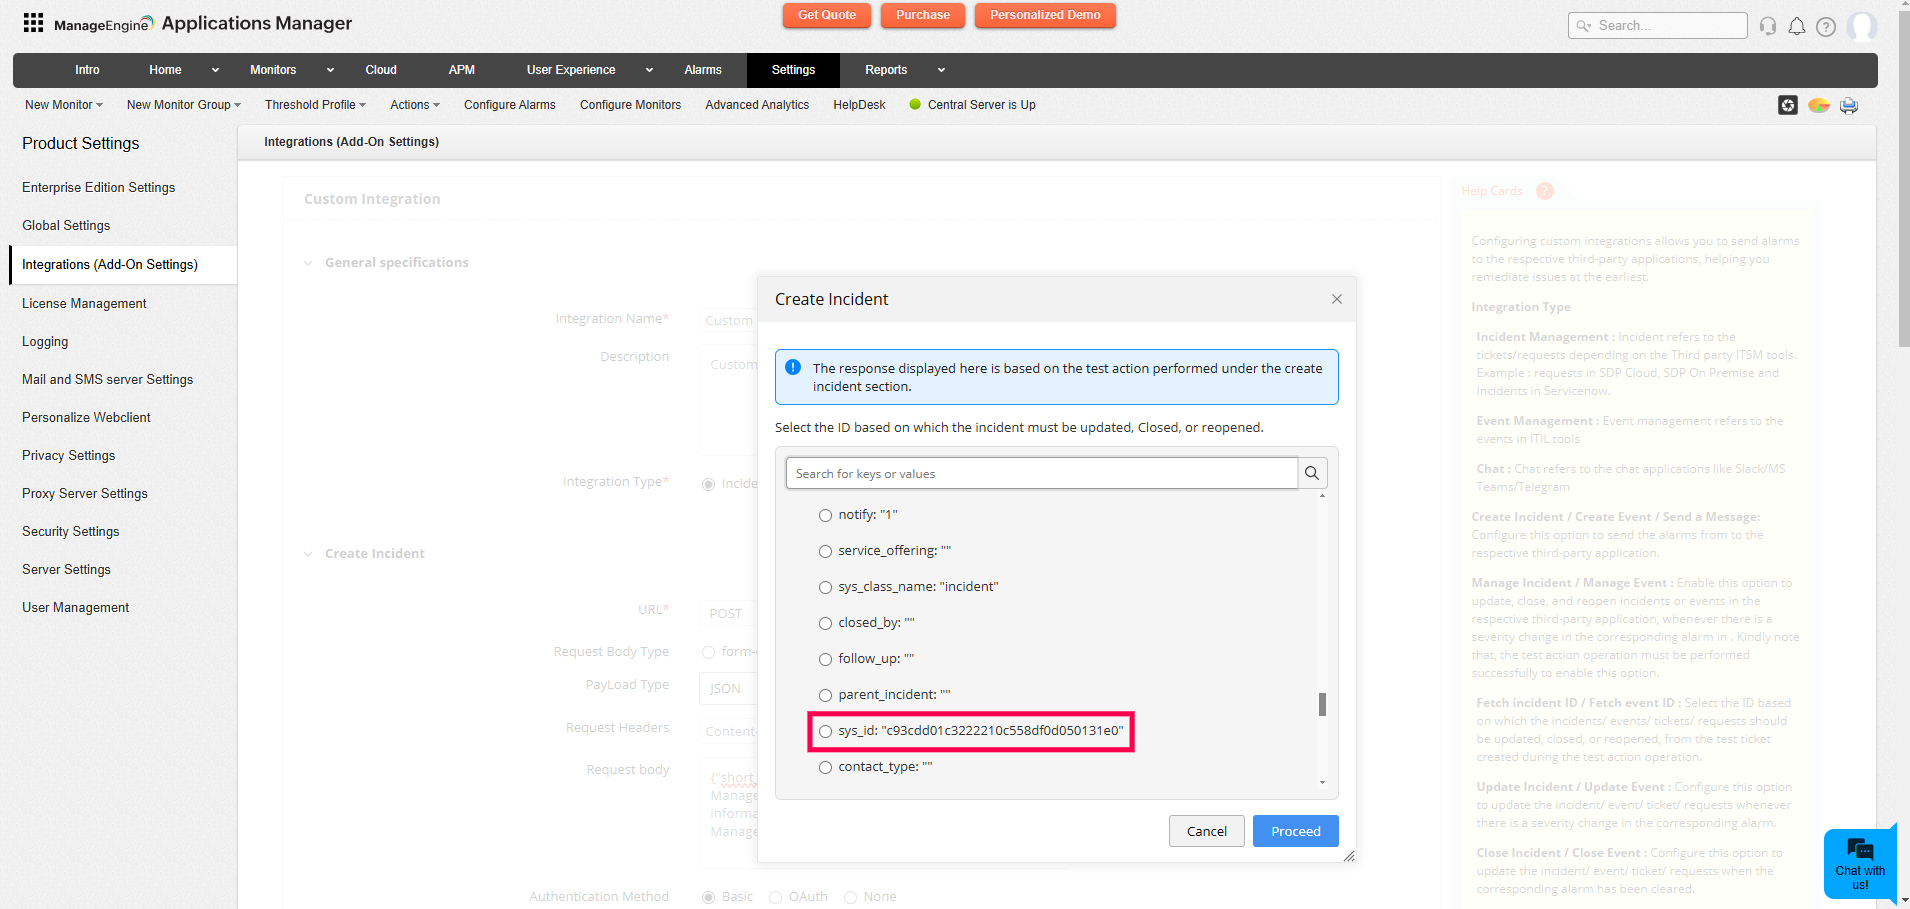
Manage Incident / Manage Event — Enable updating, closing or reopening incidents/events. Use Fetch Incident / Event IDto retrieve and select the response field (for example, Incident ID or Event ID) that will be used for subsequent updates/closures.
Note: Use the replaceable tag for the selected Incident/Event ID in update, close, or reopen webhooks.
For example - A ServiceNow update incident API URL would look like: https://dev220653.service-now.com/api/now/v1/table/incident/$.result.sys_id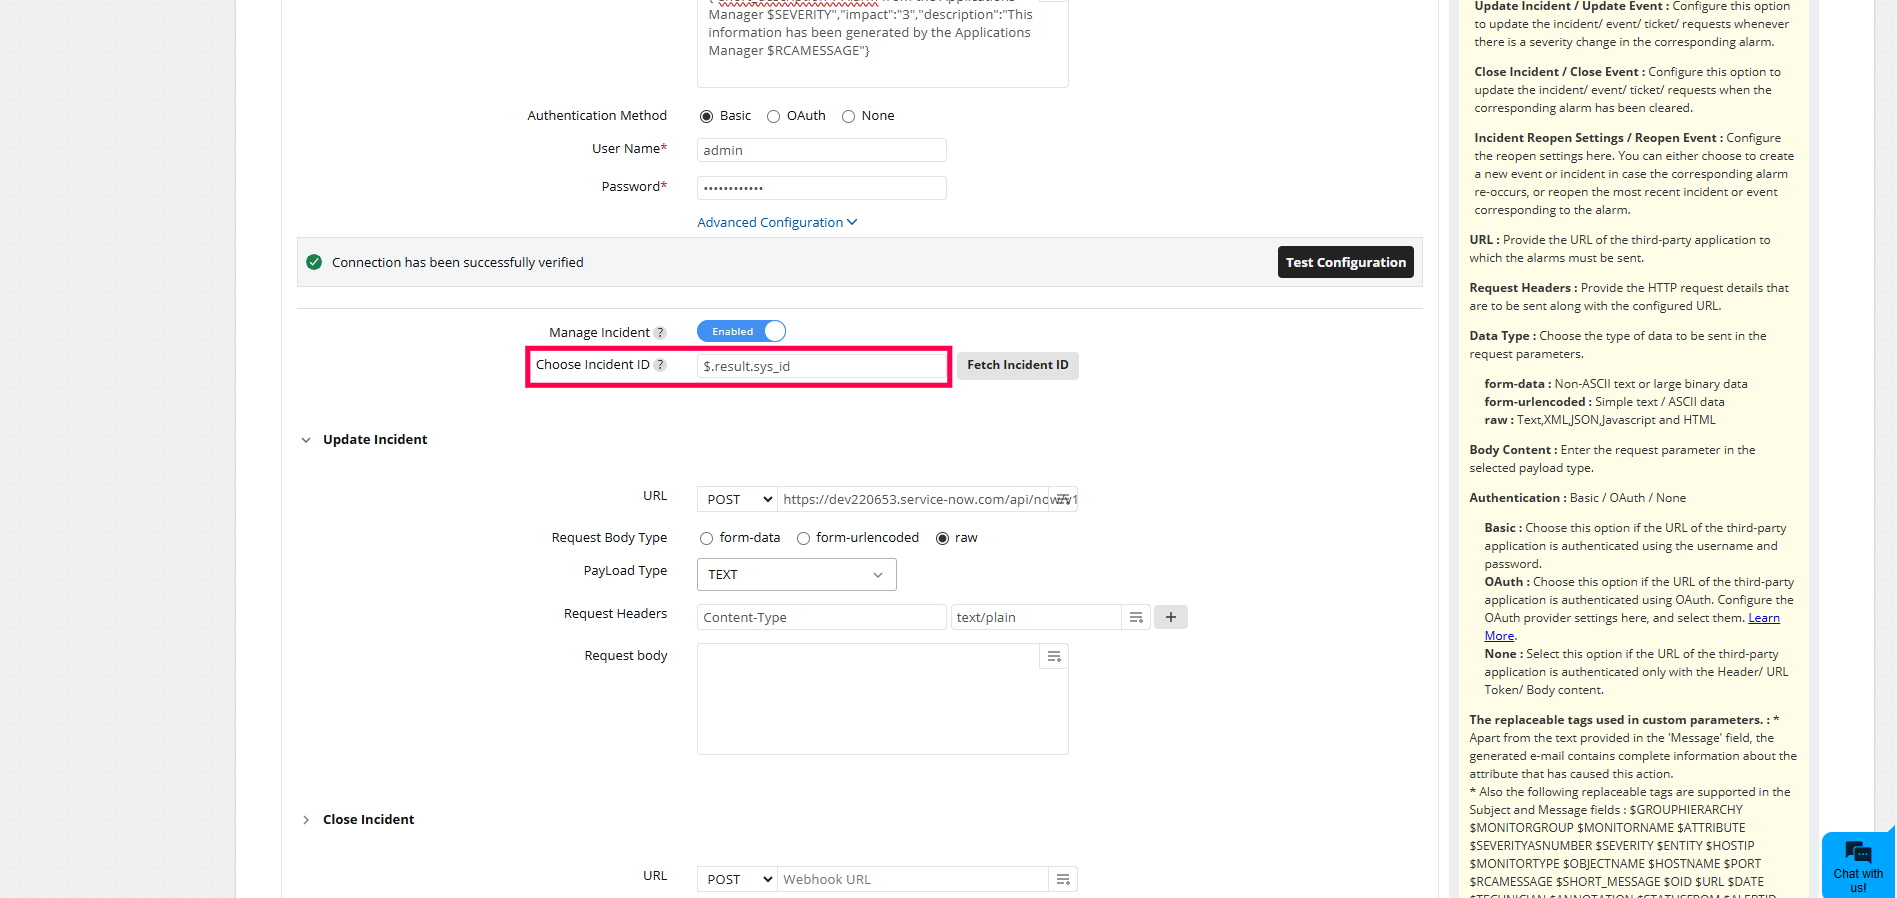
- Update Incident / Update Event — Configure the HTTP parameters to send updates when alarm severity changes.
- Close Incident / Close Event — Configure the HTTP parameters to close incidents/events when alarms clear.
- Incident Reopen / Event Reopen settings — Choose whether to create a new incident/event on reoccurrence or reopen the most recent one within a configured window.
- Click Save when configuration is complete.
For Chat
Use this to send alarm notifications as chat messages. Configure the HTTP request parameters, payload format and authentication similar to the incident/event actions. Advanced options include User Agent, Timeout and Authentication method.
- Define the message payload and headers per the target chat API.
- Test using Test Configuration and click Save.
Configuring HTTPS parameters
Configure the HTTP(S) request parameters as follows:
- URL — Target webhook or API URL.
- Request Headers — Any headers required by the target API.
- Data Type — form-data, form-url-encoded, or raw.
- Payload / Body Content — For raw type, specify payload type and body content.
- Custom Parameters — For form-data and form-url-encoded, list the parameters to send.
Note: You can configure a maximum of 25 custom integrations. Delete existing integrations to create new ones if you reach the limit.
Once saved, integrations appear on the Integrations page. You can edit or delete integrations from there. Deleting an integration will also remove any references to it in Applications Manager.
How Custom Integrations Work in Applications Manager
Follow the steps below to ensure that your custom integration actions are triggered correctly for alerts:
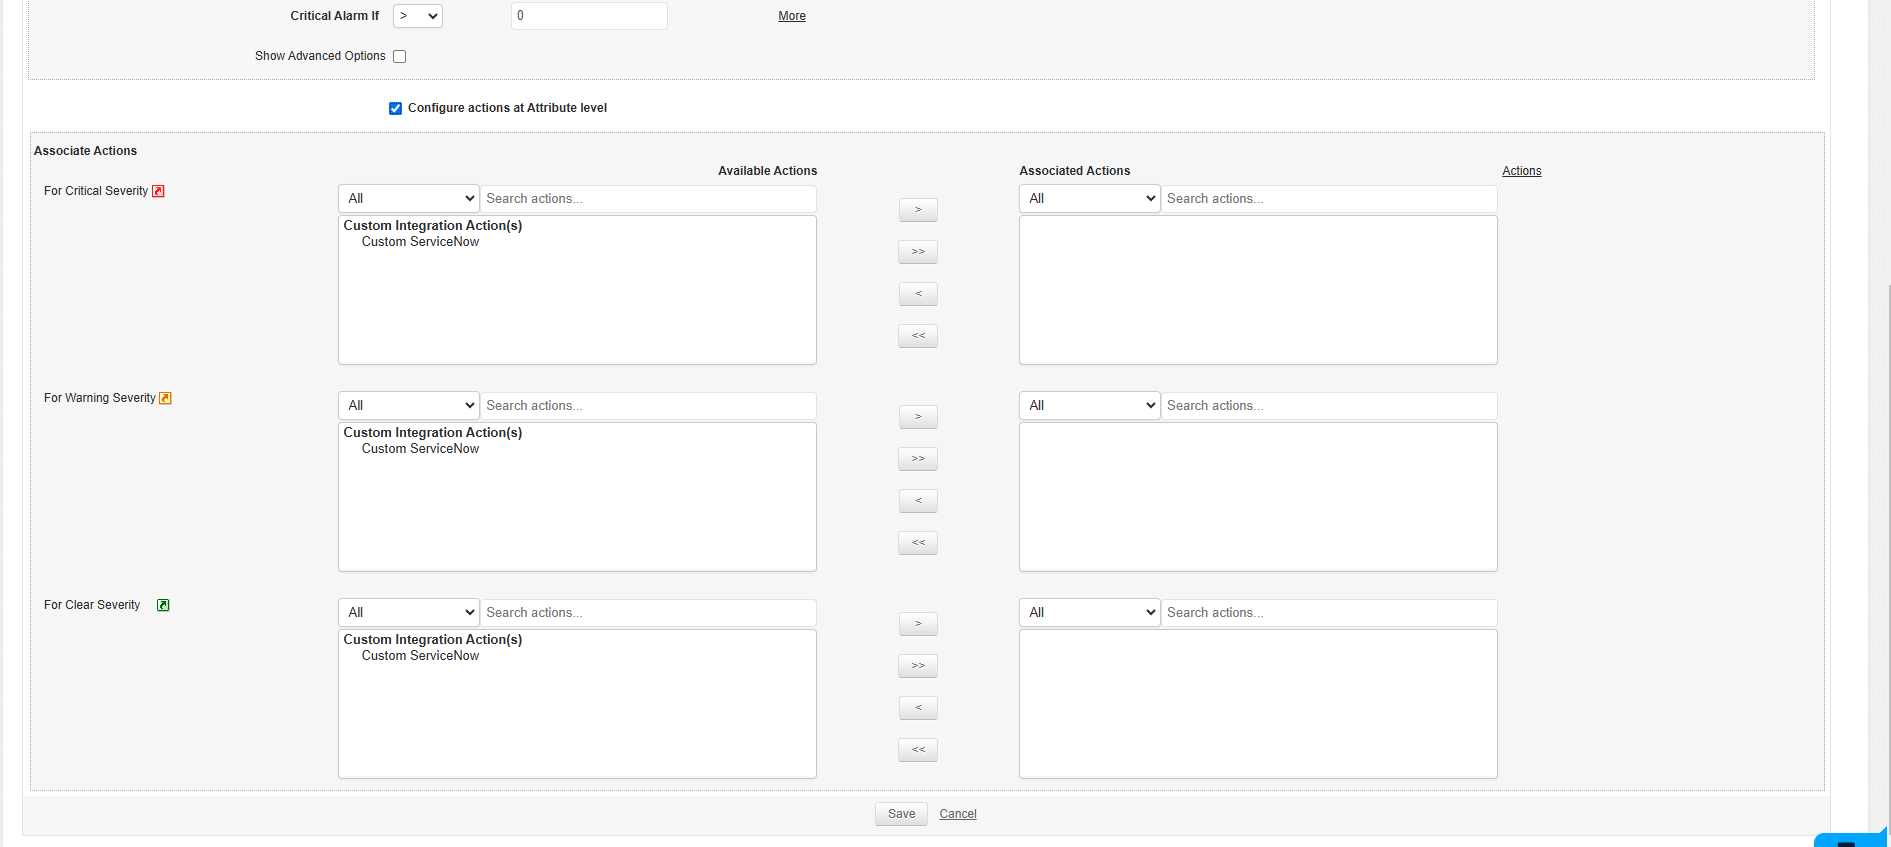
- Action automatically created — When you save a Custom Integration in Applications Manager, a corresponding action entry is created in the Actions list. You don’t need to manually create an action for it.
- Associate the action with thresholds — To invoke the Custom Integration when an alert is raised, open the relevant monitor or threshold configuration and associate the automatically created Custom Integration action within the threshold's action profile. The action will then be executed when the threshold condition is met.
This flow ensures the integration is available as an action immediately after configuration and makes it straightforward to trigger third-party notifications from any APM alerting rule.
Best Practices:
- Always test configurations before adding them to production threshold rules.
- Use consistent parameter/field names to simplify updates and incident correlation.
- Ensure authentication tokens/credentials are stored securely and rotated per your security policy.