Load Balancer
Load balancing distributes incoming requests across multiple servers, preventing performance degradation during heavy traffic while eliminating downtime caused by system or application failure. ADSelfService Plus supports load balancing to ensure a consistent and reliable experience for end users.
How it works
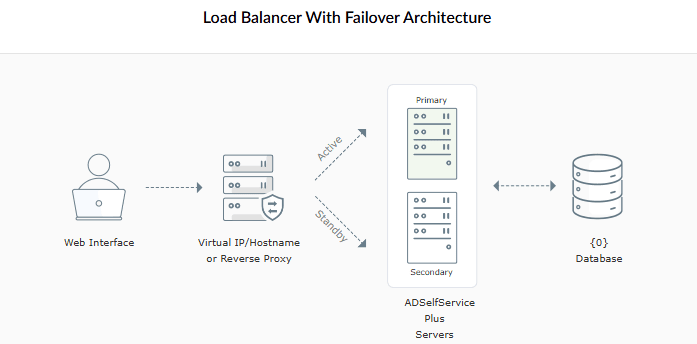
One instance of ADSelfService Plus is designated as the primary node. All remaining instances act as secondary nodes and share the database configured on the primary node. Incoming requests are distributed across all nodes by a load balancer service that runs on the configured virtual IP address and load balancing port. This is accessible via a dedicated load balancer URL which should be set as the product access URL.
Initially, the load balancing service runs on the primary server. When it fails, the load balancing service on the secondary server takes over. All configuration changes must be made from the primary node.
Limitations
- Load balancing cannot be enabled when Smart Card Authentication is enabled.
- Load balancing and Failover cannot be enabled simultaneously.
Prerequisites
Ensure the following before configuring load balancing:
- An external database is configured in ADSelfService Plus.
- The same version of ADSelfService Plus is installed on all machines (nodes).
- All nodes can communicate with each other without restrictions from firewall or antivirus software.
- All AD domains, the external database, and product-related files must be accessible by all nodes.
- The time and time zone must be the same across all nodes.
- SSL certificate and session expiration time must be configured individually on each node and uniform across all nodes.
- All nodes must use the same protocol (HTTP or HTTPS). If HTTPS is enabled on the primary node, it must be enabled on all secondary nodes as well.
- If a context path is used in the ADSelfService Plus URL, the same context path must be used on all secondary nodes.
- By default, port 7800 is used for communication between nodes. If port 7800 is in use, port 7801 is assigned, and so on. Ensure that these ports are open and not blocked by firewall or antivirus software.
- RADIUS Authentication-specific prerequisite: If RADIUS authentication is configured as an MFA factor, ensure that all nodes are configured in the RADIUS server with the same secret key.
Configuration instructions
Setting up load balancing
- Start ADSelfService Plus on all machines.
- Log in as an administrator to the ADSelfService Plus instance designated as the primary node.
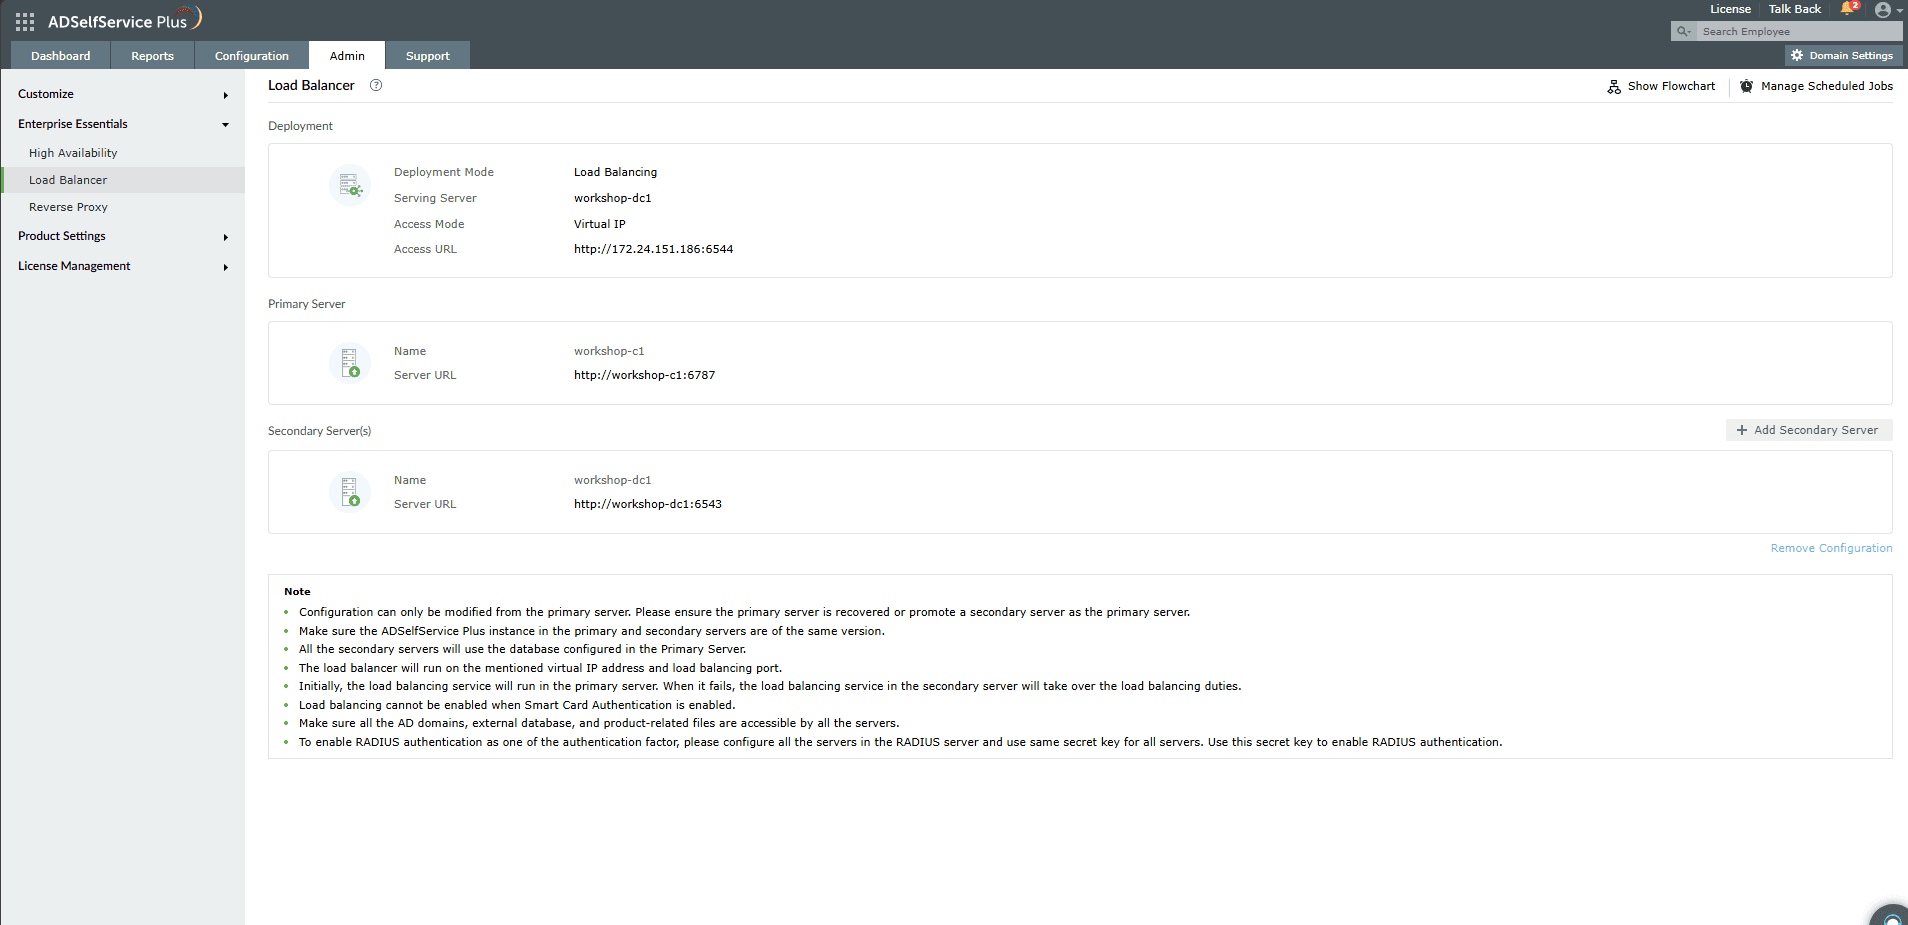
- Navigate to your directory (AD or Azure AD) from the directory drop-down at the top-left and go to Admin > Enterprise Essentials > Load Balancer.
- The Primary Server URL will be automatically populated.
- In the Secondary Server(s) section, enter the hostname or IP address of the secondary ADSelfService Plus instance in the Secondary Server URL field.
- Enter the credentials of a user with Super Admin privileges in the Admin Username and Admin Password fields.
- Under Access Mode, fill in the following fields:
- Virtual IP (required): Enter a virtual IP address. This IP will automatically bind to the active server in the failover setup. You can map this virtual IP to a virtual hostname in the DNS.
- Virtual Hostname (optional): Enter a virtual hostname, if required.
- Load Balancing Port (required): Enter a valid port number for the load balancer service. This must be different from the port used by ADSelfService Plus.
- If the primary and secondary servers are on different subnets, select the Primary and Secondary Servers are on Different Subnets checkbox. In this case, the Virtual IP field will not be required, and you will need to create a virtual host and provide its hostname in the Virtual Hostname field instead.
- To add more secondary nodes, click + Add Secondary Server and repeat steps 5 and 6.
- Click Configure. The primary node will automatically restart first. Once it is up, all secondary nodes will restart automatically.
Modifying the load balancing configuration
All modifications must be made from the primary node. Navigate to Admin > Enterprise Essentials > Load Balancer to access the configuration.
To add a new node:
- Click + Add Secondary Server.
- Enter the hostname or IP address and port number of the new secondary instance in the Secondary Server URL field.
- Enter the Super Admin username and password for the new node.
- Click Configure. The new node will restart automatically.
To remove the load balancing configuration:
- Click Remove Configuration.
- Confirm the action in the pop-up that appears.
Managing scheduled jobs
By default, scheduled jobs such as report generation and directory synchronization run from the primary node. You can configure them to run from a secondary node to reduce load on the primary server.
- Log in as an administrator to the primary node.
- Navigate to Admin > Enterprise Essentials > Load Balancer.
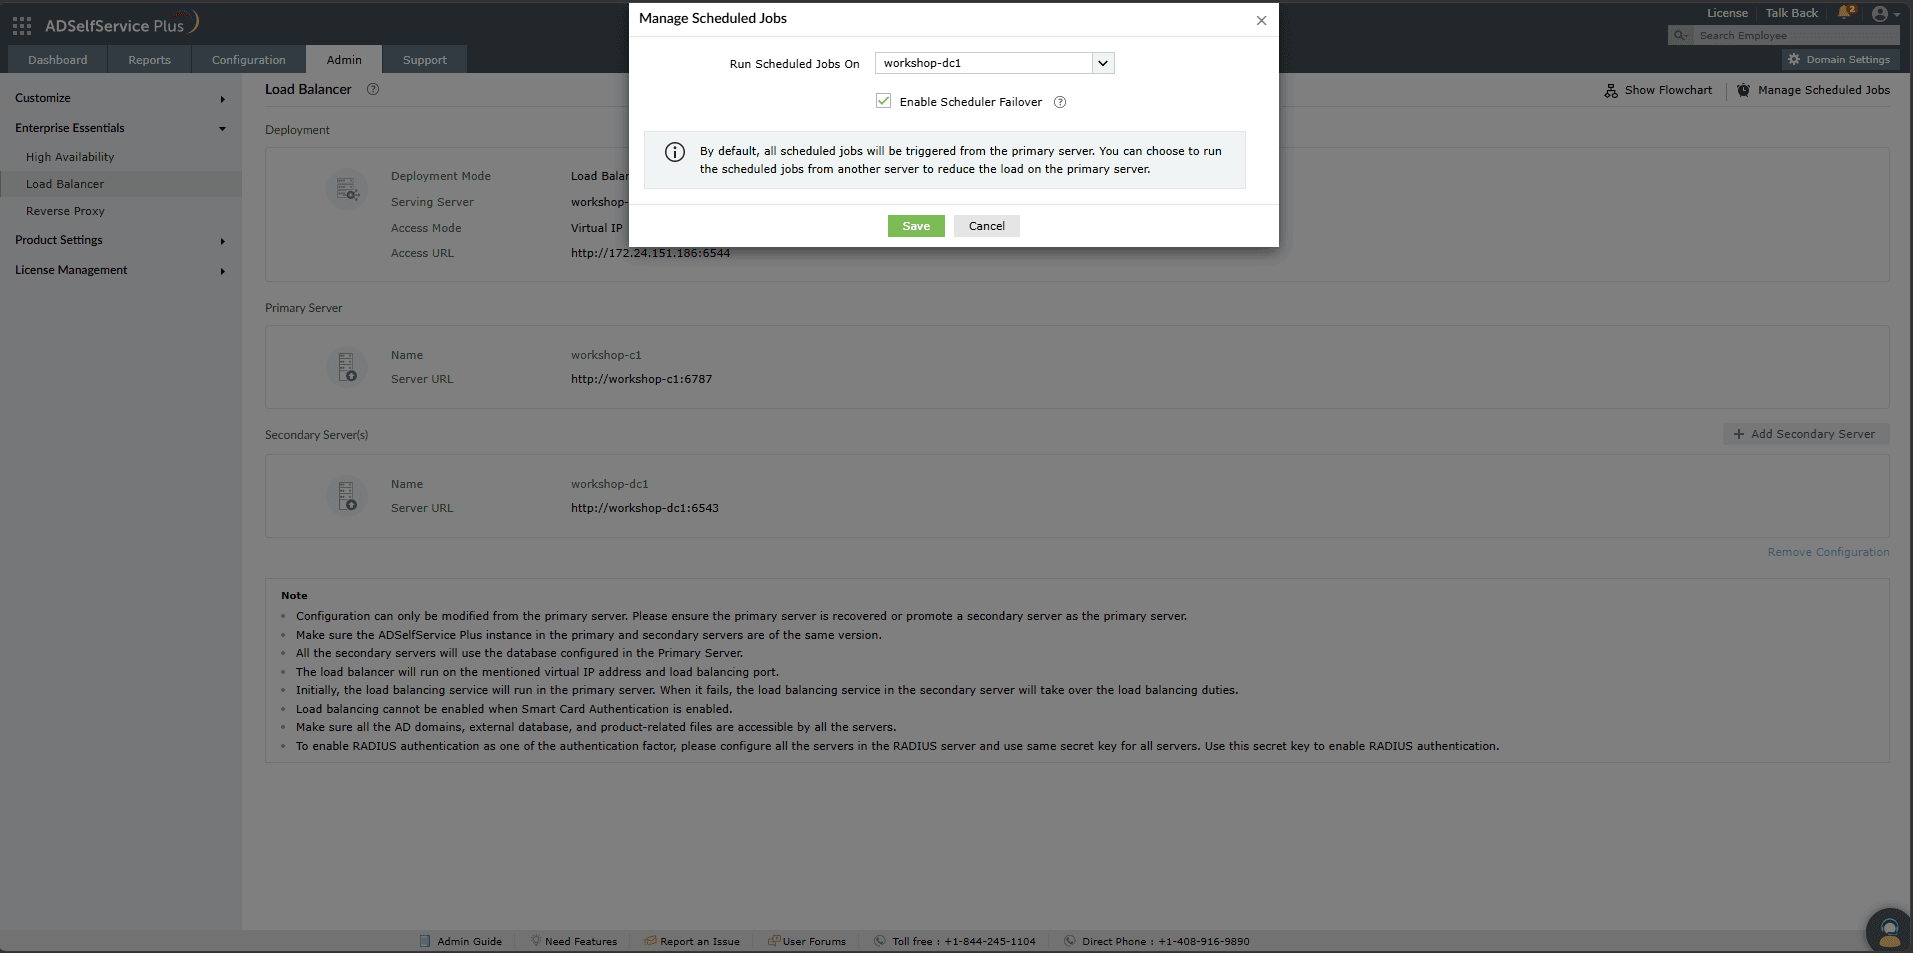
- Click Manage Scheduled Jobs in the top-right corner.
- In the Run Scheduled Jobs On drop-down, select the node you wish to handle the scheduled jobs.
- Select the Enable Scheduler Failover checkbox to automatically move scheduled jobs to the first available node if the selected node goes down.
- Click Save and restart the server for the changes to take effect.
Troubleshooting
1. Build number is different from the primary node
- Cause: The ADSelfService Plus build number on a secondary node does not match the primary node.
- Solution: Update all secondary nodes to match the build number of the primary node. Refer to the Service Pack page to learn how to update ADSelfService Plus.
2. Scheduled jobs are not running. Please restart this server.
- Cause: The Manage Scheduled Jobs setting was changed but the server has not been restarted for the changes to take effect.
- Solution: Restart the ADSelfService Plus server.
3. Protocol mismatch found. Make sure all the nodes involved in load balancing use the same protocol.
- Cause: A secondary node is using a different protocol (HTTP/HTTPS) than the primary node.
- Solution: Ensure that all nodes use the same protocol. If HTTPS is enabled on the primary node, enable it on all secondary nodes. Refer to this guide to learn how to enable HTTPS in ADSelfService Plus.
4. Communication issue. Make sure port 7800 is not blocked by the firewall in both the primary and secondary nodes.
- Cause: There may be a network connection issue between nodes, or the load balancer port (default: 7800) is blocked by the firewall.
- Solution: Ping the secondary node from the primary node to check connectivity. Verify that port 7800 is open on all nodes. If unavailable, try port 7801, then 7802, and so on.
5. A node is unreachable.
- Cause: The node may be down, its IP address may have changed, or there may be a communication error between the primary node and the affected node.
- Solution: Restart the node and check whether the issue is resolved. Ensure that the primary node and the affected node can communicate with each other without restrictions.
Tips
- Set the load balancer URL as the product access URL immediately after configuration so all users are routed correctly.
- If your deployment uses a context path in the ADSelfService Plus URL, double-check that it is identically configured on all secondary nodes before configuring load balancing since a mismatch here can be difficult to diagnose after the fact.