Security controls
Analytics Plus lets you introduce an additional layer of security to your data to ensure only the authorized personnel access it. You can easily control and manage the access to your account and the various sharing and collaboration options.
IP Restriction
Analytics Plus allows you to enhance security and ensure data confidentiality by specifying a list of IP addresses to regulate access to data and views on Analytics Plus. You can enable IP restriction at both Organization and Workspace levels. To enable IP restriction, follow the steps below.
- Login to your Analytics Plus account.
- Click the Settings icon at the top right.
The Organization Settings page will open. On the left side pane select Security Controls from the Controls/Configurations tab.
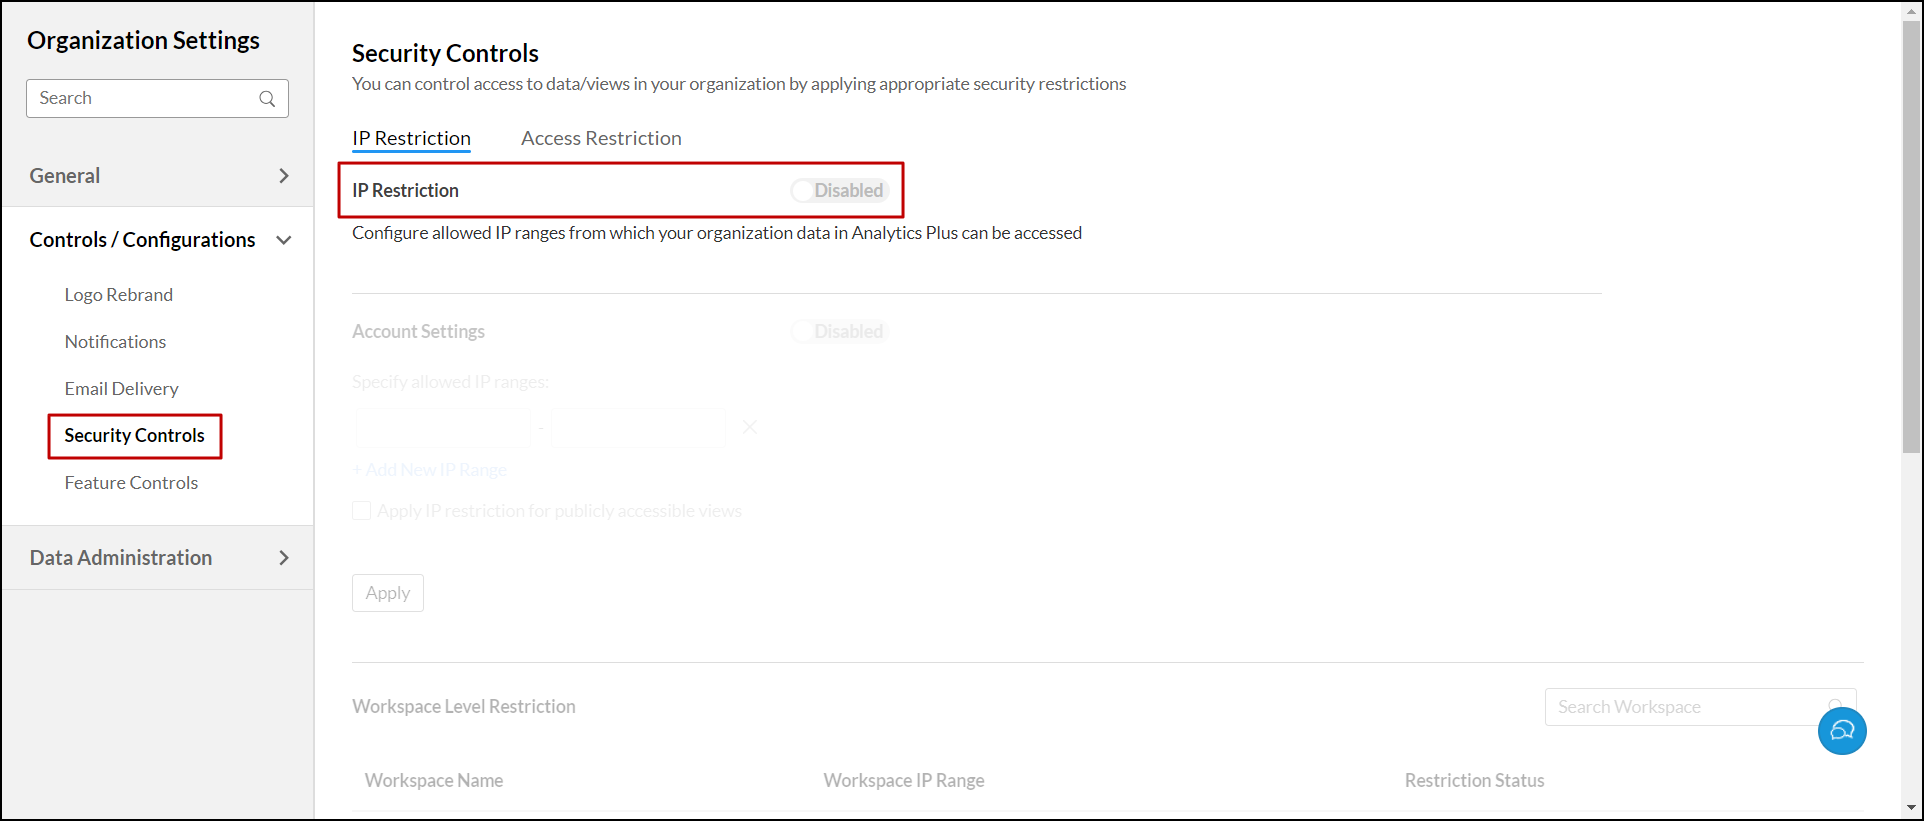
- Toggle the IP Restriction button to control access to views and data within your organization.
Organization level IP restriction
Organization level IP restriction allows you to specify IP restrictions at the organization level. These restrictions will be applied across all workspaces in the organization, by default. To enable IP restrictions at organization level, follow the steps given below.
- In the Organization Settings page, navigate to the Security Controls tab.
- Enable the IP restriction toggle button.
- Enable the Account Settings toggle button, to enable IP restrictions at organization level.
Enter the allowed IP ranges under the Specify allowed IP ranges section. Click +Add New IP Range, to add new IP ranges.
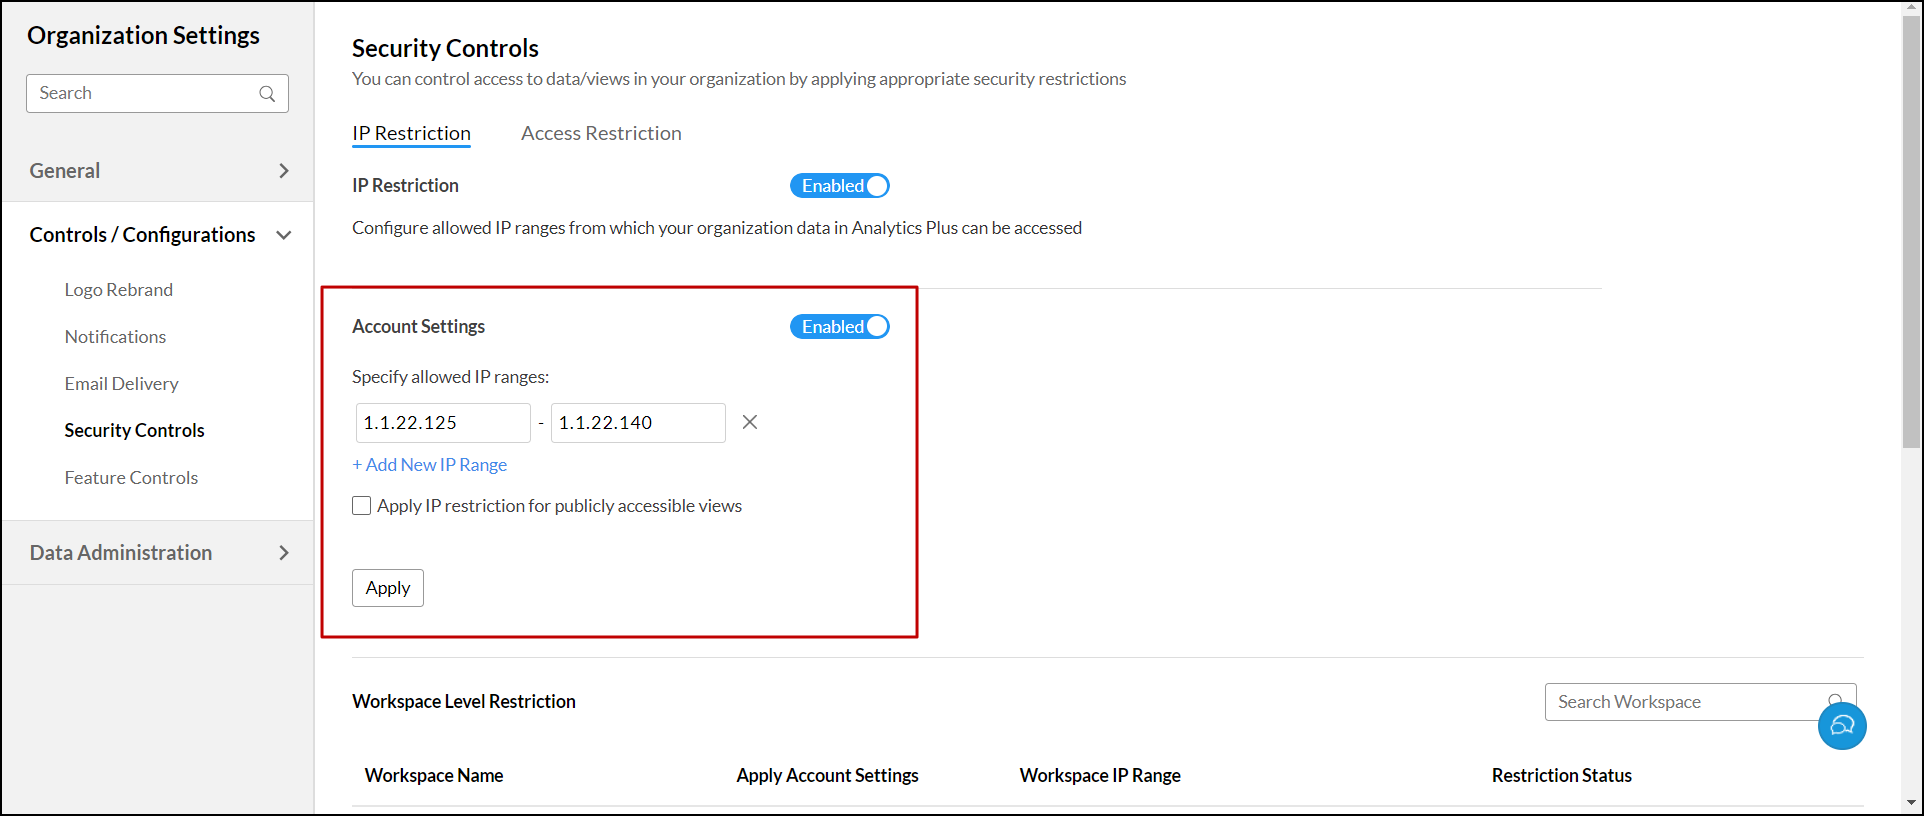
- Enable the Apply IP restriction for publicly accessible views check box to extend the restriction to public views.
- Click Apply, to enforce these restrictions to all workspaces in your organization.
Workspace level IP restriction
Workspace level IP restriction allows you to apply customized IP restrictions for individual workspaces. You can also apply IP restriction for publicly accessible views at the workspace level. Follow the steps below, to enable IP restrictions at workspace level.
- In the Organization Settings page, open the Security Controls tab.
- Enable the IP restriction toggle button.
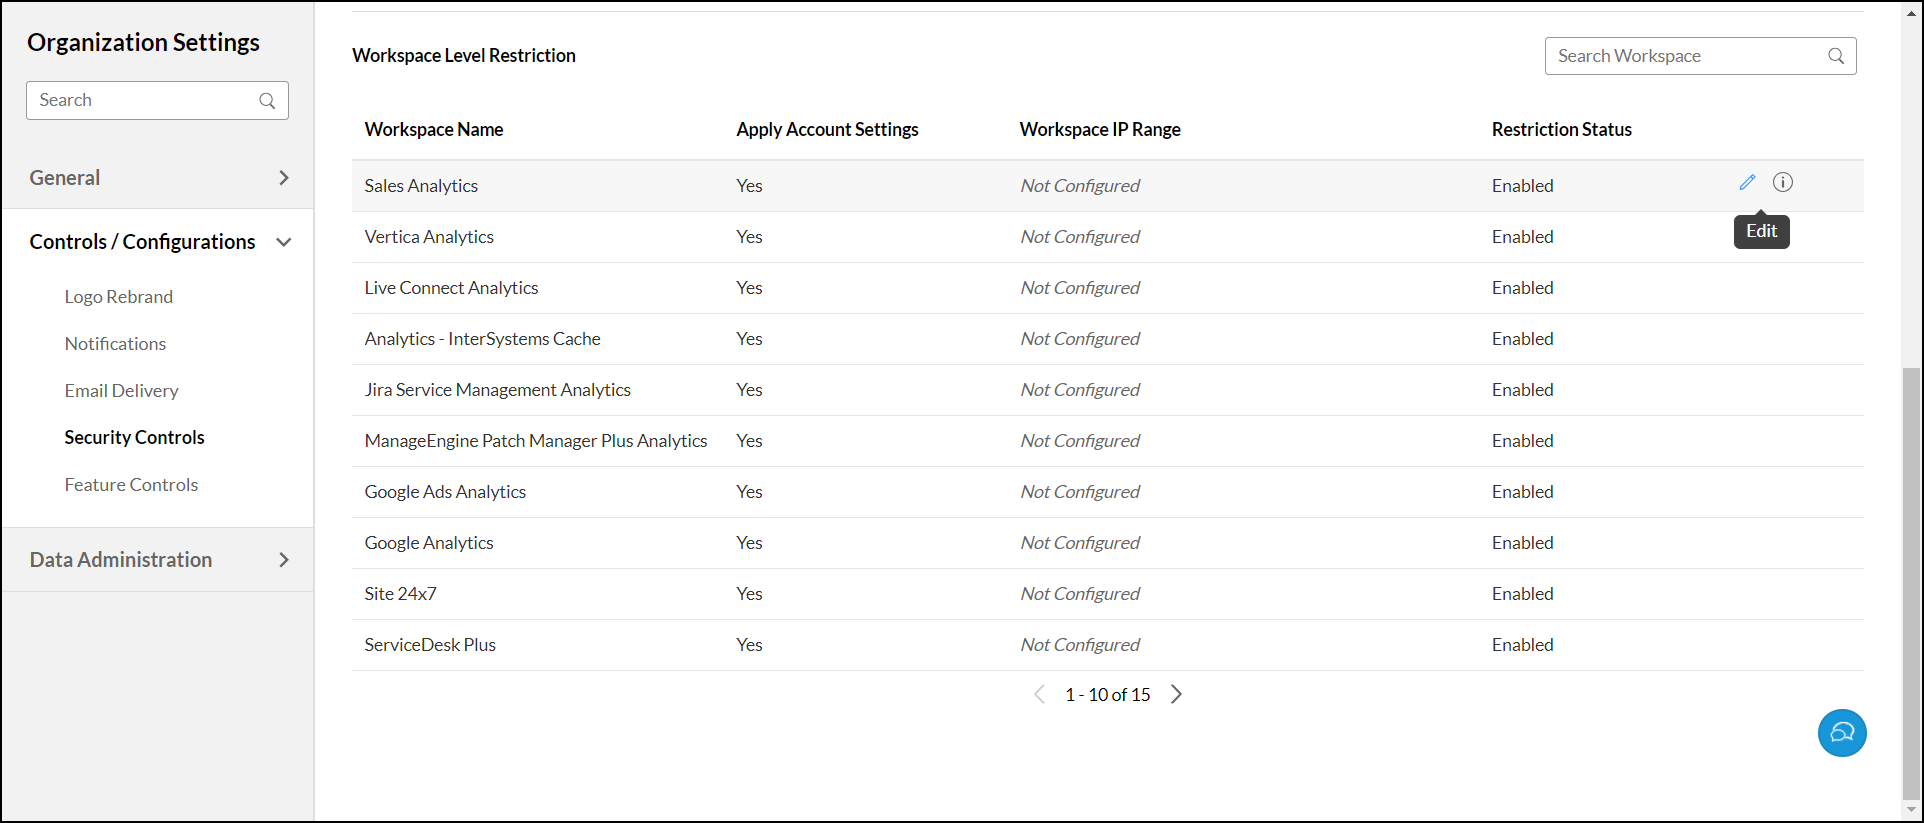
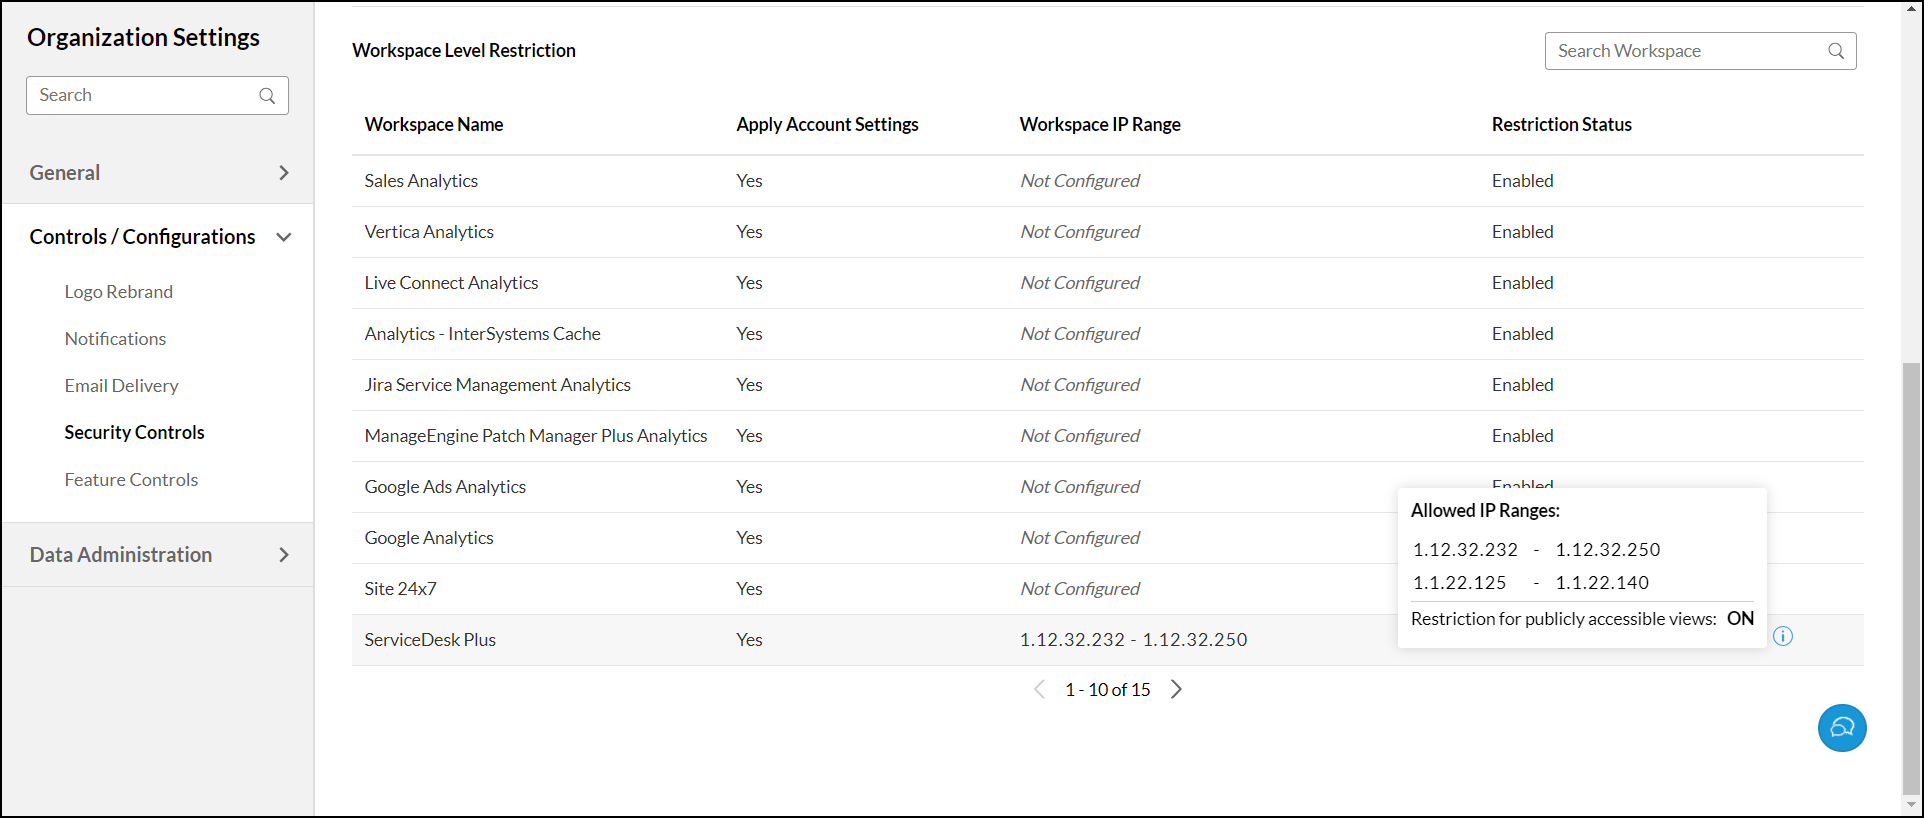
Scroll down to Workspace Level Restriction section, to find the list all workspaces in your organization along with the following details,
Cloumn Name Description Workspace Name Gives the name of the Workspace. Apply Account Settings Shows the status of Organization level IP restriction for this workspace.
Status: Yes / No
Note: This column is visible only when Organization-level IP restriction is enabled.Workspace IP Range Shows the allowed IP range for this workspace, if specified. Restriction Status Indicates the IP restriction status for this workspace, encompassing both organization and workspace levels.
Status: Enabled /Disabled
Note: The status is "Enabled" when the restriction is applied at either the organization or workspace level.Click the Edit icon at the right end of any workspace to configure/edit its workspace level IP restriction.
- The Workspace Level Restriction dialog will open with Workspace Name and Specify allowed IP ranges section.
Specify allowed IP ranges in the Specify allowed IP ranges section. Use the +Add New IP Range button to add new ranges.
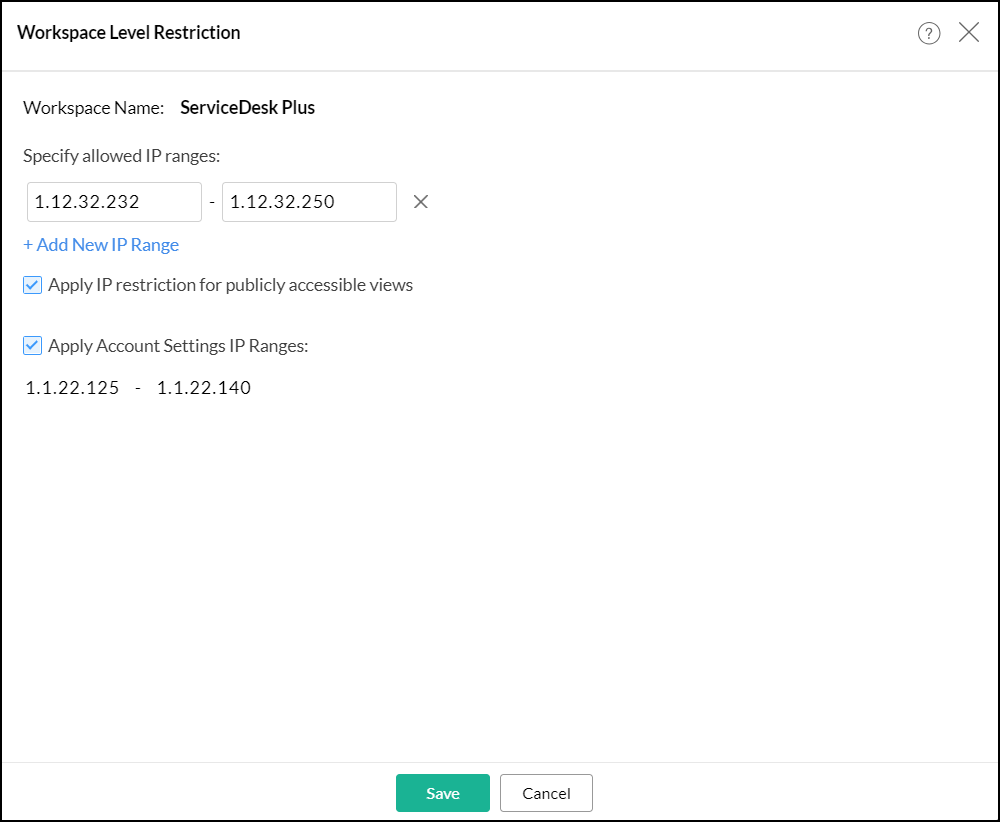
- Enable the Apply IP restriction for publicly accessible views check box, to apply IP restriction for the public views of this workspace.
- By default, Apply Account Settings IP Ranges checkbox is selected. Uncheck it if you don't want to apply organization-level IP restrictions to this workspace. Note: This checkbox is visible, only if the Organization Level IP restrictions are enabled.
- Click Save, to apply the configured restrictions.
To view restriction details for a specific workspace, Click the Info icon.
- Allowed IP Ranges: Gives the list of allowed IP ranges for the specified workspace, encompassing both organization and workspace level restrictions.
- Restriction for publicly accessible views: The status will be indicated as either ON or OFF, with respect to restrictions on publicly accessible views at workspace level.
Access Restriction
The Access Restriction allows you to control various sharing and publishing options available in your Analytics Plus account. To configure the Access Restriction option, navigate to Settings>>Security Controls>>Access Restriction>>Edit option.
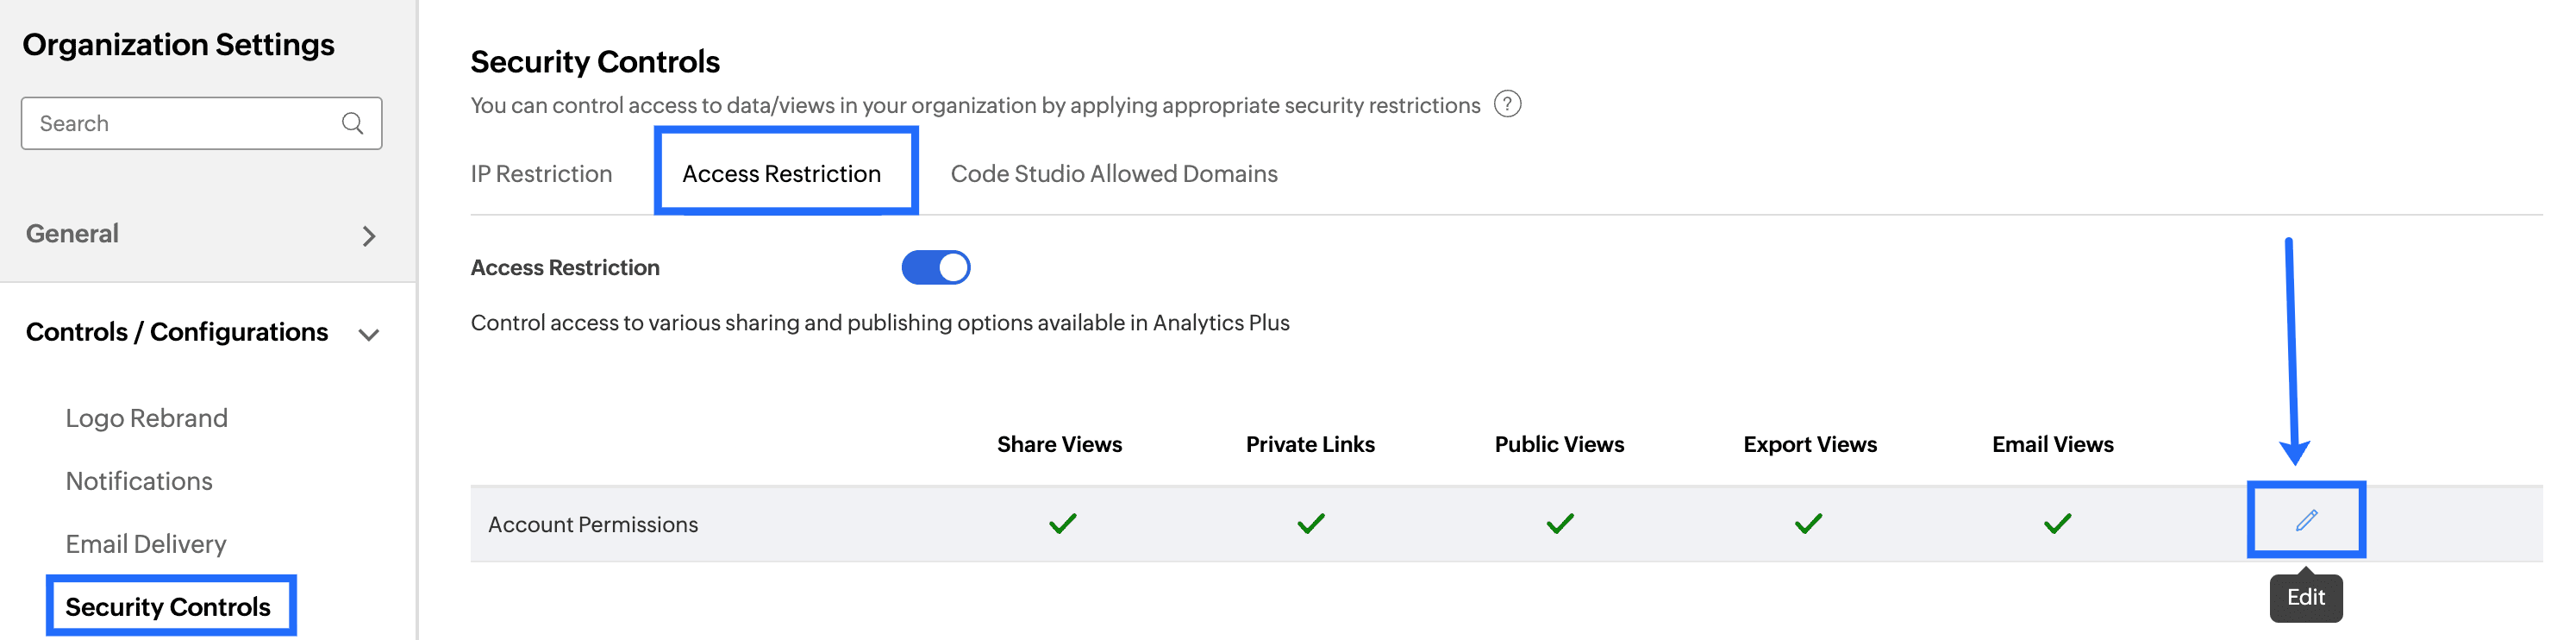
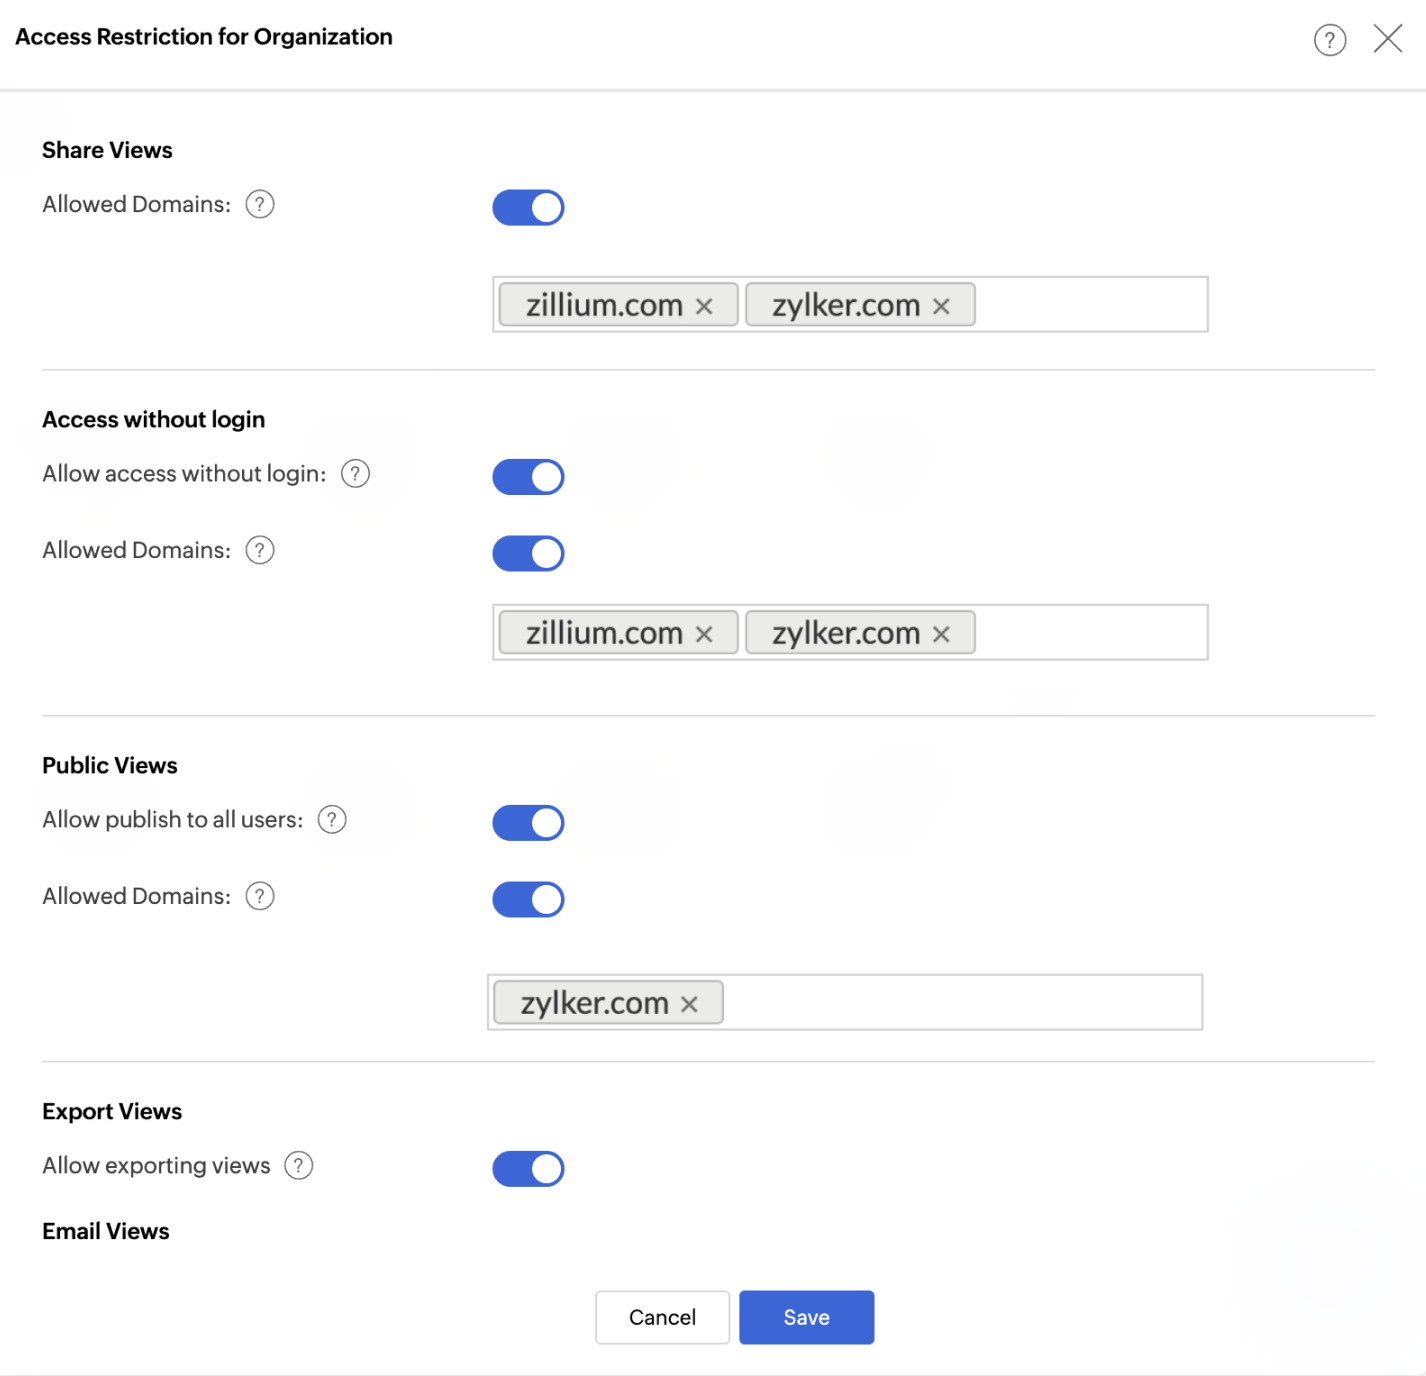
Share Views
This section allows you to restrict sharing of data/views in Analytics Plus only to users from the trusted domains. You can specify up to 100 domains.
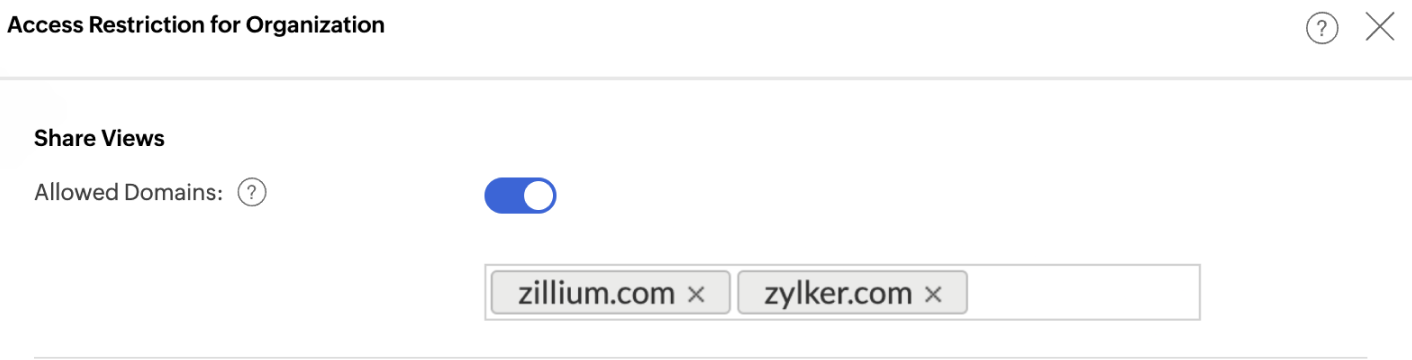
To configure domain restriction for shared users, enable the Allowed domains toggle button and then enter the domains in the field given.
Access without Login
This option allows you to specify whether Private Links (without login URLs) can be generated.
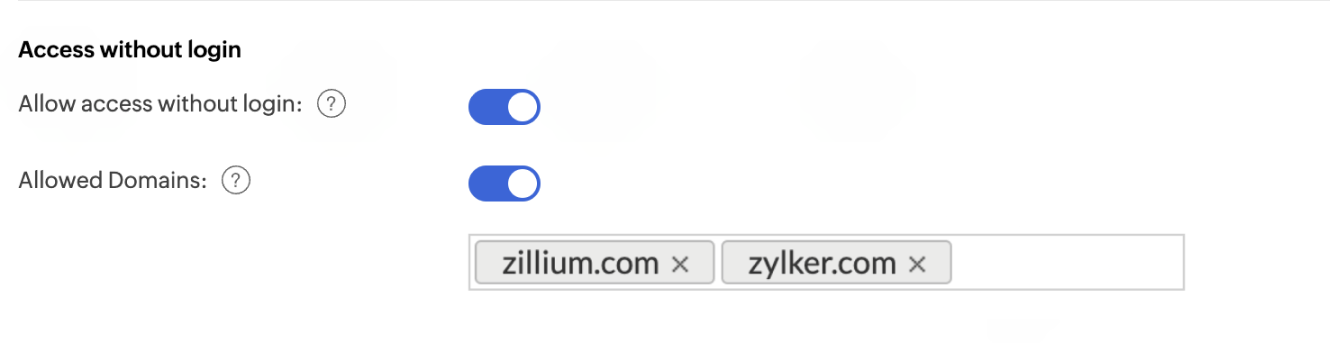
Allow access without login:
- Enable this option to allow generating of Private Links (without login URLs). By default, this will be enabled.
- Disable this option to restrict Account Administrator and Workspace Administrators from generating the Private Links (without login URLs) for views in your account.
- Allowed domains option allows you to restrict user only from specified trusted domains can access the Private links.
Enable the Allowed domains toggle button and then enter the trusted domains in the field given. Now only users from the specified domain can access the views through Private links.
Public Views
This section allows you to restrict publishing views.
Allow publish to all users:
This option allows you to specify whether views can be published or not.
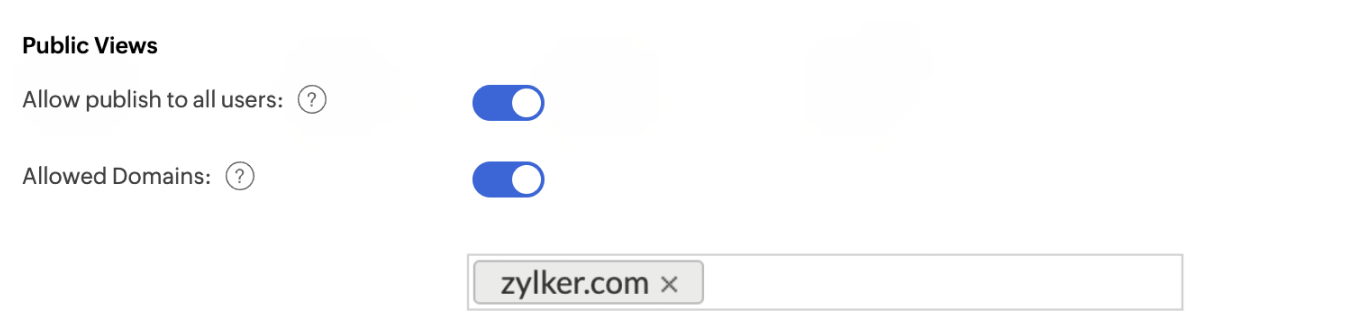
- Enable this option to allow publishing views. By default, this will be enabled.
- Disable this option to restrict Account Administrator and Workspace Administrators from publishing views.
- Allowed domains option allows you to restrict users only from specified trusted domains to access the public views.
Enable the Allowed domains toggle button and then enter the trusted domains in the field given. Now only users from the specified domain can access the public views.
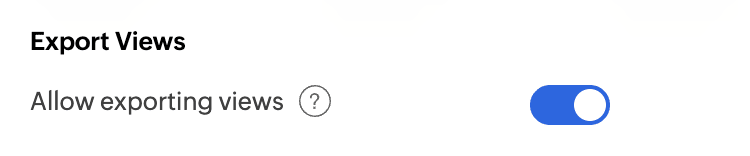
Export Views
This option allows you to export the views or data available in the organization. Disabling this option will restrict the export action.
Email Views
This section allows you to restrict emailing views.
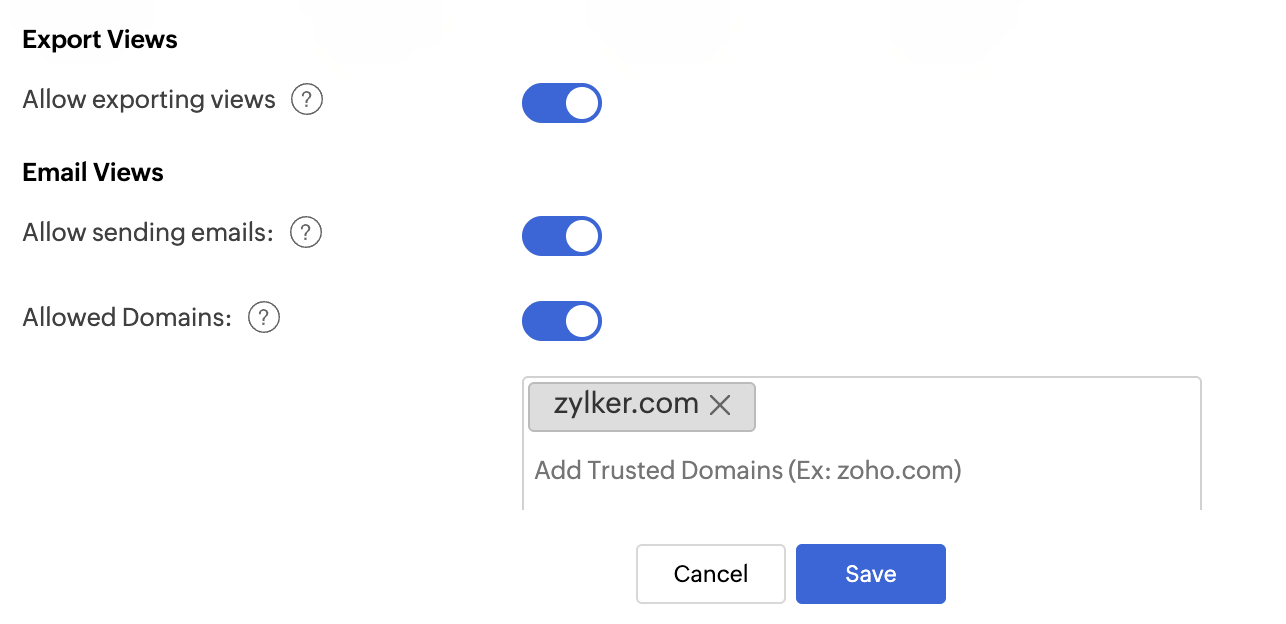
Allow sending email : This option allows you to specify whether views can be emailed or not.
- Enable this option to allow emailing views. By default, this will be enabled.
- Disable this option to restrict Account Administrator, Workspace Administrators and shared users from emailing views.
- Allowed domains option allows you to restrict that the views can be emailed only to users from the specified trusted domain. Enable the Allowed domains toggle button and then enter the trusted domains in the field given. Now the view can be emailed only to the users from the specified domains.
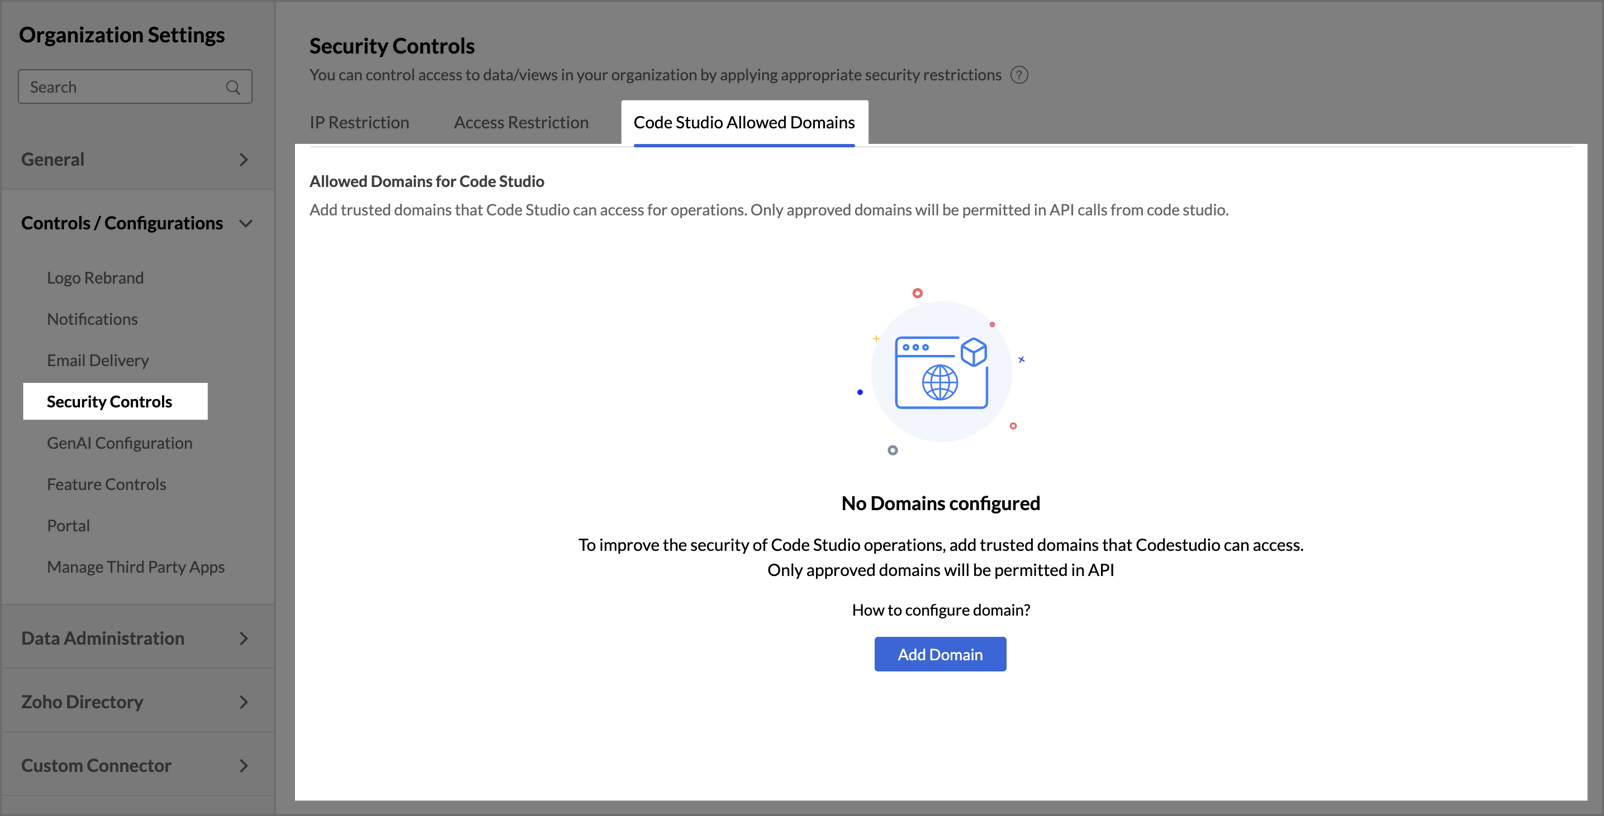
Code Studio
Allowed Domains Analytics Plus allows you to enhance the security of your data science workflows by regulating external communication from Code Studio. By specifying a list of trusted domains, you can control which external APIs and web services your Python scripts are permitted to access, preventing unauthorized data transfer. By default, Code Studio restricts all outgoing API calls to ensure a secure environment. You must explicitly whitelist a domain to allow your Python scripts to interact with it.
To add a trusted domain:
In the Code Studio Allowed Domains tab, click the Add Domain button.
- An Add Domain dialog will appear.
Enter the domain name you wish to whitelist (e.g., finepick.com).
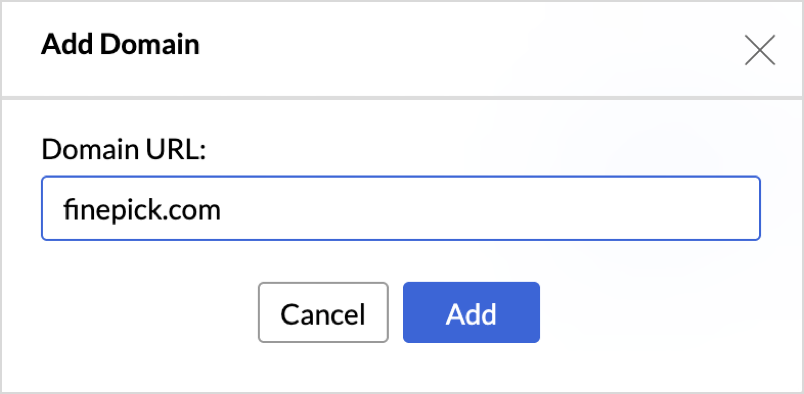
- Click Add to include it in your trusted list.
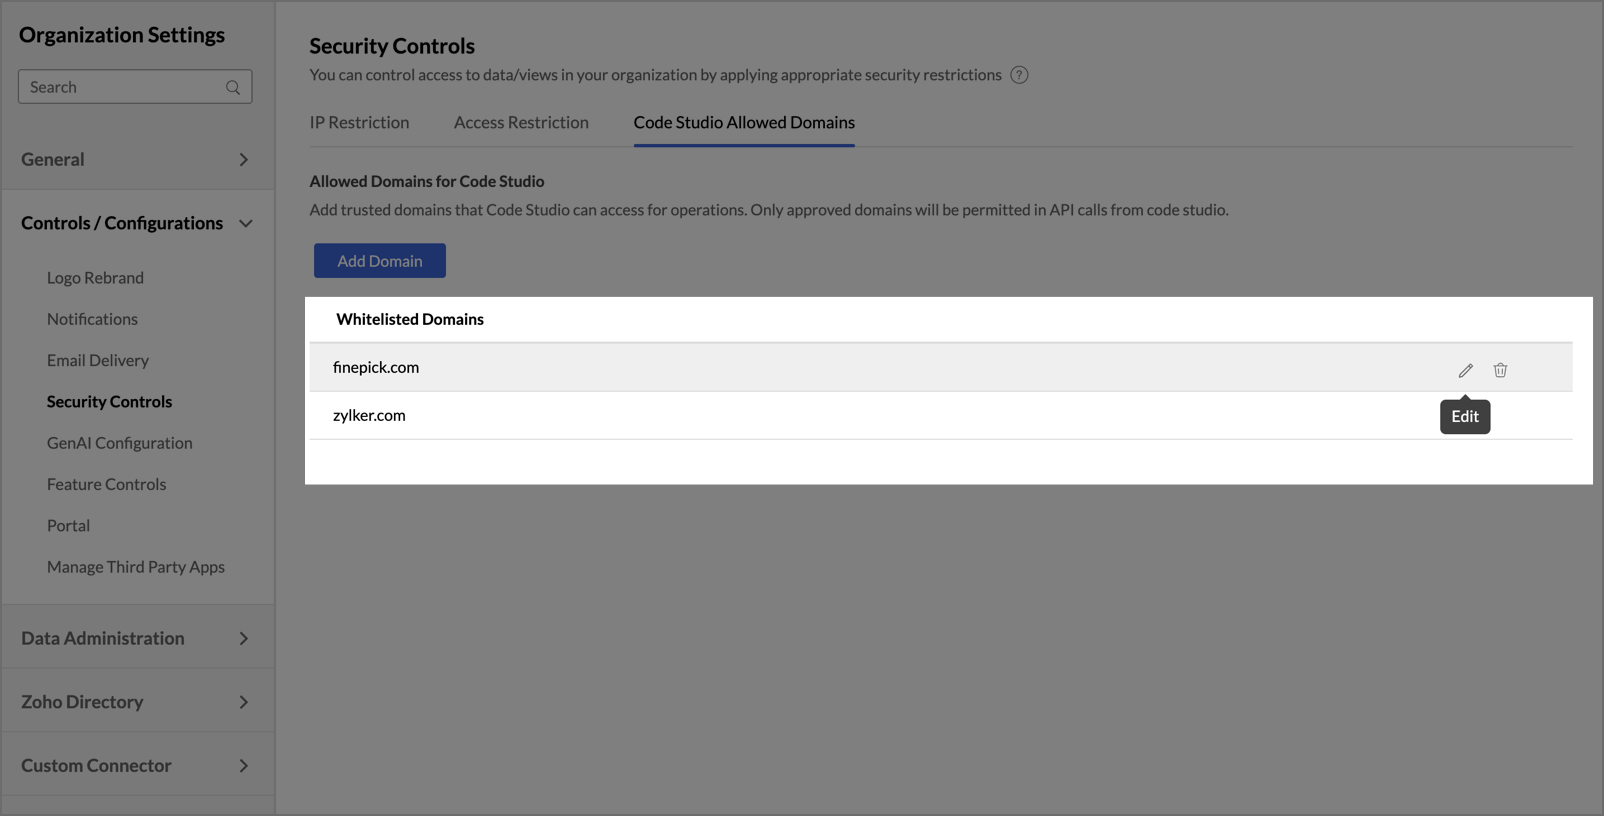
To manage existing domains
The Whitelisted Domains section displays all approved domains with the following details:
Domain Name: Displays the URL or endpoint permitted for API calls from Code Studio.
Actions: Provides options to Edit the domain entry or Delete it to revoke access immediately.
Note:
- API Enforcement: Only approved domains will be permitted in API calls from Code Studio. Any attempt to connect to an unlisted domain will result in a connection error.
- Organization-wide Scope: Whitelisted domains apply to Code Studio operations across all workspaces within the organization.