USB drives can be misused for exfiltrating business-critical data out of the organization. However, they are convenient for storing and sharing data among authorized personnel. To balance this trade-off, organizations have stopped completely blocking USB drives and have moved towards secure use of portable storage devices. With the help of a dynamic and comprehensive data leak prevention software, USB drives can be monitored for suspicious activities and modified for safe use.
ManageEngine's DataSecurity Plus offers data leak prevention (DLP) capabilities to selectively enable either read, write, or modify actions in USBs. Read on to learn how to make USBs read-only.
Steps to make USBs read-only
Download and install DataSecurity Plus to get DataSecurity Plus' USB write protection functionality up and running in just a few minutes. A selection of policies and associated responses are available to secure removable and peripheral devices and emails. Try all these features in fully functional 30-day, free trial.
- Select Endpoint DLP from the application drop-down and go to Configuration.
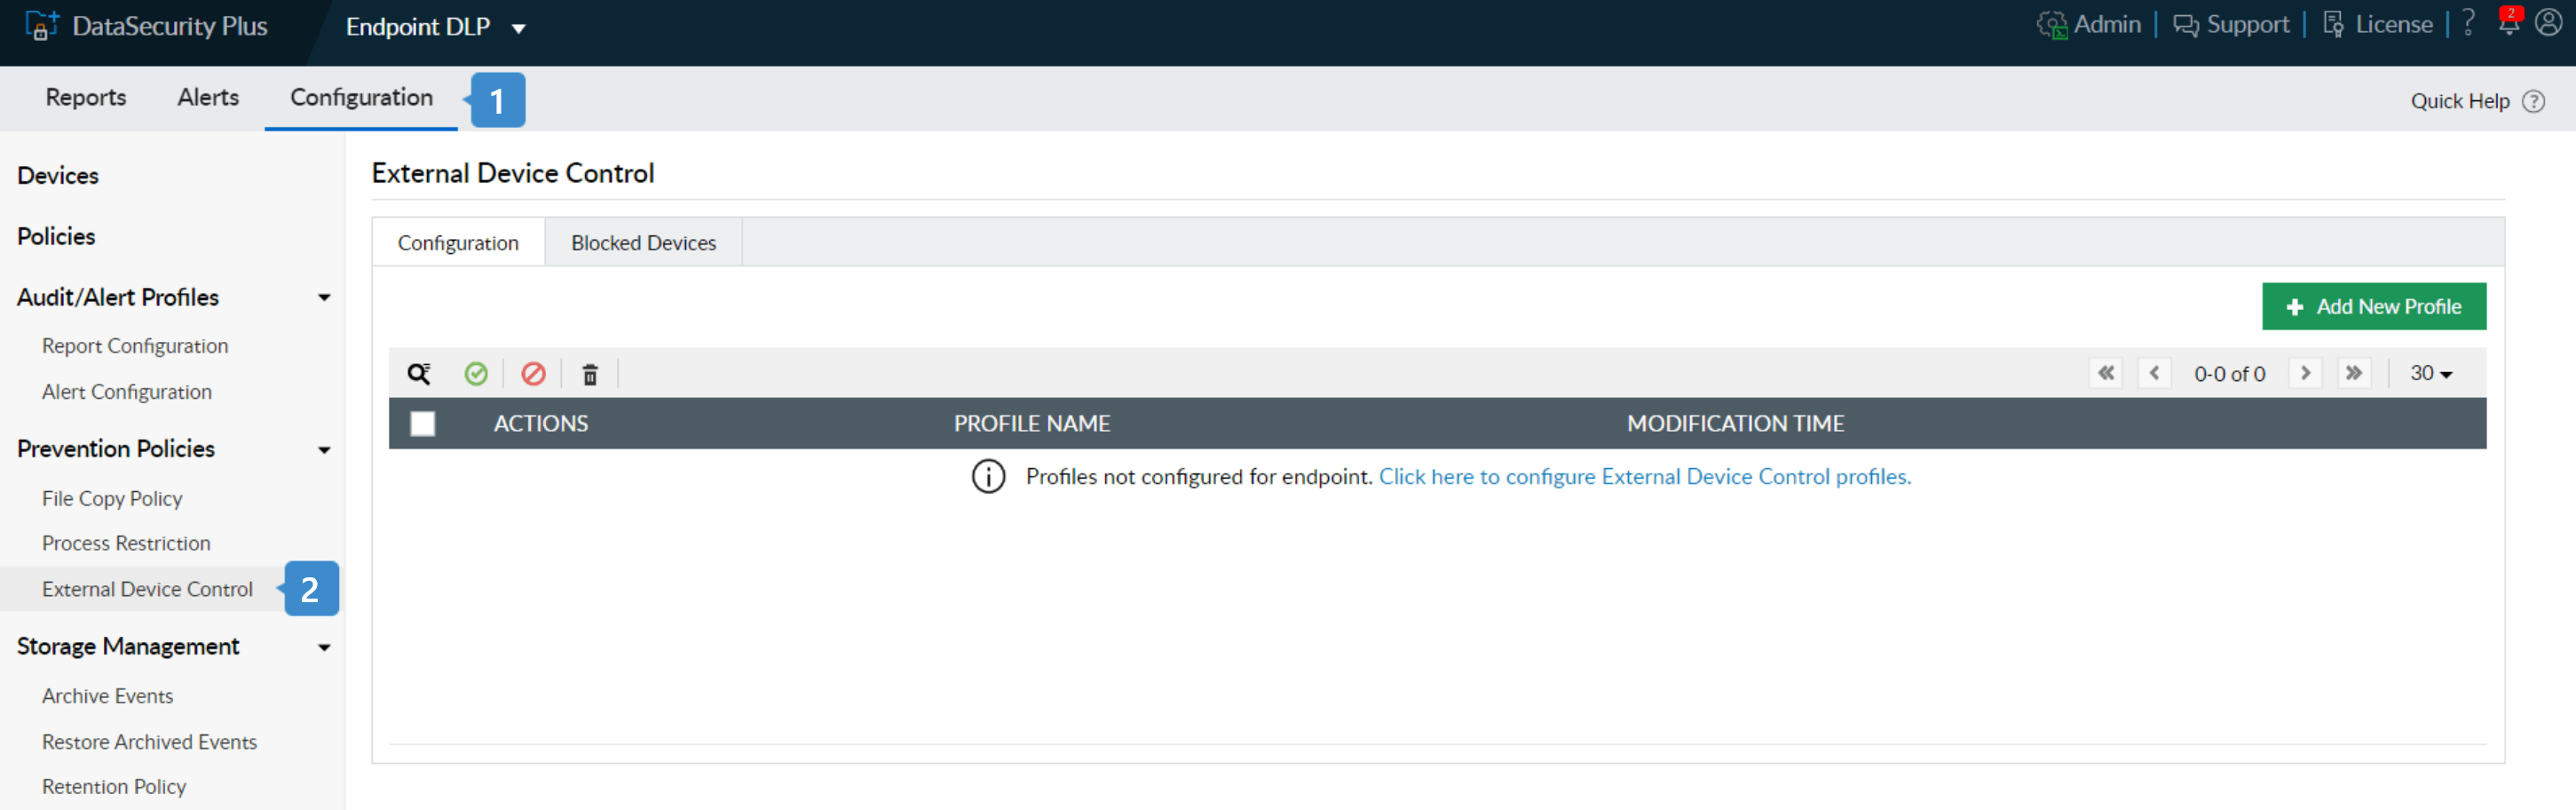
- Choose External Device Control from the Prevention Policies drop-down in the left.
- Click the Add New Profile option in the top-right corner.
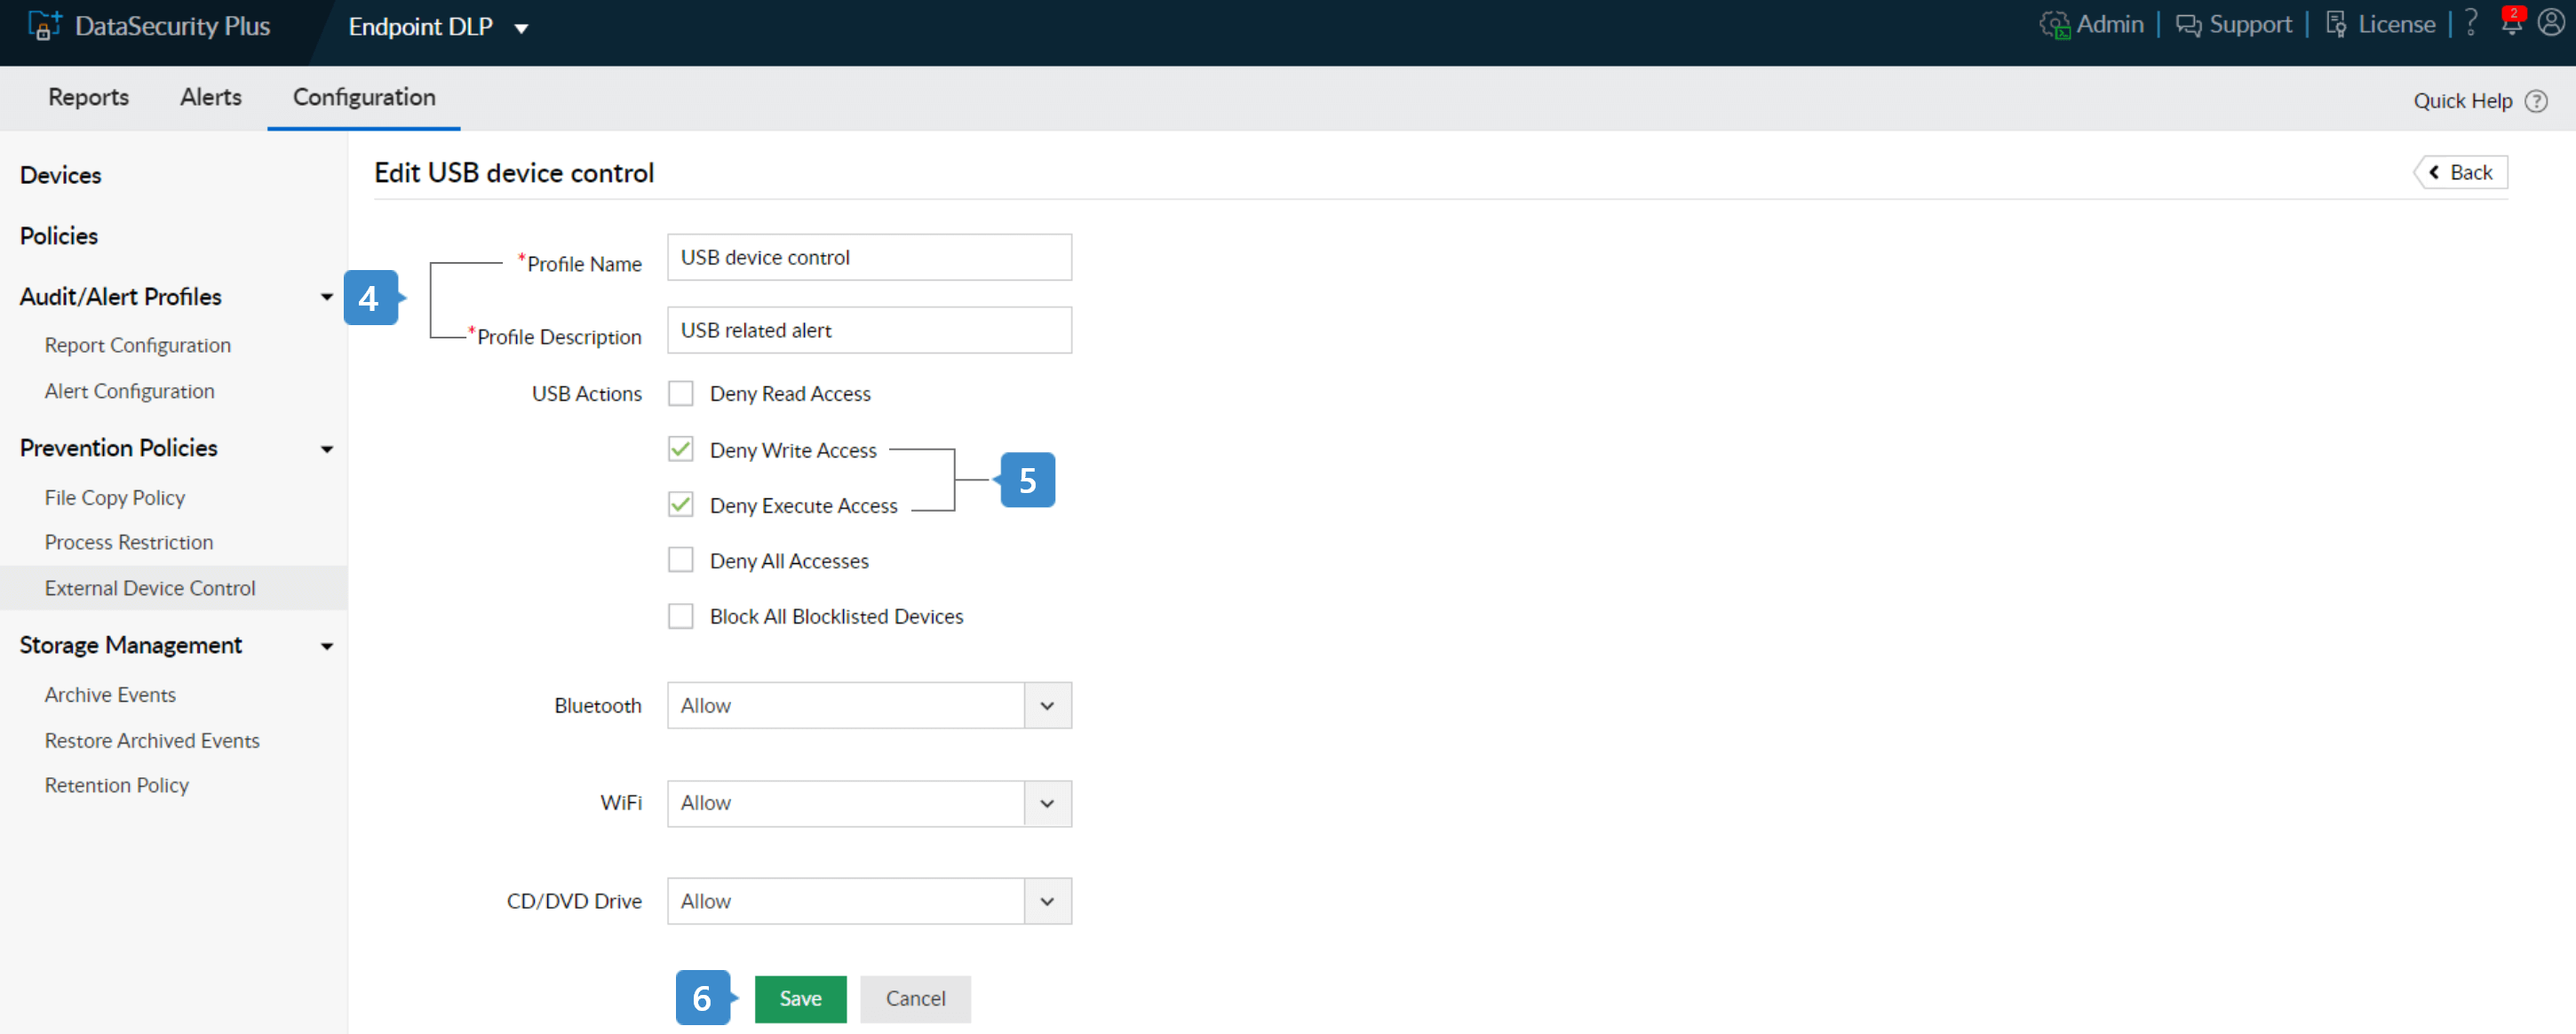
- Enter Profile Name and Profile Description.
- Under USB Actions, select Deny Write Access and Deny Execute Access.
- Click Save to create the policy.
Steps to apply the USB read-only policy across all endpoints
Ensure you're in the Endpoint DLP module.
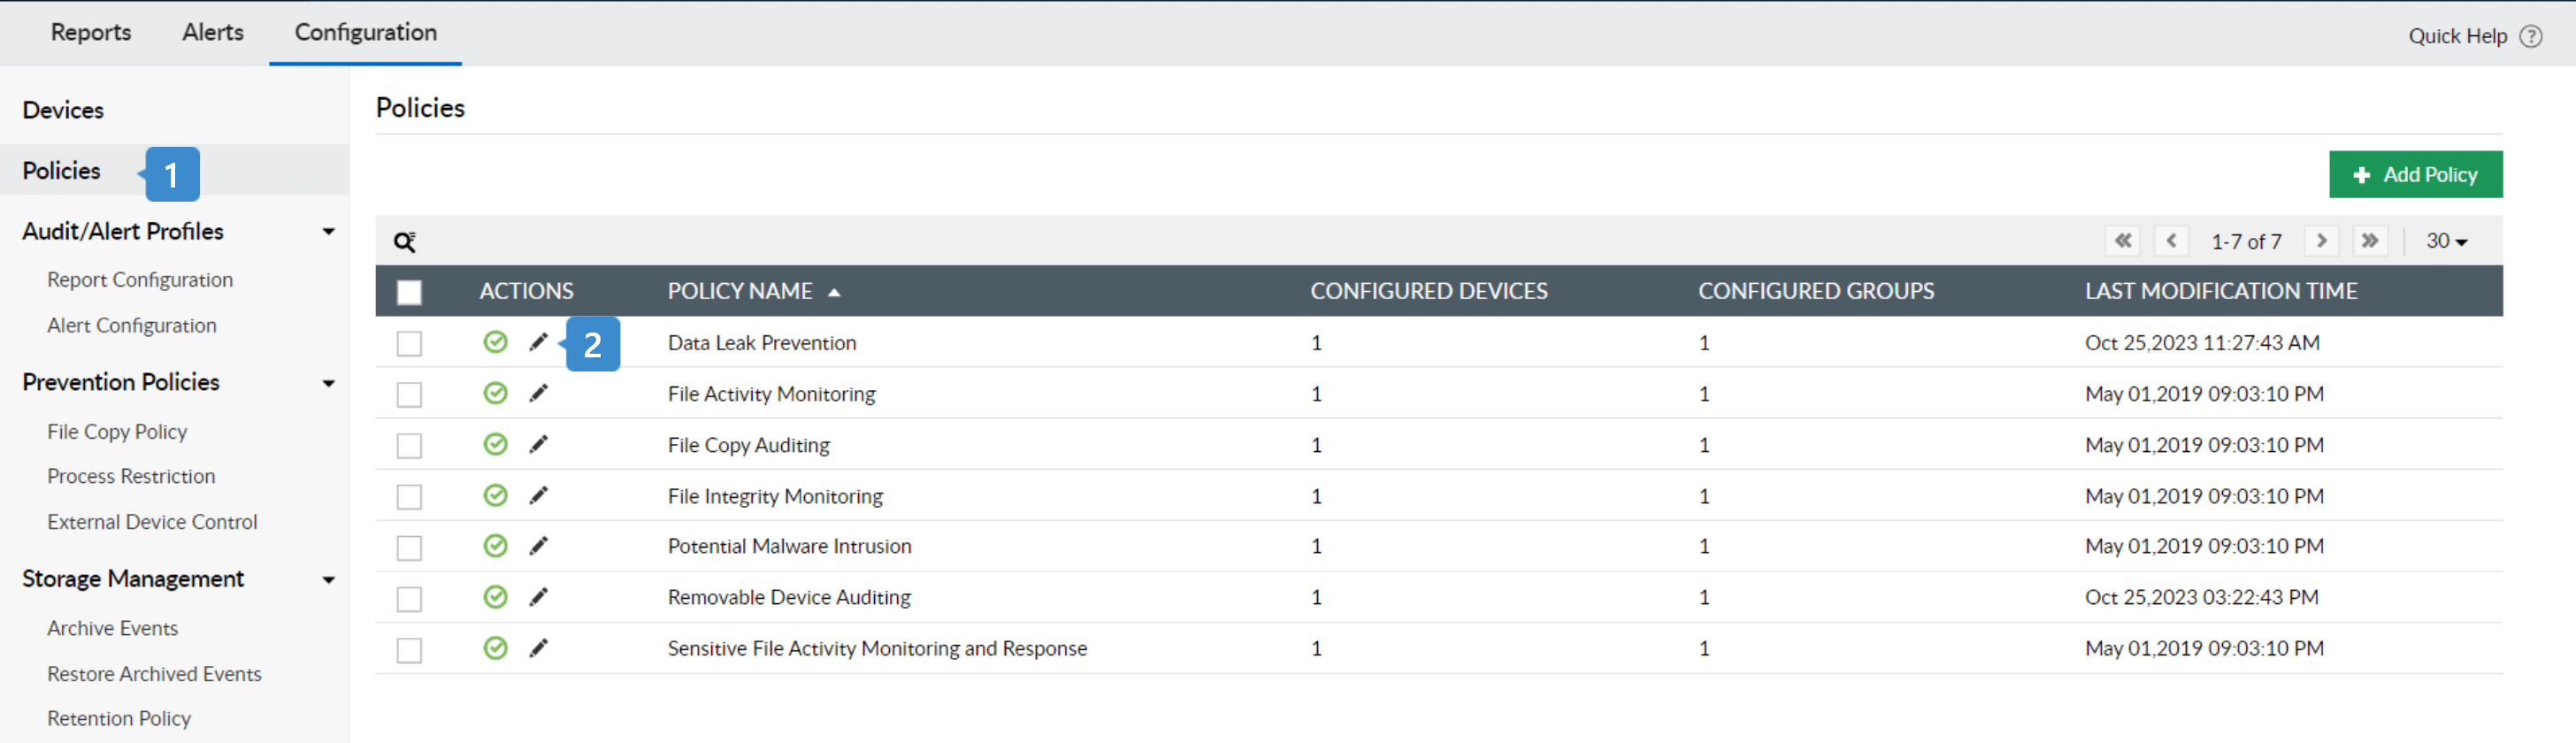
- Go to Configuration > Policies.
- In the policies table, ensure that the External Device Control profile is mapped to endpoints through the preferred policy. For instance, if you wish to implement the External Device Control prevention policy via Data Leak Prevention policy, click the edit icon next to it in the Actions column.
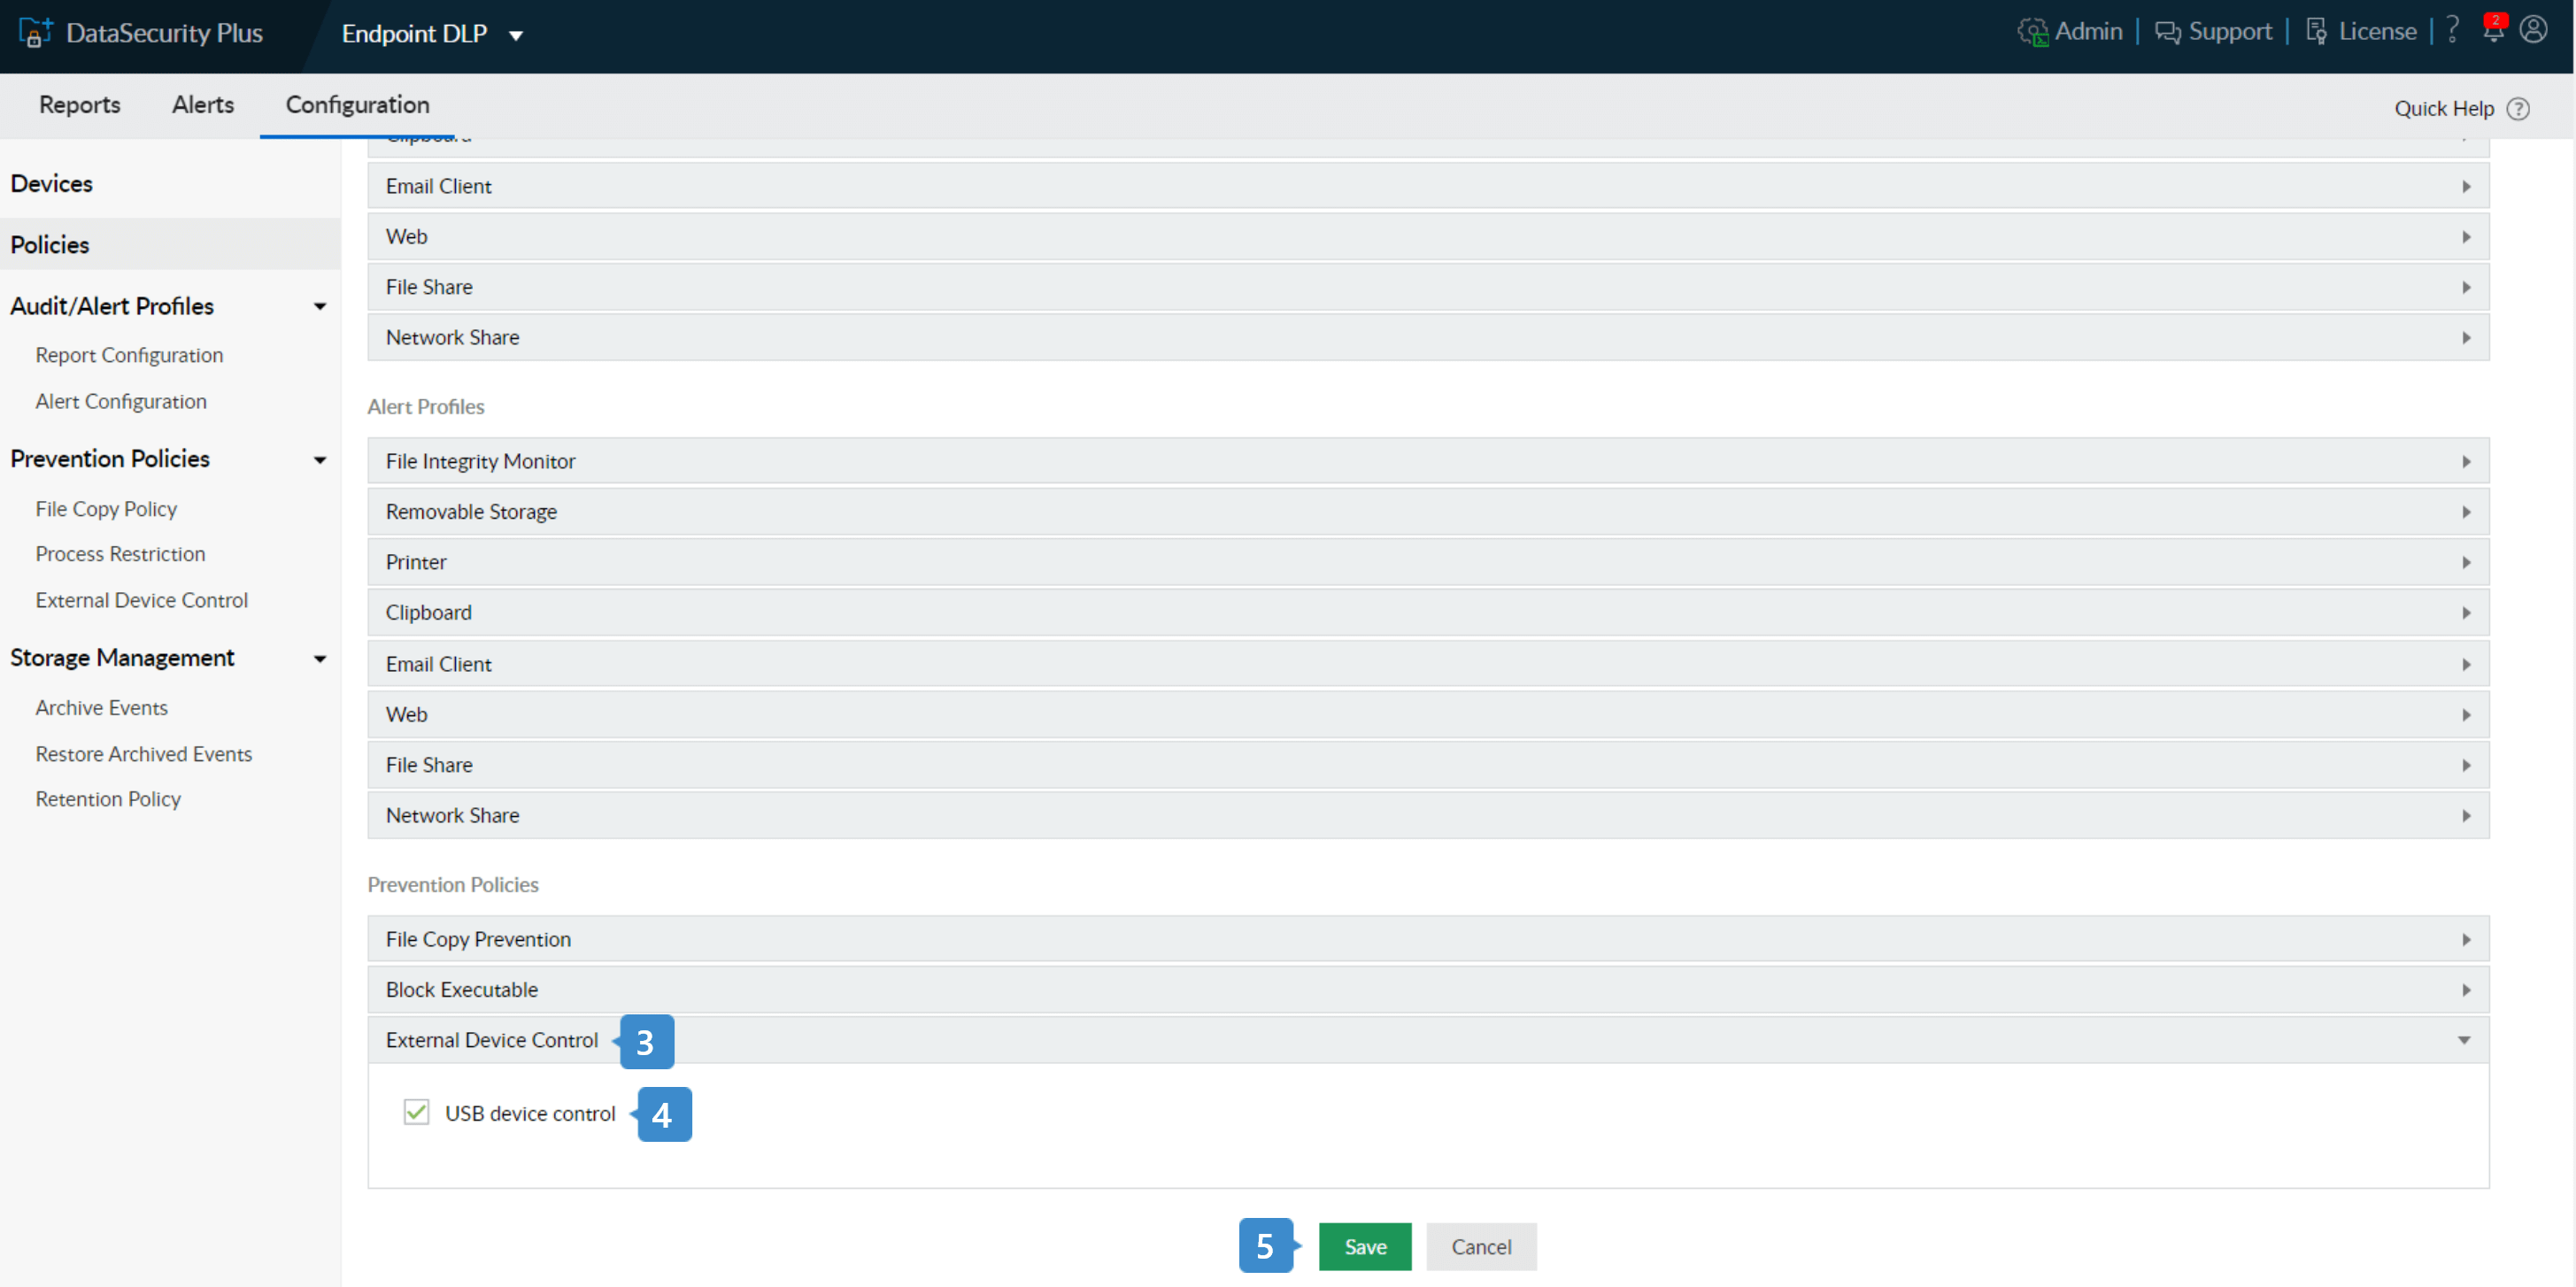
- Scroll down to Prevention Policies. Click on the External Device Control policy.
- Check the USB Device Control policy.
- Click Save to update the change.
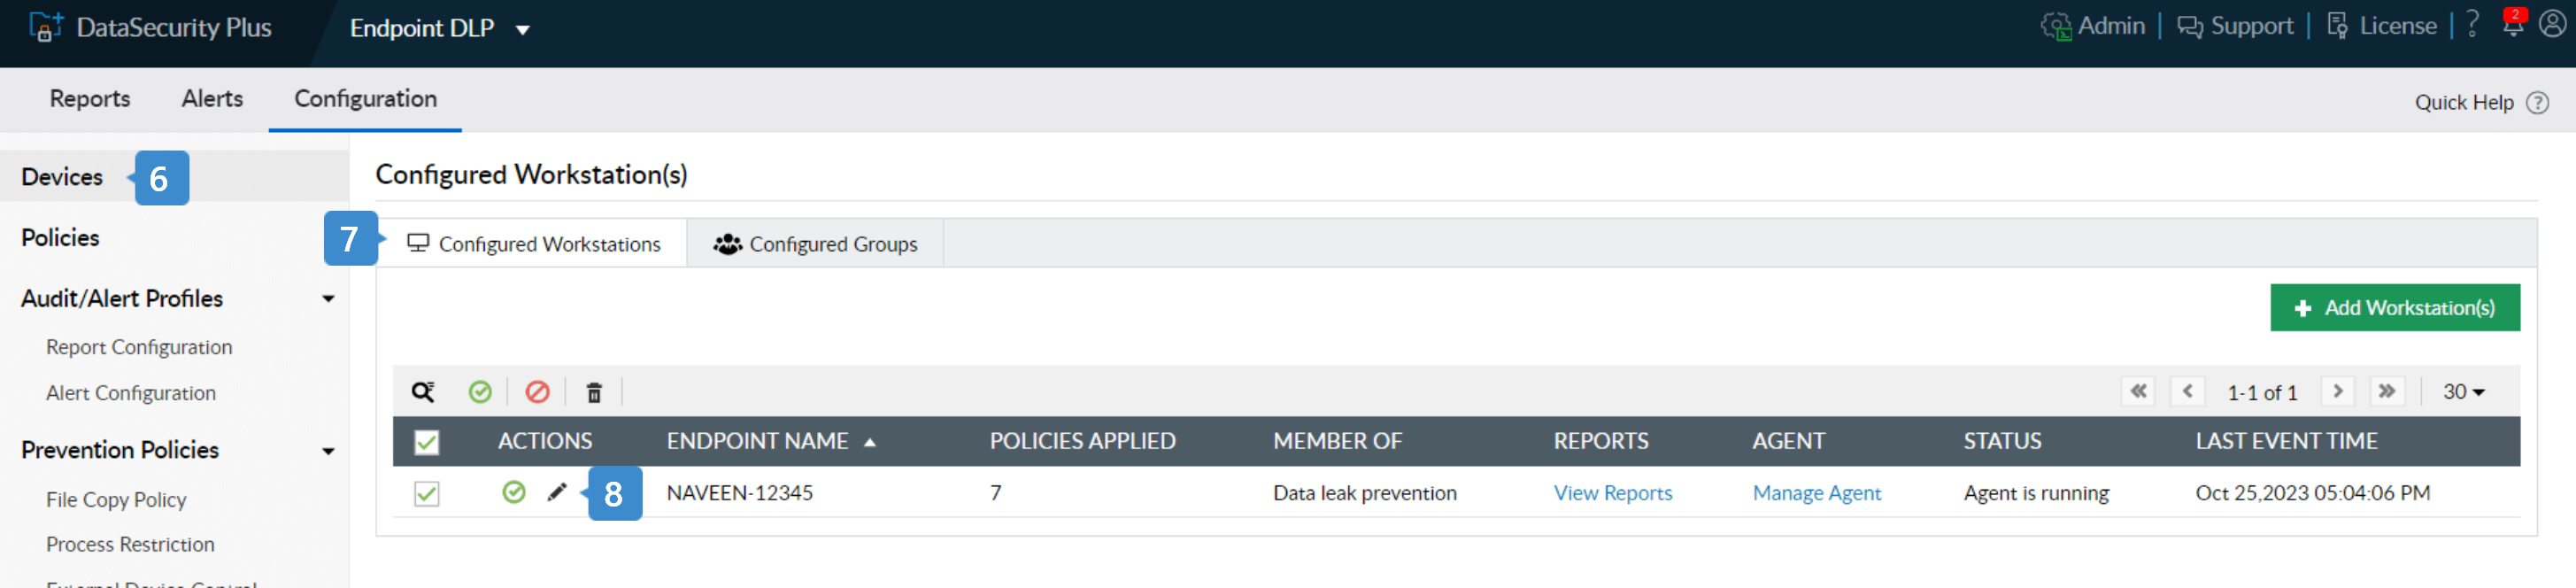
- In the Endpoint DLP module, go to Configuration > Devices.
- Check that the desired workstations are configured. When applying the policy to a group verify that the desired endpoints are added to that group.
Note: To add new endpoints and to create new endpoint groups follow the steps on this
page.
- Click the edit icon next to the endpoint or it's group.
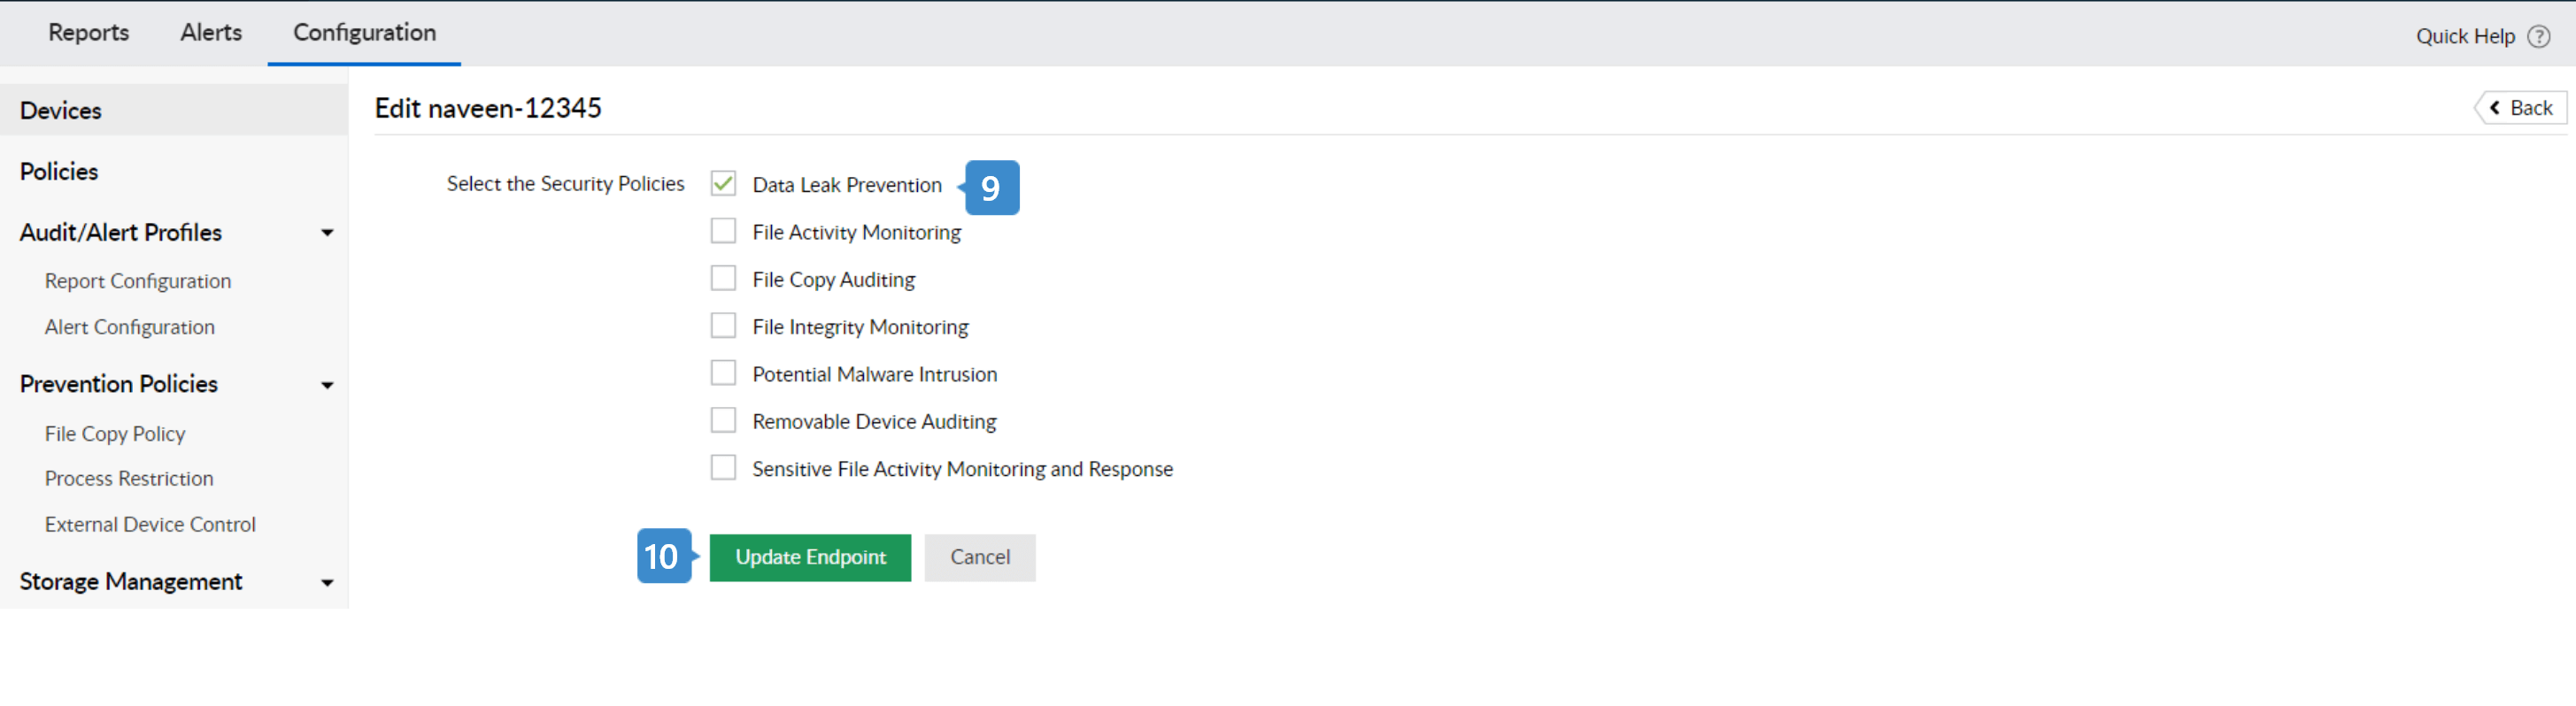
- Ensure that the policy you have edited in the previous step is applied to the endpoints or group. In this instance, verify that the Data Leak Prevention policy is checked.
- Click Update Endpoint to enforce the policy.
The USB read-only policy created will now be applied to the selected endpoints and groups.