Stop data leakage using DataSecurity Plus
A data leak refers to the unintentional or unauthorized transmission of classified information outside an organization. Depending on the sensitivity of the data leaked, it could lead to legal penalties, tarnished reputation, operational problems, and more. This is why data leak prevention strategies must be put in place to secure business-critical data.
DataSecurity Plus' data leak prevention (DLP) solution performs real-time endpoint security monitoring to detect and obstruct data leakage via removable storage devices, emails, and more. Use our predefined library of DLP policies to secure your data.
Prevent data leakage via email
Put a stop to business-critical data leaving the organization via email (Outlook) attachments using DataSecurity Plus.
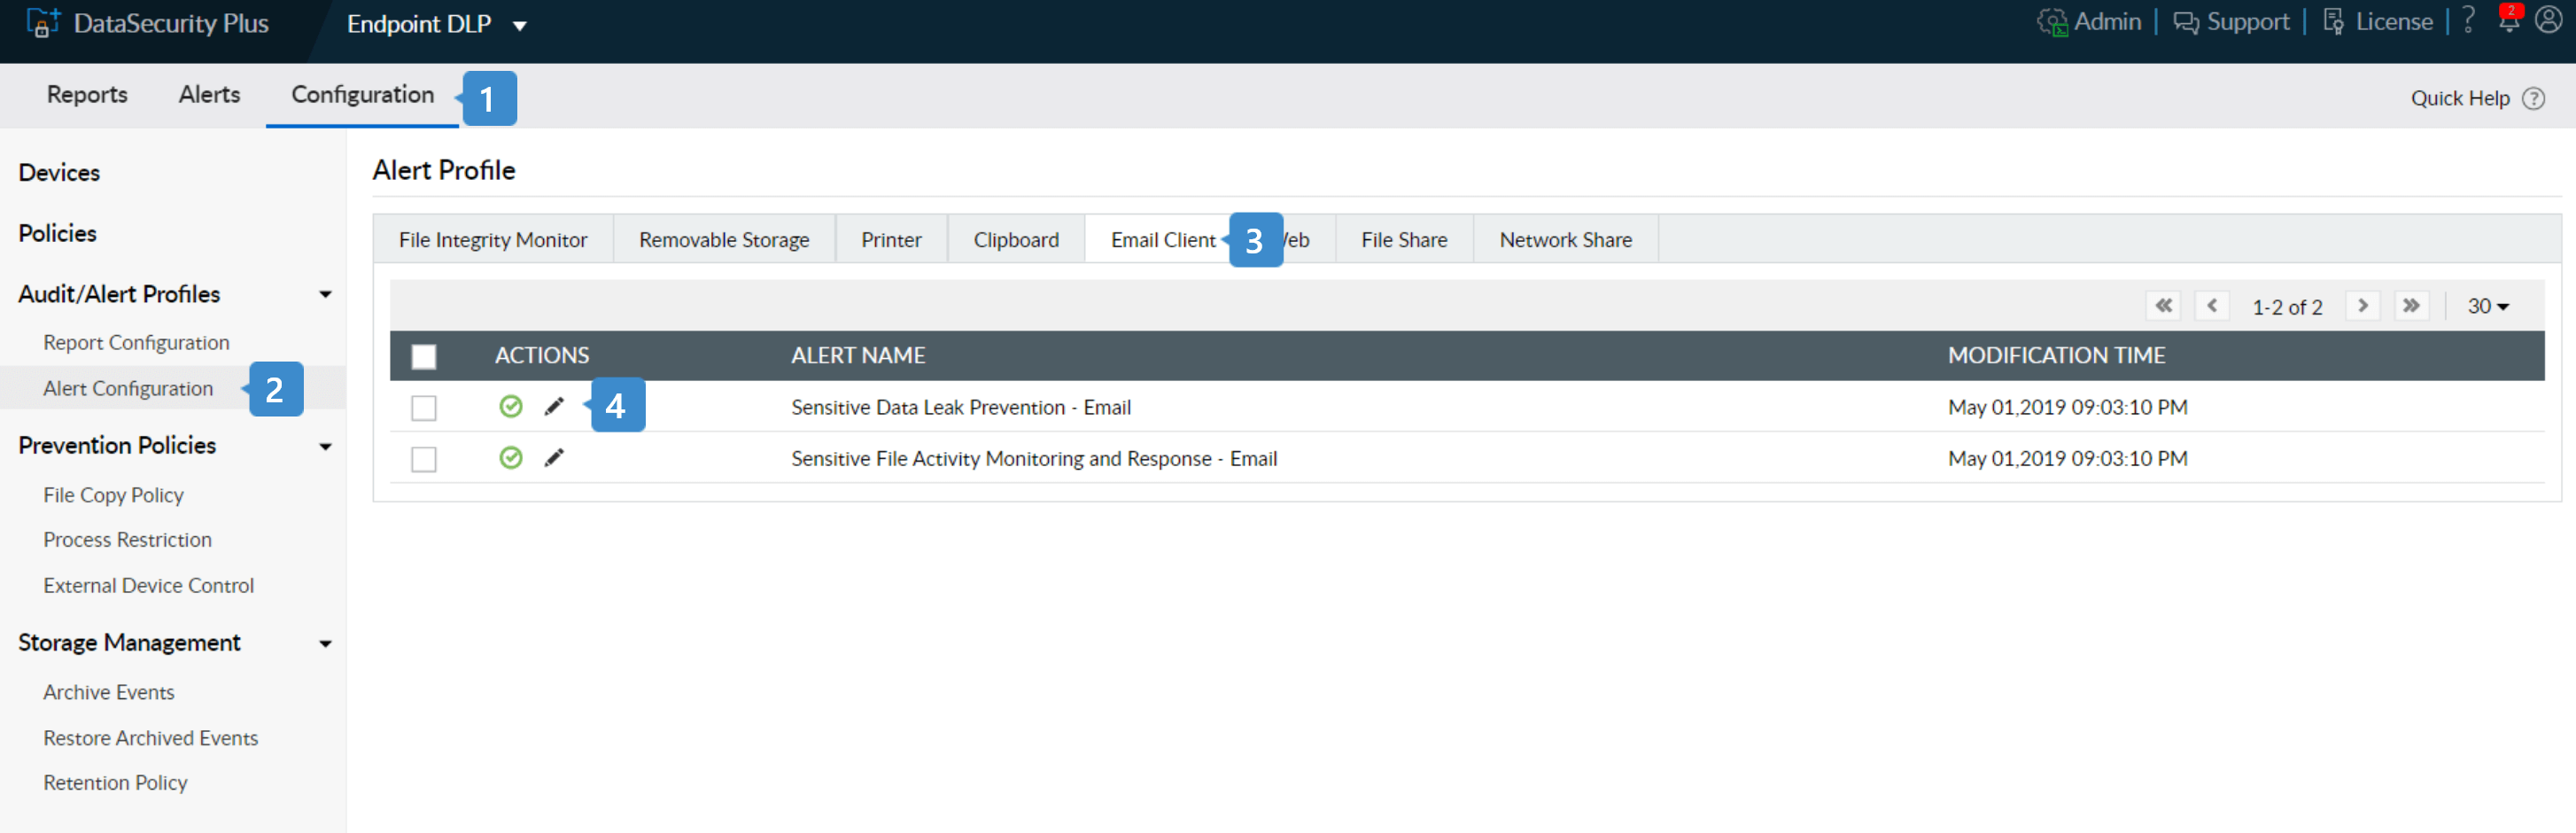
- Select Endpoint DLP from the application drop-down and go to Configuration.
- Under Audit/Alert Profiles, choose Alert Configuration.
- In the Alert Profile page that opens, select Email Client from the top menu.
- Click the edit symbol near the Sensitive Data Leak Prevention - Email profile.
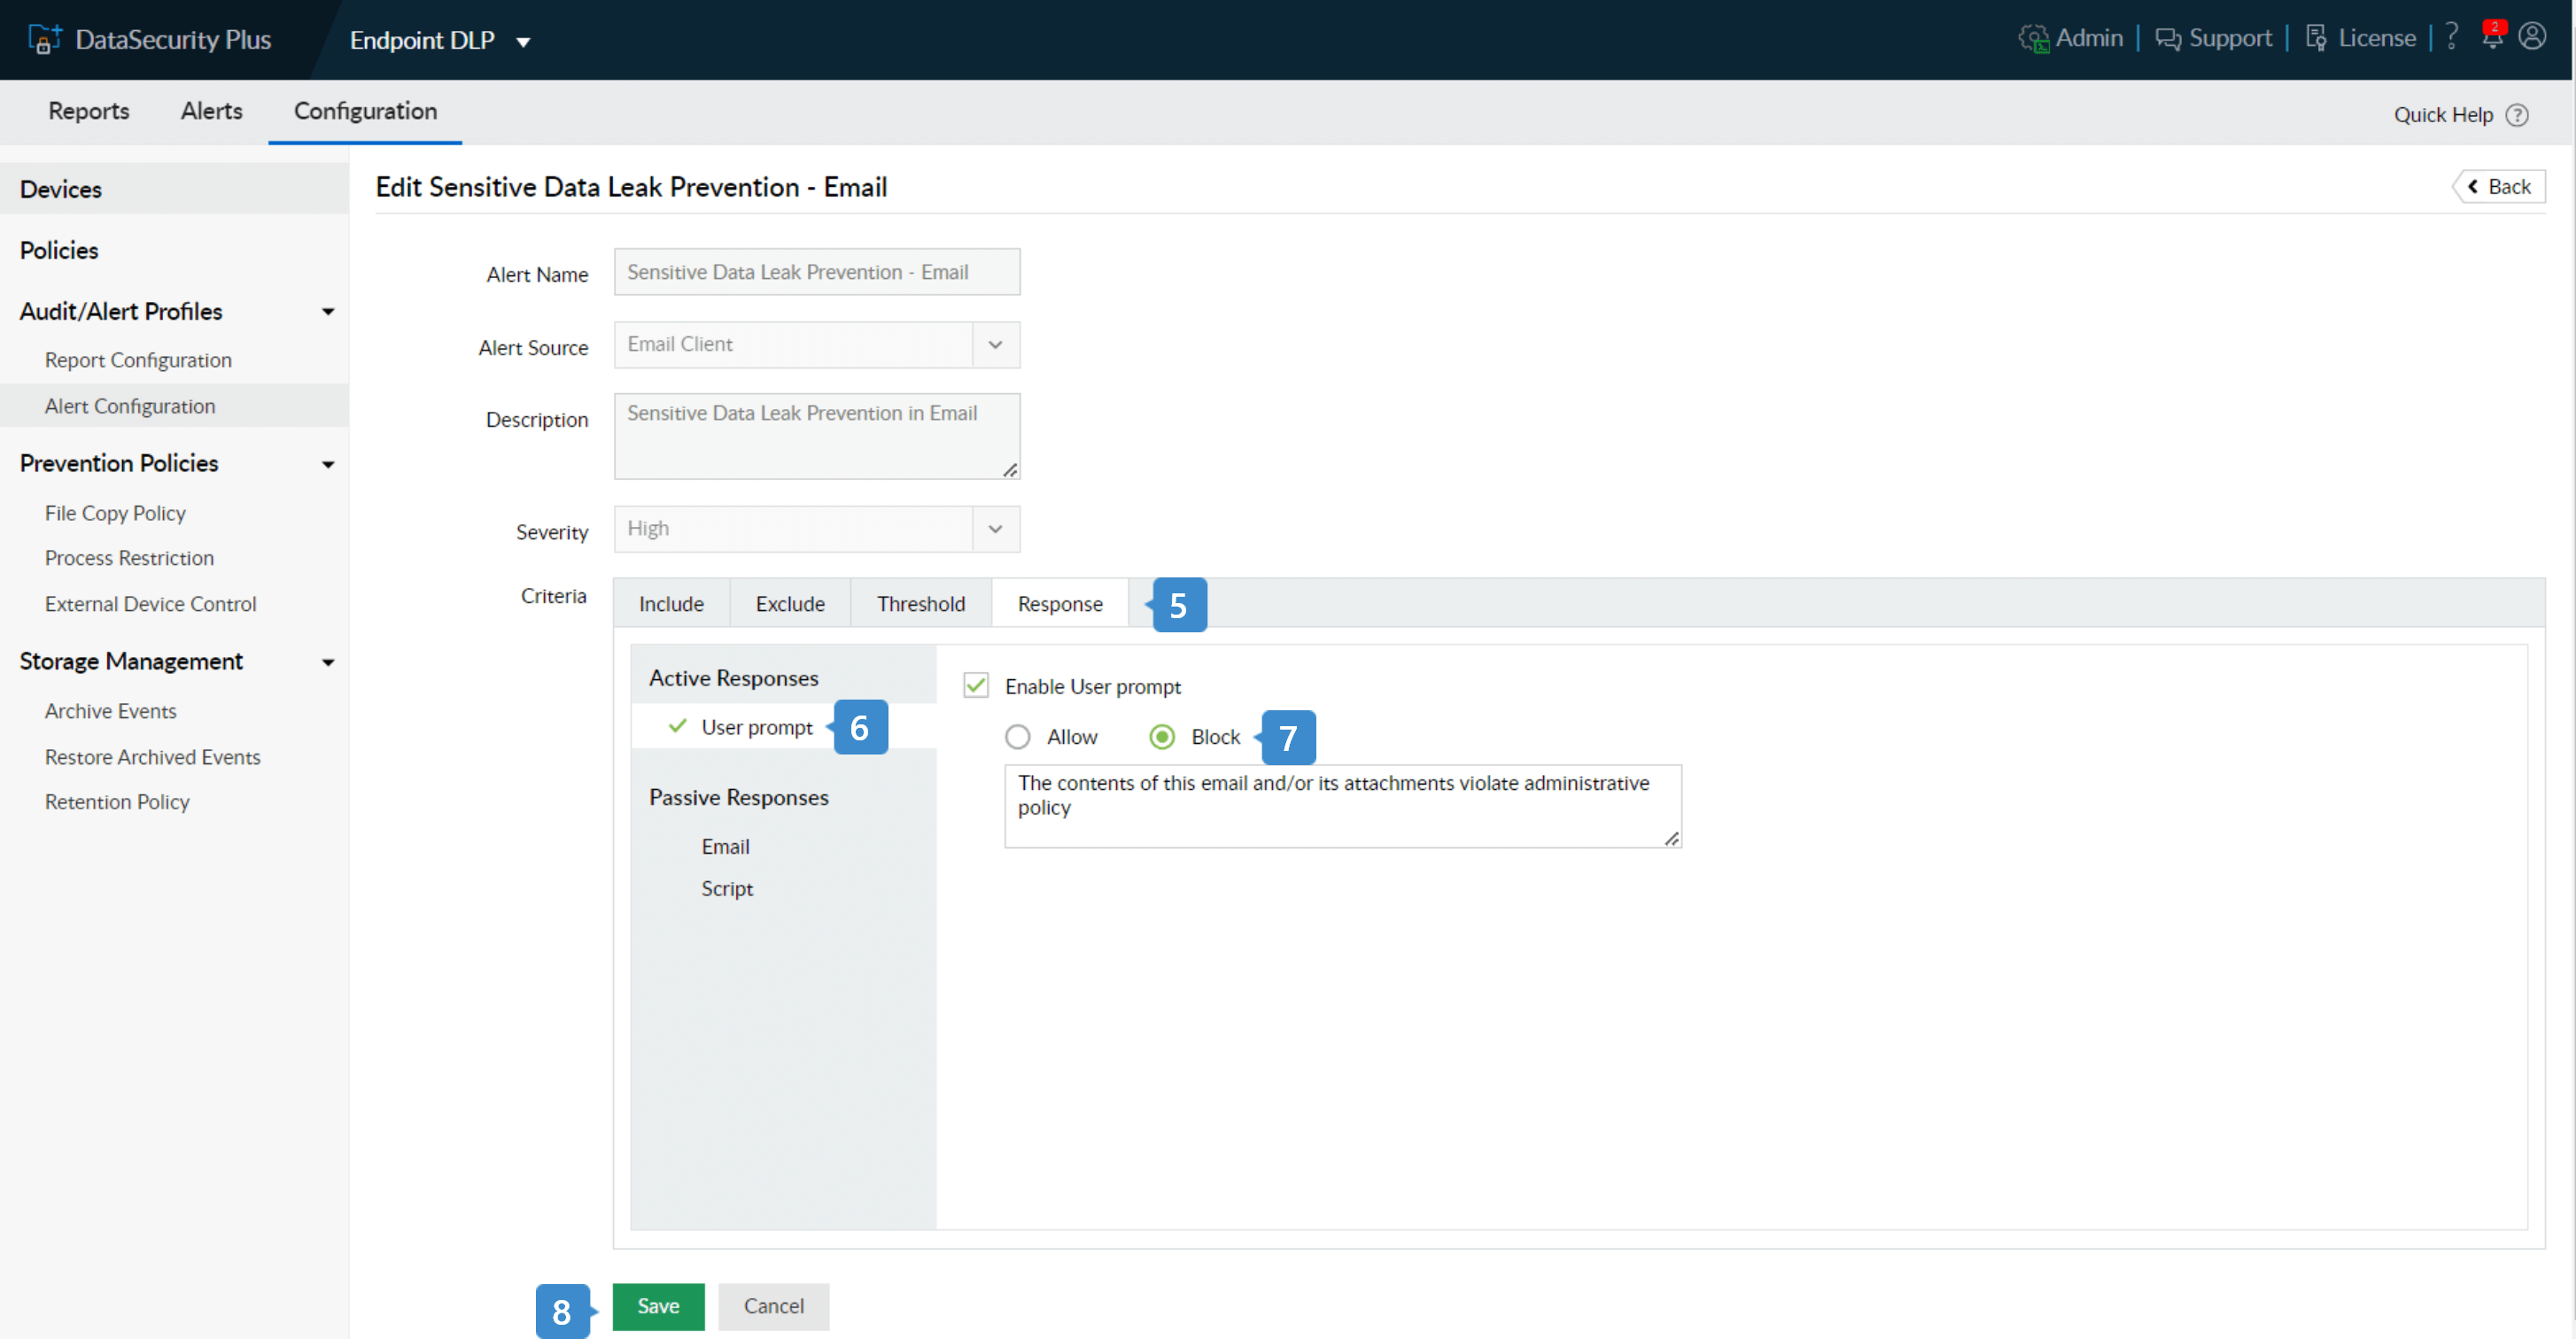
- Under Criteria, go to Response.
- Select User Prompt under Active Responses and check Enable User Prompt.
- Choose Block and customize the warning message as required.
- Click Save.
When a user tries to send a business critical file, the email is blocked and a warning is displayed as shown above.
Prevent data leakage via USB devices
The use of removable storage devices in an organization is one of the common ways in which data is leaked. DataSecurity Plus' USB data theft protection solution helps prevent data leakage using the following steps:
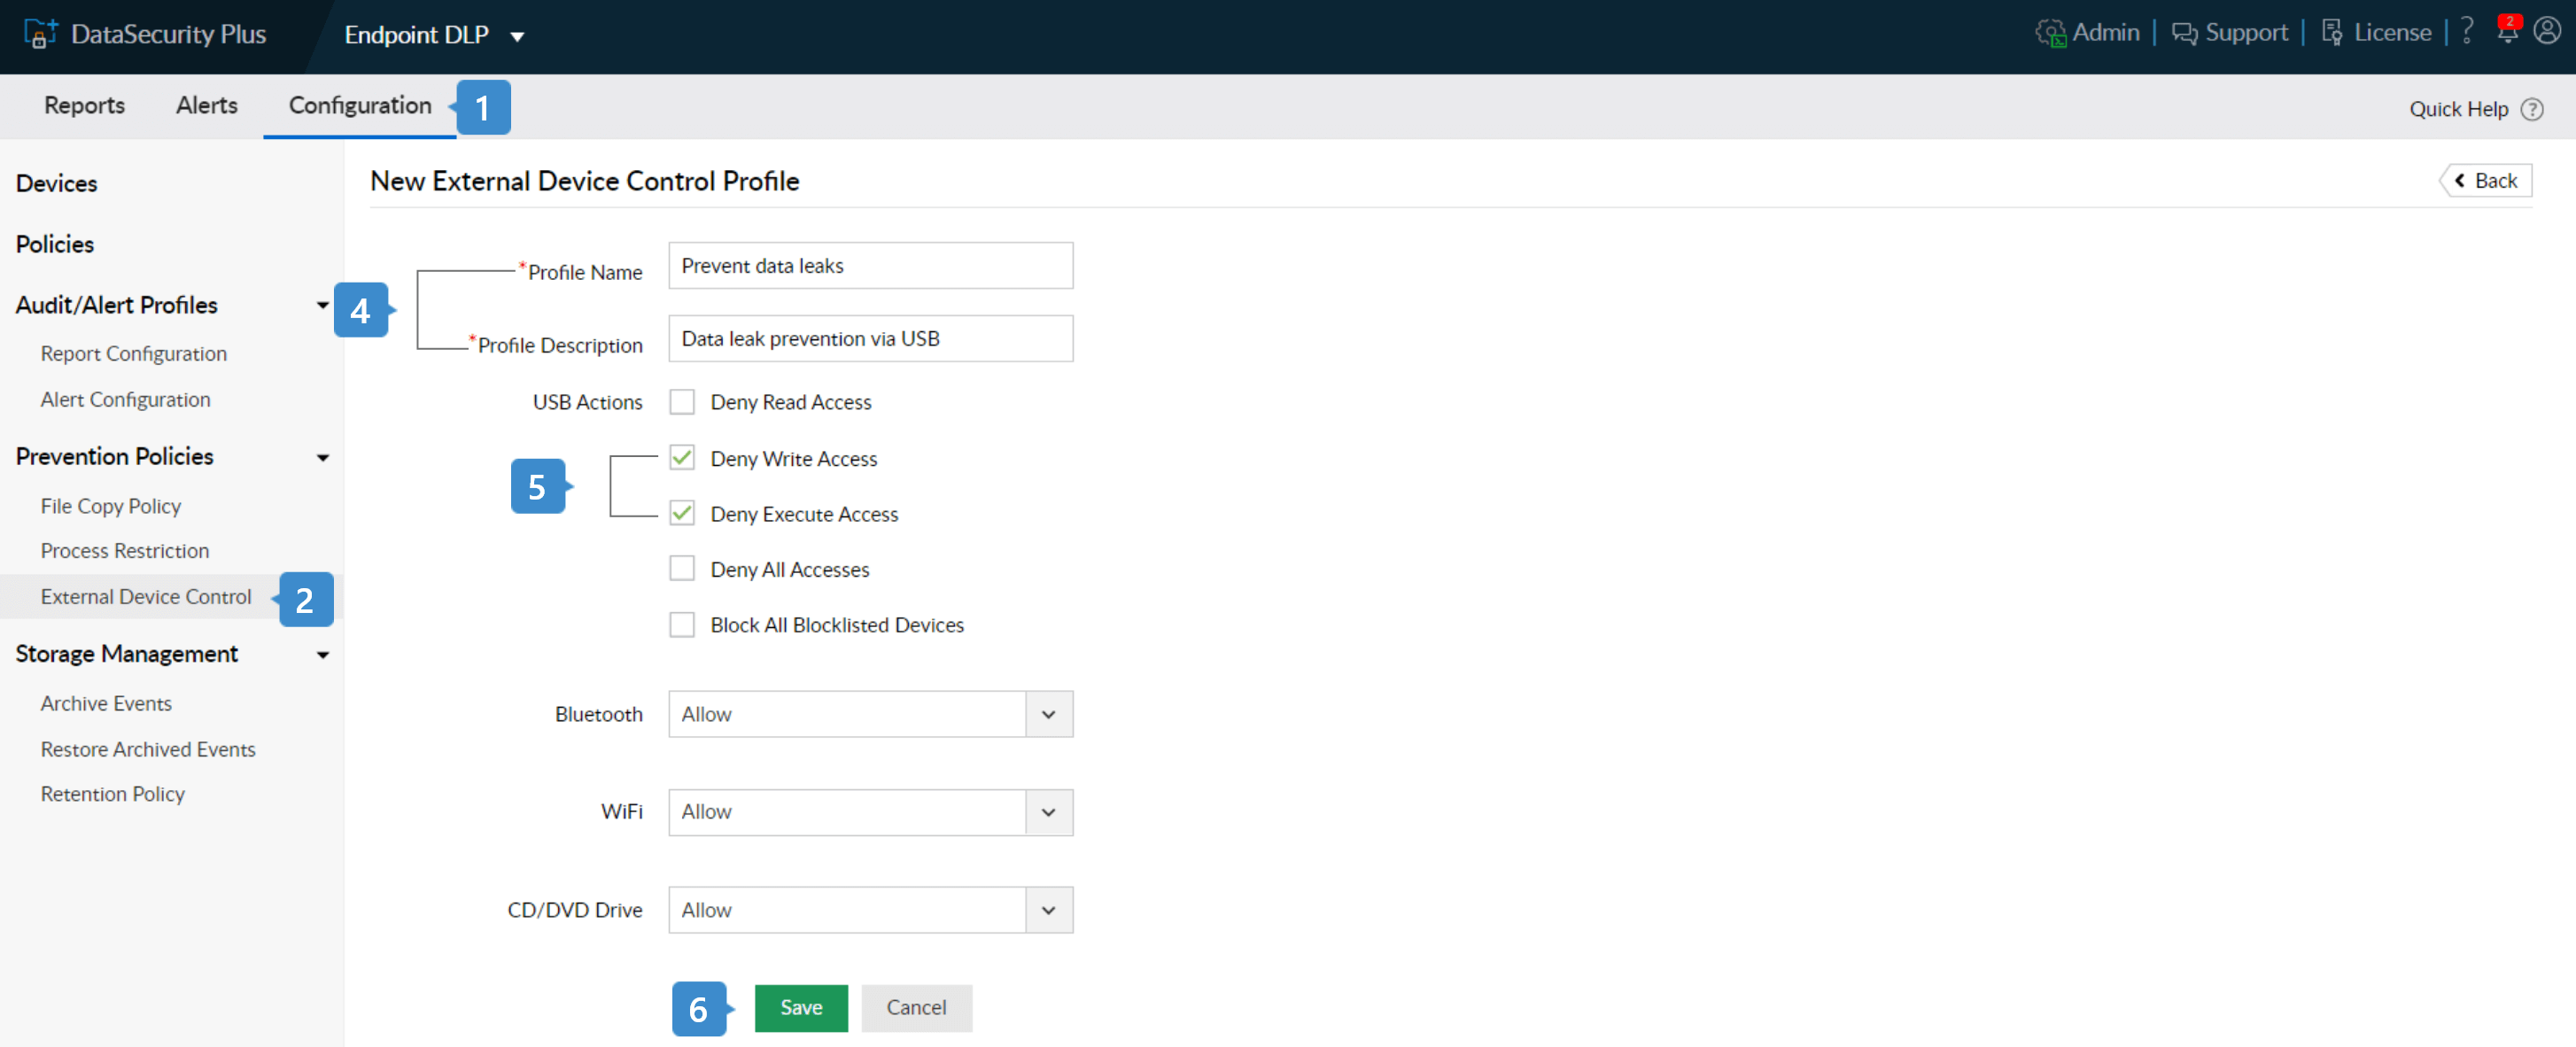
- Select Endpoint DLP from the application drop-down and go to Configuration.
- Under Prevention Policies, select External Device Control.
- Click on + Add New Profile at the top-right corner to open the New External Device Control Policy window.
- Enter a suitable Profile Name and Profile Description.
- Make all USB devices read-only by checking the entries: Deny Write Access and Deny Execute Access.
Note: Denying execute access restricts malicious executables such as data stealing Trojans from running in your USBs.
- Click Save.