Installation and Uninstallation
Last updated on:
In this page
Overview
This page explains how to install and uninstall ManageEngine Log360 on Windows and EventLog Analyzer on Windows and Linux platforms. It guides you through the installation process, including selecting the installation type and completing the setup.
Pre-requisites
- Log360's functionality differs based on the underlying operating system.
- Before proceeding, ensure that the system requirements and port requirements are met.
- Install the product by downloading the installer from this page for Log360 and this page for EventLog Analyzer.
Installing Log360
Refer to the following steps to install Log360 on Windows.
Windows
- In Windows OS, execute ManageEngine_Log360.exe to launch the InstallShield Wizard.
- In the installation wizard, click Next to continue.
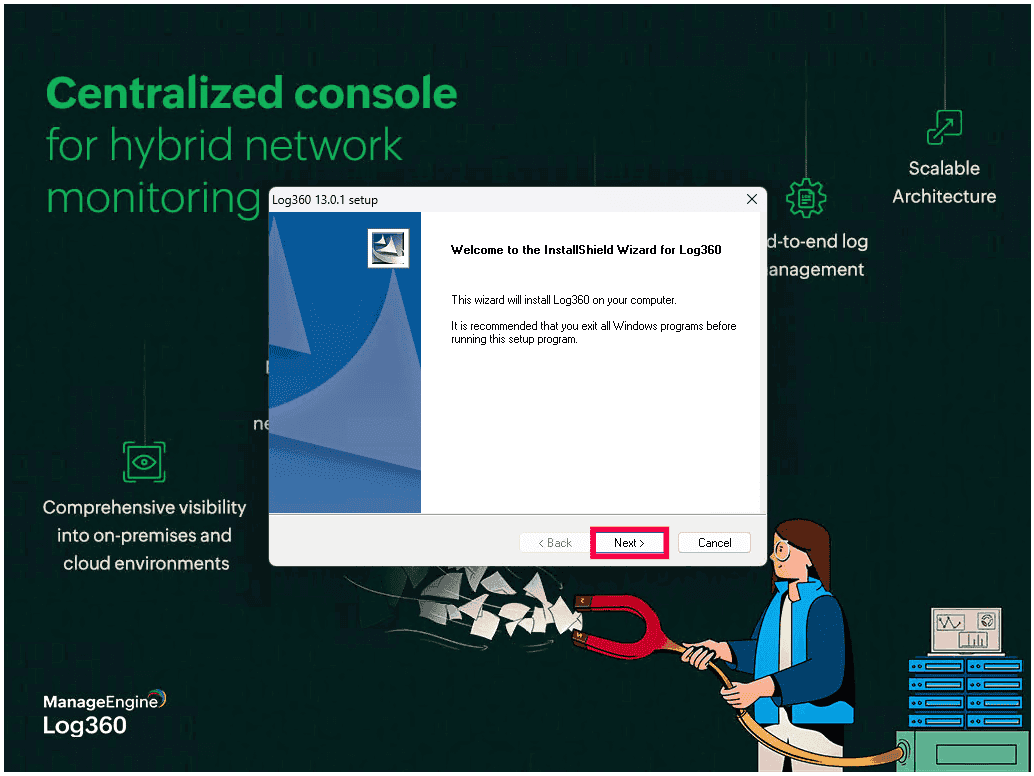
Figure 1: Launching InstallShield Wizard. - Read and accept the license agreement to proceed. Click Yes to continue.
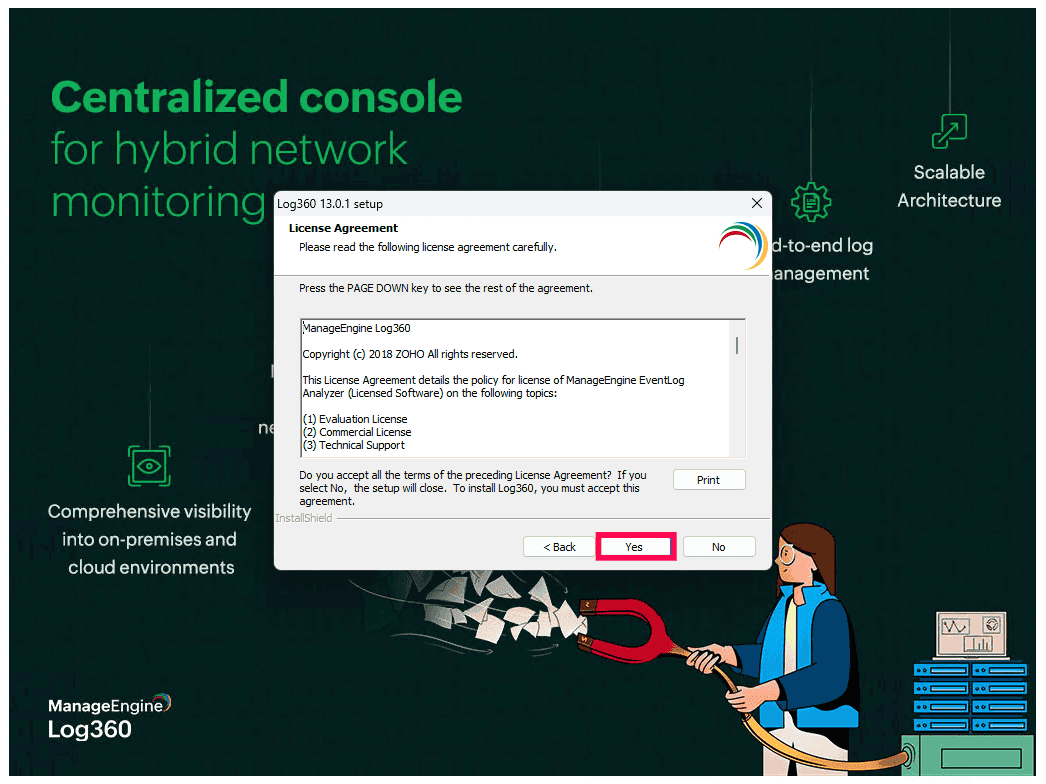
Figure 2: License Agreement - Choose the installation type and click Next:
- Standard Installation - Installs Log360 and ADAudit Plus. Standard Installation is recommended for most users.
- Minimal Installation - Installs only Log360.
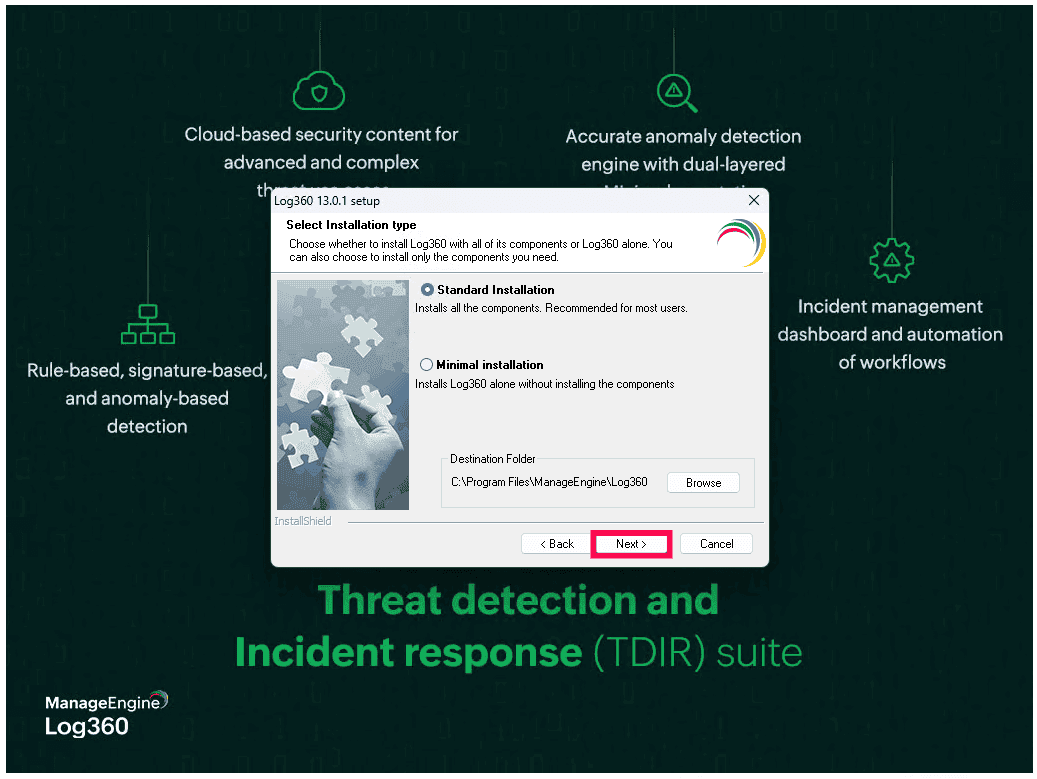
Figure 3: Choosing installation type - The default installation directory is
C:\Program Files\ManageEngine\Log360
Click Browse to select a different installation directory if required, and click OK to confirm the folder selection.
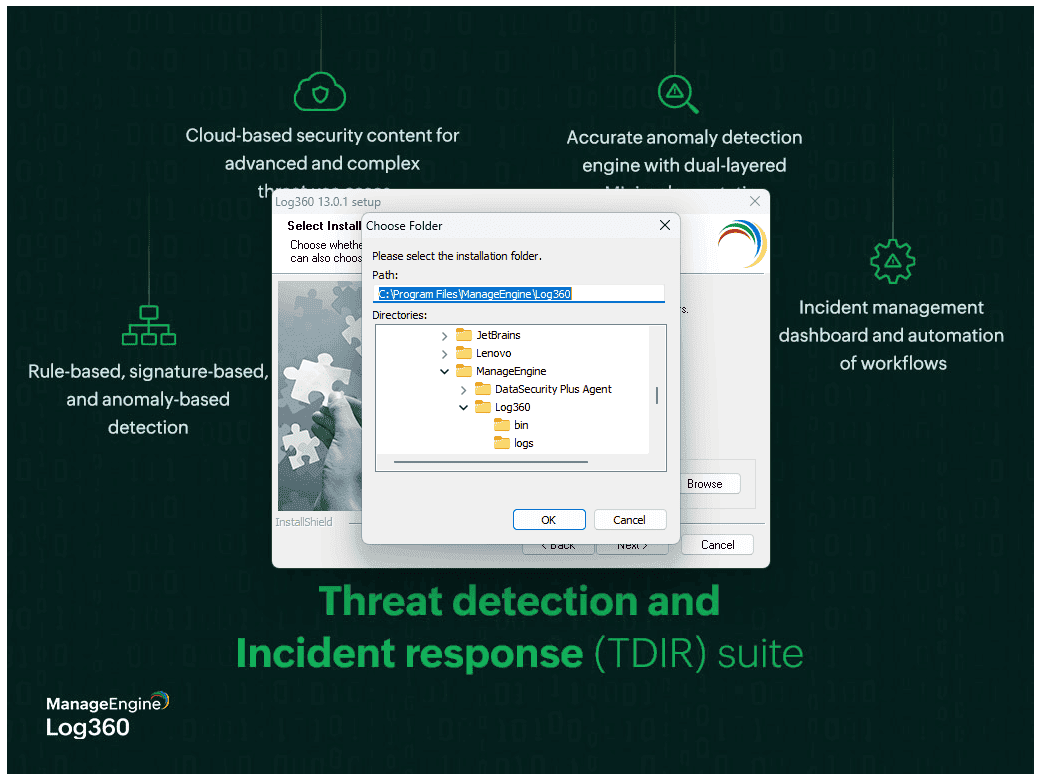
Figure 4: Selecting installation folder - After selecting the installation folder, click OK and then click Next to proceed with the installation.
- A prompt appears recommending that you exclude the Log360 installation directory from antivirus scans to prevent interference with database operations. Click OK and then click Next to continue with the installation.
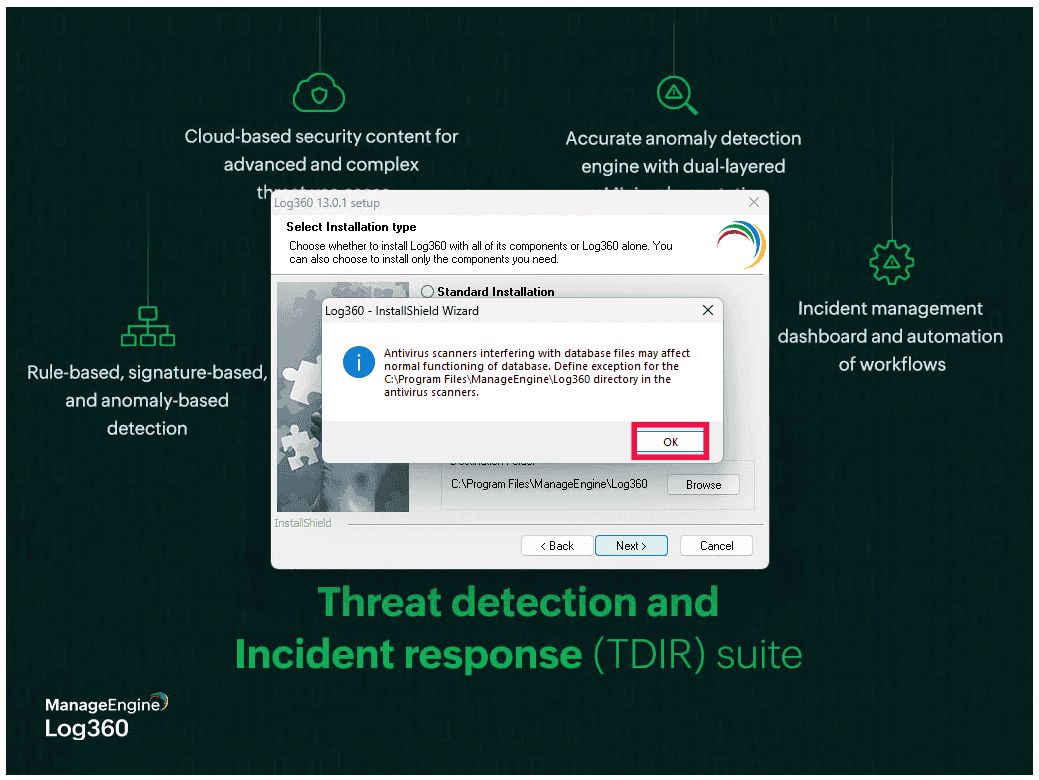
Figure 5: Antivirus scan - Review the installation summary. Click Back to modify any settings, or click Next to begin the installation.
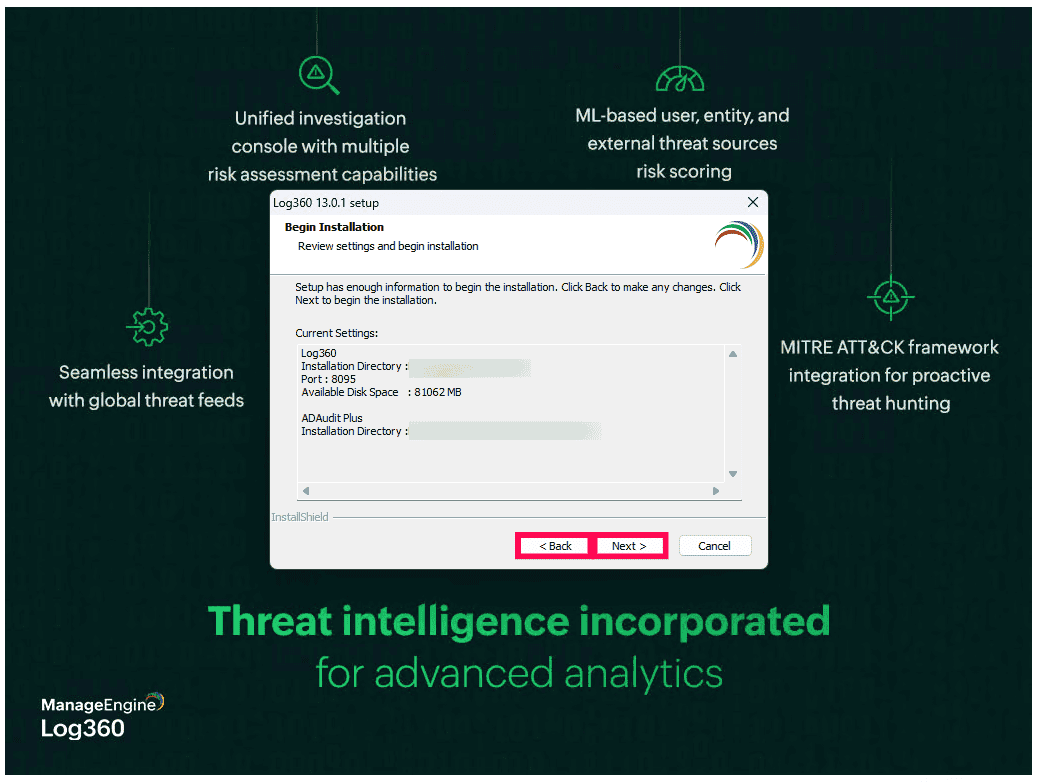
Figure 6: Standard installation - When Minimal Installation is selected, the wizard proceeds directly with the setup. Click Back to modify any settings, or click Next to continue.
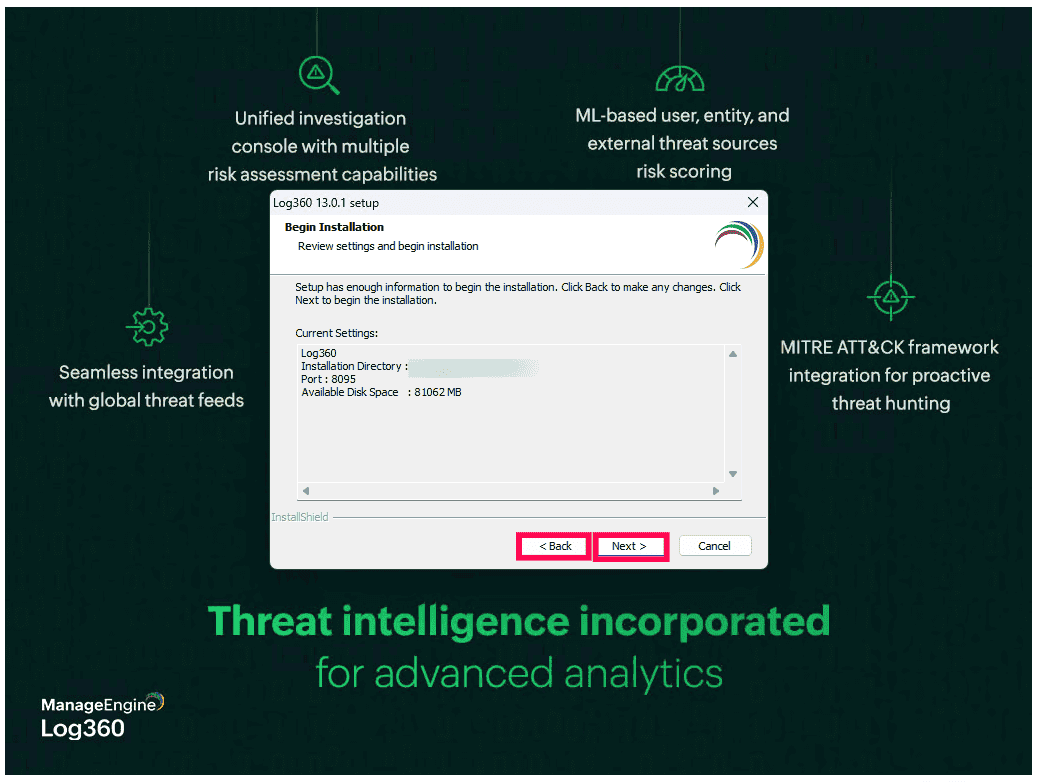
Figure 7: Minimal installation - The wizard begins unpacking the JAR files and installing the required components. This may take a few minutes.
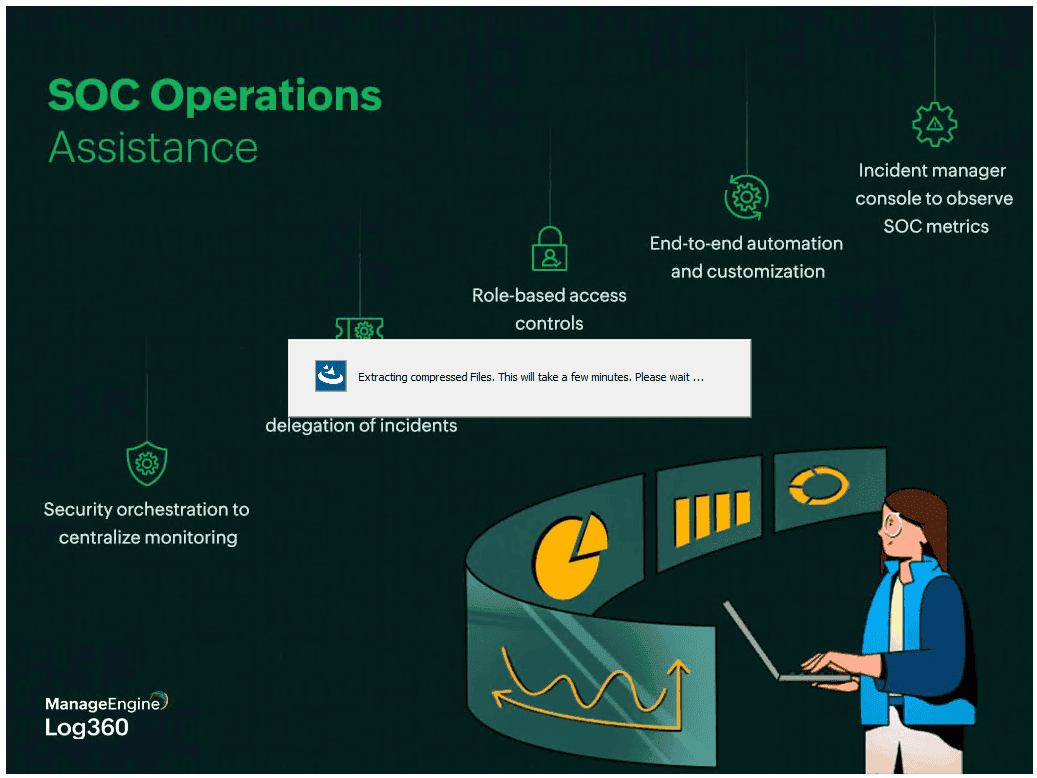
Figure 8: Installing the product - Once the installation completes, you can register for technical support or skip this step.
- In the installation wizard, select the checkbox next to Start Log360 in console mode to start the application after installation and click Finish.

Installing EventLog Analyzer
Refer to the following steps to install EventLog Analyzer on Windows and Linux.
Windows
- In Windows OS, execute ManageEngine_EventLogAnalyzer_64bit.exe to launch the InstallShield Wizard.
- In the License Agreement window, read the agreement carefully and click Yes to accept and proceed.
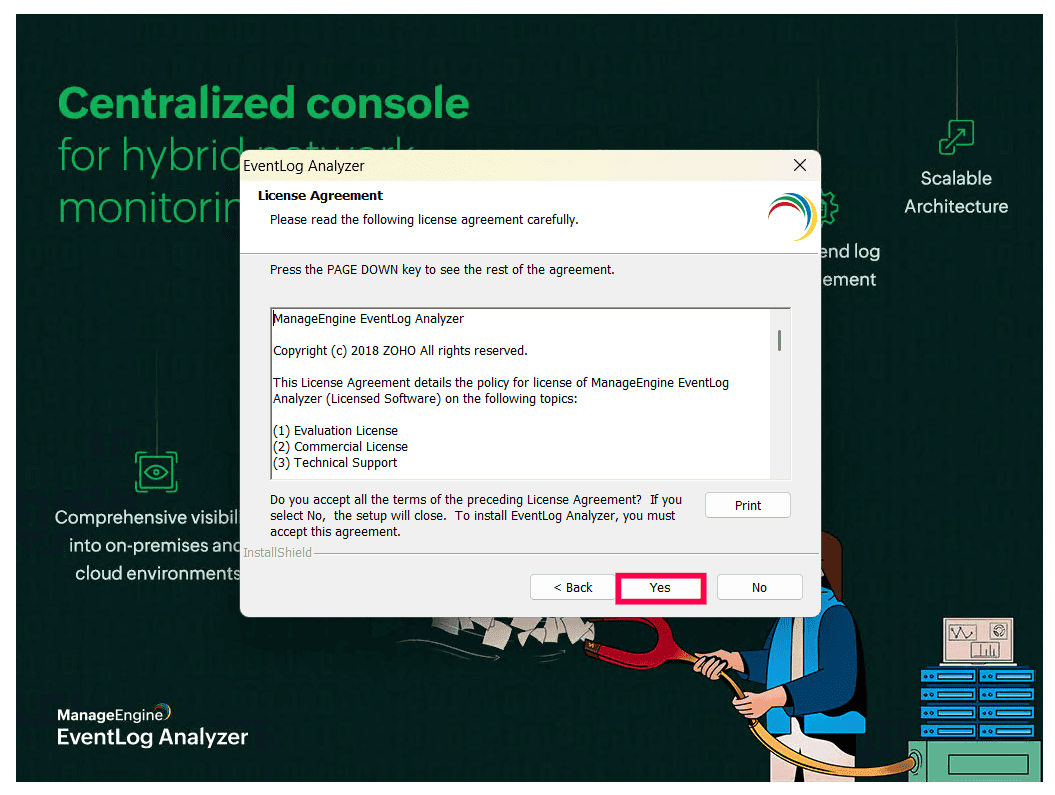
Figure 10: License Agreement - Choose the destination folder for installation. The default path is:
C:\Program Files\ManageEngine\Log360
Note The installation directory is named Log360 by default, even when installing EventLog Analyzer.
Figure 11: Selecting installation folder - Click Browse if you want to select a different location. After selecting the installation folder, click OK and then click Next to proceed with the installation.
- A prompt appears recommending that you exclude the installation directory from antivirus scans to avoid interference with database files. Click OK and then click Next to continue with the installation.
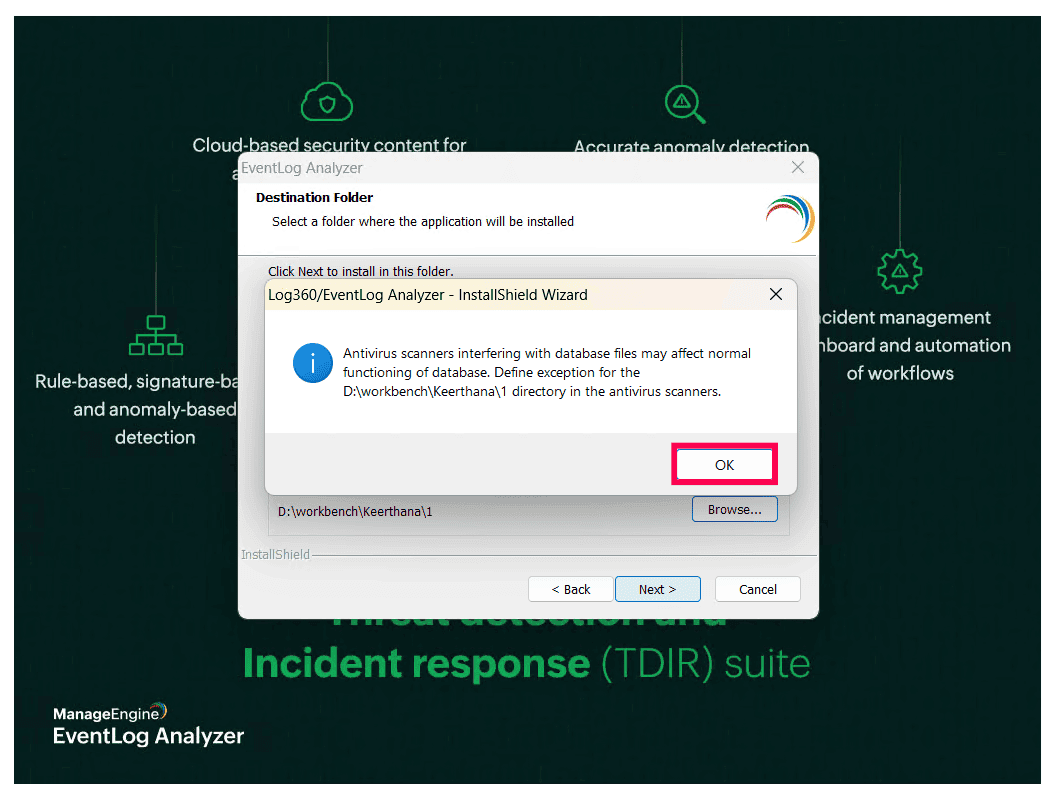
Figure 12: Antivirus scan - Review the installation summary. Click Back to modify any settings or Next to begin the installation.
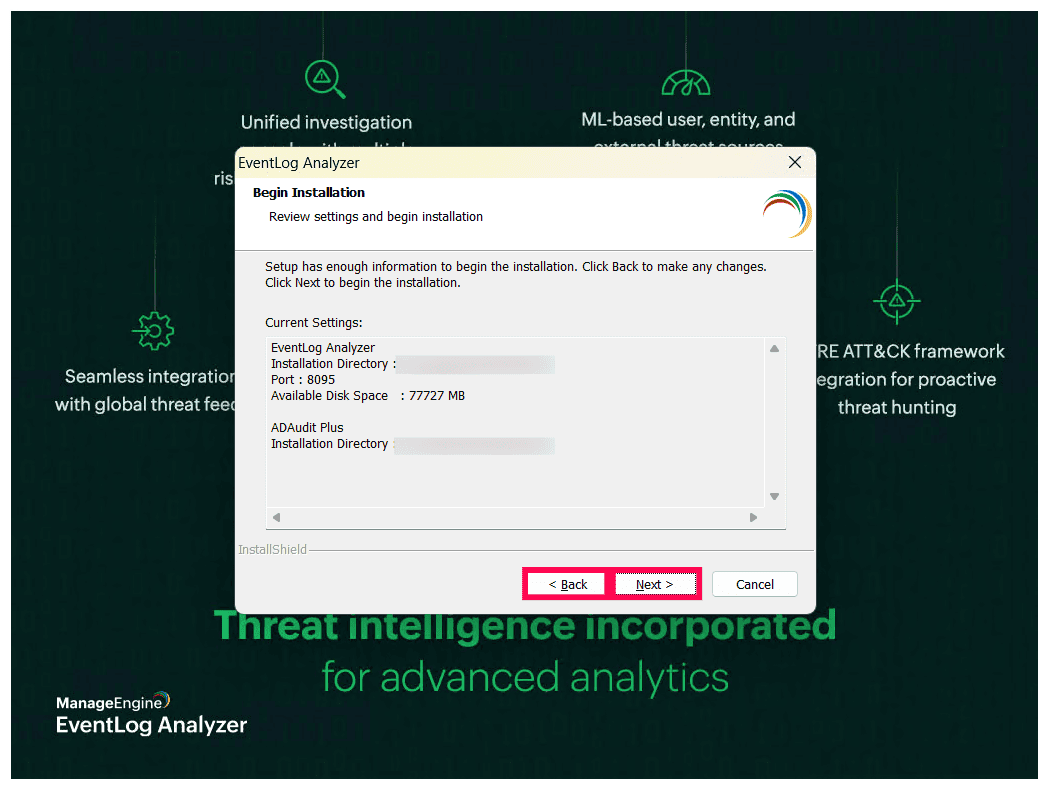
Figure 13: Reviewing settings - The wizard will extract and install the required components. This may take a few minutes.

Figure 14: Installing the product - After installation, you may register for technical support or skip this step.
- Select Start EventLog Analyzer in console mode if you want the application to launch immediately after installation.
Note If the Start EventLog Analyzer in console mode option is not selected, you can install EventLog Analyzer as a Windows service and start it later. For more information, refer to Steps to install Log360 as a service.
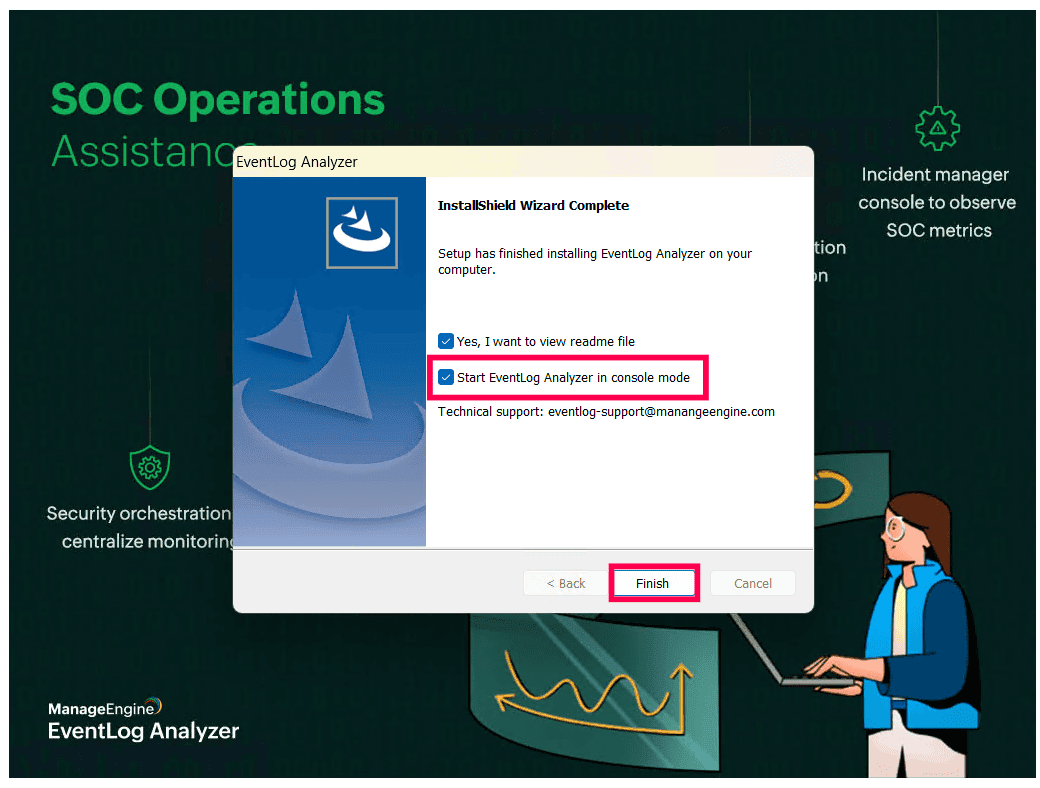
Figure 15: Installing EventLog Analyzer - Click Finish to complete the installation.
Linux
EventLog Analyzer can be installed on Linux using either the Graphical User Interface (GUI) installer or the Command Line Interface (CLI) installer.
Installing using GUI
Follow the steps below to install EventLog Analyzer using the graphical installer.
- Open the terminal and navigate to the directory where the installer file is downloaded.
- Before running the installer, grant executable permission to the installer file using the following command:
- Execute the installer using the following command:
- The installer prepares the environment and launches the graphical installation wizard. Click Next to continue with the installation.
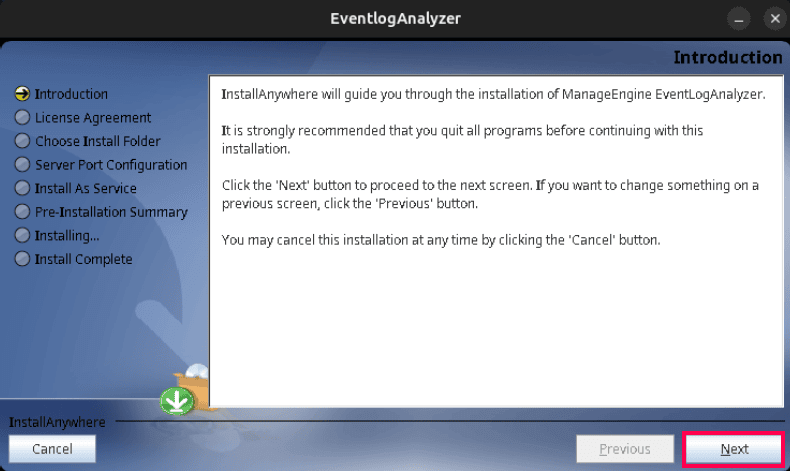
Figure 16: Installing EventLog Analyzer - Read the license agreement carefully. Select I accept the terms of the License Agreement and click Next to proceed.
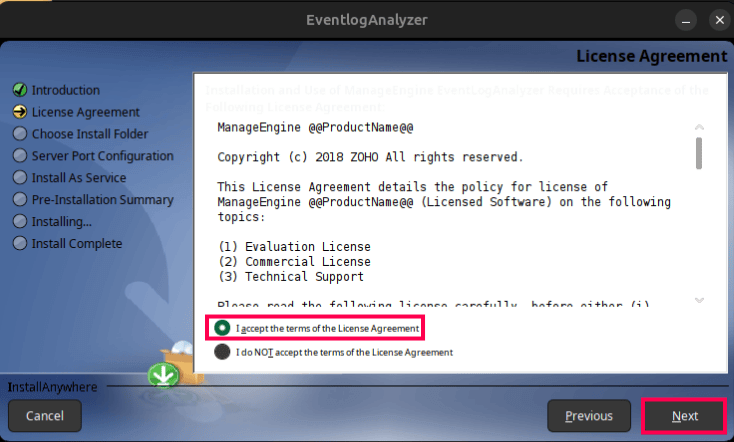
Figure 17: License Agreement - Enter your details to register for technical support. This step is optional and can be skipped if you do not wish to register at this time. Click Next to continue.
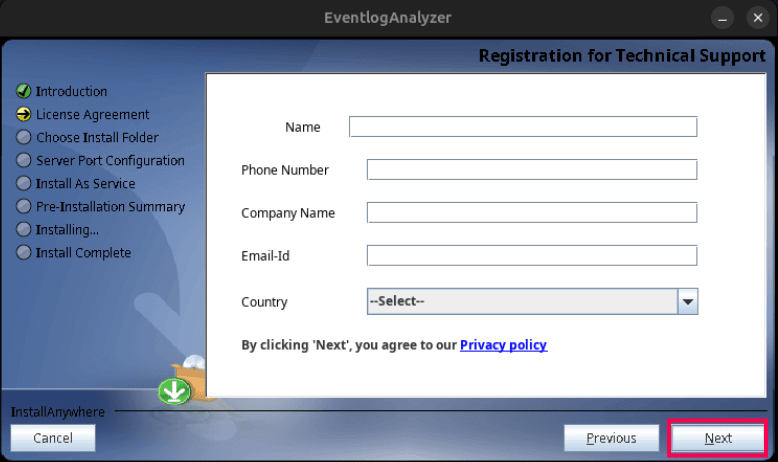
Figure 18: Registering for technical support - Select the destination folder for installation. Click Browse to choose a different location if needed. The default installation path is
/opt/ManageEngine/EventLogAnalyzer
Note If the specified folder does not exist, it will be created automatically. - Click Next to proceed.
- The default port is 8095. You can also modify the web server port for EventLog Analyzer. Ensure that the selected port is not being used by another application and click Next.
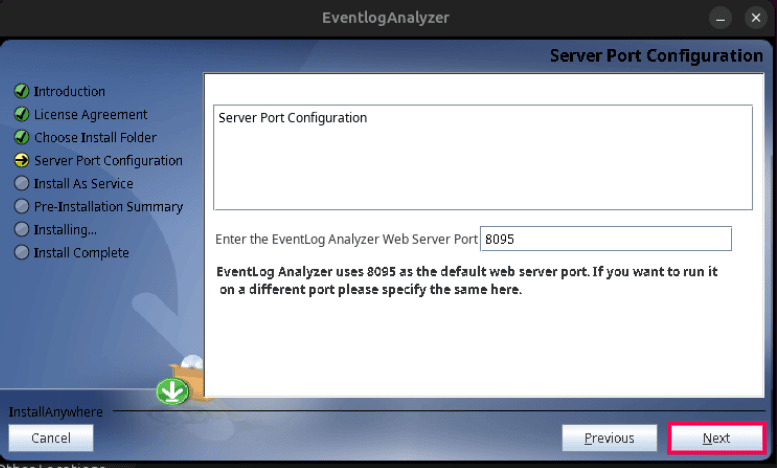
Figure 19: Configuring server port - Select Install EventLog Analyzer as Service if you want the application to start automatically when the system starts and click Next.
Note You can select install EventLog Analyzer as a service. For more information, refer to Steps to install the product as a service.
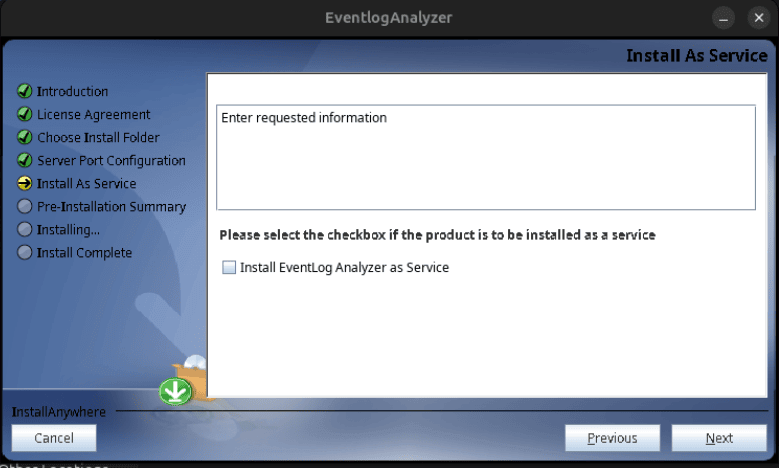
Figure 20: Installing as service - The installer extracts and installs the required components. This process may take a few minutes.
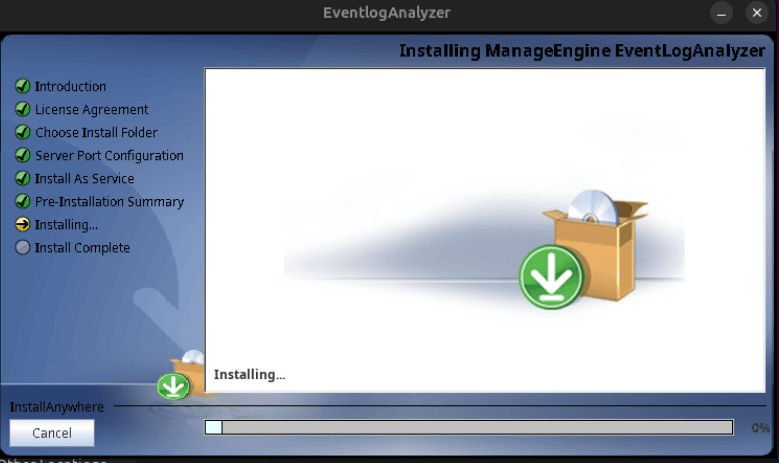
Figure 21: Installing EventLog Analyzer - After the installation completes successfully, click Done to exit the installer.
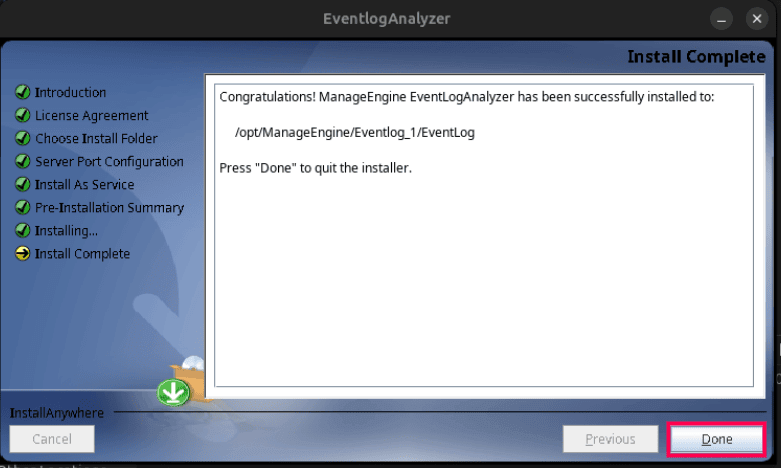
Figure 22: Installation complete
chmod +x ManageEngine_EventLogAnalyzer.bin
sudo ./ManageEngine_EventLogAnalyzer_64bit.bin
Installing EventLog Analyzer using CLI
Follow the steps below to install EventLog Analyzer using command line interface (CLI)
- Open the terminal and navigate to the directory where the installer file is downloaded.
- Before running the installer, grant executable permission to the installer file using the following command:
- Run the installer in console mode using the following command:
- The installer initializes and launches the InstallAnywhere console installer.
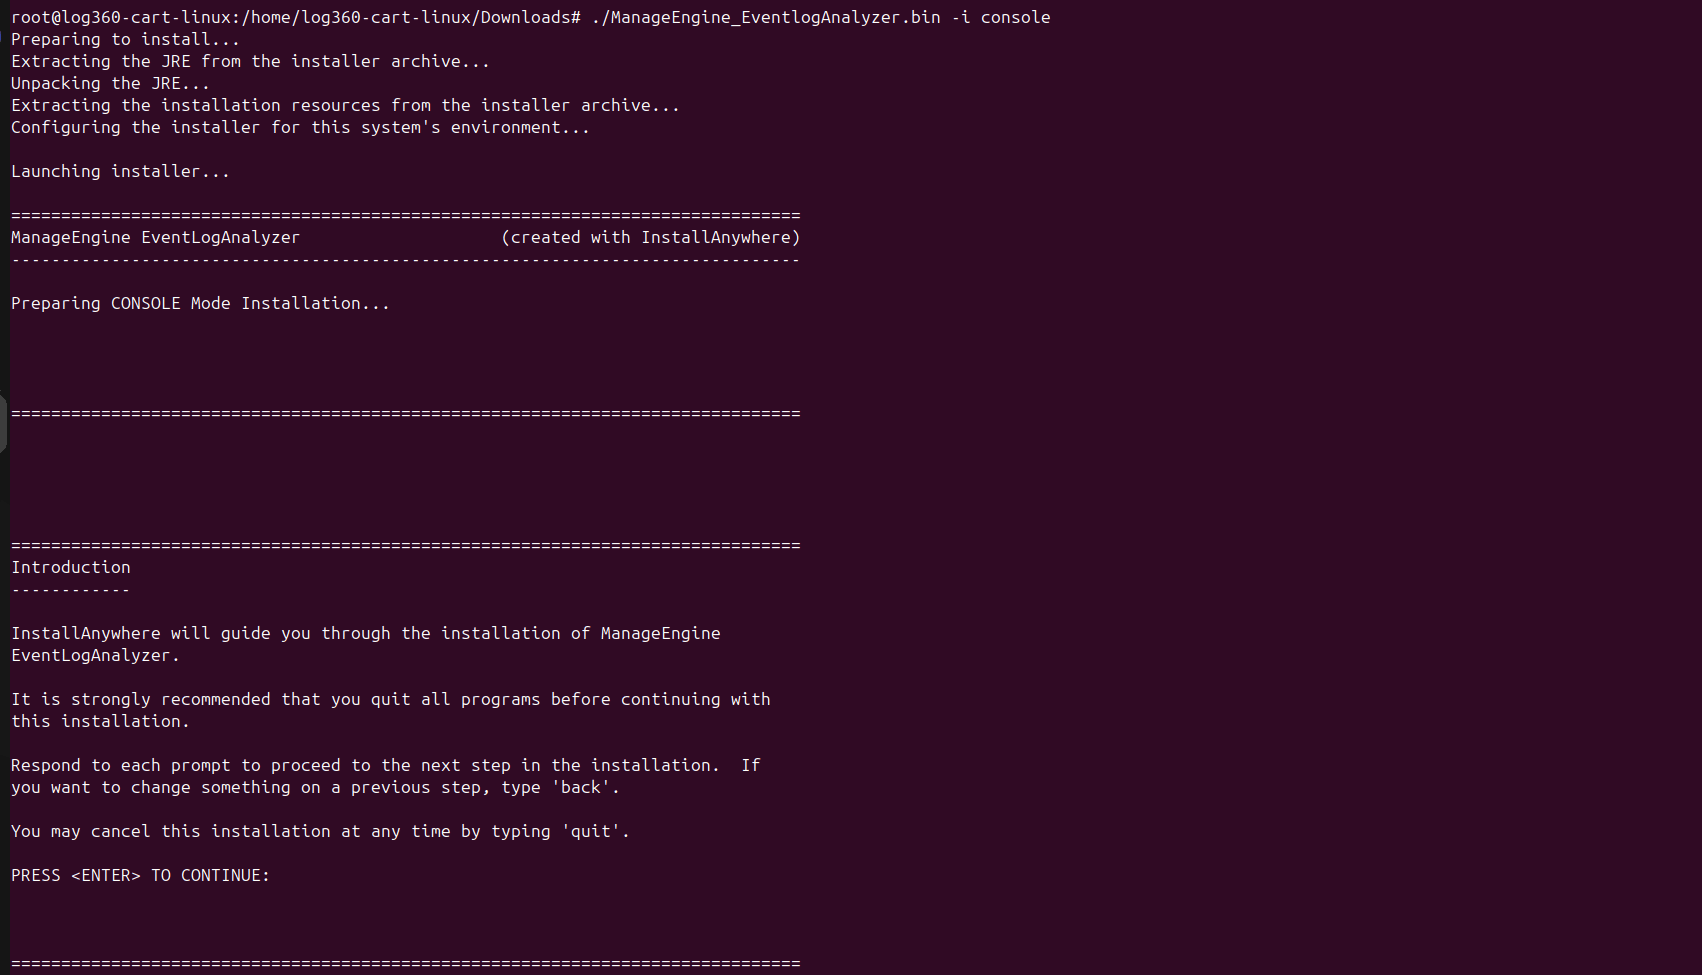
Figure 23: Launching the EventLog Analyzer console installer - The installer displays an introduction message describing the installation process. Press Enter to continue.
- The license agreement is displayed in the terminal. Review the agreement and type Y to accept the terms and proceed with the installation.
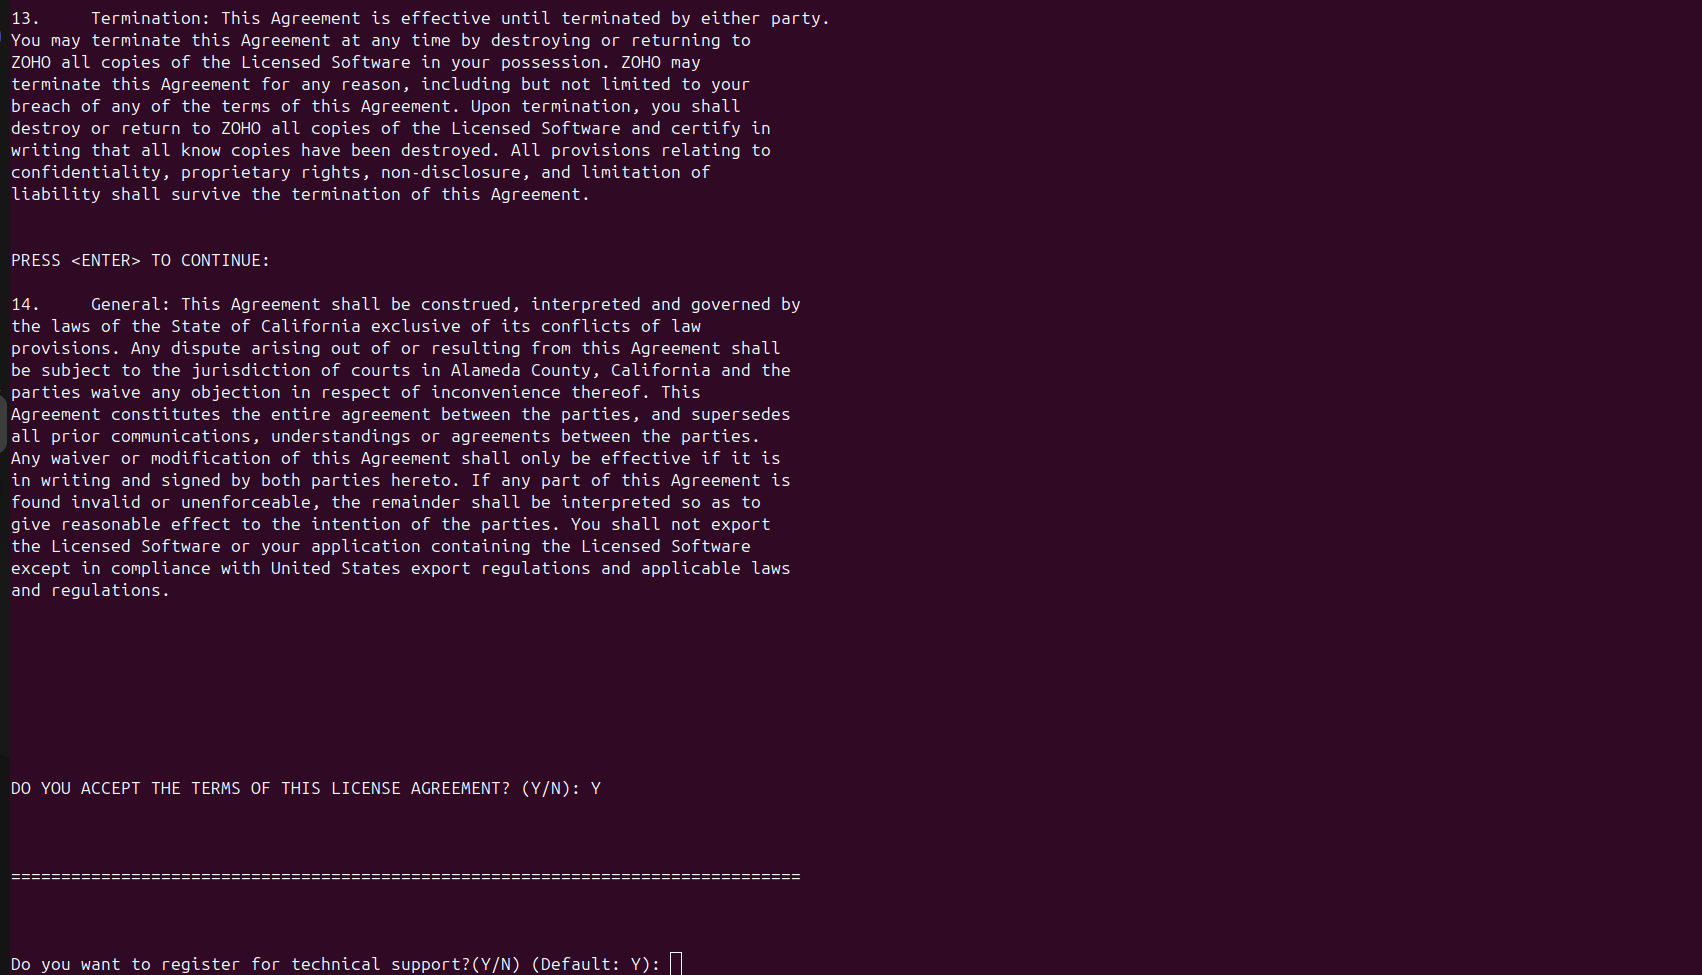
Figure 24: Accepting the license agreement - The installer prompts you to register for technical support. You may skip this step if registration is not required. Enter the following details if you choose to register:
- Name
- Phone number
- Email ID
- Company name
- Country
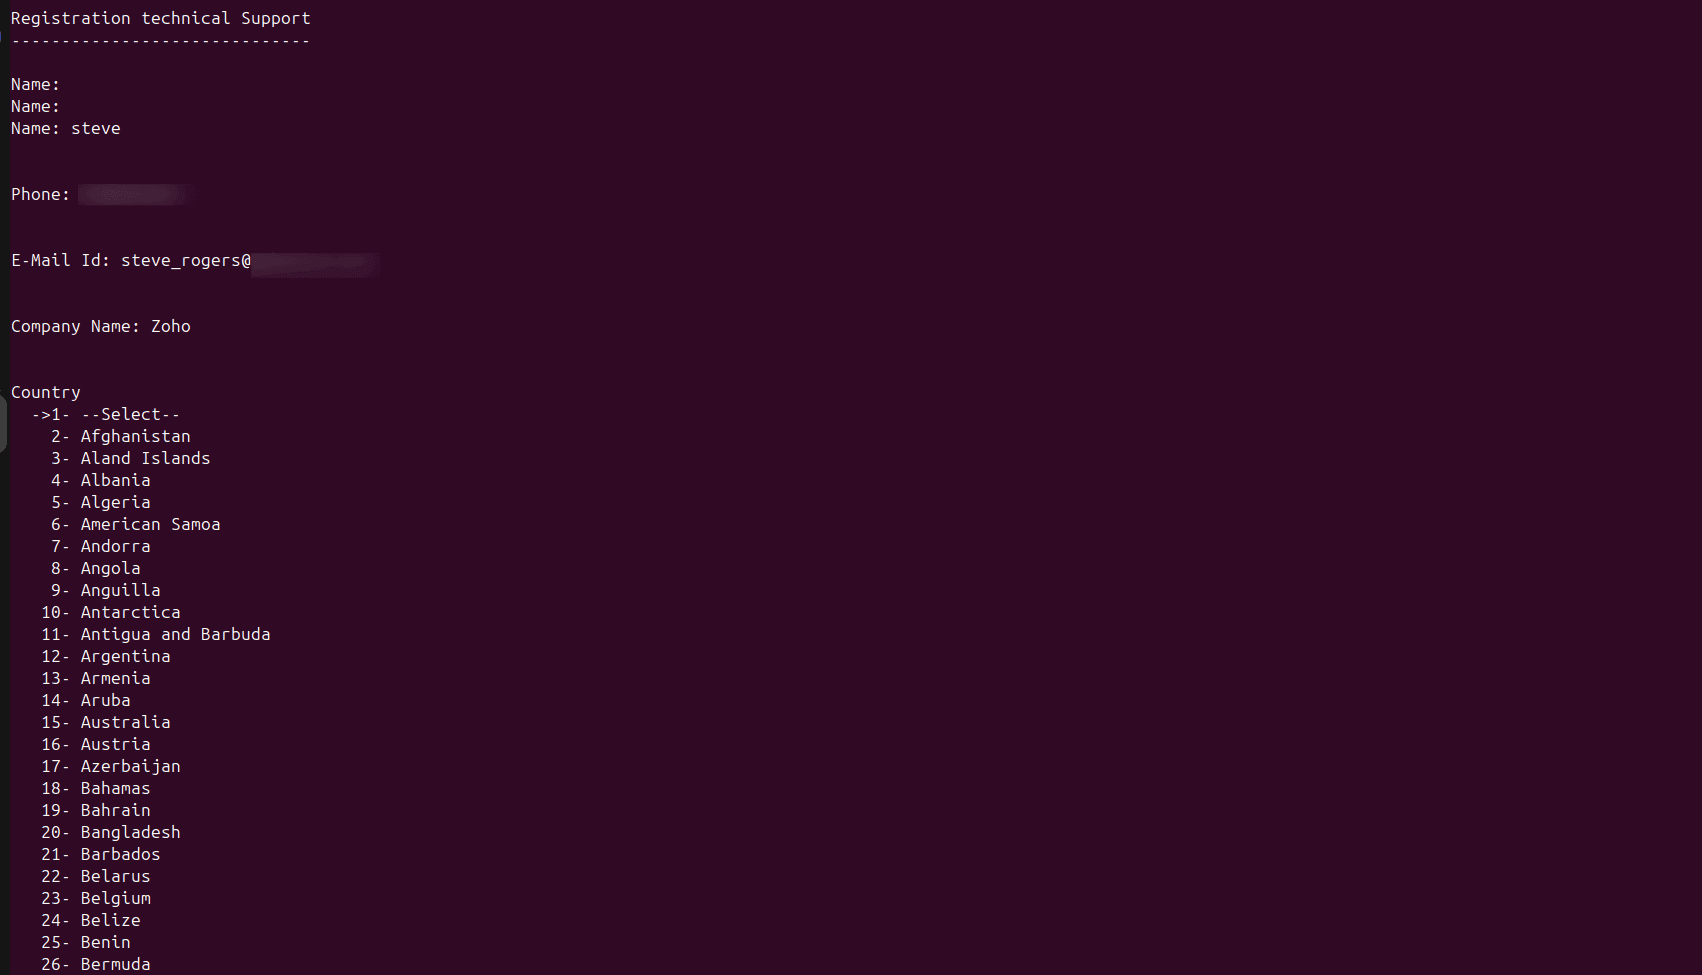
Figure 25: Technical support registration - After entering the registration details and selecting the country, the installer displays a privacy policy confirmation message. The following options are available:
- 1 - Next: Proceeds with the registration details and continues the installation.
- 2 - Skip: Skips the registration process and proceeds with the installation.
- 3 - Cancel: Stops the installation and exits the installer.
- 4 - Back: Returns to the previous step to modify the entered details.
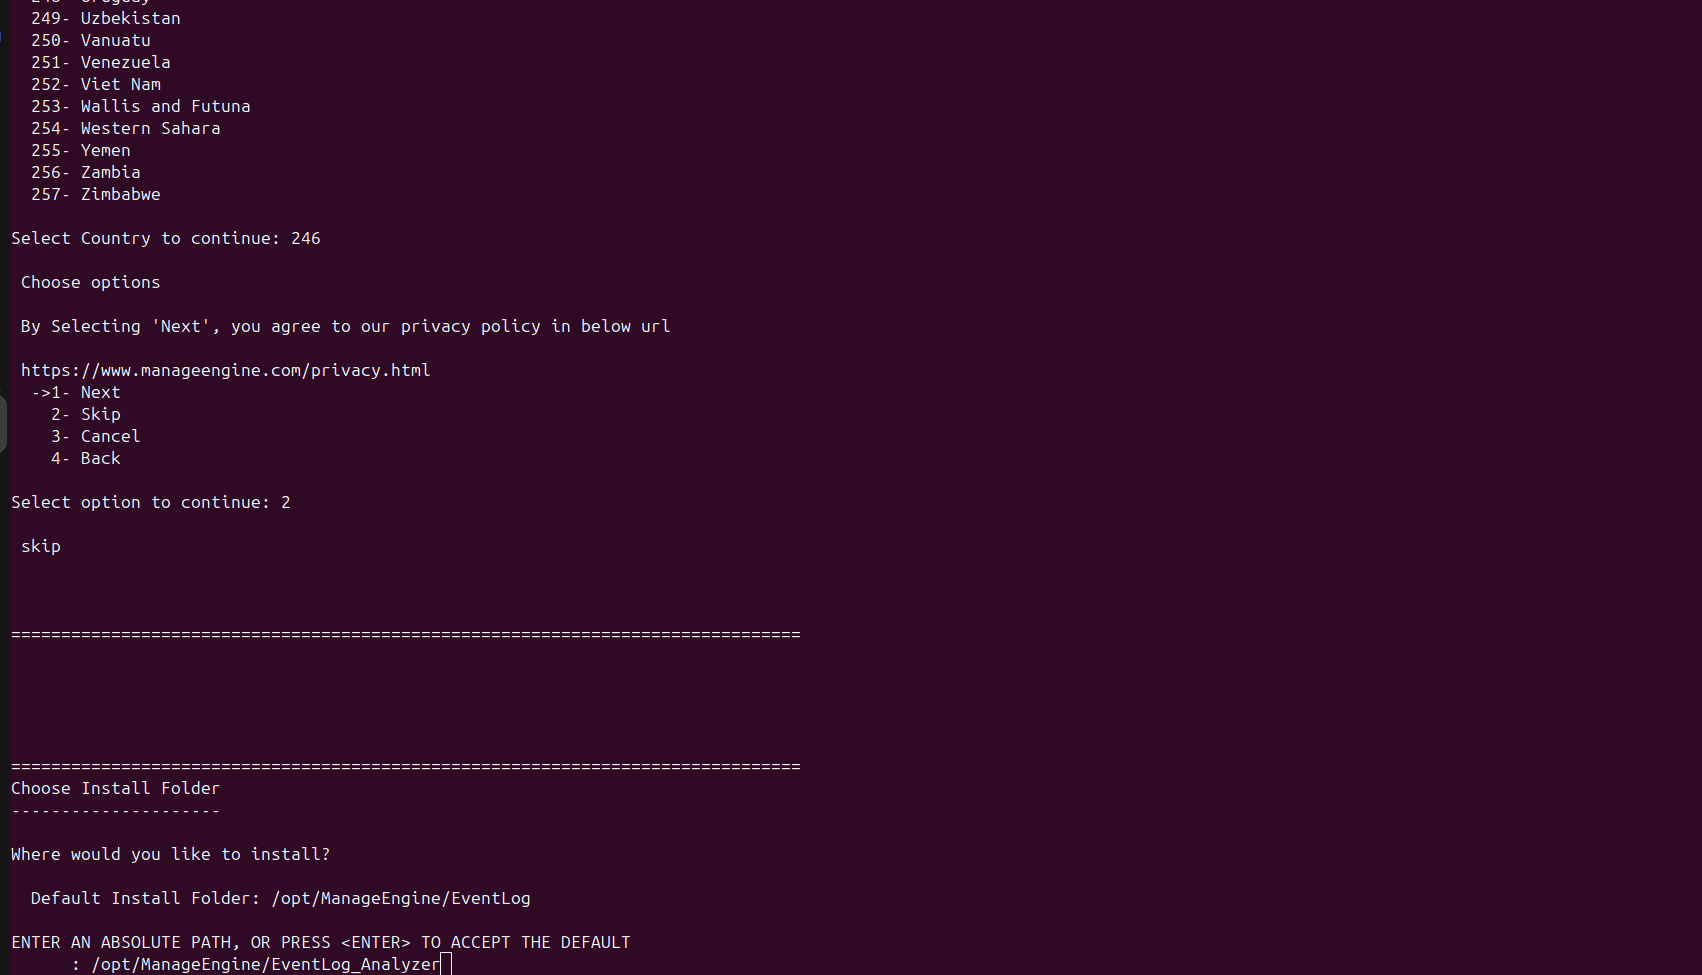
Figure 26: Privacy policy confirmation - Enter the appropriate option number and press Enter to continue.
- Specify the directory where EventLog Analyzer will be installed. The default installation directory is:
/opt/ManageEngine/EventLog
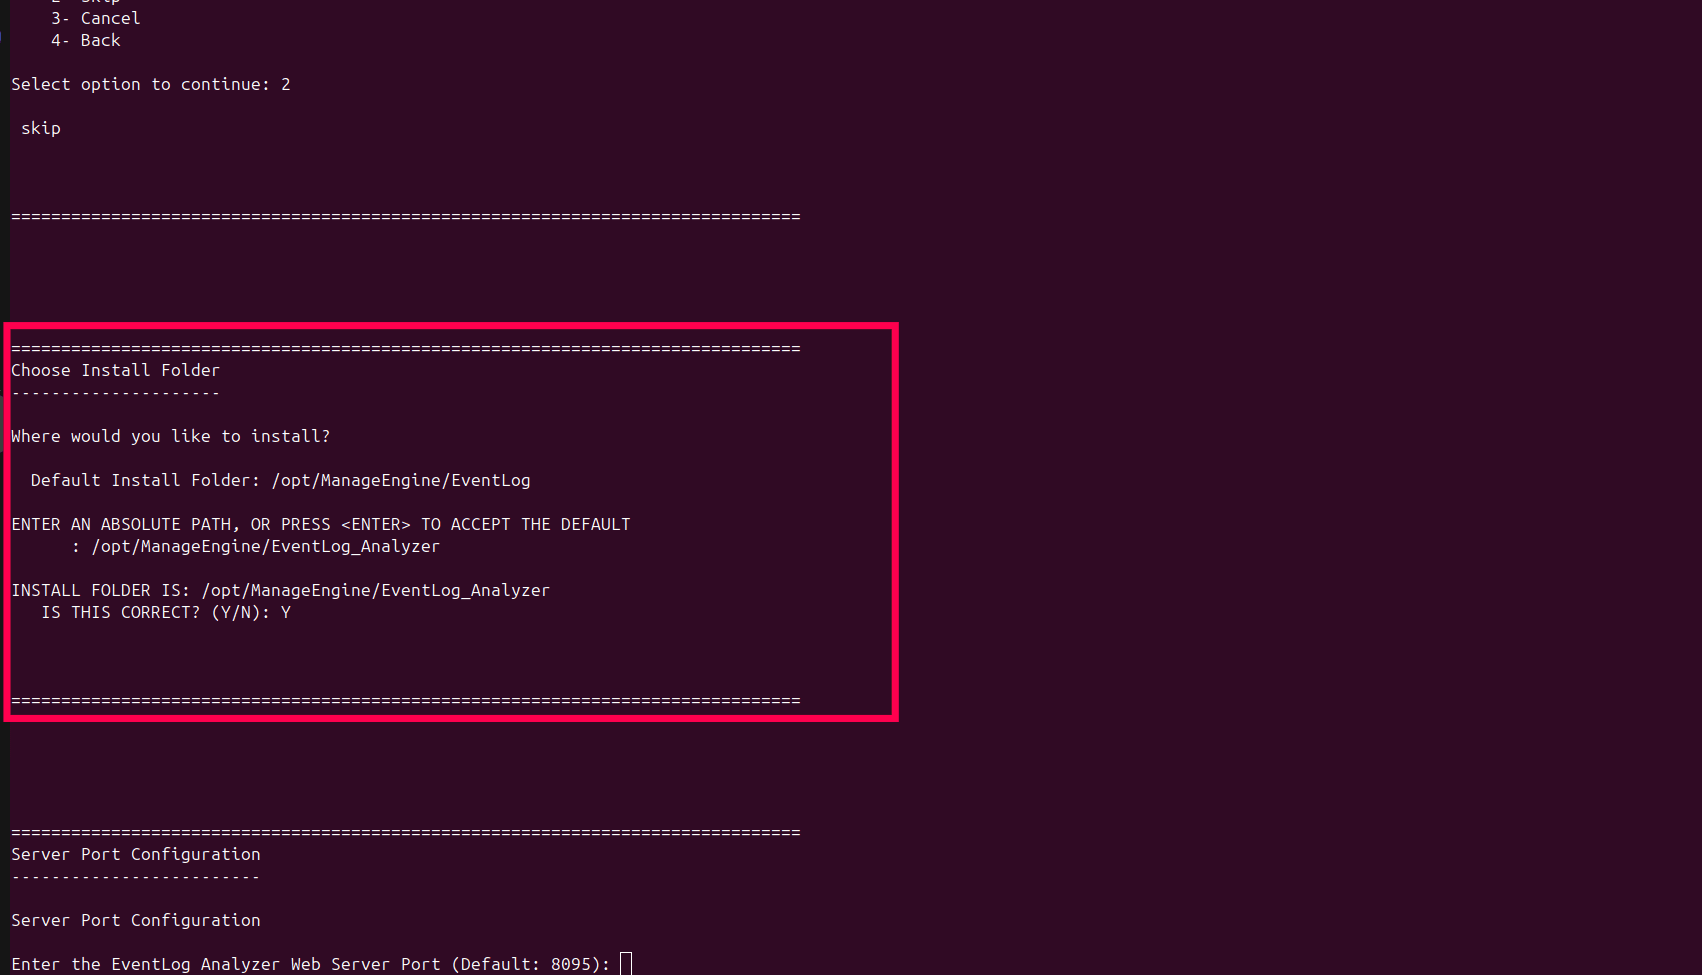
Figure 27: Selecting installation directory - Press Enter to accept the default path or specify a custom installation directory. Confirm the installation folder when prompted.
- Enter the EventLog Analyzer web server port. The default port is 8095. Ensure that the selected port is not already in use.
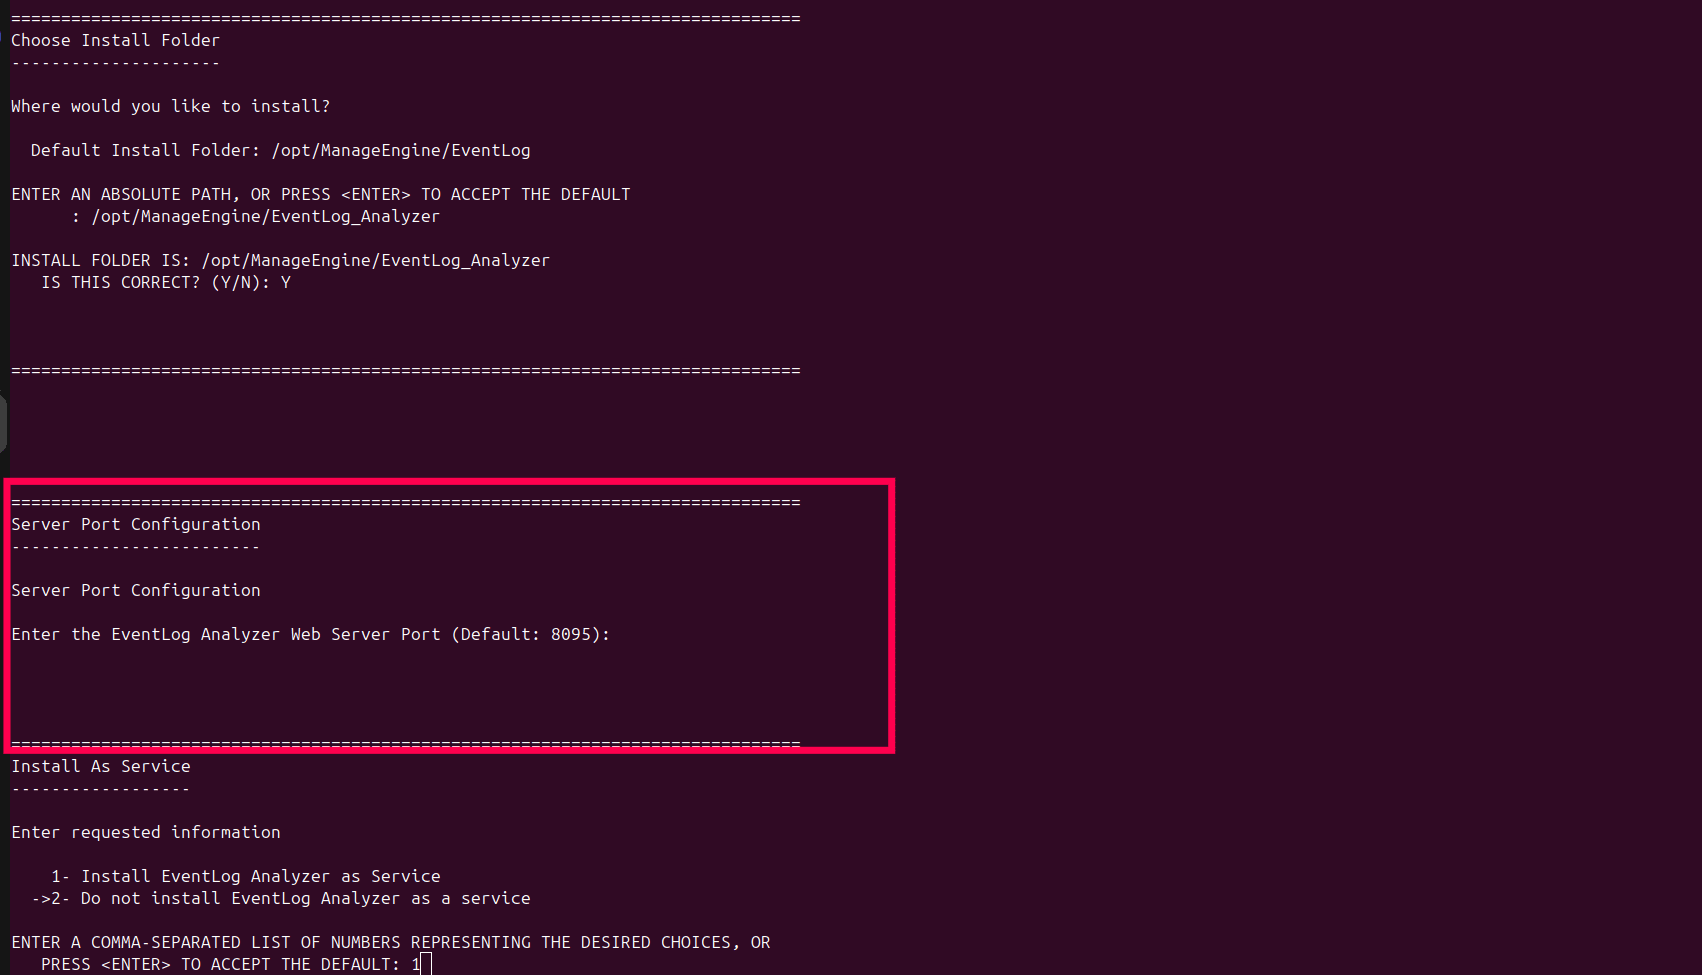
Figure 28: Server port configuration - Choose whether to install EventLog Analyzer as a service. The following options available:
- 1- Install EventLog Analyzer as Service
- 2- Do not install EventLog Analyzer as a service
- Enter 1 to install the service or press Enter to accept the default option.

Figure 29: Installing as a service - The installer displays the installation summary including:
- Product name
- Installation directory
- Disk space required
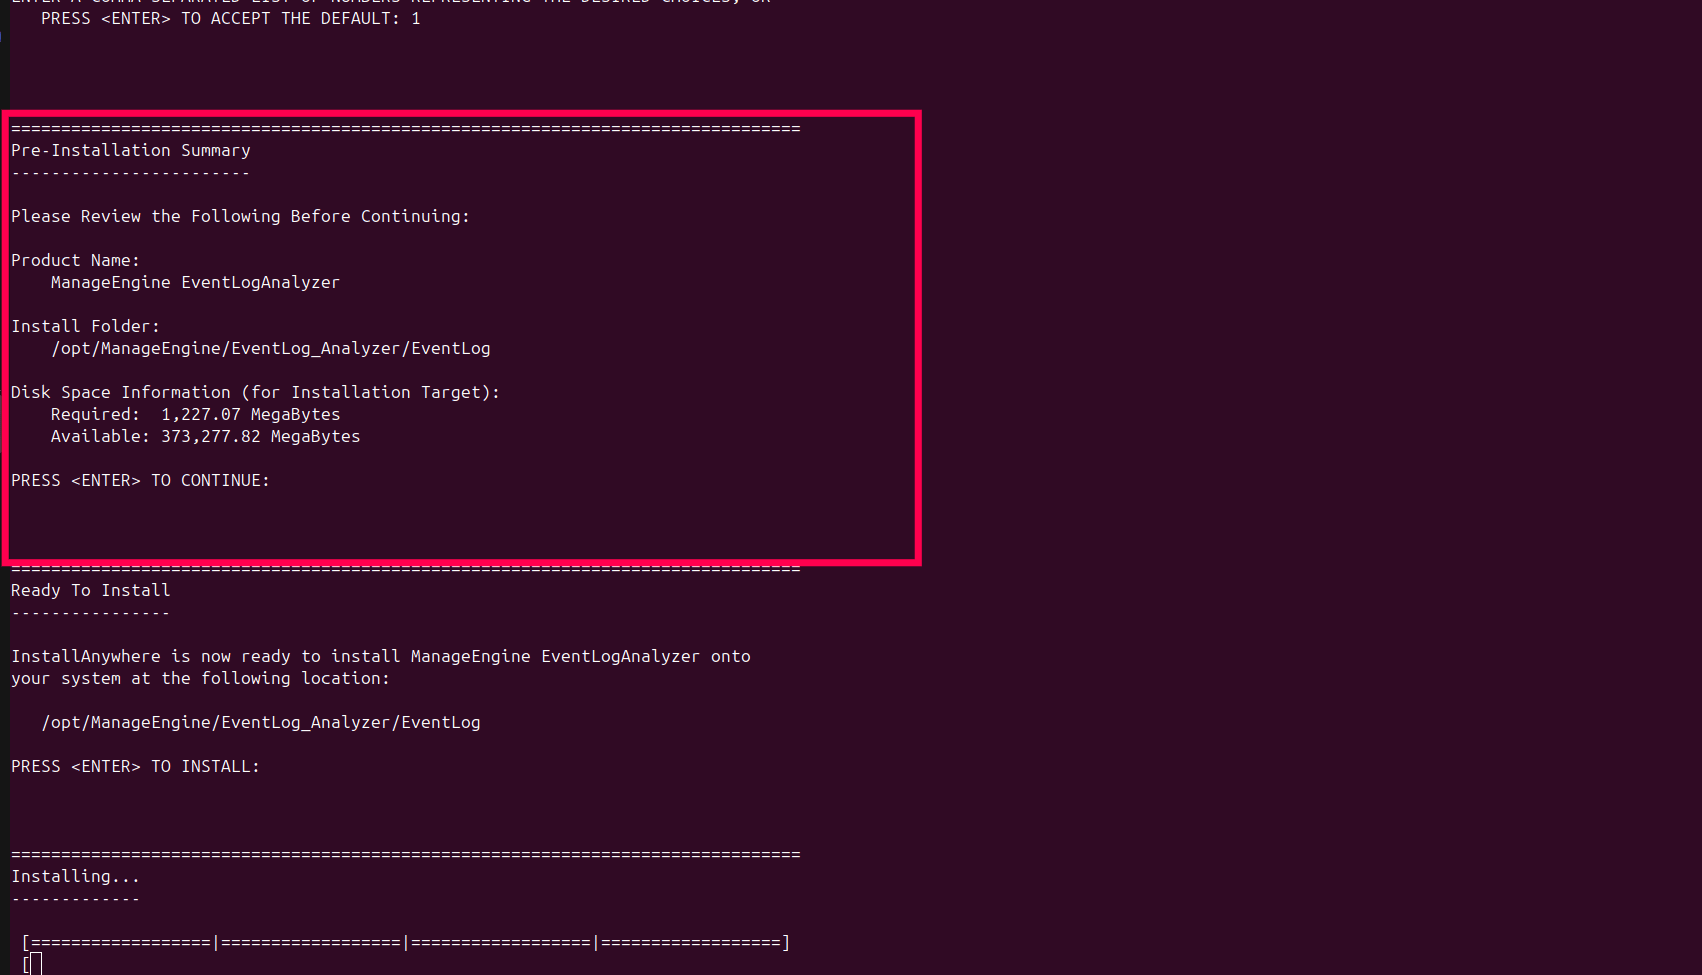
Figure 30: Pre-installation summary - Press Enter to continue.
- The installer begins extracting files and installing EventLog Analyzer.
- After the installation completes successfully, the following message is displayed: Congratulations. ManageEngine EventLog Analyzer has been successfully installed.
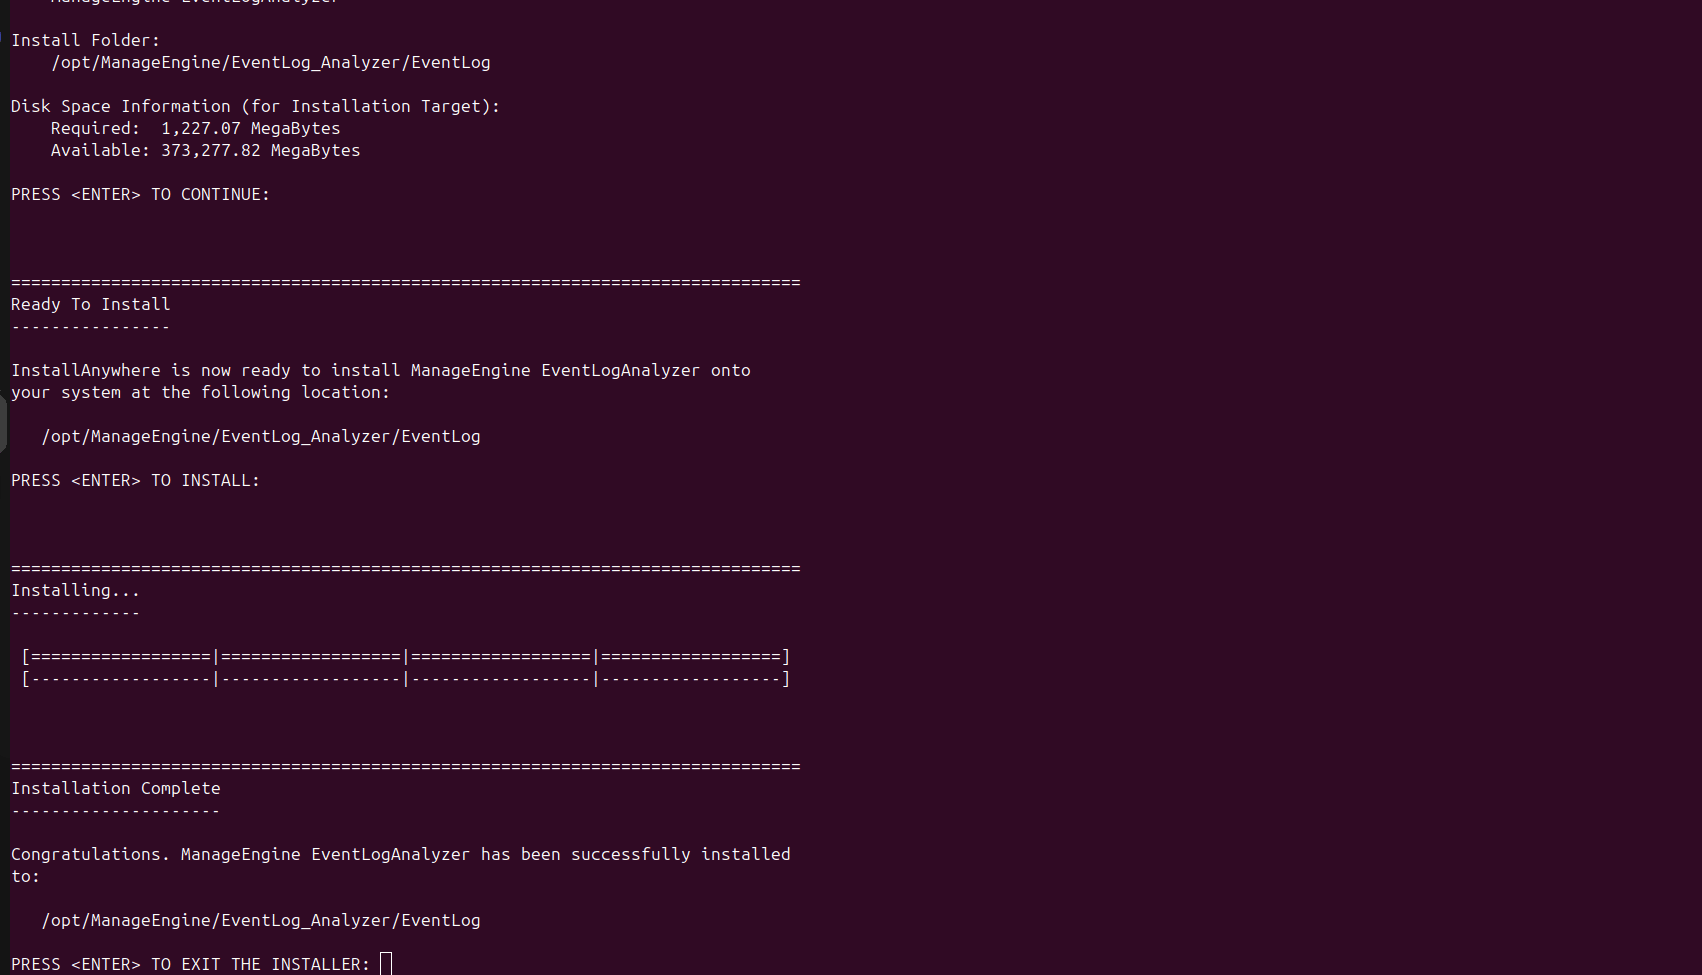
Figure 31: Installation complete - Press Enter to exit the installer.
chmod +x ManageEngine_EventLogAnalyzer.bin
./ManageEngine_EventLogAnalyzer.bin -i console
Uninstalling Log360
Refer to the following steps to uninstall Log360 on Windows
Windows
- Go to Control Panel.
- Click Programs, and then select Uninstall a program.
- Select ManageEngine Log360 and click Uninstall.
- To uninstall child components, select the child components such as, ADAudit Plus. The selected components will be uninstalled.
Uninstalling EventLog Analyzer
Refer to the following steps to uninstall Log360 on Windows and Linux.
Windows
- Go to Control Panel.
- Click Programs, and then select Uninstall a program.
- Select EventLog Analyzer and click Uninstall.
Linux
- Open the Terminal and navigate to <EventLogAnalyzer_Home> directory.
- Execute the following command in Terminal Shell:
- When prompted, click Yes to confirm your choice and complete the uninstallation.
cd _ManageEngine\ EventLogAnalyzer_installation/./Change\ ManageEngine\ EventlogAnalyzer\ Installation
Read also:
This page explained how to install and uninstall ManageEngine Log360 on Windows and Linux platforms. To learn how to start, stop and access the product console, refer to the following pages: