Integrating with ServiceDesk Plus (SDP) On-premise
- Overview
- Version Compatibility
- Configuring ServiceDesk Plus in Applications Manager
- Ticket Settings
- Configuration Item Details and Relationship Mapping
- CMDB Reports
- Frequently Asked Questions (FAQs)
Overview
About the integration
ServiceDesk Plus is a web-based Help Desk and Asset Management software, offered by ManageEngine. With ServiceDesk Plus installed in your network, you can automatically log trouble tickets for specific alarms and maintain a Configuration Management Database (CMDB) that allows you to plot out your IT infrastructure from Applications Manager.
Logging trouble tickets
Applications Manager can automatically log trouble tickets for specific alarms and to notify the concerned technician when a particular process exceeds the set threshold point. Along with the provision to e-mail, SMS, and other notifications, alarms can also be tracked by automatically logging trouble tickets to ServiceDesk Plus. Applications Manager takes care of the two way syncing of Alerts & Tickets status from SDP. For example, you can automatically log a ticket when an alarm is raised, reopen the ticket whenever an alarm reoccurs or close the ticket if the alarm is cleared. In addition to this, the alerts under the Alarms tab include a Ticket Icon which loads the ticket raised when clicked on. Learn more
Configuration Management Database (CMDB)
From a CMDB perspective, all the components monitored in Applications Manager are referred to as Configuration Items (CI). With the ServiceDesk Plus integration in Applications Manager, you can:
- Identify CIs in your IT environment and Enable CI Sync to create CIs in ServiceDesk Plus
- Map the relationship between the CIs and
- Use the relationships to predict the impact of CIs before performing any change.
- Track of all the pending requests, problems, and changes raised for the CI Type.
Once a problem ticket is logged, you can also assign a technician for the ticket. Any impact caused by the malfunctioning of these CIs and other CI details can be identified with Relationship Mapping, and specific measures can be adopted to minimize the effect.
Version Compatibility
Below is the version compatibility of Applications Manager with ServiceDesk Plus (SDP):
| Applications Manager Version | SDP Version |
|---|---|
| 175900 and above | 15100 and above |
| 15050 to 175800 | 11138 to 15099 |
| 15000 to 15040, or Hotfix 15001 and above | 11117 to 11137 |
| Hotfix 14783 and above, or Hotfix 14843 and above | 11117 to 11136 |
| 14390 to 14911 | 11000 to 11116 |
| 14380 and below | 9102 to 10515 |
Note: The above-mentioned version compatibility is applicable for APM Plugin installations also. To find out the version compatibility of APM Plugin with OpManager, refer here.
Configuring ServiceDesk Plus in Applications Manager
This section describes the method in which ServiceDesk Plus Settings are to be configured in Applications Manager:
Prerequisites
- ServiceDesk Plus must be reachable from Applications Manager
- The technician used to integrate ServiceDesk Plus with Applications Manager must have SDAdmin - Administrator privilege. This is to allow access to the form data from ServiceDesk Plus so that it can be loaded in the Create a new ticket action page in Applications Manager.
Steps to configure
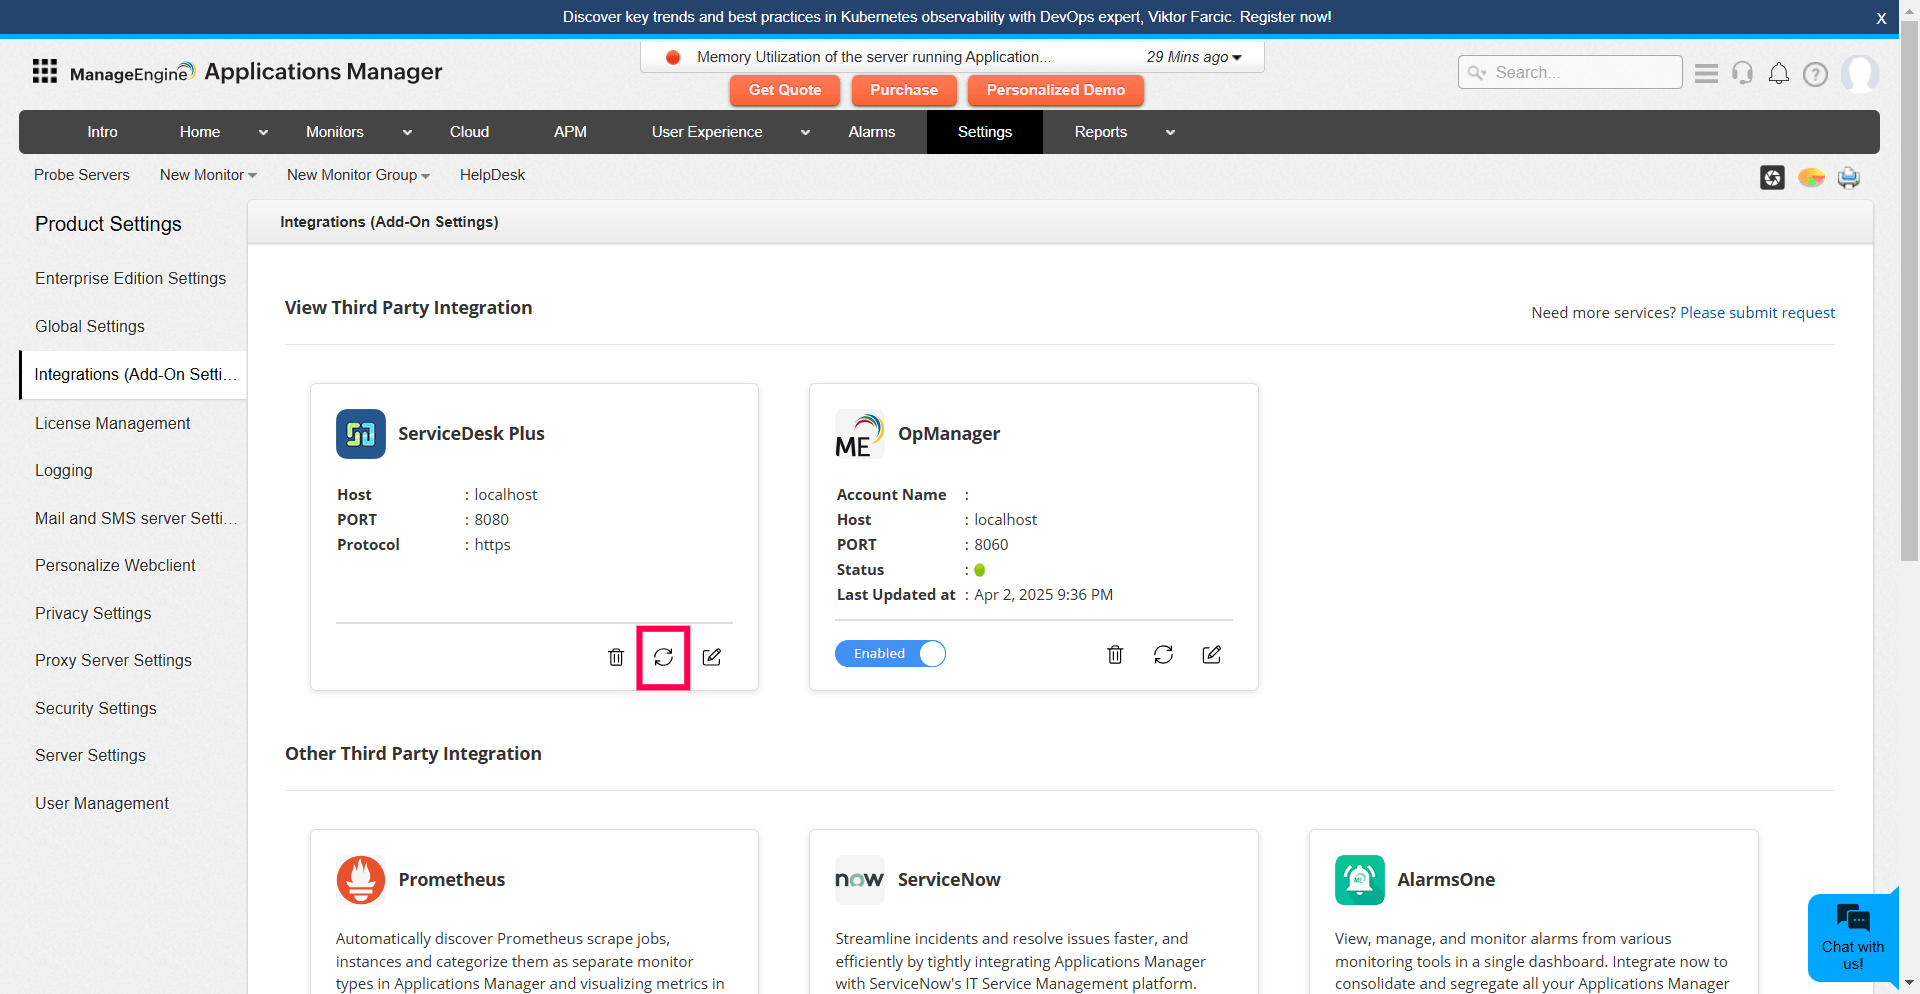
- Under Settings tab, click on Add-On Settings under Product Settings.
- Click on the Add icon shown under the ServiceDesk Plus section. This will take you to the ServiceDesk Plus Server Details page.
- Configuring ServiceDesk Plus Settings in Applications Manager is done Using REST APIs, which uses the REST API key to authenticate the SDP user account and to perform ticket operations instantly, as well as automatic closure of tickets. Follow the steps below to configure ServiceDesk Plus Settings in Applications Manager using REST API:
- Under the ManageEngine ServiceDesk Plus Server Details section, select the product as ServiceDesk Plus.
- Enter the Server Name and Port Number where ServiceDesk Plus is running.
Enter the REST API key, which can be obtained by adding/editing the required technician, enabling login for the technician and then generating the API key for that technician under Admin → Users & Permissions → Technicians in the ServiceDesk Plus console.
Note: Make sure that the technician whose API key you are using has SDAdmin - Administrator privilege, which can be selected from the Assigned Roles field for the technician in the ServiceDesk Plus console.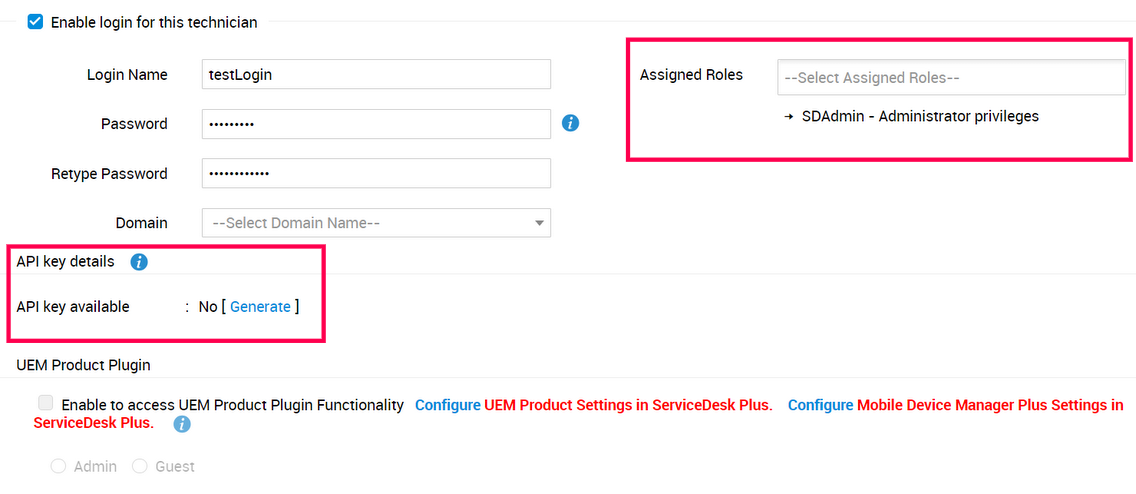
- Select one of the given protocols: http or https(SSL).
- Enable the Mail Notification for Connectivity Failuretoggle button if you wish to trigger mail notifications in case of connectivity failures. After enabling this option, enter the following details:
- Configure the email to which the notification has to be sent. You can configure either by choosing Admin email (Mail address configured for the admin user or the mail address in SMTP configuration) or by selecting email actions to be triggered for the selected email from the dropdown.
- Enable the Append Custom Message checkbox if you want to append customized text messages along with the mail notification.
- Enable the Repeat mails until successful connection checkbox to repeat mail notifications until connection is established successfully. After enabling, specify the Repeat Interval (in minutes) after which mail notification has to be repeated.
- By enabling Log tickets toggle button you have the option to configure Ticket Settings.
- Enable Configuration Item (CI) sync toggle button to configure Configuration Item Settings (only if you have selected ServiceDesk Plus and not ServiceDesk Plus - MSP).
- Test if the connection is working and save the settings.
Note: The connectivity status of the ServiceDesk Plus will be notified through In-app notifications (product bell icon).
Ticket Settings
Reopen Settings
- Set Applications Manager to perform one of the following actions when an alarm is raised again for a closed ticket:
- To reopen the ticket whenever an alarm is recurred.
- To reopen the ticket within a certain number of days from the closed time. If the ticket is not reopened, a new ticket is automatically created. (To reopen the ticket whenever an alarm is recurred within a certain number of days else open a new ticket.)
- To create a new ticket or to open a new ticket whenever an alarm has recurred.
- Set Applications Manager to perform one of the following actions when an alarm is raised again for a resolved ticket:
- To reopen the ticket whenever an alarm is recurred.
- To reopen the ticket within a certain number of days from the closed time. If the ticket is not reopened, a new ticket is automatically created. (To reopen the ticket whenever an alarm is recurred within a certain number of days, else open a new ticket.)
- To create a new ticket or to open a new ticket whenever an alarm has recurred.
- Set Applications Manager to perform one of the following actions when an alarm is raised for an entity that was previously clear and if the existing ticket in HelpDesk is not closed/resolved:
- To update the existing ticket whenever an alarm is recurred.
- To update the existing ticket within a certain number of days from the clear alert. If the ticket is not updated, a new ticket is automatically created. (To update the existing ticket whenever an alarm is recurred within a certain number of days, else open a new ticket.)
- To update the notes associated with that ticket.
- To create a new ticket or to open a new ticket whenever an alarm has recurred.
- Enable on-demand ticket generation using:
- Raise a ticket action, so that you can raise a ticket on demand using a ticket action from alarms page. The new on-demand tickets are mapped to the respective configuration items.
- Request Form, so that you can raise a ticket on demand using the request form from alarms page. The new on-demand tickets are mapped to the respective configuration items.
Update Settings
- Set Applications Manager to perform one of the following actions when the severity of an alarm is changed / RCA of the alarm is updated for an already created ticket:
- To update the ticket.
- To update the notes associated with that ticket.
- Set Applications Manager to perform one of the following actions when an alarm is cleared for a ticket:
- To close the ticket.
- To update the notes associated with that ticket.
- Set Applications Manager to perform one of the following actions when a monitor or a ticket action or a metric is deleted for a ticket:
- To close the ticket.
- To update the notes associated with that ticket.
- Update the ticket only if there is a status change in the alarm.
- If enabled, the action is triggered only when there is a status change in the alarm.
- Add notes for the ticket whenever an annotation is made for the alarm.
Accessing from Applications Manager
- Access ticket details from Applications Manager. User can access the ticket details from the ticket details link in the alert details page.
- Launch Read-only ticket. When selected, the ticket details launched from Applications Manager would be read-only.
- Overwrite the request template with the fields selected in the action profile.
- This option is disabled by default. In Log a ticket action, on selecting the Incident template, the other fields will be hidden. The default values of the Incident template chosen would be used to log the trouble ticket in ServiceDesk Plus.
- If enabled, the other fields will become visible, thereby, allowing the user to modify the default fields of the Incident template.
Configuration Item Details and Relationship Mapping
Once the ServiceDesk Plus Settings are configured, Applications Manager identifies all the monitors (unless you have configured to exclude specific monitors or selected monitor types) and adds them as Configuration Items in ServiceDesk Plus CMDB.
You can configure the following CI Sync options by enabling the Configuration Item (CI) Sync toggle button under the Add-On Settings tab:
- Delete the CI if the corresponding monitor is deleted.
- Exclude the monitor(s) of the selected monitor type(s). Use the provided list to select and move monitor types that should be excluded from CI Sync.
- Configure custom fields of the monitor as attributes of a configuration item. These fields do not need to exist in ServiceDesk Plus prior to configuration.
- Users can access Configuration Item and relationship details from the Applications Manager monitor snapshot page.
Viewing Configuration Item and Relationship Maps:
- Go to the Monitors tab.
- From the Select View list, choose Bulk Configuration View.
- Open the List View which will give you a list of all the monitors.
- In the List View of monitors, click on the
 icon next to a monitor to view its CI details.
 - Click on the
 icon to view its Relationship Map.
CI Synchronization Enhancements in SDP OP CMDB v3:
- Version Compatibility: If the SDP is version 15100 or above, the compatible Applications Manager version is 175900 or above.
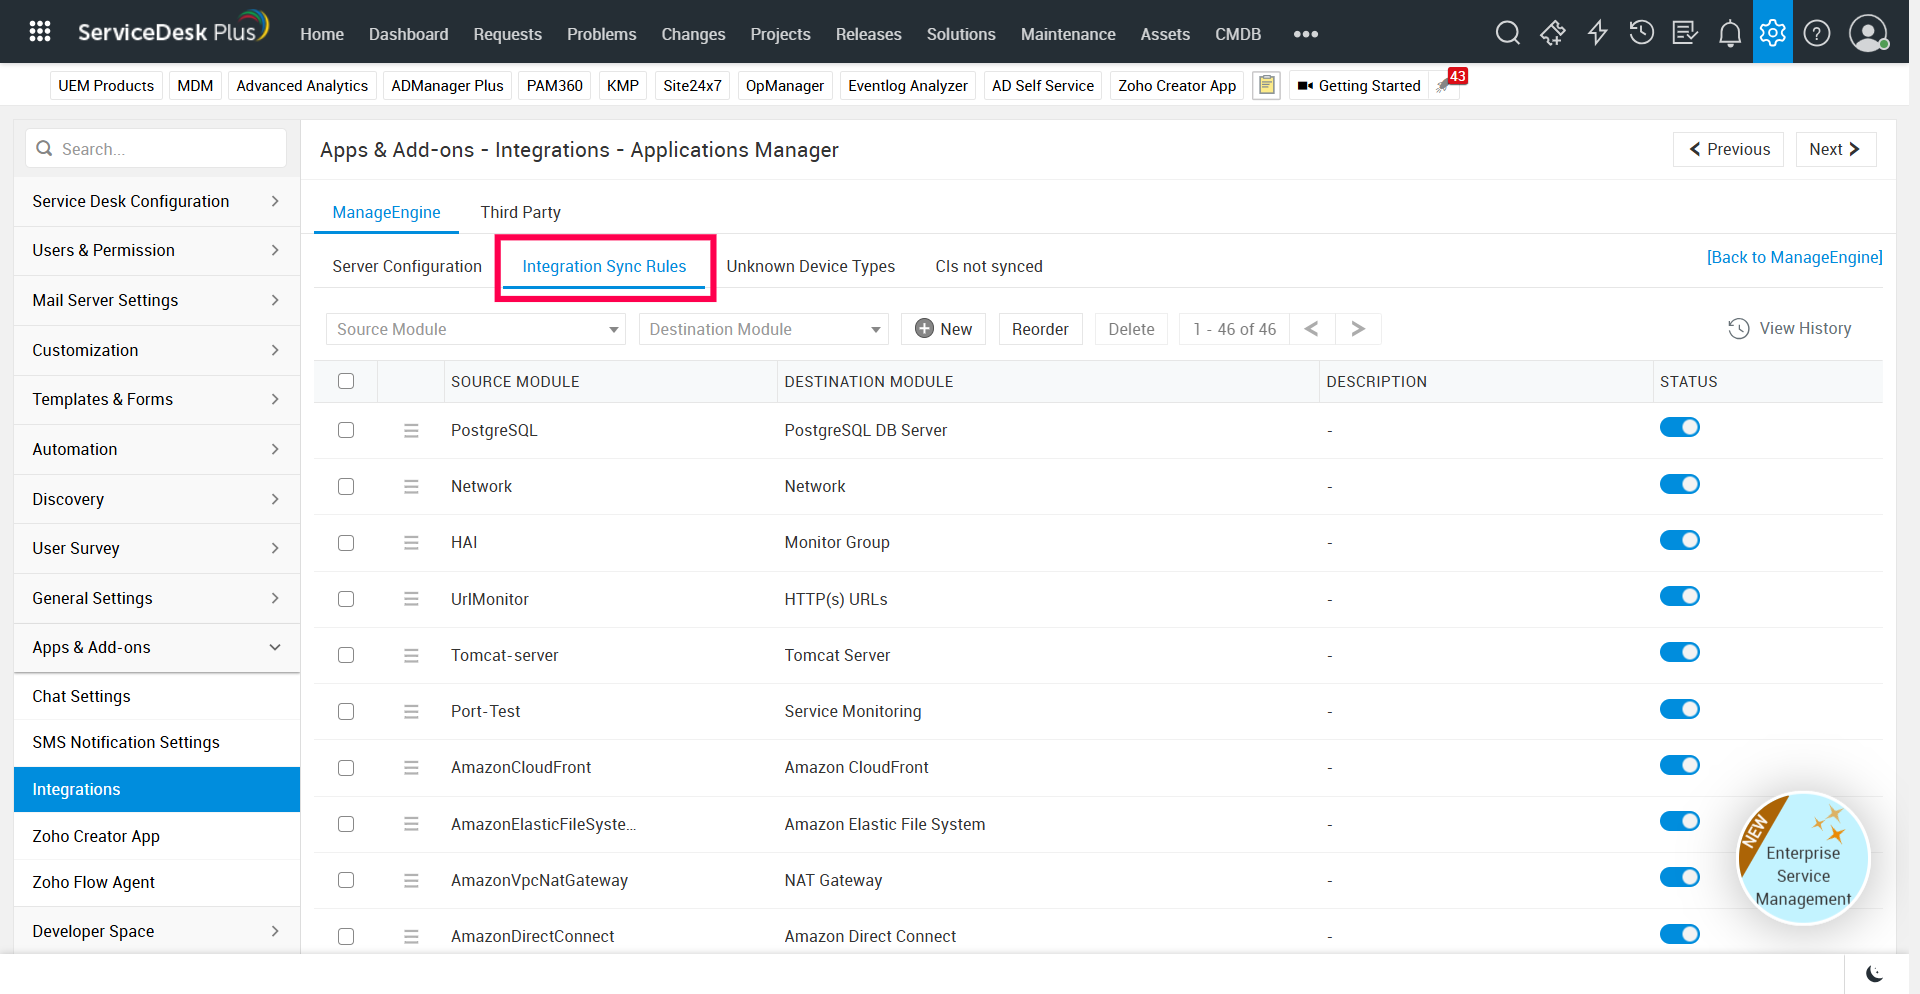
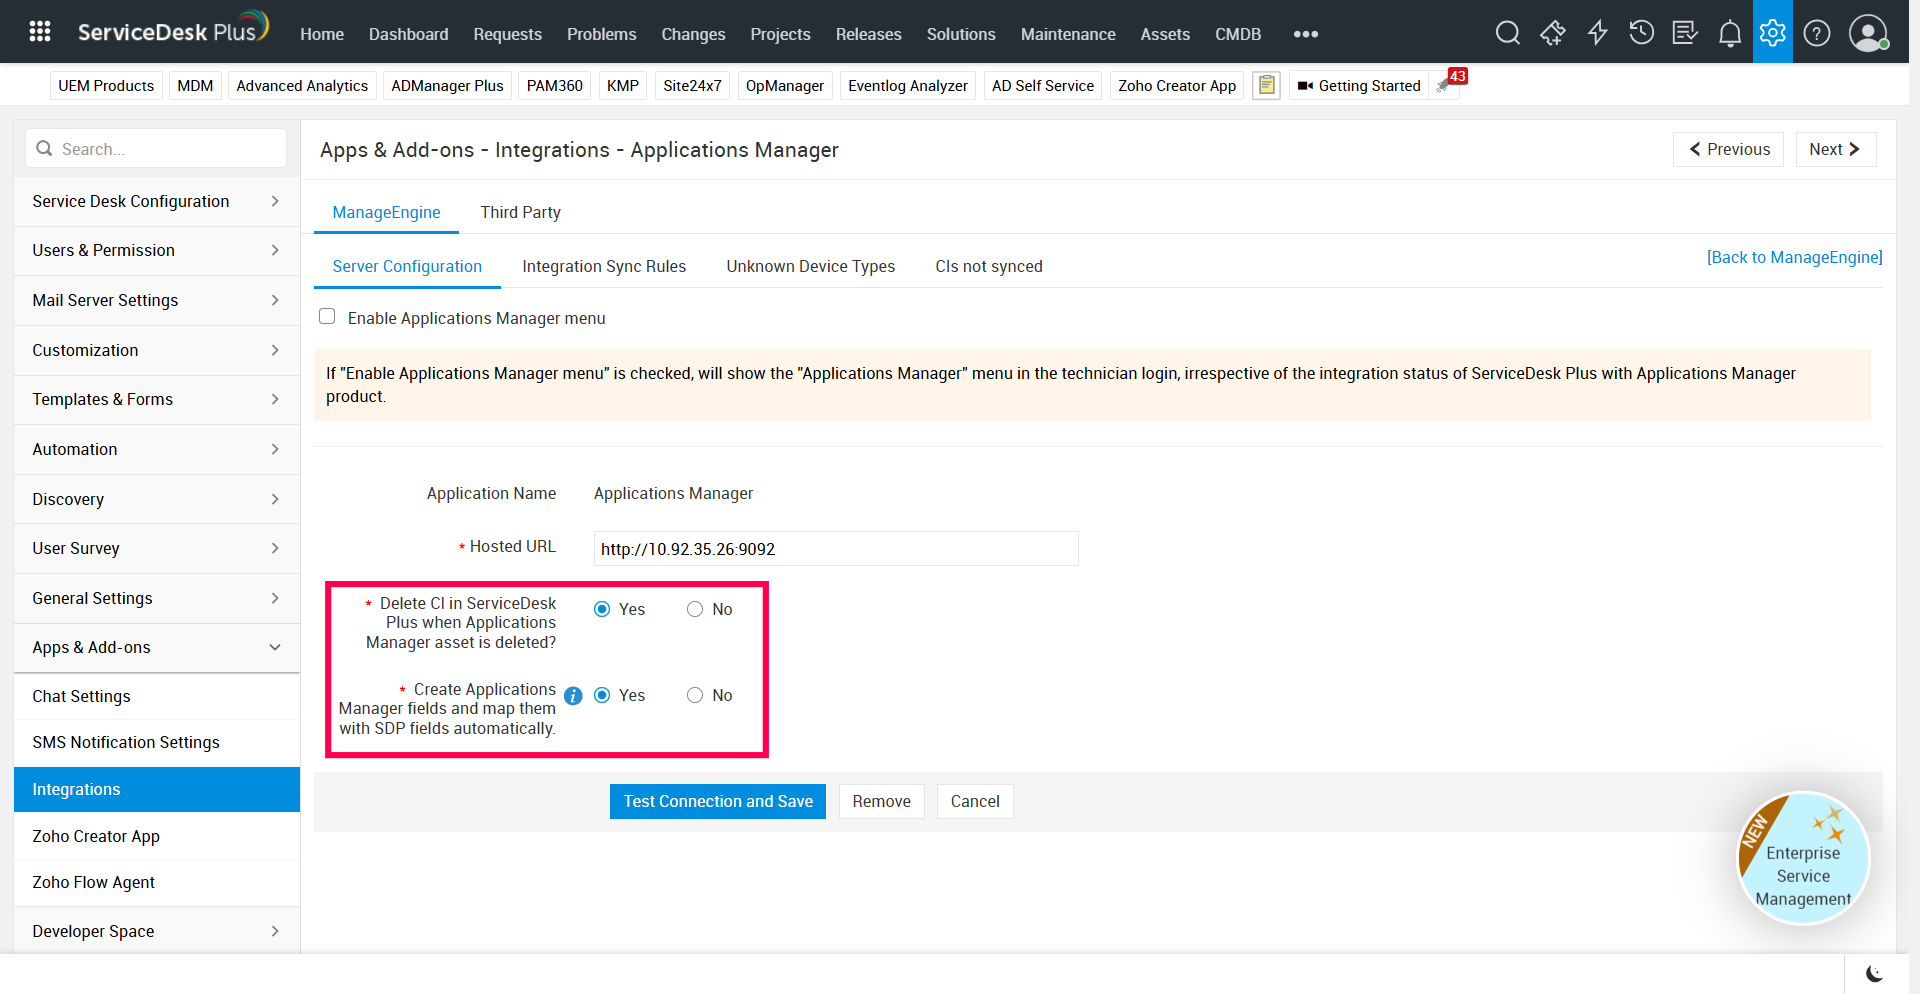
Integration Sync Rule: From SDP version 15100, CI Sync is controlled via Integration Sync Rules in SDP. To view or configure this, navigate in SDP to Admin → Apps & Add-ons → Integrations → Applications Manager → Integration Sync Rules.
CI Sync Settings Alignment: Ensure that the CI Sync settings configured in SDP OP’s Integration page are aligned with the settings chosen in Applications Manager for seamless sync.
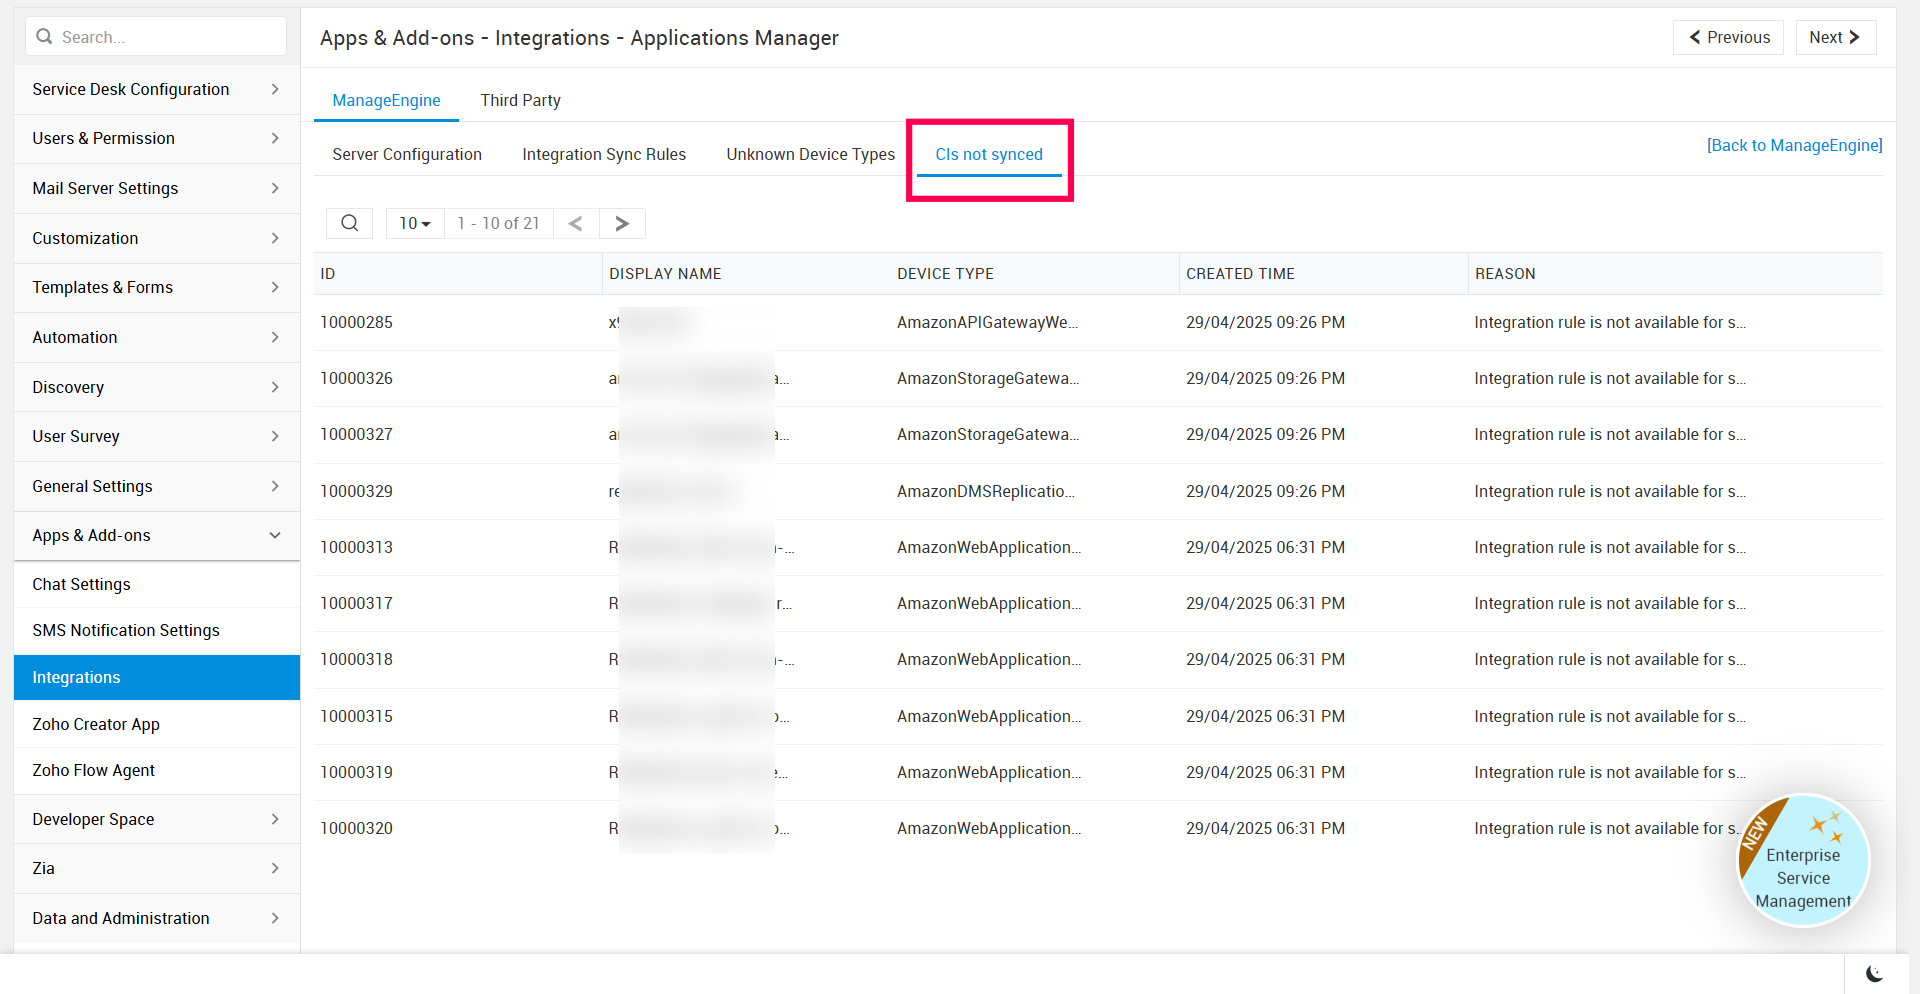
Sync Troubleshooting: If a monitor is not synced and appears under the CIs not synced tab in SDP OP, please contact SDP support for assistance.
Limitation in CI Sync:
When ServiceDesk Plus OP is integrated with the Applications Manager Central server with CI sync enabled, there may sometimes be mismatches in the synced CIs and their fields. This occurs because monitors are added in the Applications Manager Probe and then synced to the Central server. During this Probe-to-Central sync, delays in data synchronization can result in CIs being synced to ServiceDesk Plus without some fields being populated. To resolve this, the Resync option can be used manually.
CMDB Reports
The CMDB Reports section provides a detailed summary of all resources from Applications Manager that are synchronized with ServiceDesk Plus On-Premise (SDP OP) integration. This report allows you to track synchronization attempts, verify data consistency, and troubleshoot failures with ease. Each entry in the report includes key details such as:
- Display Name - Resource name as identified in Applications Manager.
- Resource Type - Type of the monitored resource (e.g., Network, Linux, PostgreSQL, Tomcat Server).
- CI Name / CI Type / CI ID — The corresponding Configuration Item details in ServiceDesk Plus On-Premise (SDP OP) integration.
- Operation — The synchronization action performed (for example, Add or Update).
- Last Successful Attempt / Last Attempt — Timestamps of the latest sync activities.
- Status — Indicates whether the sync was successful or failed.
- Message — Displays additional information or error codes to help troubleshoot issues.
Customizing the Report
Use the column selector to add or remove fields and tailor the report to your needs (for example, display CI ID or Resource Name). Apply search and filter options across columns to quickly locate specific records (e.g., filter by status to view only failed syncs).
Exporting Reports
For offline analysis or audit purposes, the report can be exported in multiple formats. This helps in maintaining a record of all CMDB synchronization activities.
- CSV
- Excel
Frequently Asked Questions (FAQs)
- How can I map an asset to a ticket?
An asset is added from Applications Manager when a server monitor is added as a CI in ServiceDesk Plus during CI Sync. Any trouble ticket associated with the server and its child monitors will be tagged with the corresponding asset, provided it is successfully synced. - I have migrated to a new ServiceDesk Plus (SDP) setup. Do I need to reconfigure the integration in Applications Manager?
- If you are switching from a UAT environment to a Production environment:
Please remove the old integration that points to the UAT environment and add a new one in Applications Manager. This ensures that your integration points to the correct production environment. - If you are keeping the same SDP setup but the server details have changed (for example, the server was moved or its hostname/IP address has been updated):
You can go to the integration settings in Applications Manager and use the Edit option to update the server details.
- If you are switching from a UAT environment to a Production environment: