Managing the Customer Portal
After enabling the Customer Portal, you can manage customer access and maintain individual customer workspaces from a single location. This page explains how to add customers, configure Customer Portal settings, switch between customer accounts, terminate a customer portal when needed, and troubleshoot common issues related to customer management.
Migrating to the Customer Portal
If you are currently using CloudSpend without the Customer Portal and wish to enable it, you can migrate your organization to the Customer Portal model. Follow the steps below to complete the migration process:
Enable Multi Portal migration
- Navigate to Admin > User Management > Users > Enable Multi Portal. The Enable Multi Portal pop up screen will appear.
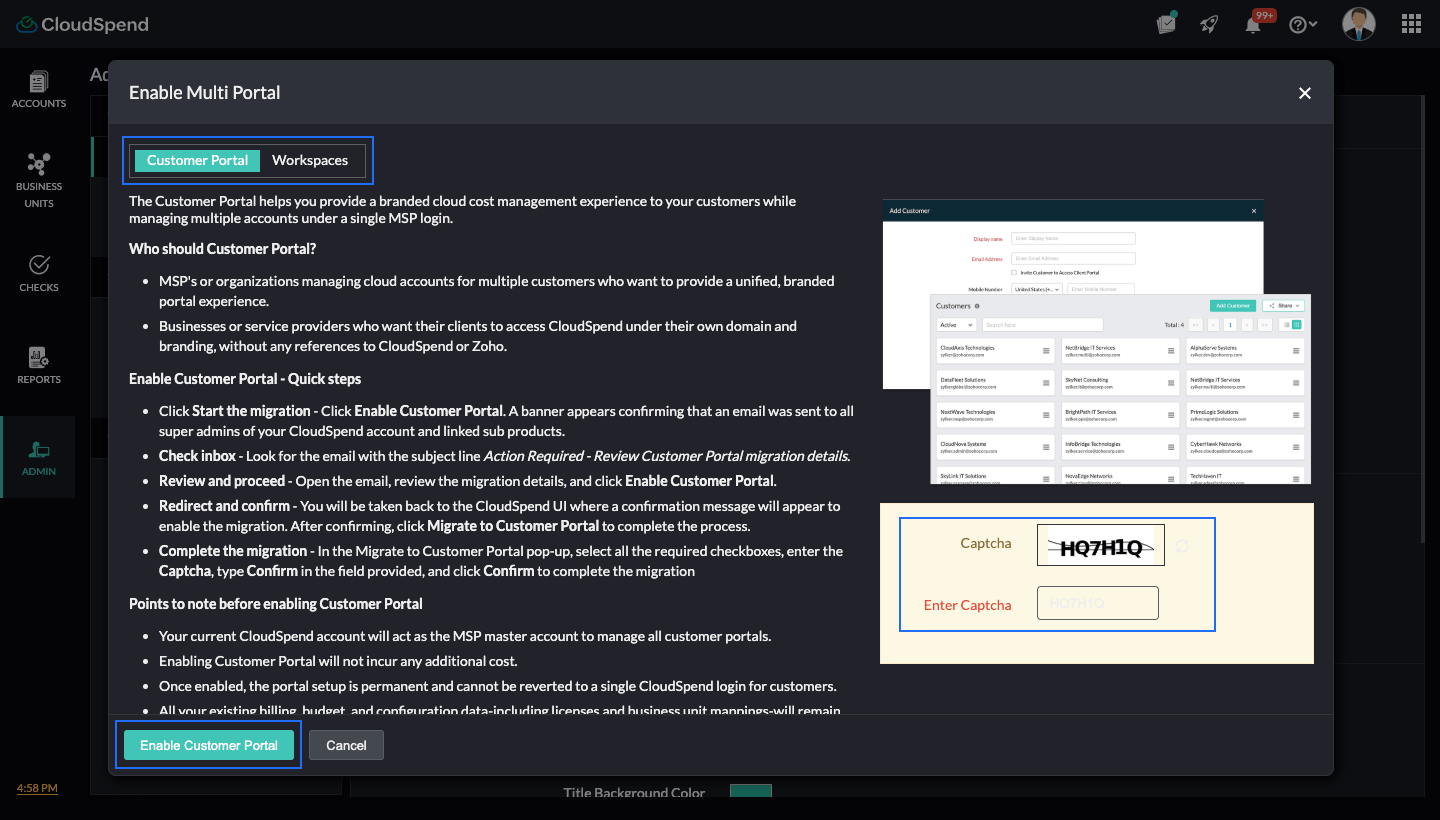
- Read and accept the Customer Portal details, enter the captcha, and click Enable Customer Portal. A banner will appear confirming that an email was sent to all super admins of your CloudSpend account and linked sub-products.
Review and confirm the migration request
- Check your inbox for an email with the subject line Action required: Review Customer Portal migration details.
- Open the email, review the migration details, and click Enable Customer Portal.
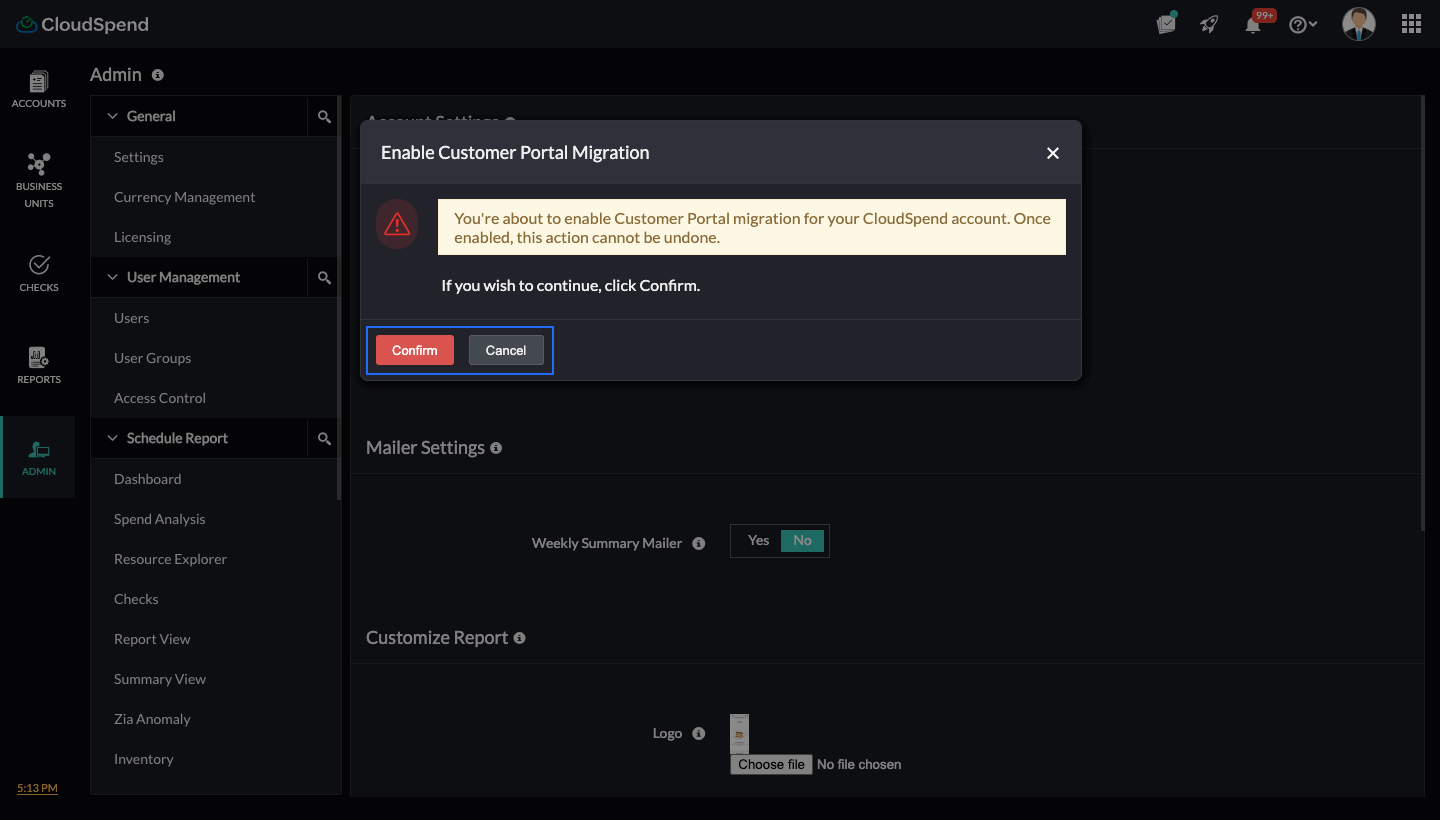
- You'll be taken back to the CloudSpend UI where a confirmation message will appear to complete the migration.
- Click Confirm to proceed with the migration.
Migrate from User Management
- Go back to Admin > User Management > Users, and click Migrate to Customer Portal. The Migrate to Customer Portal pop-up will appear.
- Select the check boxes to acknowledge the conditions and results of migration.
- Enter the Captcha, type Confirm in the provided field, and click Confirm to begin the migration.
Migration completion
- The migration process may take a few minutes depending on the size of your data.
- Once completed, your new Customer Portal will be available in the MSP tab.
- At least two admins must confirm the migration request to enable the migration. If the account has only one admin, a single confirmation is enough.
- Each customer portal is limited to 10 customers by default. Contact support to increase this limit.
Viewing the Customer Portal
To access a specific customer account, use the filter drop-down located at the top-left of the Customer Portal index page. This allows you to search for and focus on the customer account you wish to manage. Additionally, if you wish to work across multiple customer accounts simultaneously, you can open each one in a separate browser tab by clicking the desired customer account name.
Creating a Customer Portal
To create a new Customer Portal, follow the below steps:
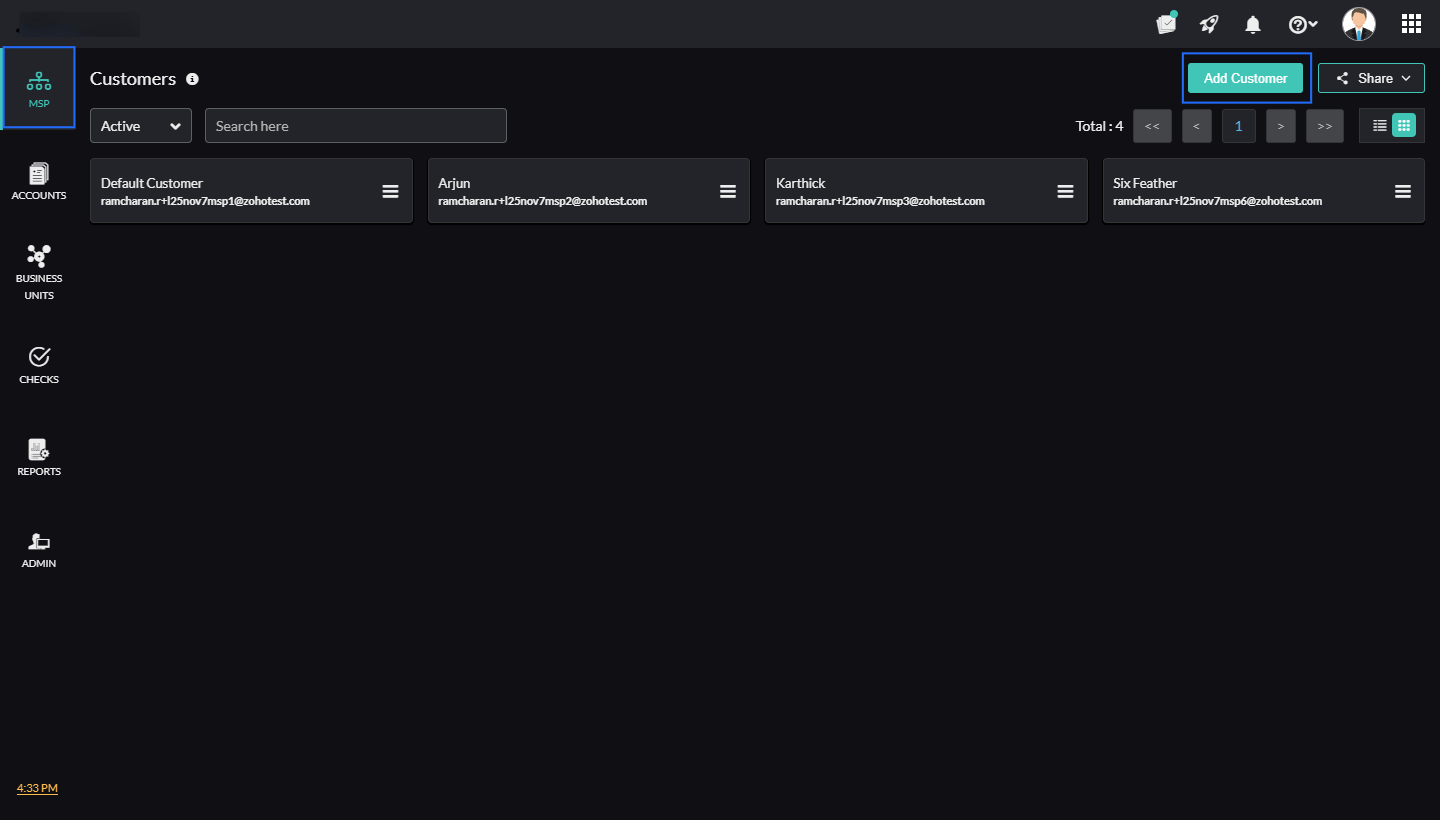
- Login to CloudSpend and navigate to the MSP tab.
- On the MSP page, click Add Customer.
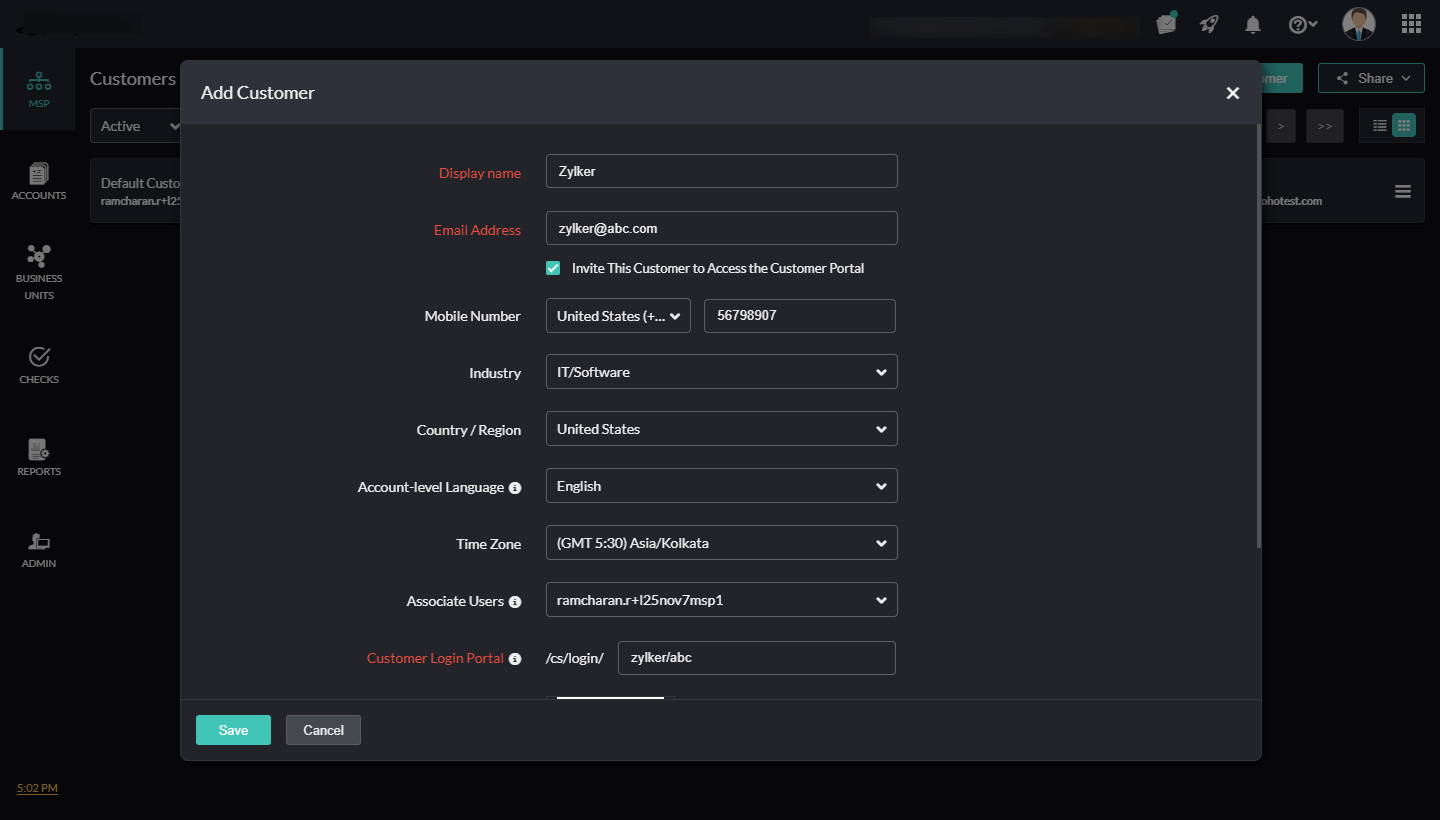
- On the Add Customer Portal page, enter the following details:
- Display name:Enter the name you want to use to identify this customer inside the Customer Portal.
- Email address:Enter the customer’s primary email address. This will be used for portal access, communication, and onboarding.
- Invite This Customer to Access Customer Portal:Enable this if you want the customer to receive a portal access invitation right away. If left unchecked, you can invite them later.
- Mobile Number:Enter the customer’s contact number. Choose the country code first, then type the number. This will be used for verification or communication if required.
- Industry: Select the industry the customer belongs to. This helps classify accounts in your MSP view.
- Country or Region:Choose the customer's location.
- Account Level Language: Select the language the customer will see when they log in to their portal. This sets their default UI language.
- Time Zone:Choose the customer’s preferred time zone. Billing periods, scheduled reports, and timestamps will follow this time setting.
- Associate Users:Select the MSP user (usually an admin or account owner) who will be linked to this customer. This helps manage responsibility and visibility for the account.
- Customer Login Portal: This shows the login path the customer will use. It is usually created automatically based on your portal settings and white labeling configuration.
- Captcha:Enter the characters shown in the captcha box.
- Click Save.
Once saved, you can view the customer account you created on the Customer Portal page.
Customer Portal Settings
The CustomerPortal Settings page lets you configure core identity and branding details for your master MSP account. These settings define how the portal appears to customers, what domain they access, and how your MSP’s contact information is displayed. It helps maintain a consistent branded experience across all customer portals and ensures that communication and login details align with your preferences. You can view the Portal Settings page from, Admin > General section.
- Name:The primary administrator or account owner’s name. This will be used for identification within the portal.
- Company Name:The MSP’s organization name. This will appear in customer-facing views and in certain communication templates.
- Custom Domain:The domain or URL customers will use to access the portal. This is part of white labeling and helps remove CloudSpend default URLs while giving customers a branded domain to log in through.
- Logo:The logo displayed on the customer portal. Uploading a custom logo helps align the portal with your branding.
- Sender Email: The email used to send alerts, onboarding mails, notifications, and customer communication. This ensures that all outgoing mails appear to come from your organization.
- Mobile Number:A contact number linked to the MSP account. This may be used for verification or as a reference in communication settings.
- Country / Region:The MSP’s location. This may influence localization preferences and general account defaults.
- Account-level Language: The default language for the portal interface. This will be the primary UI language for the MSP account.
- Time Zone: The default time zone for all timestamps, scheduled activities, budget resets, and report timings.
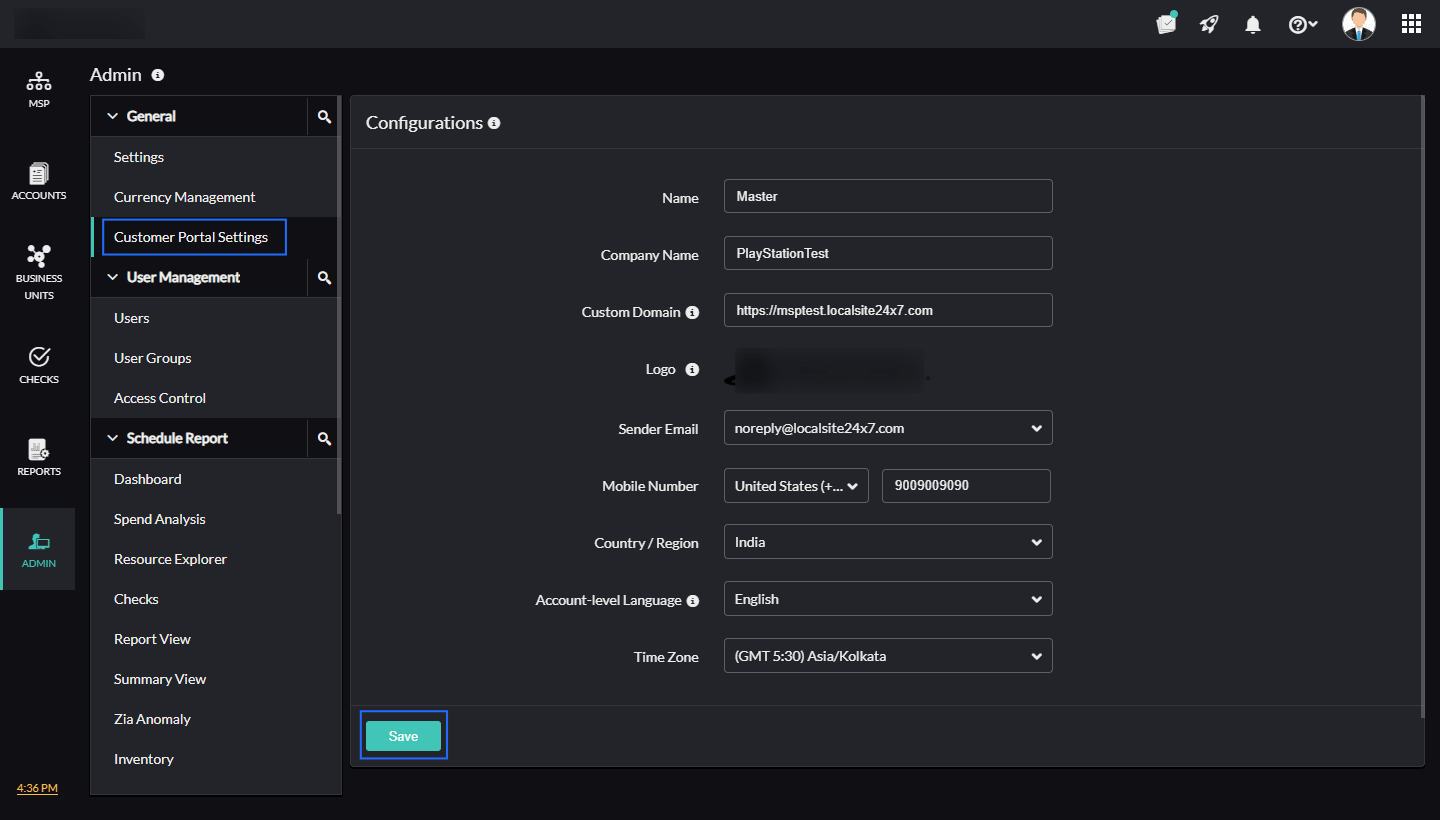
Once you apply the changes, click Save.
Editing customer details in the Customer Portal
To edit customer details:
- On the Customers page, click the hamburger icon next to the respective customer's name.
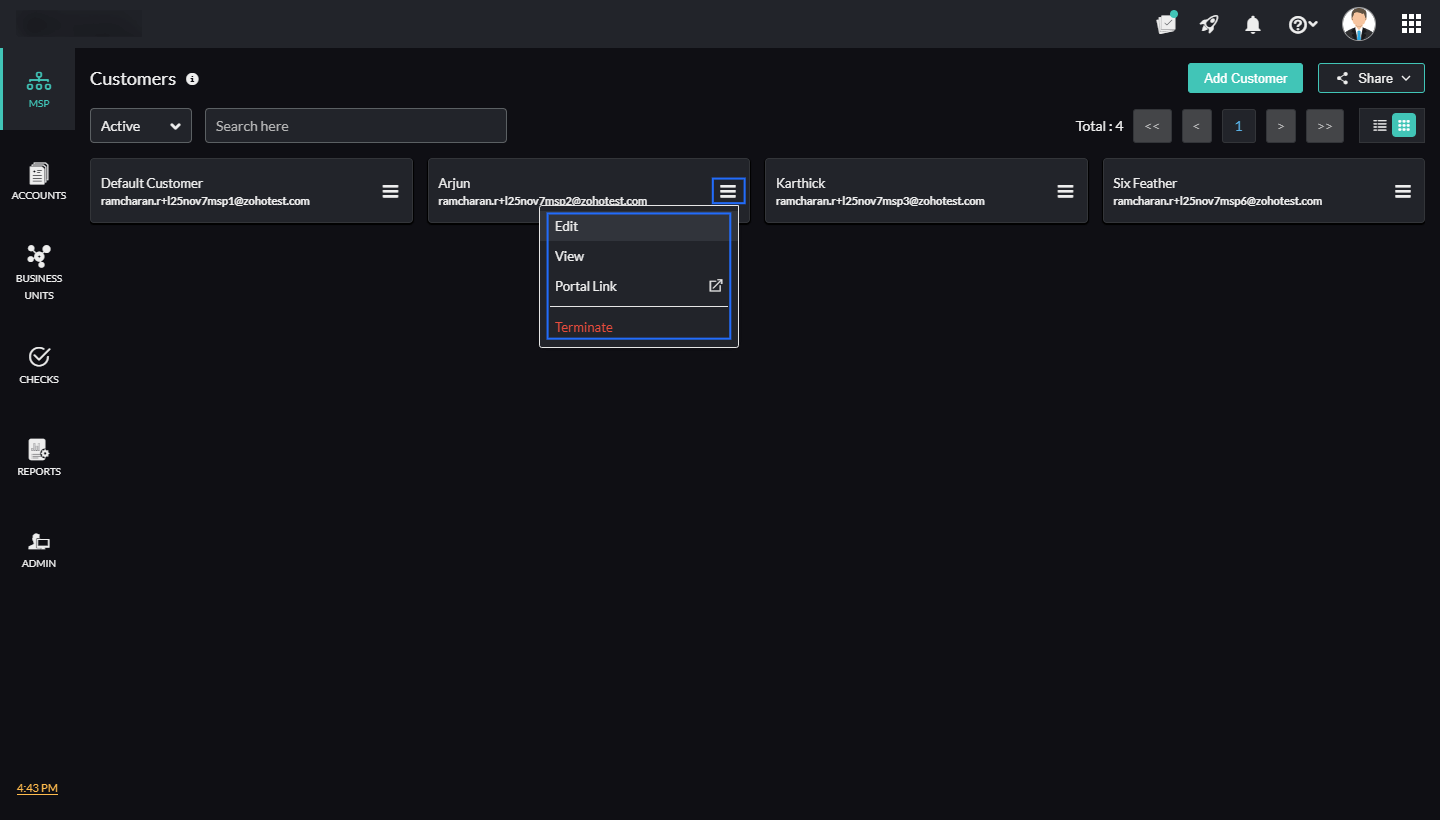
- On the Edit Customer page, make the required changes and click Save.
Accessing a customer's portal through the portal link
The Portal Link option appears for customers who have portal access enabled. This link is the direct login URL for that specific customer’s portal. When an MSP adds a customer and chooses to allow portal login, CloudSpend generates a unique login path for that customer under the MSP’s domain or custom domain.
Selecting Portal Link opens this login URL in a new tab. You can share this link with the customer if they need quick access to their portal or if they did not receive the invite mail. This link always points to the customer’s own login page and is tied to the branding, domain, and settings configured in the CustomerPortal Settings section. It helps MSPs quickly verify the customer’s portal setup and guide customers during onboarding.
To access the Portal Link:
- On the Customers page, click the hamburger icon next to the customer name.
- Select Portal Link to open the customer’s portal login page and provide the necessary credentials to access the customer's portal.
Terminating a customer
To terminate a customer:
- On the Customers page, click the hamburger icon next to the respective customer account name.
- Select Terminate or on the Edit Customer page, click Terminate Customer.
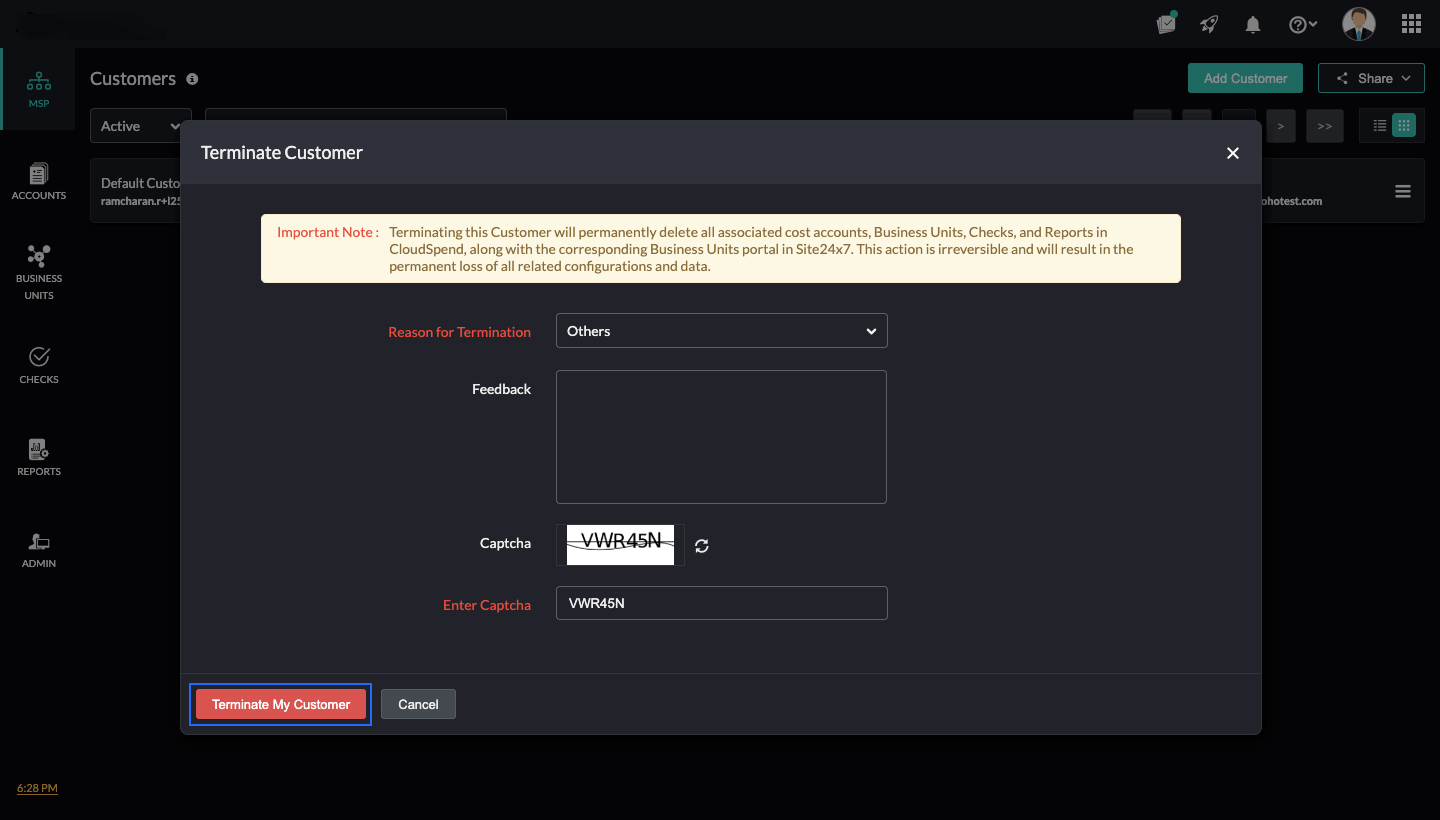
- In the Terminate Customer Portal pop-up, enter the following details:
- Reason for Termination:Select the reason for terminating the customer portal.
- Feedback: Share any comments or suggestions related to the termination.
- Enter Captcha:Enter the displayed captcha text for verification.
- Click Terminate My Customer Portal to permanently delete the selected customer account.
- Click Cancel to exit the dialog without taking any action.
Switching between customer accounts
You can switch between customer accounts from any module page in CloudSpend. By default, you'll start in your default customer account.
To switch to another customer account:
- Click the customer account drop-down at the top-right of the page.
- Select the customer account you wish to switch to.
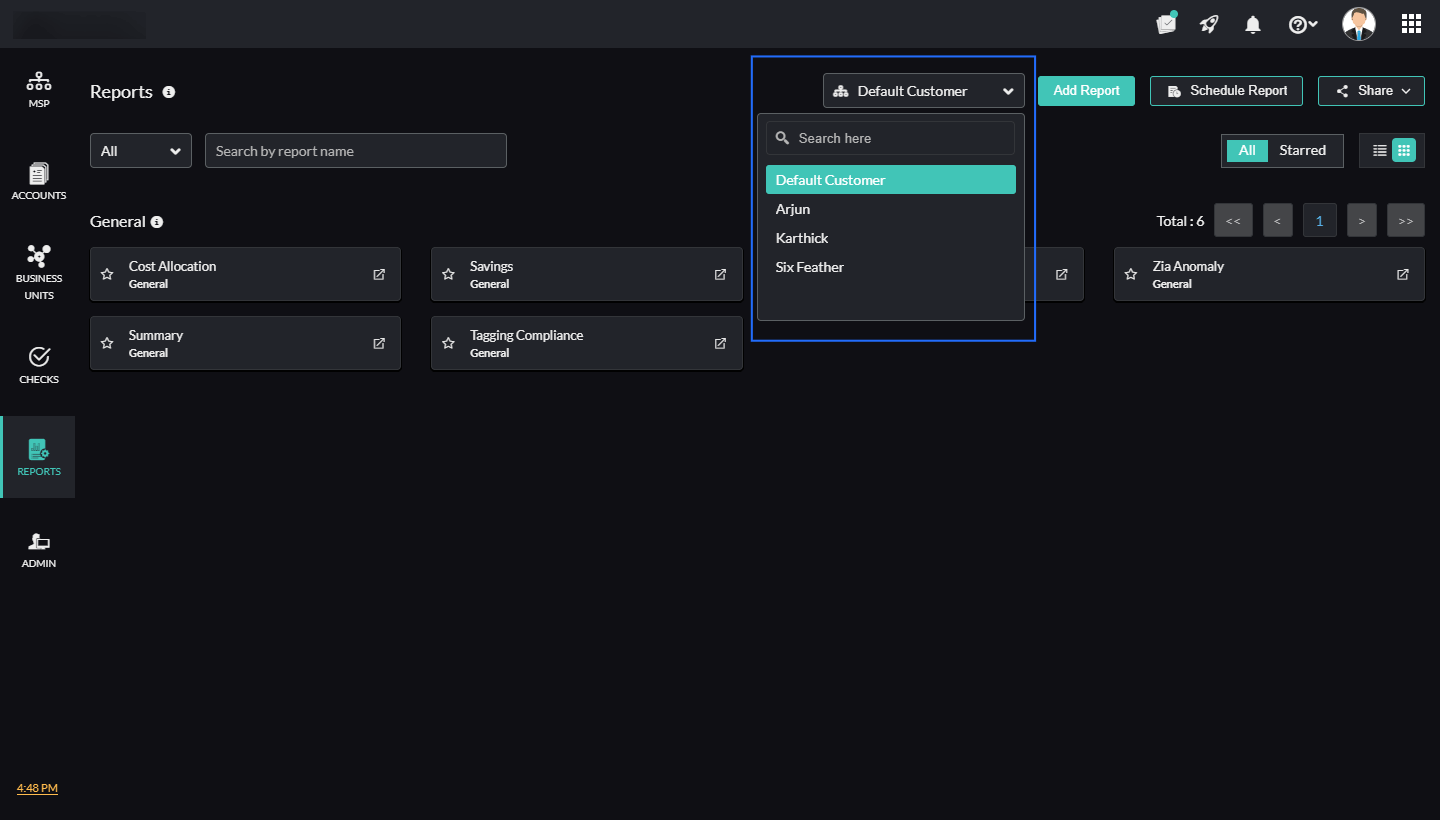
- You will be instantly switched to the selected customer's account, without leaving your current page.
Customer accounts from Site24x7 are not shown in CloudSpend
If you are an MSP using Site24x7 and you already have customer accounts set up there, you will notice that these accounts do not appear in the CloudSpend Customer Portal. This is an expected behavior.
CloudSpend does not currently sync or import customer accounts that already exist in Site24x7. Even if your MSP account is linked across both products, the Customer Portal in CloudSpend will only show the customer accounts you create inside CloudSpend. This setup keeps the two systems separate. Any customer you create or manage in CloudSpend remains independent from the ones you have in Site24x7.
Related topics