Steps to raise false positives
Step 1
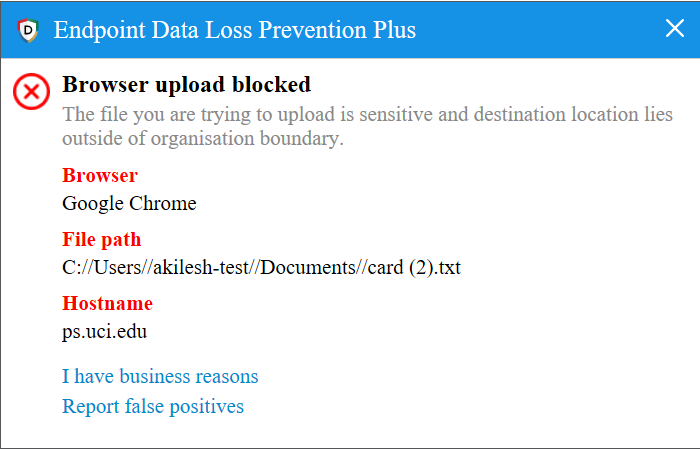
When accessing sensitive data an error message is displayed. From this error message, you can choose either I Have Business Reasons or Report False Positive.
Step 2
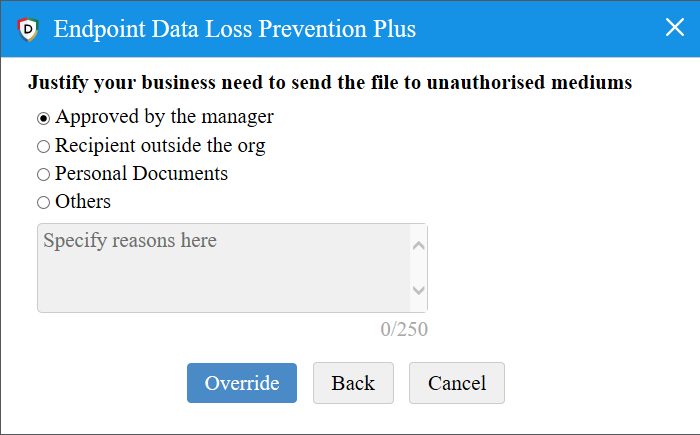
If an action like file upload or file transfer is not authorized, but the sensitive data has to be transferred/accessed, you can opt for I Have Business Reasons. Here you can choose between the options Approved by Manager or Sending file to a client/customer or Personal Document, to justify your business need for transferring/accessing the file.
Step 3
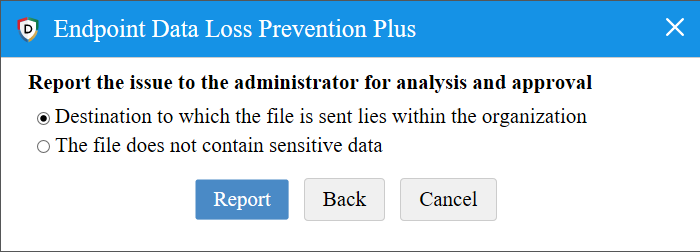
If the file itself does not contain sensitive data or if the data channel has to be added to the authorized list, you can opt for Report False Positive. You can choose between the options that report the issue to the administrator for approval upon analysis.