Email Settings
Users can choose to receive email notifications for data alerts and scheduled reports. The following settings help organizations improve their email delivery and customize the email address from which these notifications are triggered.
Email Deliverability
This feature helps ensure that emails sent from Analytics Plus are recognized as legitimate in user's inboxes and do not end up in spam folders. Follow the outlined steps to set up Analytics Plus as an authorized email sender.
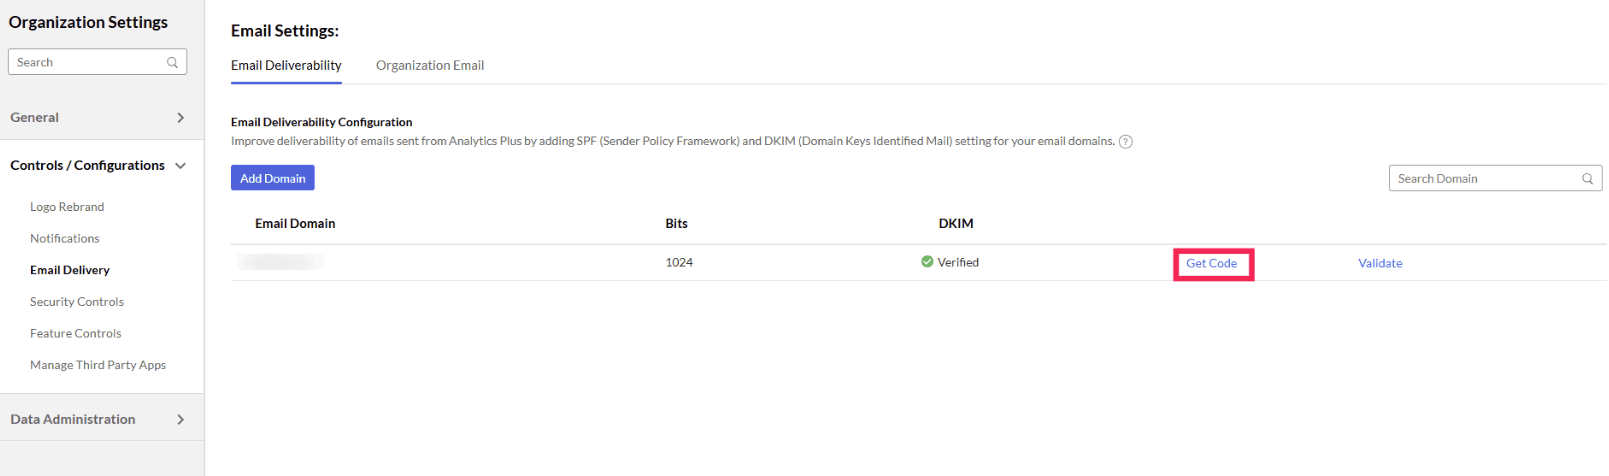
Navigate to the Settings page > Controls/Configurations > Email Delivery and click Add Domain.

In the dialog that appears, provide the domain name, and click Add.
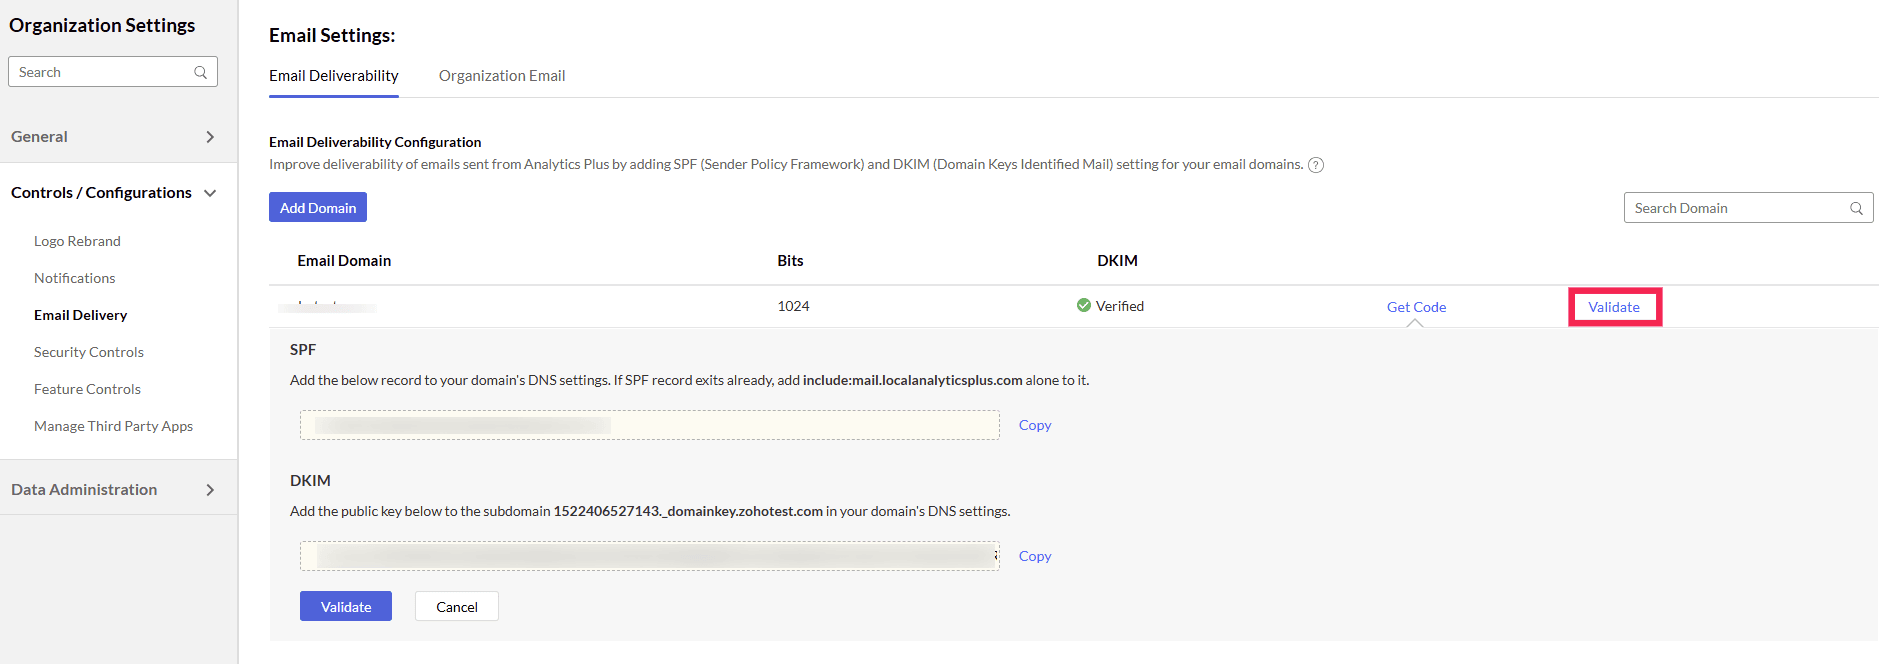
Click the Get Code link and copy the generated SPF and DKIM values.
Add the SPF and DKIM values in your DNS settings.
Return to your Analytics Plus console and click the Validate button to verify your domain and start sending emails using Analytics Plus without ending up in the spam folder.
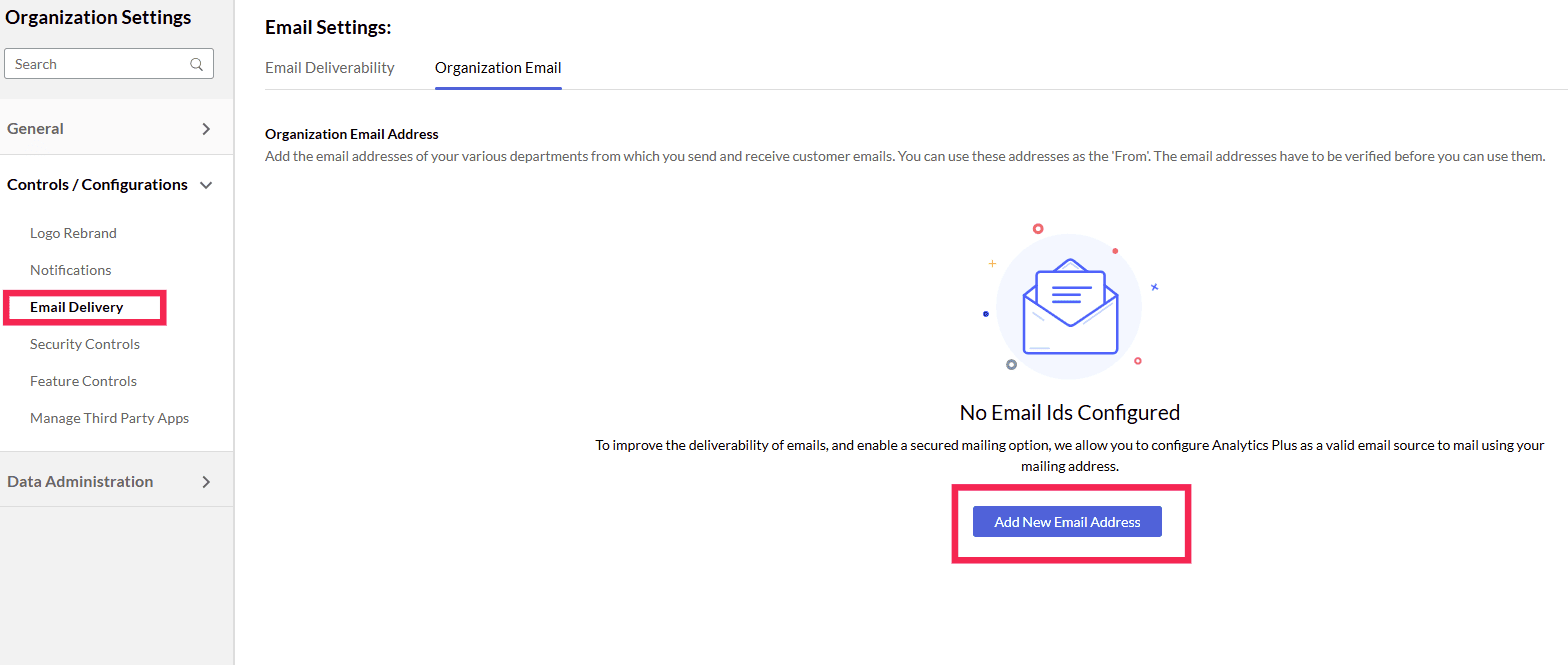
Organization Email
Analytics Plus lets you send emails using a common email address as an alternate to emails bearing the respective user's email address. You can also add more than one common email address.
Follow the steps below to send emails from a common email address:
Navigate to the Settings page > Controls/Configurations > Email Delivery > Organization Email, and click Add New Email Address.
Provide the organization email address and display name in corresponding textboxes.
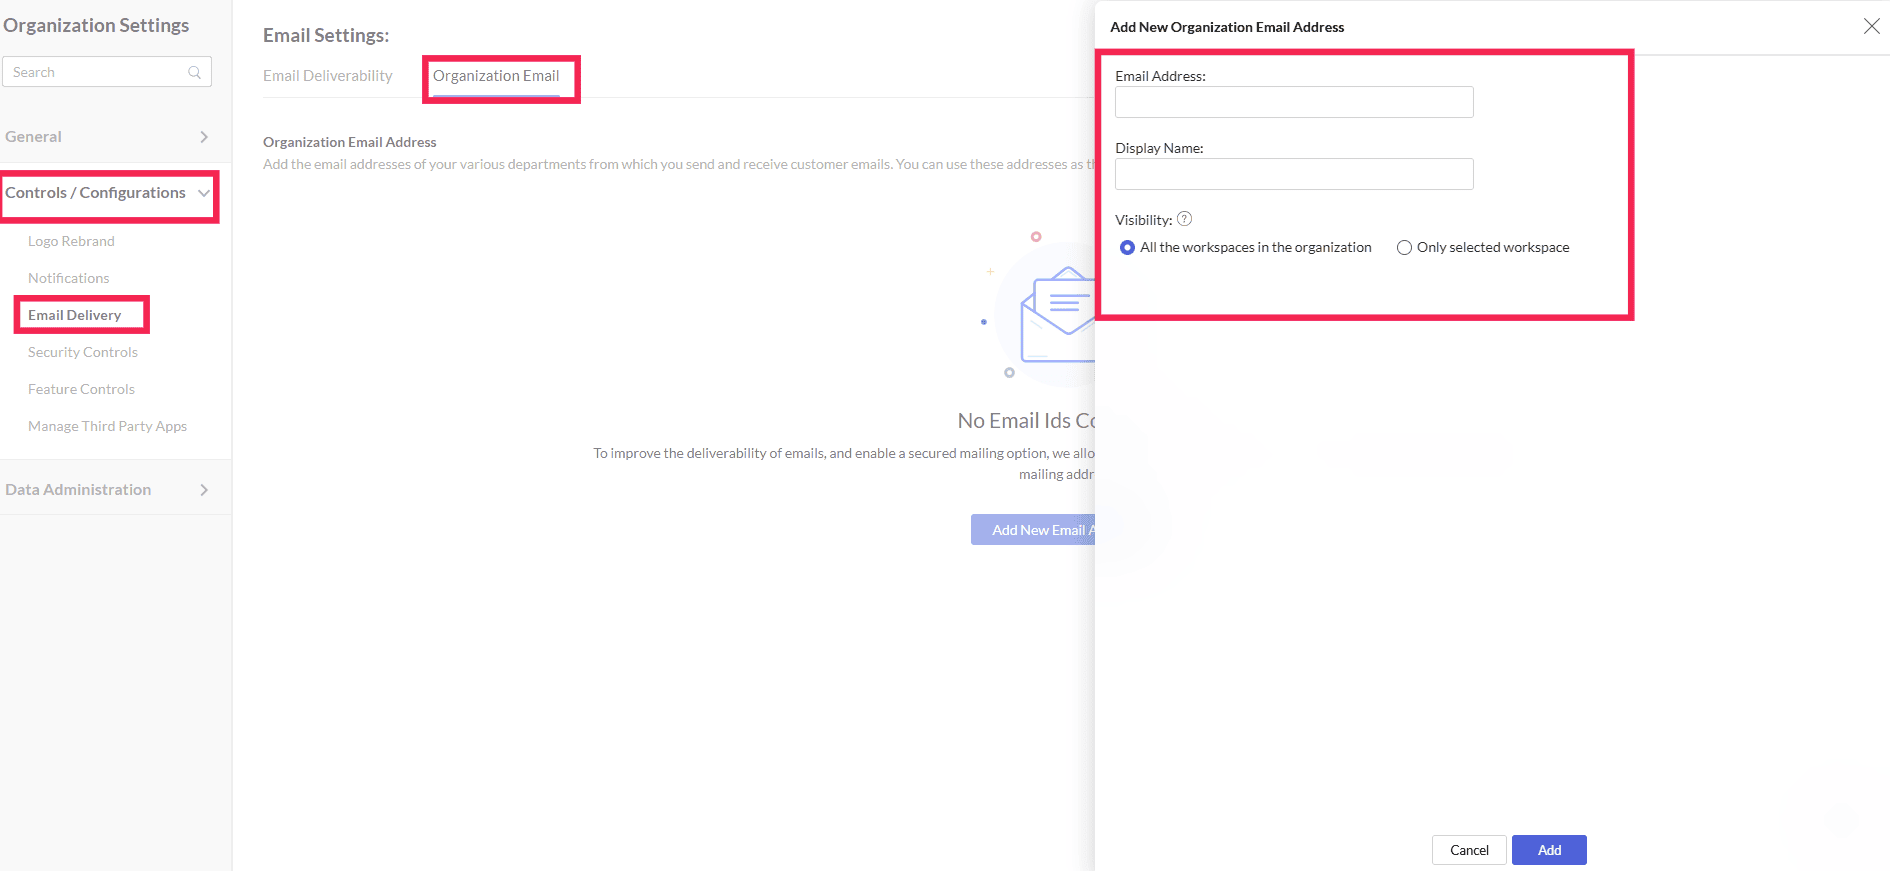
Choose one of the following visibility options, and click Add.
All the workspaces in the organization: This option allows you to add the email address to all the workspaces, including the workspaces created later.
Only selected workspaces: This option adds the email address to the selected workspaces.
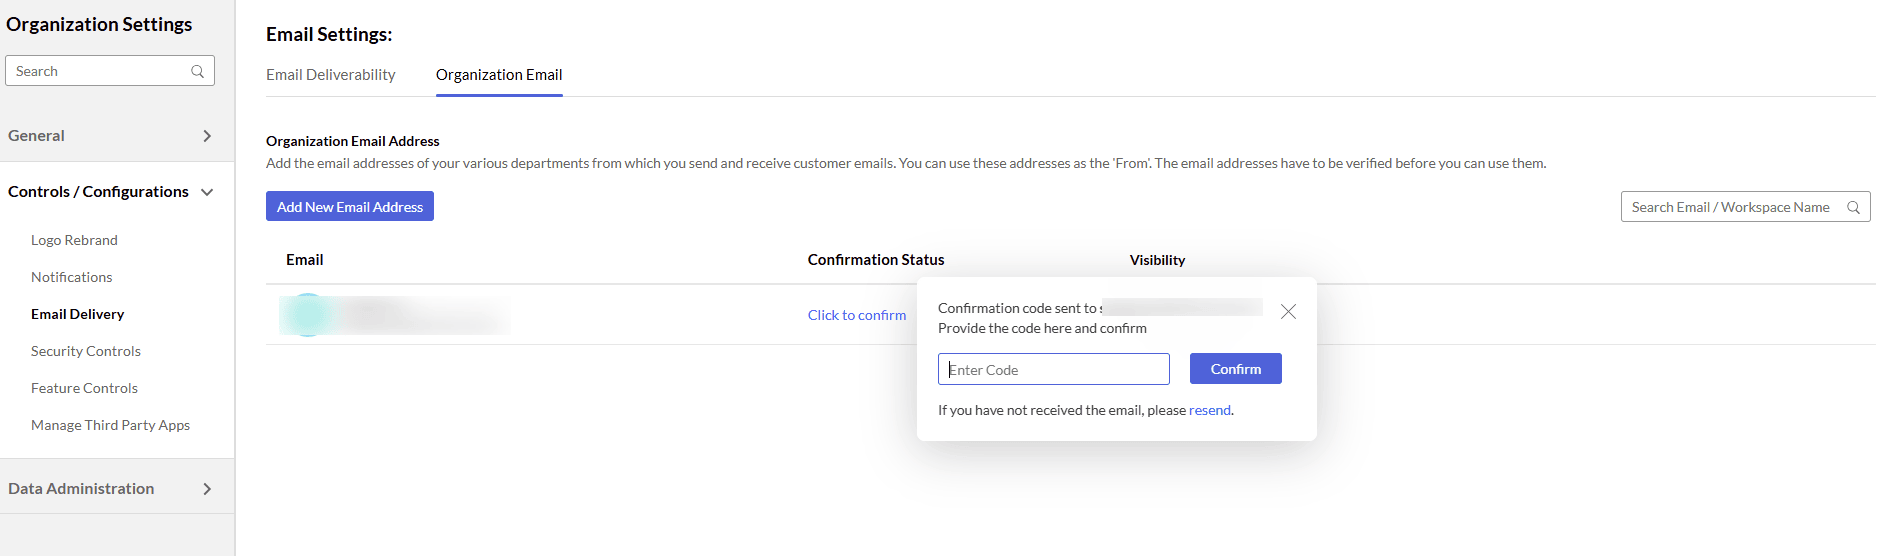
Click the Click to confirm link corresponding to the email address to verify the newly added email address.

Enter the verification code sent to the email address and click Confirm.
Once verified successfully, you can start sending email using the configured email address.