Configuring Rule Update Settings
Last updated on:
In this page
Overview
Rule Update Settings ensure that your system consistently receives the latest rule updates from Security Intelligence Pack, our cloud repository, enabling accurate and reliable threat detection. For environments with internet connectivity, you can configure automatic synchronization or perform manual updates from the cloud server. For offline or air-gapped environments, rule updates can be applied by downloading the latest Rule Library package and configuring the system to use it locally.
Pre-requisites
Before configuring Rule Update Settings, ensure the following:
- Whitelist the domain static.zohocdn.com in your firewall or network security settings to avoid any connection blocks.
- The user creating scheduled tasks must have the necessary permissions to:
- Access the script file.
- Access the directory specified by the -targetDir parameter.
- The user creating the cron job must have:
- Read and execute permissions for the script file.
- Write access to any directories the script interacts with, such as log or download folders.
- Ensure curl is installed and accessible for the user running the cron job, as it is required to download the ZIP files.
Steps to configure Rule Update Settings for:
Environments connected to the internet
- Navigate to the Rule Library page.
- In the top-right corner, click the
 icon and select static.zohocdn.com from the drop-down.
 - Click Save to apply the changes.
- Click Sync Now to fetch the latest rules immediately.
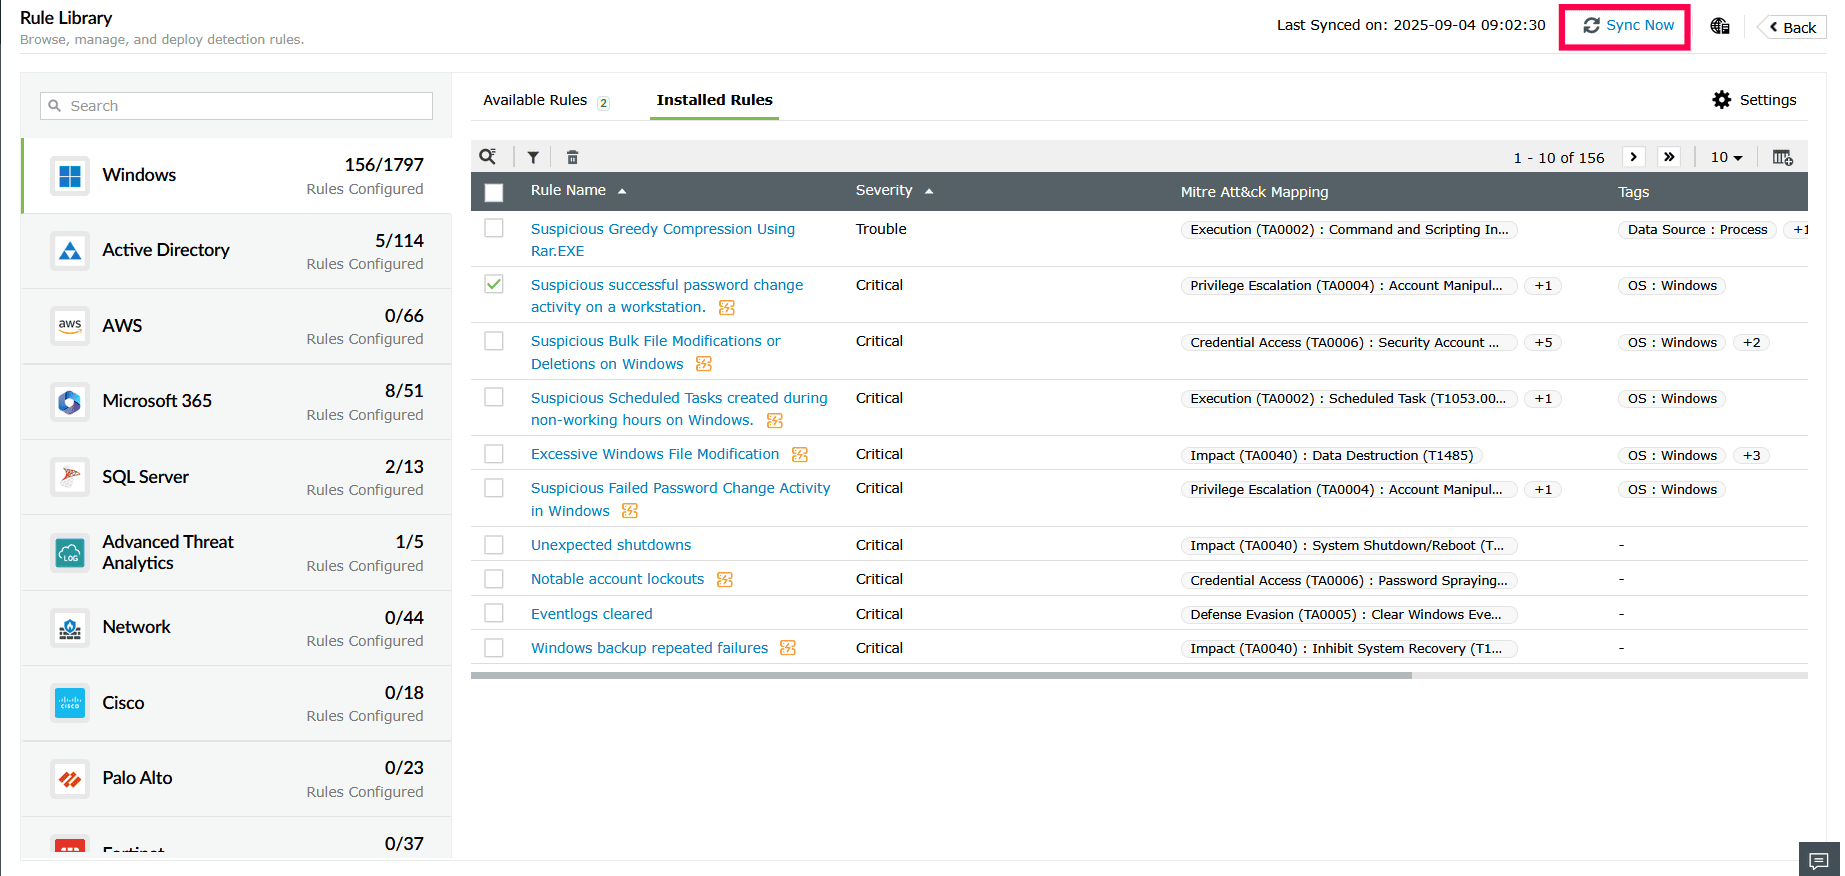
Figure 1: Syncing the Rule Library - A scheduled synchronization job also runs every 6 hours to update rules automatically.
Offline or air-gapped environments
- Go to the Rule Library page.
- In the top-right corner, select the icon and select Localhost from the drop-down.
- Click Save to apply the changes.
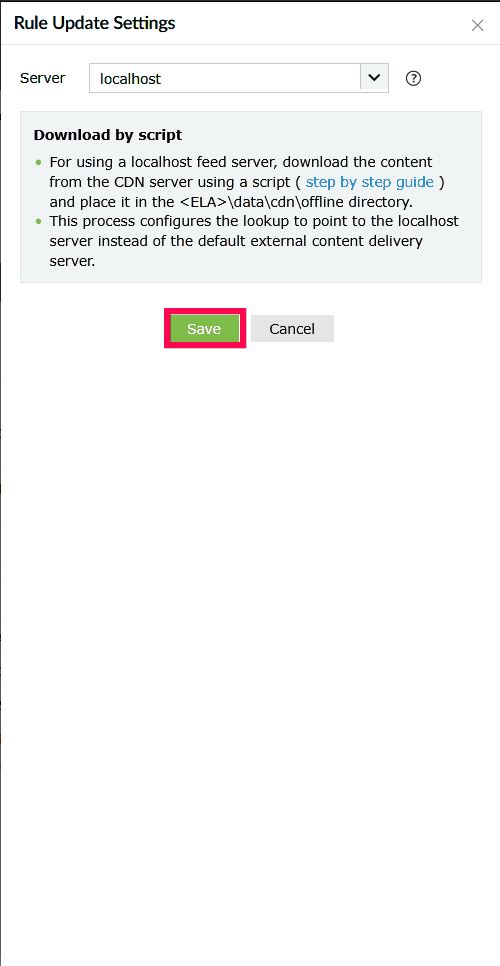
Figure 2: Configuring Rule Update Settings - Download the latest Rule Library ZIP file.
- Place the downloaded log360library.lpm file in the following folder on the server: {server.home}\data\cdn\offline
- The system extracts and applies the updated rules automatically.
- If auto-install is enabled, rules matching the configured severity levels will be installed after syncing.
Downloading Rule Library ZIP files
- Download the latest Rule Library file using the provided script:
NOTE The following scripts are located in the path <Installed Dir>\Log360\tools\
- Windows: download-log360library.bat
- Linux: download-log360library.sh
- Run script file to download the latest log360Library ZIP file.
- To automate the download process, you can schedule the script to run at regular intervals using:
- Task Scheduler on Windows
- Cron Job on Linux
Steps to schedule a PowerShell script every 6 hours in Task Scheduler
- Press Win + R to open the Run dialog box.
- Type taskschd.msc, and click OK.
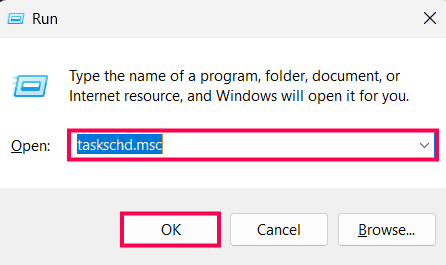
Figure 3: Opening the Task Scheduler - Click Create Task.
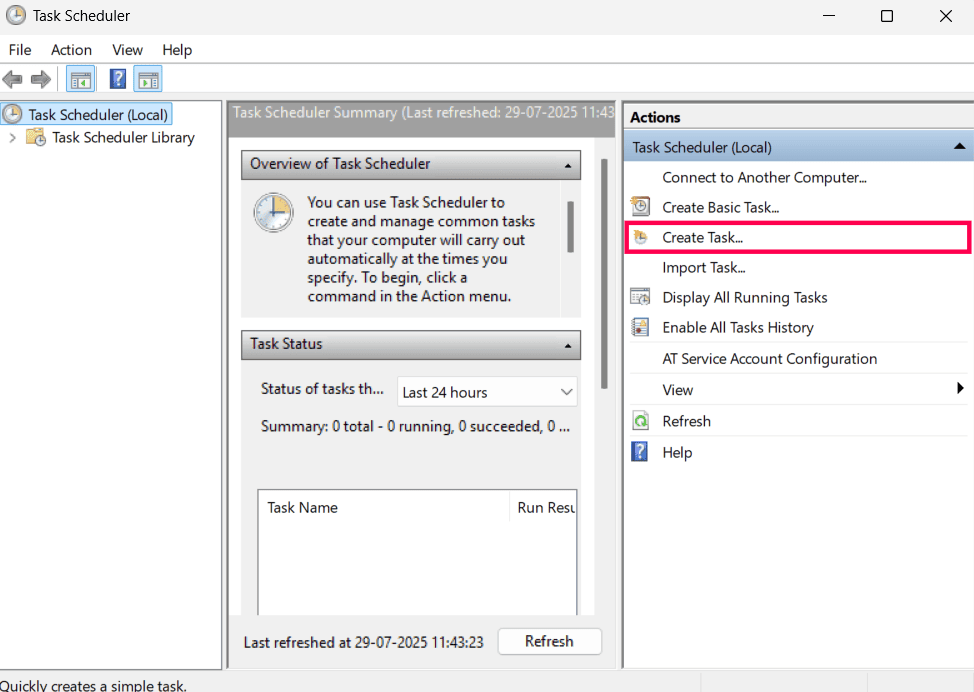
Figure 4: Creating a new task in Task Scheduler - In the General tab:
- Enter a name.
- (Optional) Add a description.
- Select Run whether user is logged on or not.
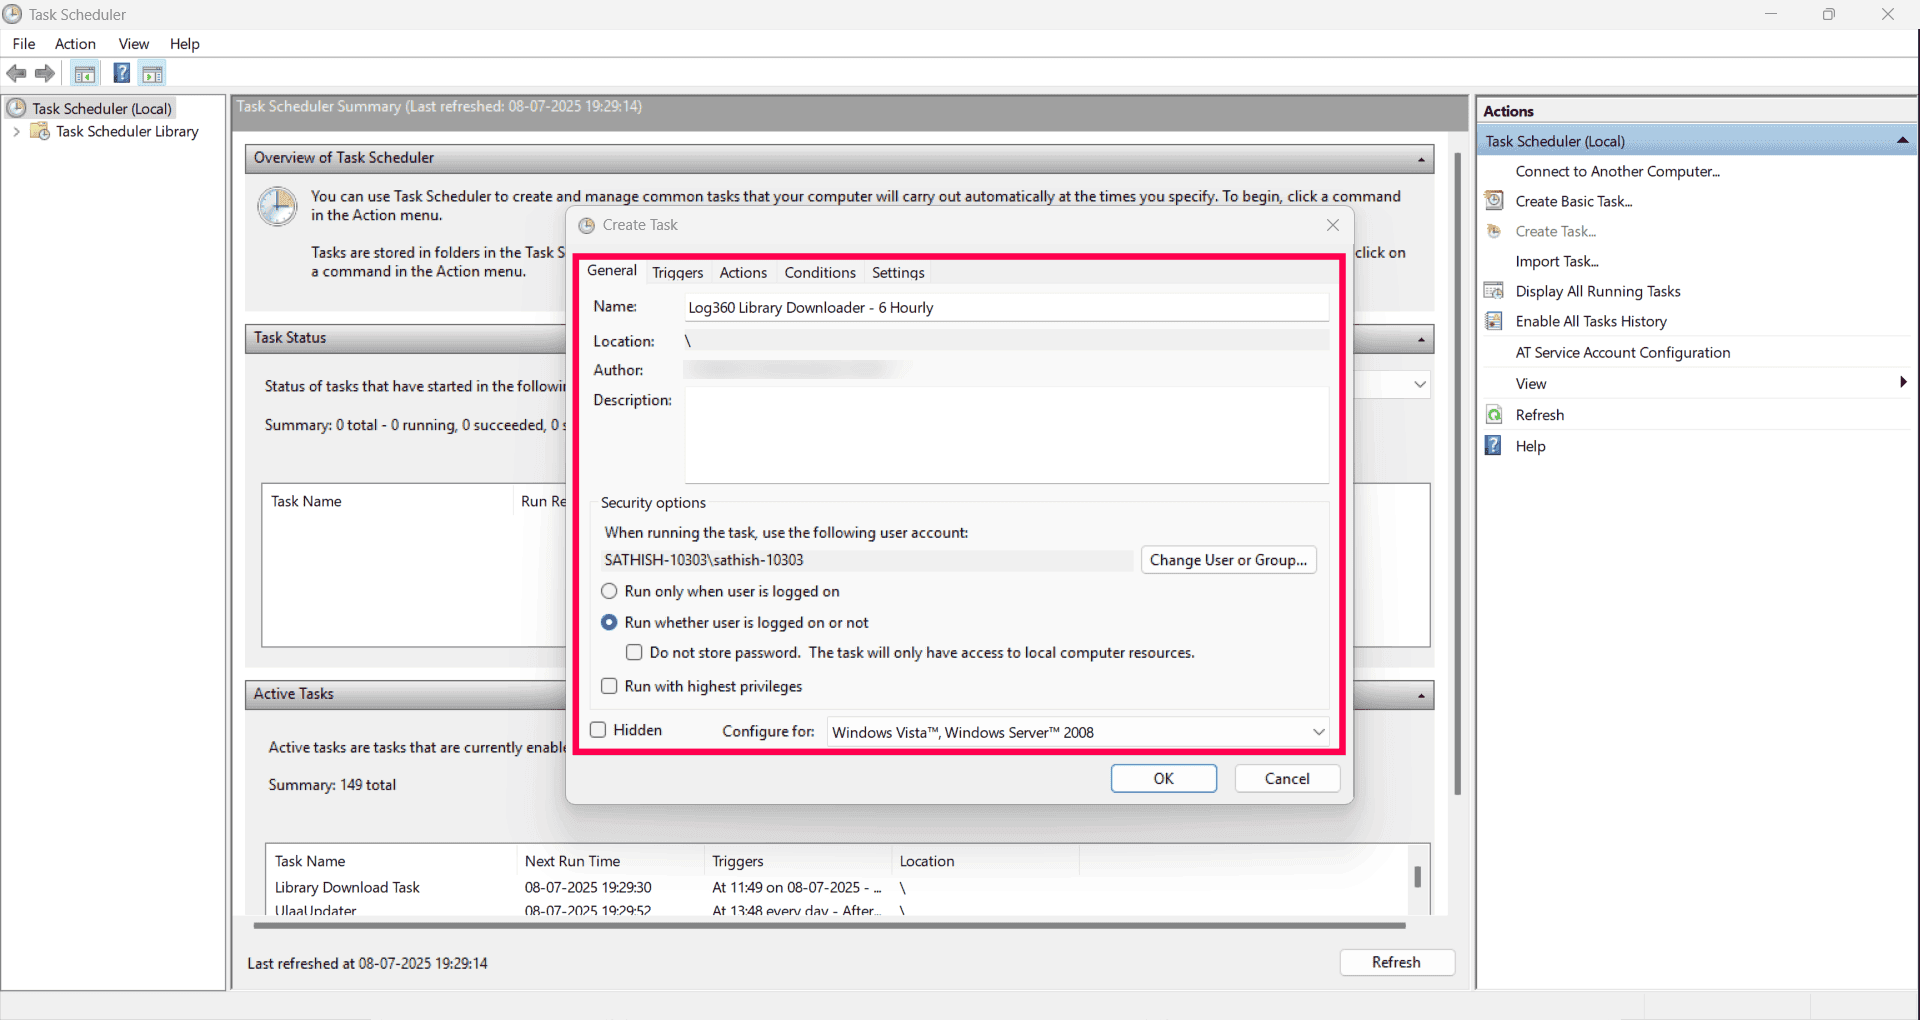
Figure 5: Configuring General settings - Go to the Triggers tab and click New.
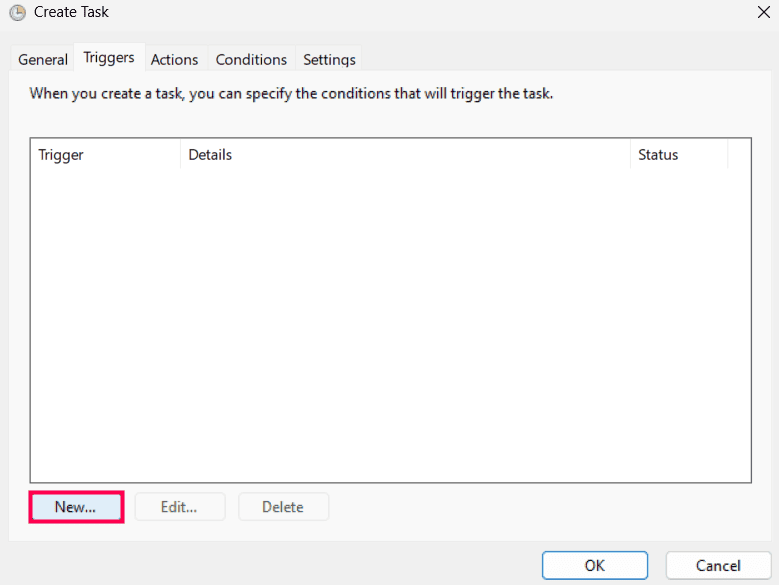
Figure 6: Creating a new Trigger - In the New Trigger window:
- From the Begin the task dropdown, select On a schedule.
- Under Settings, choose Daily and set the Start date and time.
- Under Advanced settings, check Repeat task every and set it to 6 hours.
- In the For a duration of field, select 1 day.
- Enable Stop task if it runs longer than and set it to 30 minutes.
- Ensure the Enabled checkbox is selected.
- Click OK to save the changes.
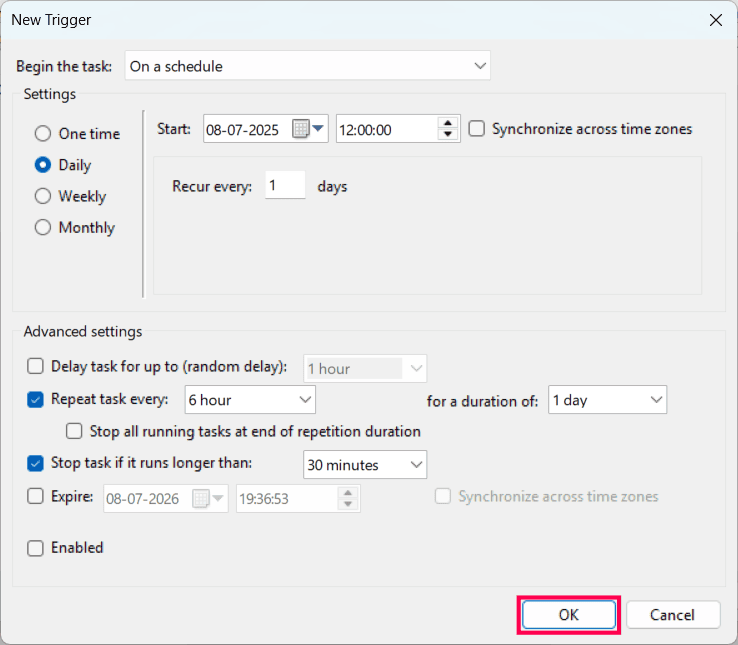
Figure 7: Configuring task triggers - Navigate to the Actions tab and click New.
- In the Actions window:
- In the Action dropdown, select Start a program.
- In the Program/script field, enter cmd.
- In the Add arguments (optional) field, enter: /c "<download_path>\download-log360library.bat -targetDir <folder where files need to be downloaded>"
NOTE:If the -targetDir parameter is not provided, the files will be downloaded to the script file's parent directory by default.
- Click OK.
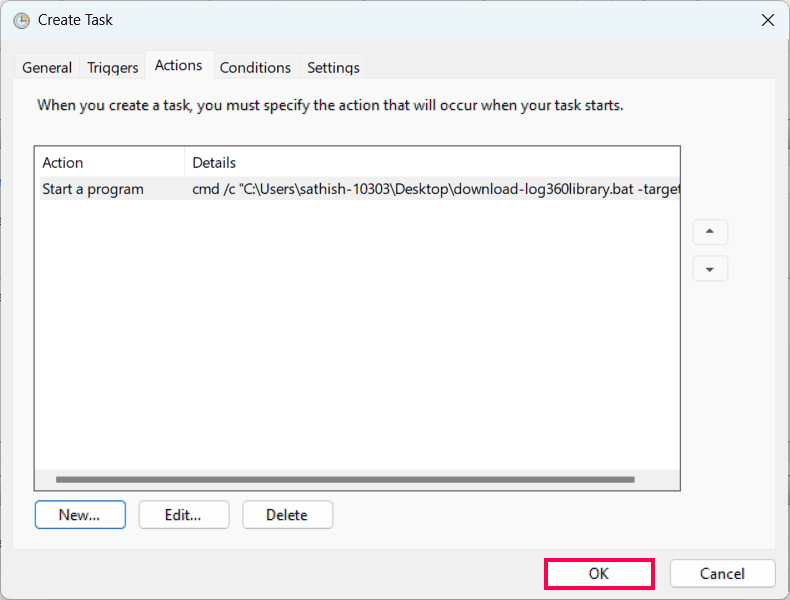
Figure 8: Configuring task actions - Navigate to the Conditions tab.
- Go to the Settings tab.
- In the Settings tab:
- Select the checkbox next to Allow task to be run on demand.
- Select the checkbox next to Stop the task if it runs longer than, and set the duration to 1 hour.
- Select the checkbox next to If the running task does not end when requested, force it to stop.
- In the If the task is already running, then the following rule is applied dropdown, choose Do not start a new instance.
- Click OK to save the task.
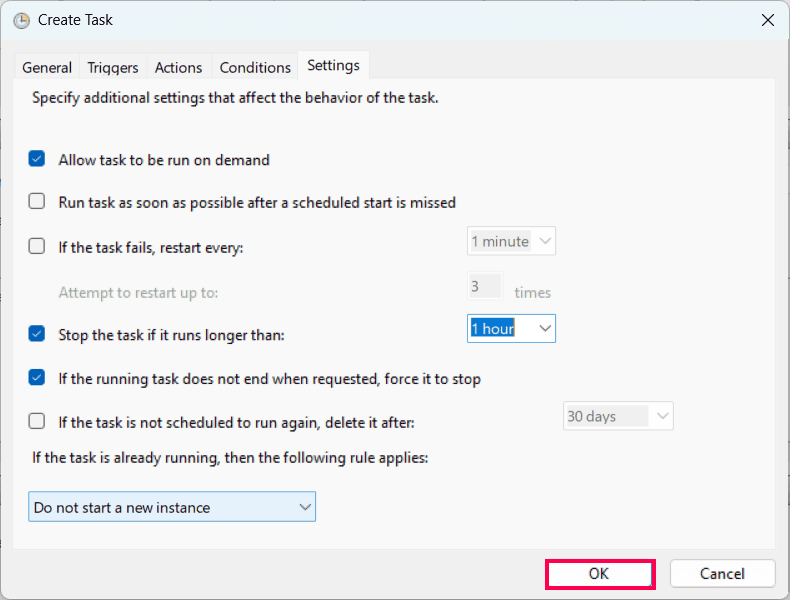
Figure 9: Configuring additional settings - When prompted, enter your Windows username and password.
- To verify the configuration, right-click the task in Task Scheduler and select Run.
Steps to schedule a shell script for every 6 hours in Cron Job
- Set the script as executable before running it by using the following command: chmod +x <script_file_path>/download-log360library.sh
- Run the crontab -e command to open the crontab editor.
- Insert the following cron entry to run the script every 6 hours: 0 */6 * * * <script_file_path>/download-log360library.sh --target-dir "<download_path>
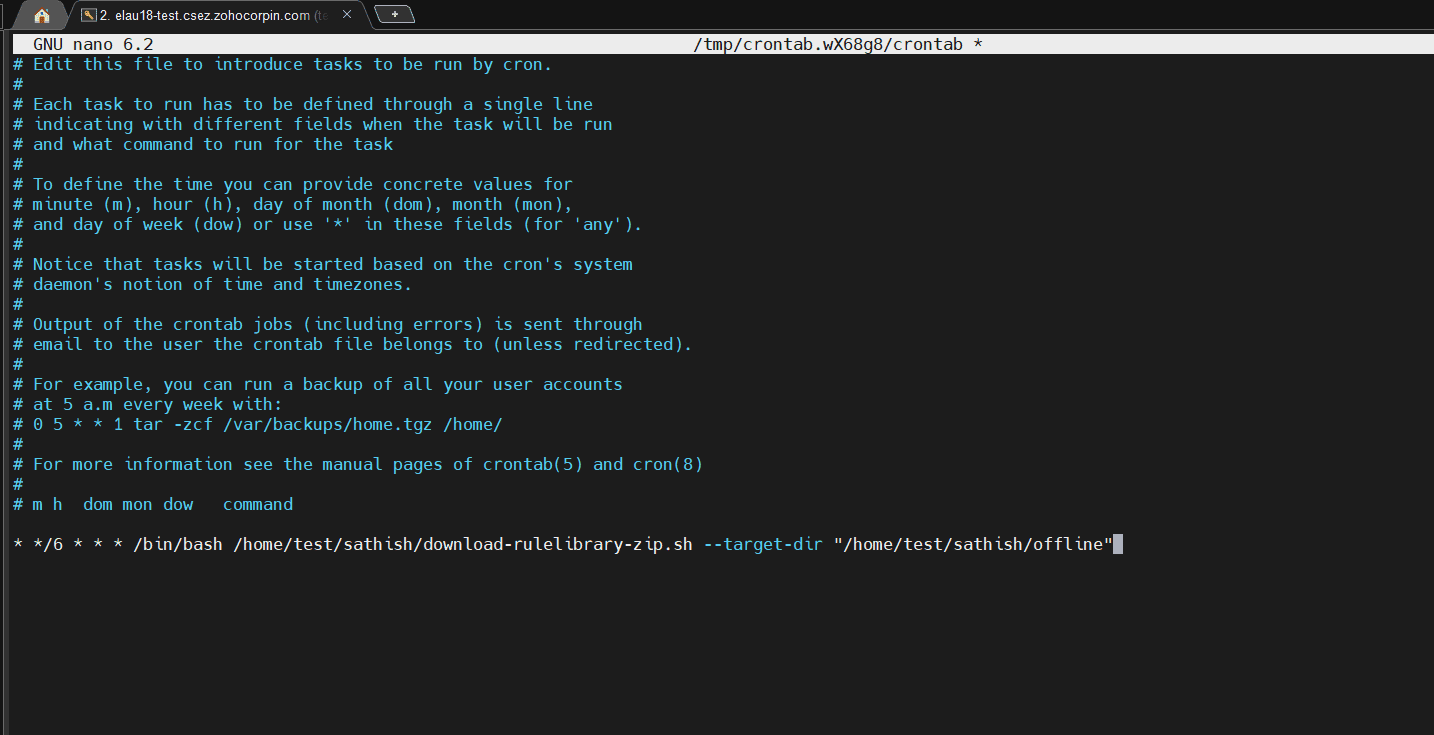
Figure 10: Adding the cron command - You can modify the path or time as required.
- Save and exit the crontab editor:
- Press Ctrl + O to save.
- Press Ctrl + X to exit.
- Verify the cron job installation by running the command: crontab -l
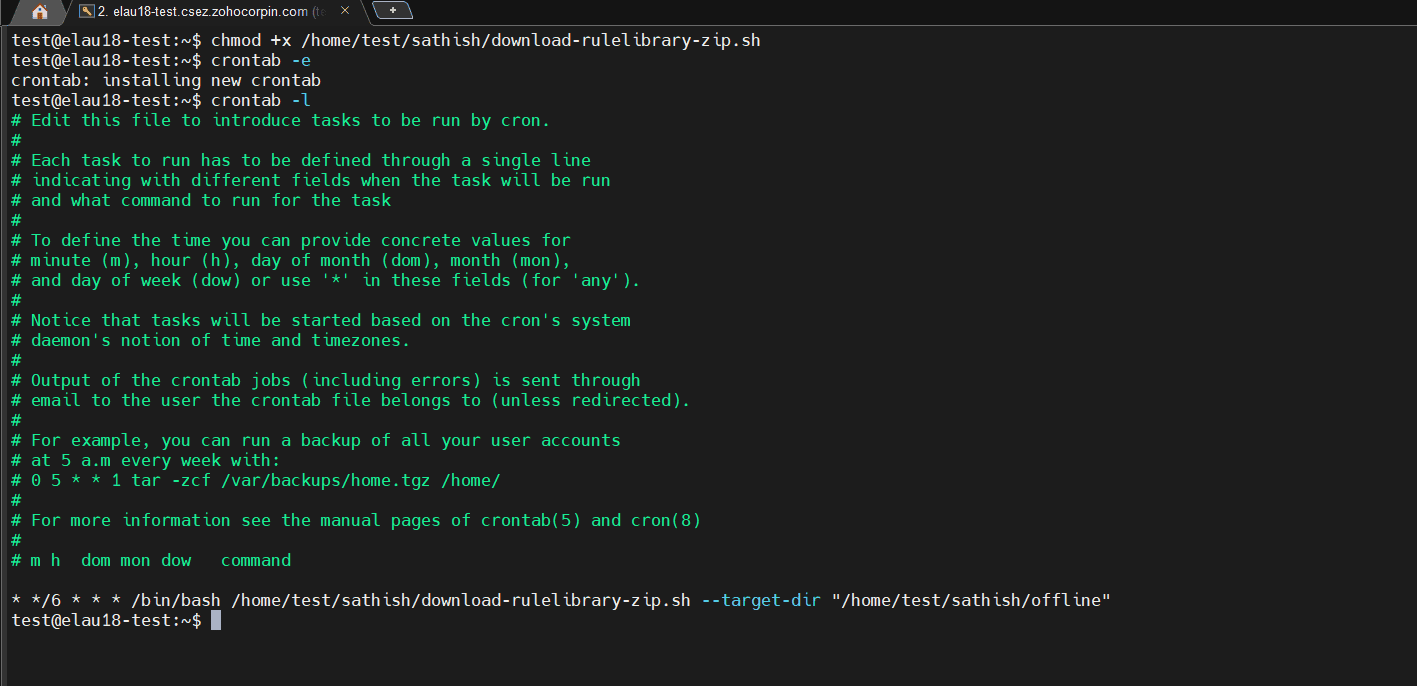
Figure 11: Saving and verifying the cron job - Check logs to confirm execution:
- Review the script's log file: <download_path>/logs/download.log
- Alternatively, review system logs such as var/log/cron.log depending on your operating system.
Read also
This page explained how to keep your Rule Library updated in online and offline environments. To learn more about the Rule Library and managing its capabilities, refer to: