SharePoint Online migration guide
Last updated on:In this article
Migrating to SharePoint Online enables organizations to modernize collaboration, improve accessibility, and reduce infrastructure costs. In many organizations, migration is driven by upcoming end-of-life deadlines, such as July 14, 2026 for legacy SharePoint versions (SharePoint 2016 and 2019), making cloud adoption a strategic priority. Beyond simply moving files, a successful SharePoint Online migration depends on effectively aligning information architecture, preparing the destination environment through proper site provisioning, and ensuring that document libraries, metadata, permissions, and version history are preserved.
Pre-migration planning and assessment
Before initiating migration, organizations must define a clear migration strategy:
- Analyze information architecture: Review how sites, document libraries, and content are structured to avoid replicating inefficient designs in the new environment.
- Perform site provisioning: Prepare destination SharePoint Online sites, libraries, and configurations in advance.
- Plan pre-stage migration: Move bulk data early, then run incremental migration passes to capture recent changes before final cutover.
- Identify dependencies: Evaluate workflows, customizations, and legacy components that may not be supported.
- SharePoint Online
- Windows PowerShell
- SharePoint Manager Plus
Method 1: Migrate using SharePoint Online native tools
Microsoft provides built-in tools that support migrations from on-premises SharePoint versions and file shares to the cloud, making them the recommended starting point for most organizations.
Prerequisites
- A configured SharePoint Online destination tenant.
- A source environment running a supported SharePoint version.
- A SharePoint Administrator or Global Administrator account for the destination Microsoft 365 tenant.
- A Site Collection Administrator account for the source SharePoint environment.
- If migrating file shares, an account with read access to the source files and folders.
- Network connectivity between the source environment and SharePoint Online.
- A pre-migration assessment completed using the SharePoint Migration Assessment Tool.
- Data cleanup completed for obsolete sites, unsupported workflows, unnecessary permissions, and large files.
Note:
Most migration tools rely on application permissions for secure, API-based access to SharePoint environments. Proper configuration ensures that migration tools can authenticate and transfer data without exposing user credentials.
Steps to migrate sites using the SharePoint Migration Tool
- Install and launch the SharePoint Migration Tool.
- Log in with Microsoft 365 administrator credentials.
- Select Add new migration > SharePoint Server.
- Enter the on-premises SharePoint site URL and click Next. If prompted, provide Site Collection Administrator credentials.
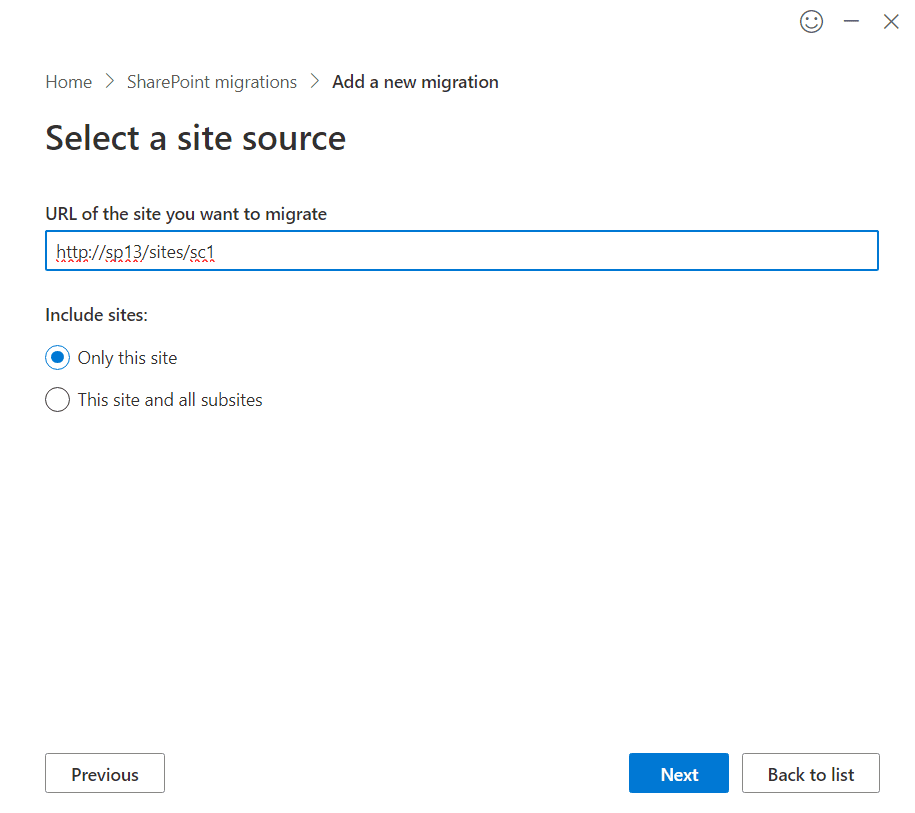
- Select the destination site in SharePoint Online and click Next.
- In Review settings, ensure that you enable permissions preservation, metadata preservation, and version history migration to maintain document integrity and user access.
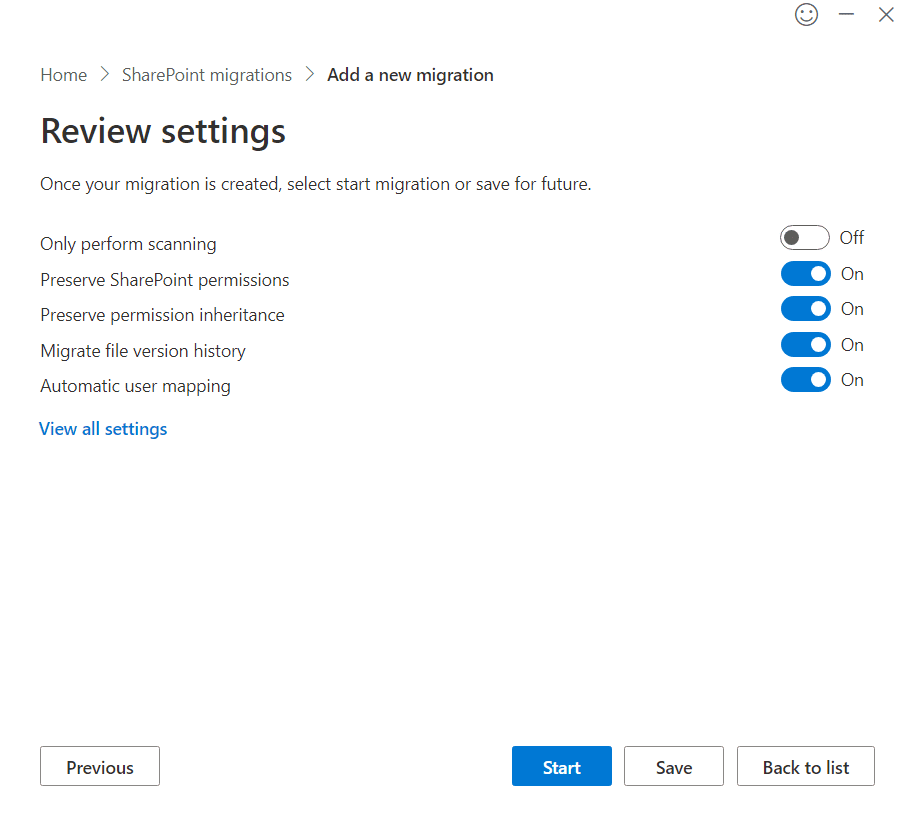
- Click Start. Once the status shows Complete, download the summary report to check for any failures.


Steps to migrate document libraries and folders using Migration Manager
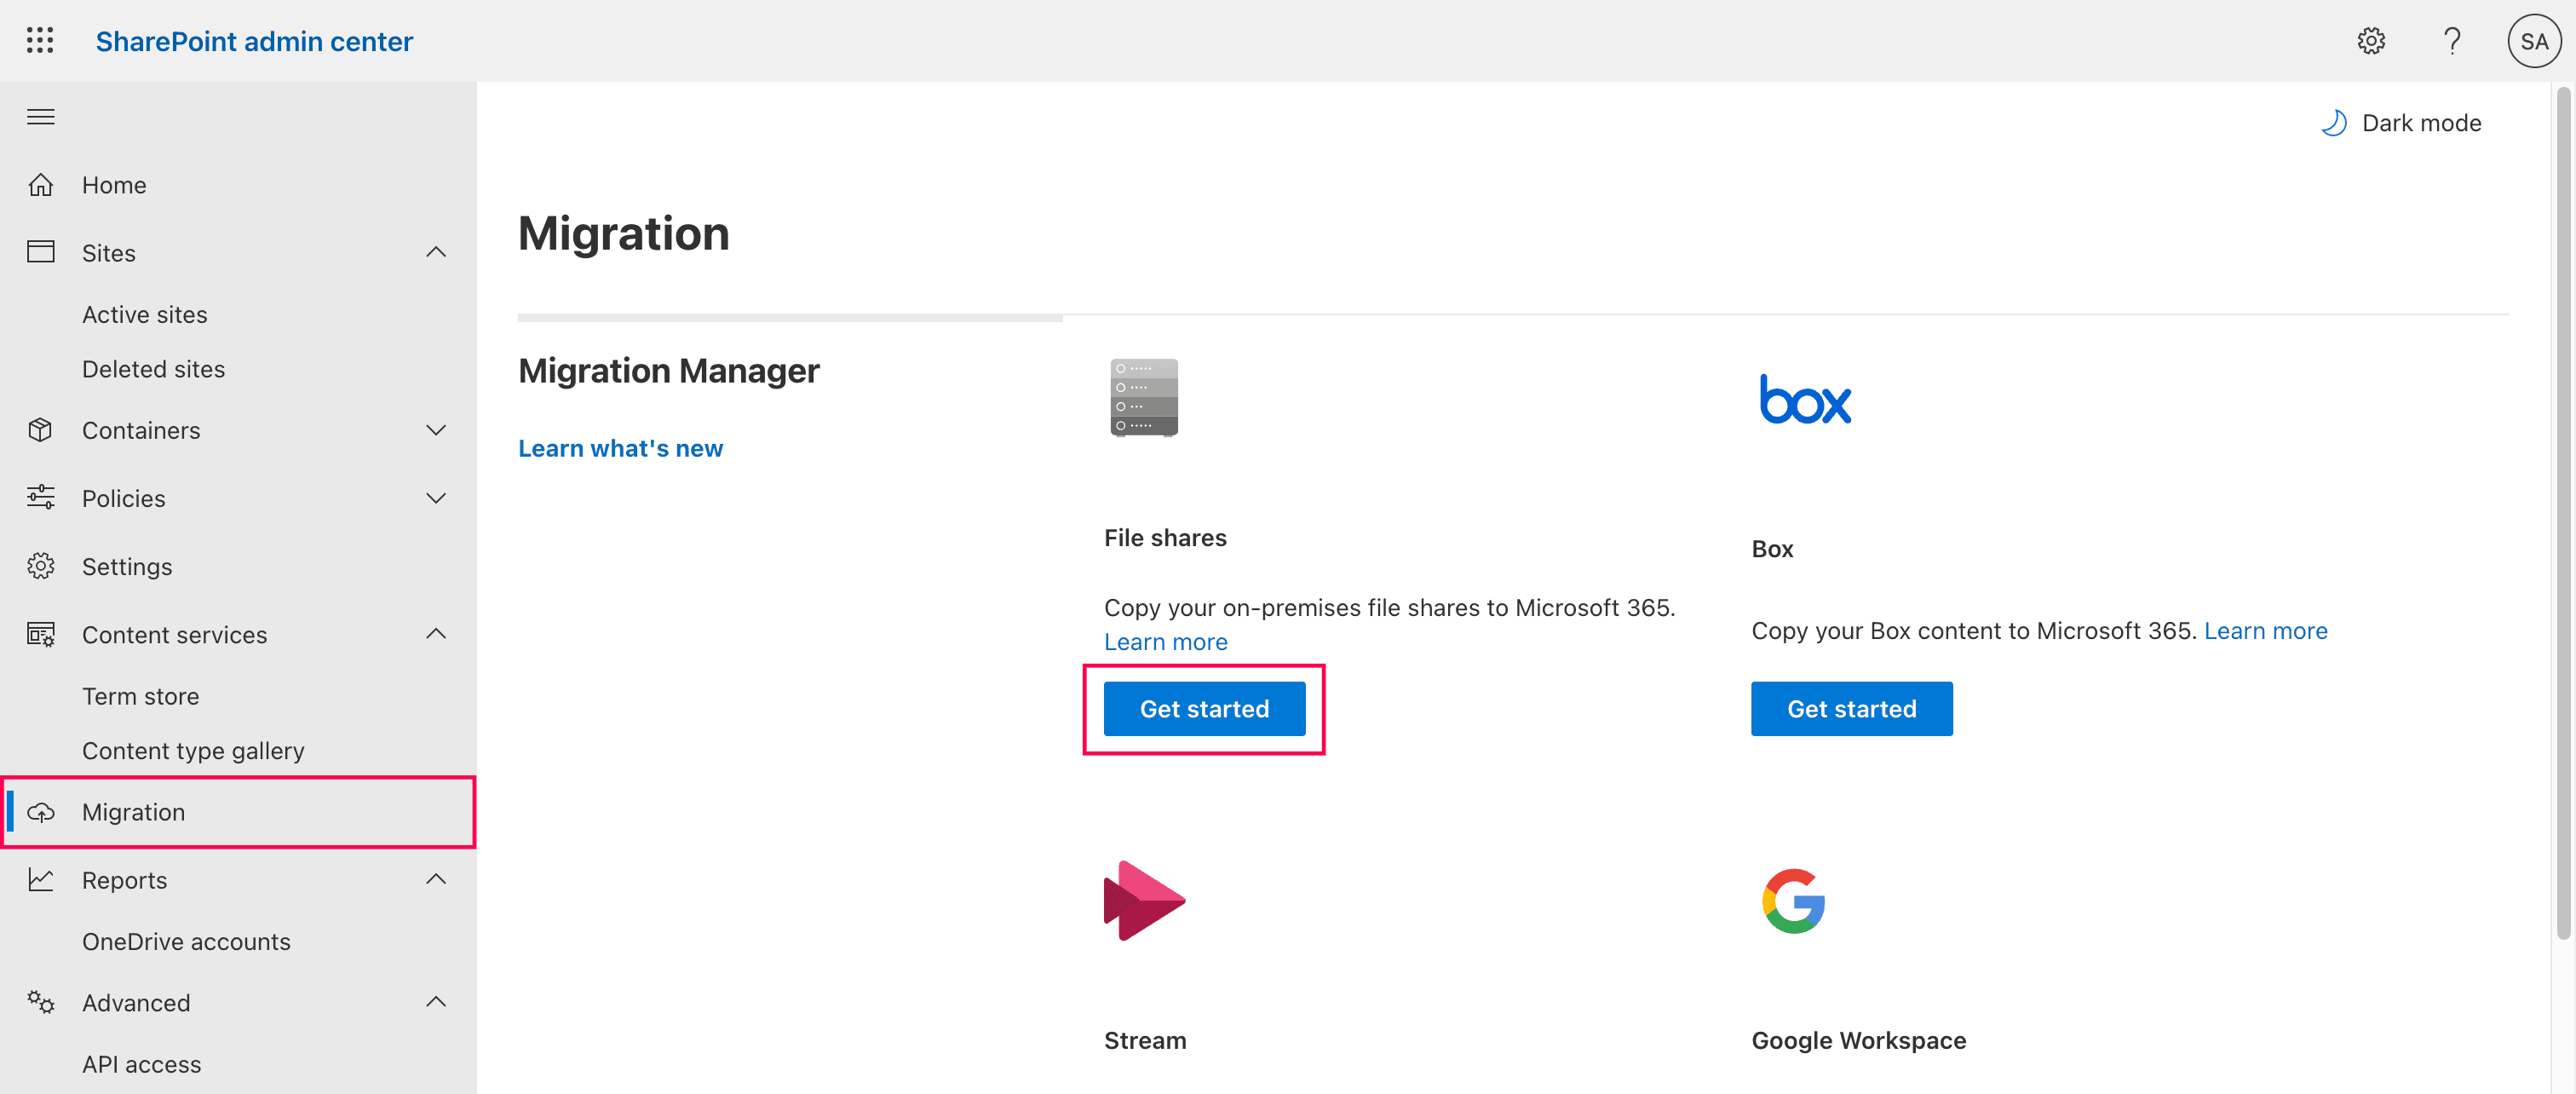
- Log in to the SharePoint admin center, and select Migration from the left pane.
- Select Get started under File shares.
- Click Download agent to download the setup file and install it on a Windows machine or server that has Read access to your local network drives.
- Verify that the installed agent appears as Enabled within the Migration Manager dashboard.
- Click Add source path under Let's scan your source. Initiate a scan of the source path to identify potential issues like file paths exceeding 400 characters or file names containing unsupported symbols.
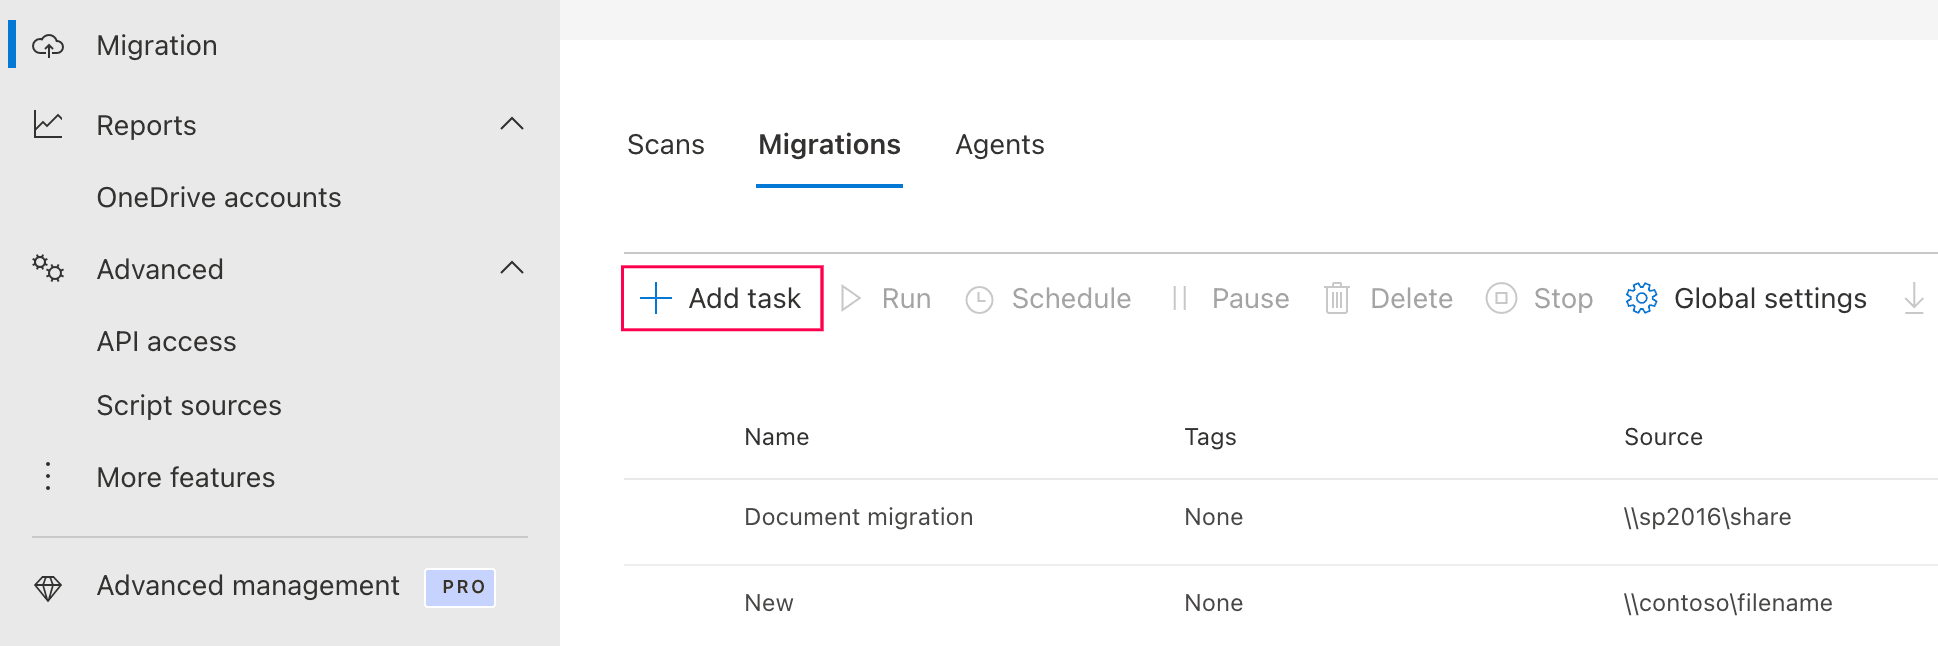
- In the Migration tab, click + Add task, then select Single source and destination, and enter the specific network path ( UNC ) for the file share you intend to move.
- Enter the URL of the target SharePoint site and choose the specific document library or folder where the data should be migrated.
- Adjust the task settings to preserve NTFS permissions, apply file type filters, or schedule the migration for a specific time.

- Click Run to authorize the Migration Manager to assign the job to an active agent and begin the data transfer.
- Monitor the progress bar in the dashboard and download the Summary Report once finished to review any skipped files or errors.


Limitations to consider
- Support for complex customizations such as InfoPath, master pages, and classic features is limited.
- Legacy workflows may need to be rebuilt in Power Automate.
- Performance depends on bandwidth and throttling.
- Only basic reporting and error handling is supported.
- No advanced scheduling or governance features are available.
Method 2: Migrate using PowerShell
PowerShell allows administrators to migrate SharePoint content programmatically, making it useful for scripted, repeatable, and bulk migration tasks.
Prerequisites
Before using PowerShell, ensure that:
- You have SharePoint Administrator or Global Administrator rights.
- The source and destination SharePoint environments are accessible.
- You have the necessary permissions to read from the source and write to the destination.
- The PnP.PowerShell module is installed. If not, run:
Install-Module PnP.PowerShell -Scope CurrentUser
- You are connected to SharePoint Online.
Connect-PnPOnline -Url https://tenant.sharepoint.com/sites/SourceSite -Interactive
Export and apply a site template
- Export the structure of the source site. This helps duplicate lists, libraries, branding, and settings, but may not migrate all content or customizations.
Get-PnPSiteTemplate -Out "SiteTemplate.xml"
- Connect to the destination site and apply the template:
Connect-PnPOnline -Url https://tenant.sharepoint.com/sites/TargetSite -Interactive
Invoke-PnPSiteTemplate -Path "SiteTemplate.xml"
Copy files from one SharePoint site to another
Use the following command to copy an individual file from the source site to the destination site:
Copy-PnPFile -SourceUrl "Shared Documents/Report.docx" `
-TargetUrl "/sites/TargetSite/Shared Documents/Report.docx" `
-OverwriteIfAlreadyExists
Copy an entire folder
Use the following command to copy a folder and its contents:
Copy-PnPFile -SourceUrl "Shared Documents/Projects" `
-TargetUrl "/sites/TargetSite/Shared Documents/Projects" `
-OverwriteIfAlreadyExists
Supported parameters
The following parameters can be used while migrating SharePoint content with PowerShell:
| Parameter | Description |
|---|---|
| -SourceUrl | Specifies the source path of the file or folder |
| -TargetUrl | Specifies the destination path |
| -OverwriteIfAlreadyExists | Replaces the file if it already exists in the destination |
| -IgnoreVersionHistory | Skips version history during migration |
| -Connection | Uses an existing SharePoint connection |
Limitations to consider
- PowerShell cannot migrate a full site in a single step.
- It requires PowerShell scripting knowledge and manual execution.
- Site templates may not capture all customizations, workflows, or permissions accurately.
- Large-scale migrations can be difficult to troubleshoot and monitor.
- There is no built-in scheduling, delegation, or centralized dashboard.
- Post-migration validation and governance must be handled separately.
Method 3: Streamline migrations with SharePoint Manager Plus
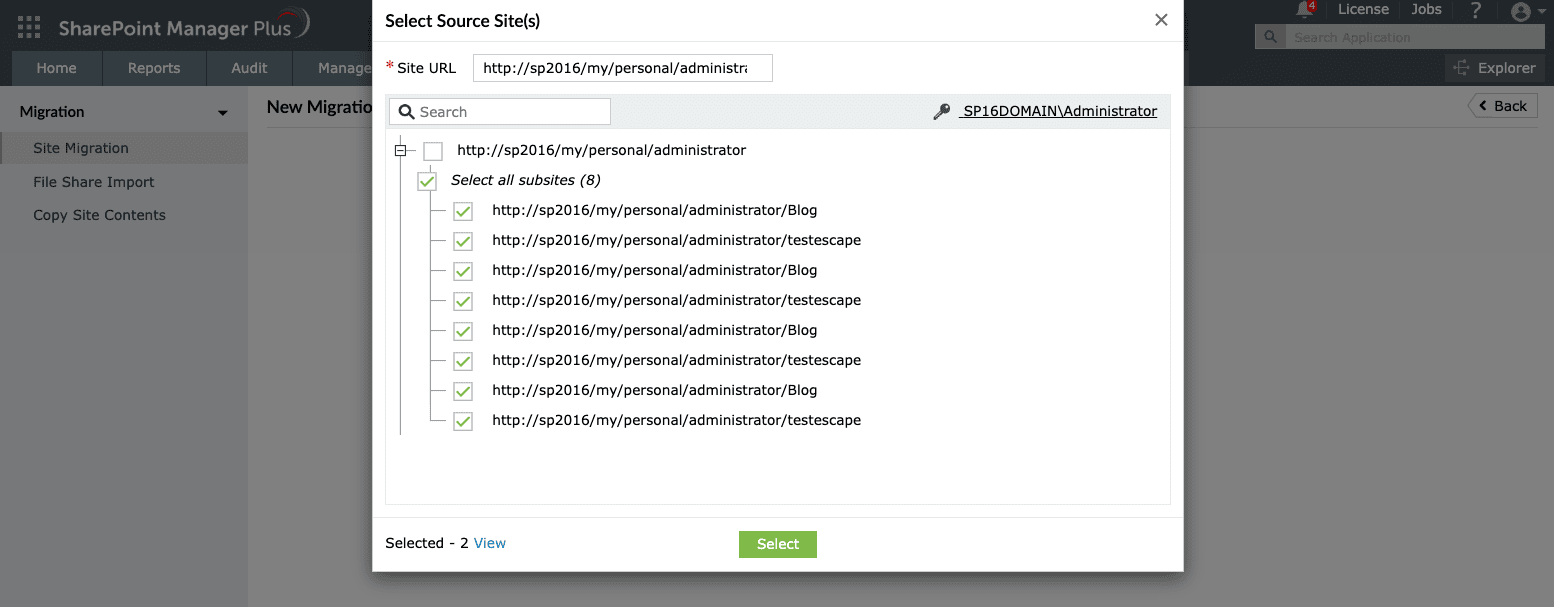
- In SharePoint Manager Plus, navigate to Migration > Site Migration and click + Add Migration Task.
- Choose the source and destination sites using the Select Source and Select Target fields.
- Select all necessary objects to be included, such as site users, groups, permissions, and lists.
- Click Run Now or Run Later based on your preference. You can see the status of the migration on the Site Migration page.
- Upon completion, click View Details under the Result column to get a summary report.


How to effectively migrate to SharePoint Online
Migrating SharePoint data across environments can be complex and time-consuming without the right tools. SharePoint Manager Plus simplifies this process by providing a centralized platform to plan, execute, and monitor migrations efficiently. Handle various migration needs, including on-premises to SharePoint Online, tenant-to-tenant, and intra-environment migrations with ease.
Preserve permissions and metadata
Easily migrate entire SharePoint site collections across environments to maintain consistency and security, all while preserving structure, permissions, and metadata.
Delegate migration jobs
Assign migration tasks to non-administrative users without elevating native permissions. Track migration progress and user actions with detailed reports.
Assess migration readiness
Analyze existing site architecture, permissions, and usage to support pre-migration inventory and cleanup.
Validate post-migration
Audit your SharePoint environment post-migration to ensure content, access, and structures are correctly migrated. Schedule reports to have them delivered to email recipients of your choice.
Manage access during migrations
Grant, remove, or copy permissions in bulk and manage access across sites, libraries, folders, and files, ensuring secure and consistent access control throughout the migration process.
Cross-tenant migration considerations
Cross-tenant migration involves moving SharePoint content between different Microsoft 365 tenants. This scenario is common during mergers, acquisitions, or organizational restructuring.
Key considerations:
- Ensure proper user mapping configuration between tenants.
- Secure authentication using application permissions.
- Have a careful cutover planning process to minimize downtime.
- Validate permissions and data integrity post-migration.
Important tips for your migration journey
Perform a full inventory before migration
Identify all sites, libraries, workflows, and customizations to understand dependencies and avoid missing critical components.
Run incremental migrations
Execute incremental migrations to capture changes made during the transition and ensure data consistency.
Validate permissions and authentication mappings
Carefully review user permissions and authentication settings to prevent access issues after migration.
Plan user adoption and communication
Prepare users with pilot groups, training sessions, and clear communication to ensure a smooth transition and minimize disruption.
FAQs
Yes, SharePoint sites and site collections can be migrated using native tools or third-party solutions. Native tools support structured migrations, while advanced tools like SharePoint Manager Plus provide additional capabilities such as automation, delegation, and detailed reporting.
Yes, you can migrate directly from SharePoint Server 2016 to SharePoint Online using Microsoft’s native tools, such as the SharePoint Migration Tool, or third-party solutions. However, it’s important to perform a pre-migration assessment and clean up unsupported features before migrating.
Classic SharePoint workflows, such as those built using SharePoint Designer or InfoPath, are not fully supported in SharePoint Online and typically do not migrate as is. They need to be redesigned or rebuilt using modern solutions like Power Automate.
To ensure a successful migration, perform a thorough pre-migration assessment, clean up unused or outdated content, choose the right migration strategy (such as a phased or full migration), run incremental migrations, and validate permissions and data after migration. Proper user training and communication also help minimize disruption.
No, SharePoint is not going away. SharePoint Online continues to be a core part of Microsoft 365, with ongoing updates and enhancements. However, on-premises versions are gradually being phased out in favor of cloud-based solutions, making migration to SharePoint Online a recommended long-term strategy.