Configure life cycle management for JumpCloud

About JumpCloud

JumpCloud is a cloud-based IAM platform for businesses to centralize user authentication, access control, and security policies across devices and applications through tools such as SSO, MFA, and access and device management. It also provides directory services for enterprises to store and manage their identities in the cloud.

By integrating JumpCloud with ManageEngine Identity360, you can enable the following life cycle management capabilities:

  • Identity synchronization  

    Import and synchronize user accounts and groups from JumpCloud into Identity360, manage their identities in the Universal Directory, and sync them to other directories and applications. This enables you to oversee all user-related actions from a single console.

  • Provisioning  

    Provision and modify users' access and account attributes across enterprise applications based on the changes in JumpCloud. Provisioning and orchestration eases onboarding and life cycle management, boosting productivity and efficiency.

  • Access management  

    Manage account unlocks, password expiration, and group membership of users in JumpCloud from the Identity360 portal. This helps you to simplify user account maintenance and enhance security by ensuring timely password updates and user group management.

Provisioning features supported

  • Creation: Automatically set up a new user account in JumpCloud via provisioning when a user is created in Identity360.
  • Modification: Modify user attributes in JumpCloud as and when their profiles get modified in Identity360.
  • Deletion: When a user is provisioned through Identity360, the user account will be automatically deleted in JumpCloud.
  • Enable or disablement: Promptly activate or suspend a user account in JumpCloud when the respective account is enabled or disabled in Identity360.
Note:
  • Once user accounts have shifted from Staged status to Active or Suspended status in JumpCloud, they cannot be reverted to Staged status.
  • Once provisioning for JumpCloud is enabled, user creation, modification, or deletion will automatically happen as and when users are created, modified, and deleted in Identity360.

The following steps will help you configure the supported life cycle management capabilities for JumpCloud from Identity360.

Prerequisites

  1. Log in to JumpCloud as an admin or as a user with admin privileges.
  2. In the left panel, navigate to Settings > Organization Profile tab.
  3. Under General, copy the Organization ID.
    JumpCloud organization settingsThe organization settings in JumpCloud.
  4. Click the Profile icon in the top-right corner and select Administrators.
    JumpCloud administrators settings
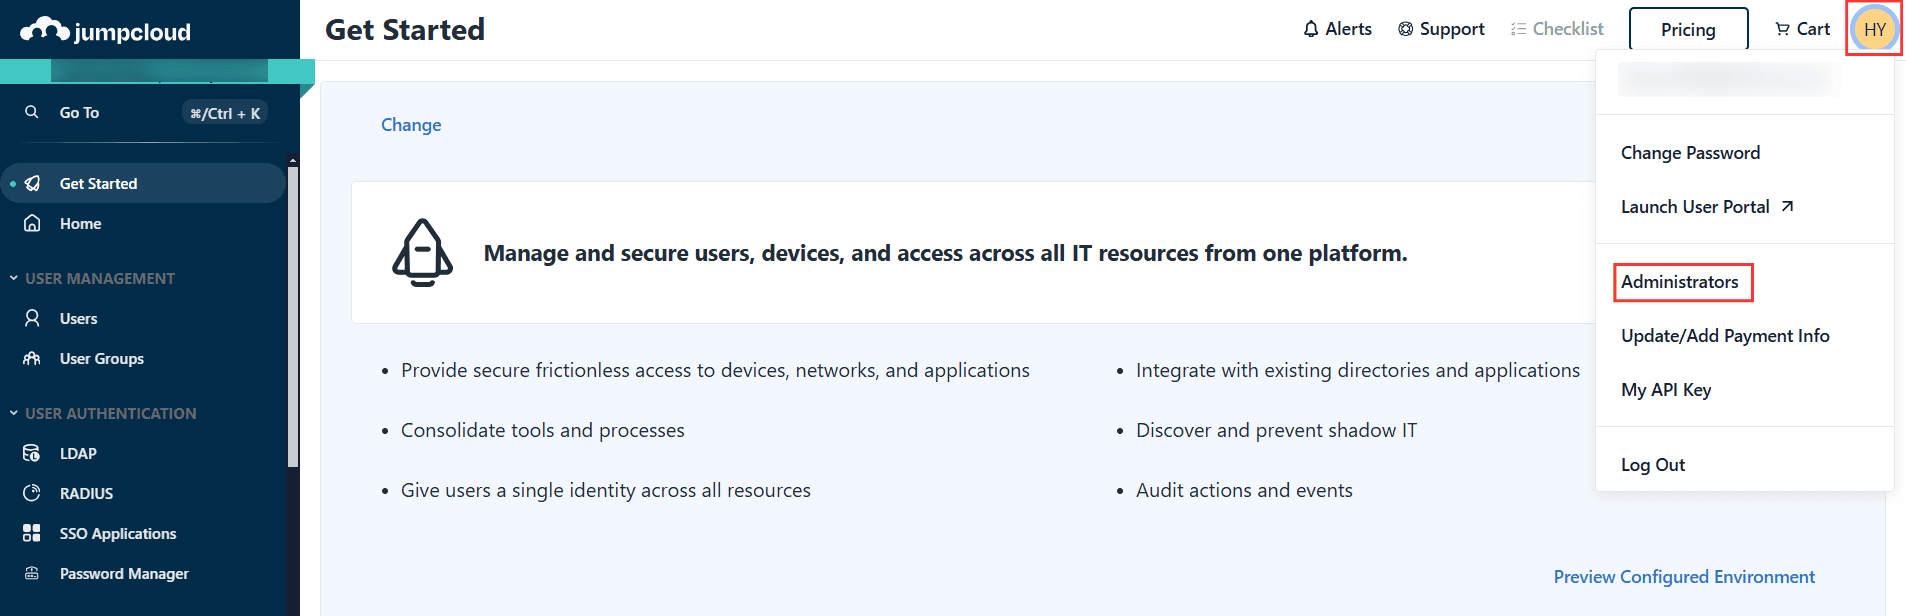
The admin settings in JumpCloud.
  5. Select the user designated with the role of Administrator With Billing.
    JumpCloud modification of admin permissions
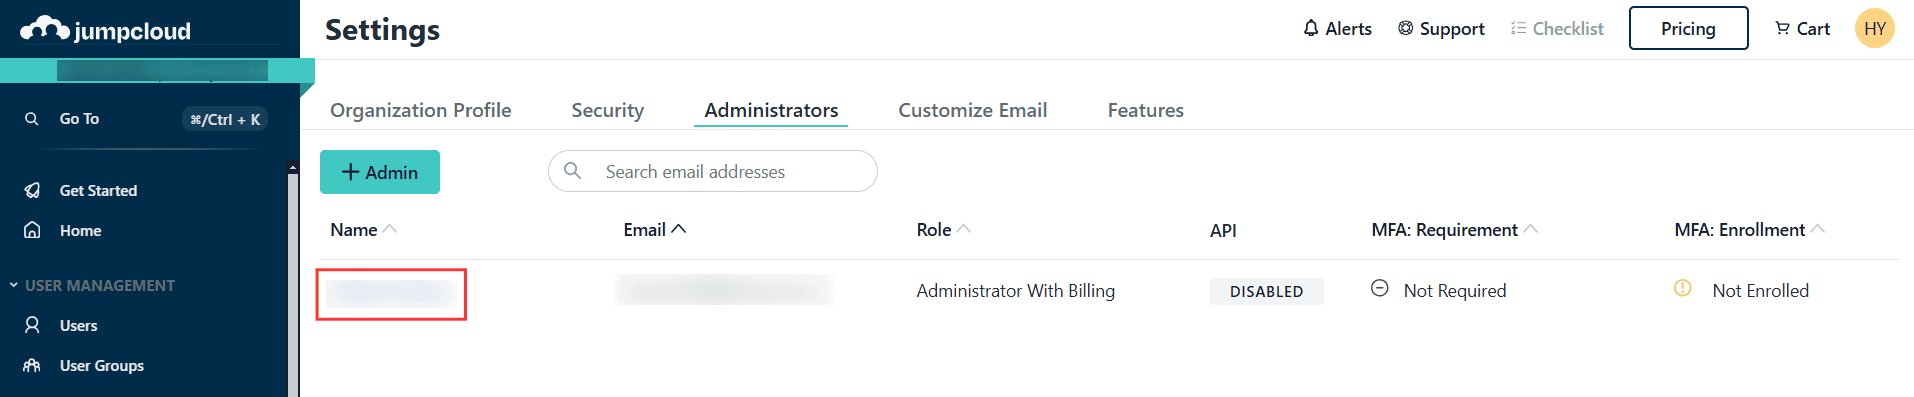
Modifying admin permissions in JumpCloud.
  6. Check the box beside Enable API access and click Save.
    JumpCloud API access enablement
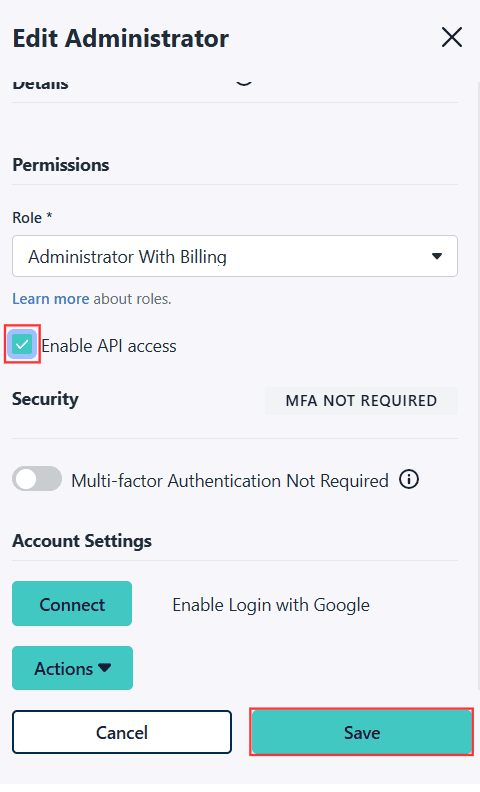
Enabling API access for the admin in JumpCloud.
  7. Click the Profile icon again and select My API Key.
    JumpCloud profile settings
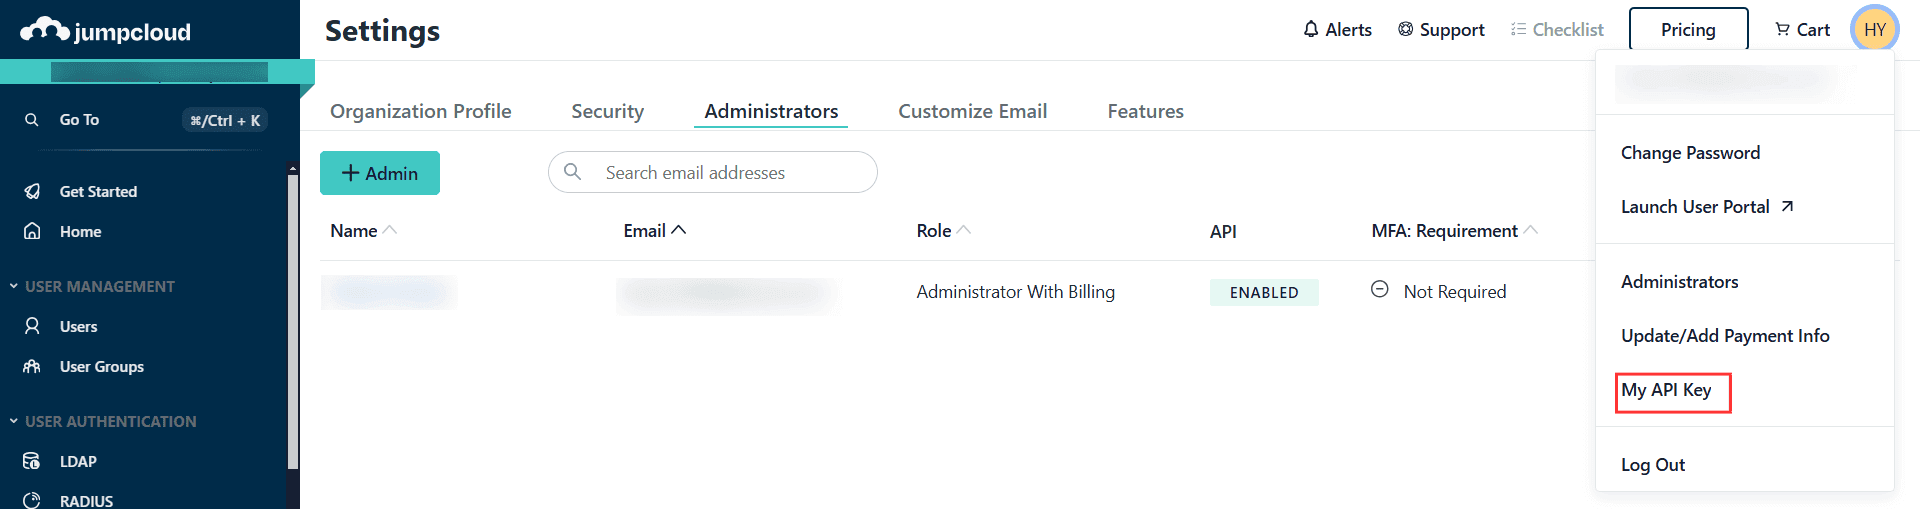
The profile settings in JumpCloud.
  8. Choose the No Expiration option from the Expiration Date drop-down and click the Generate New API Key button.
    JumpCloud API Key generation
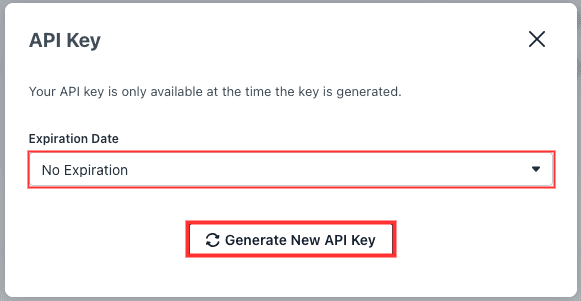
Generating new API Key in JumpCloud.
  9. Copy the new API Key.
    JumpCloud API Key
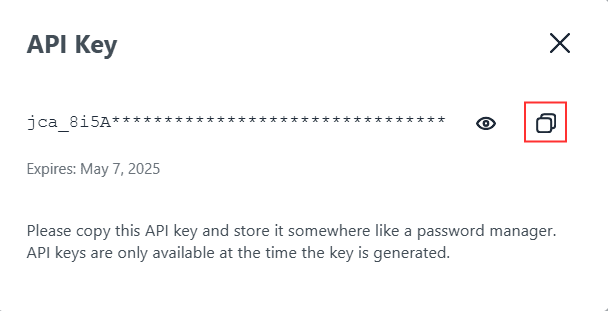
The API Key in JumpCloud.

Identity360 configuration steps

  1. Log in to Identity360 as an admin, super admin, or technician with a role that has Application Integration permissions.
  2. Navigate to Applications > Application Integration and click Create New Application.
  3. Select JumpCloud from the applications displayed.
    Note: You can also find JumpCloud from the search bar located at the top.
  4. Under the General Settings tab, enter the Application Name and Description, if necessary.
  5. Under the Choose Capabilities section, select the capabilities you wish to enable, and click Continue.
    Identity360 application configuration general settings
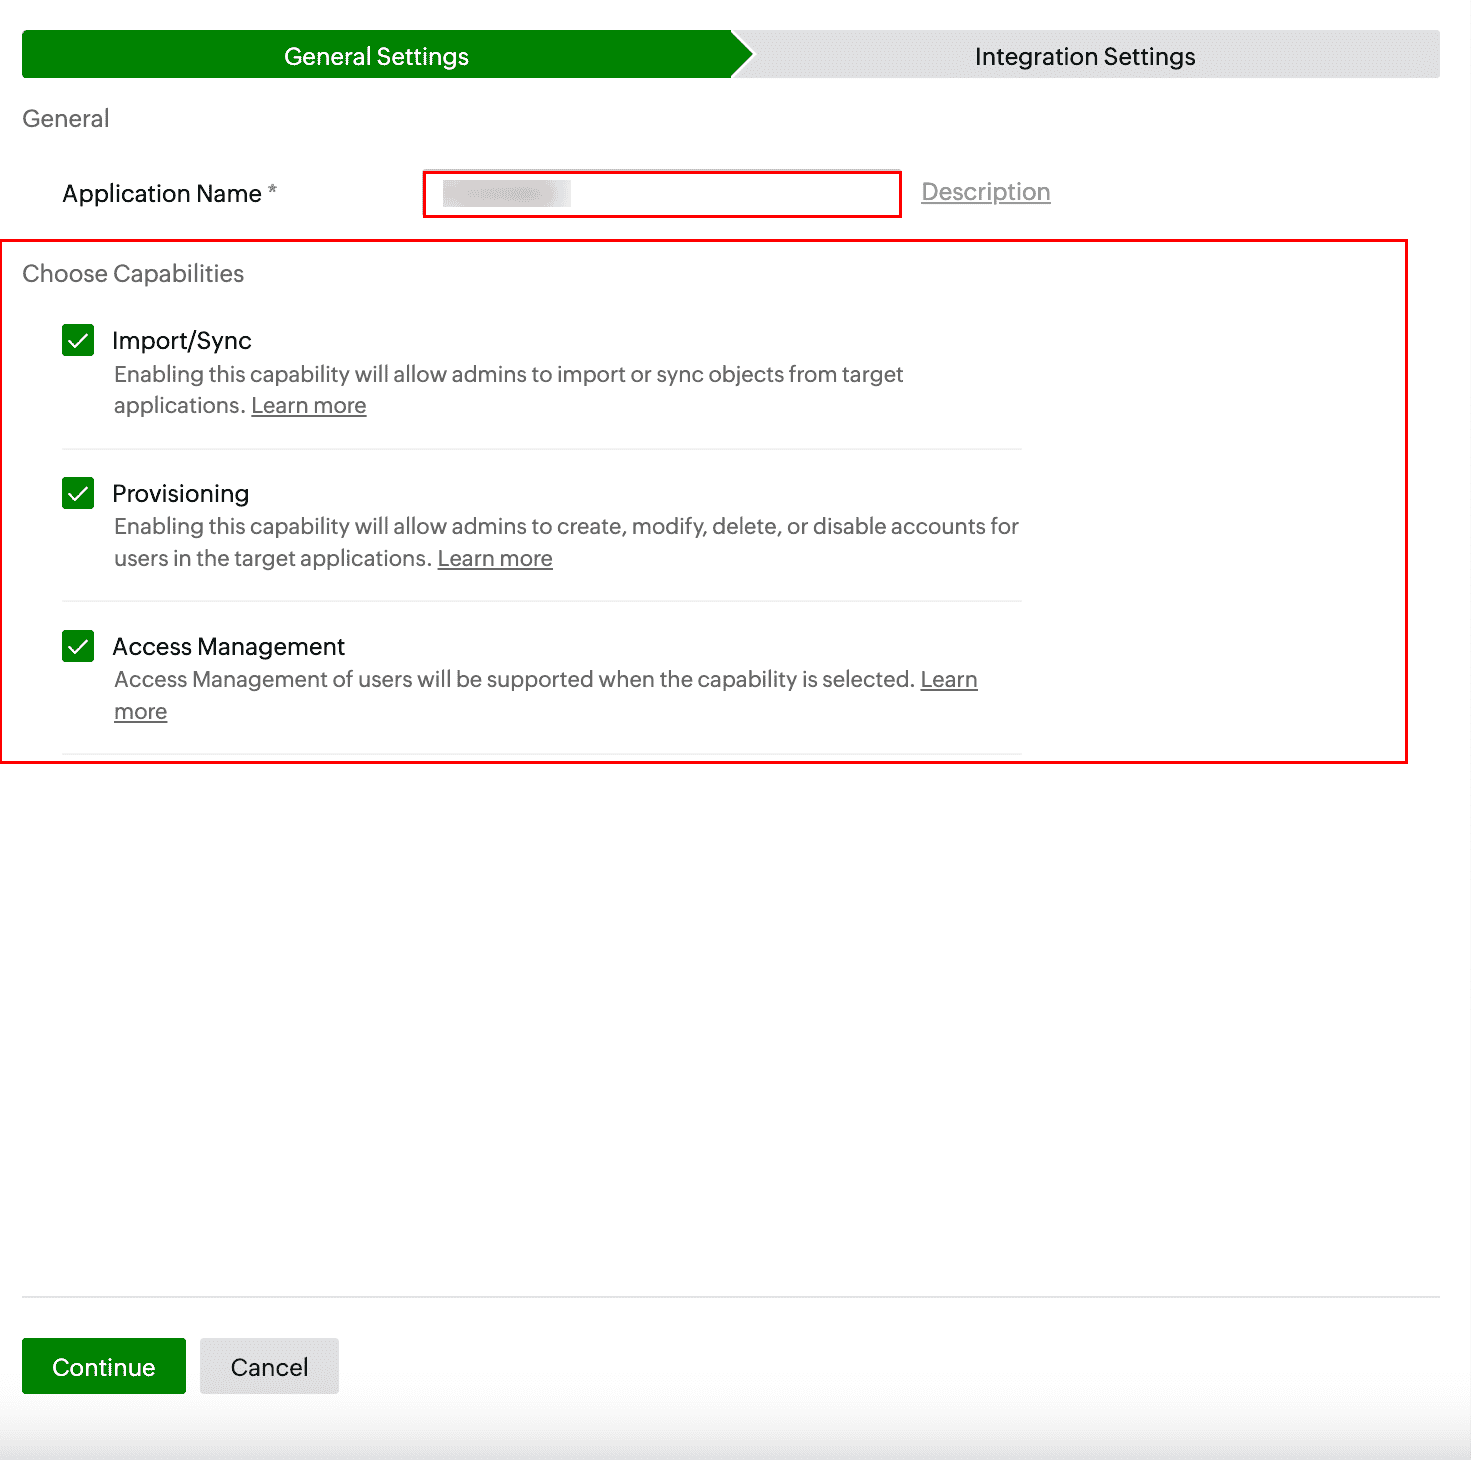
The general settings of LCM configuration for JumpCloud.
    Note: If you select Provisioning or Access Management, the Import/Sync option will automatically be enabled. This is because the data imported or synchronized from an application is used for provisioning and access management capabilities.
  6. Under the Integration Settings tab, select a suitable Connection from the drop-down under the Application Connection section. If there are no preconfigured connections, click Create New Connection to set up a new connection.
  7. Click Save to complete configuring Import/Sync, Provisioning, or Access Management for the application.

Application connection

An application connection is a link established between Identity360 and JumpCloud to automate the process of syncing, creating, updating, and deleting user accounts in JumpCloud. This ensures that user accounts and roles are consistently managed and synchronized between Identity360 and JumpCloud.

Steps to create a connection with JumpCloud

  1. After giving application-specific details, navigate to the Integration Settings tab and click Create Connection.
    Note: Alternatively, you can create and manage application connections by navigating to Applications > Application Connection > Create New Connection > Choose JumpCloud from the Application drop-down.
    New application connection creation for JumpCloud
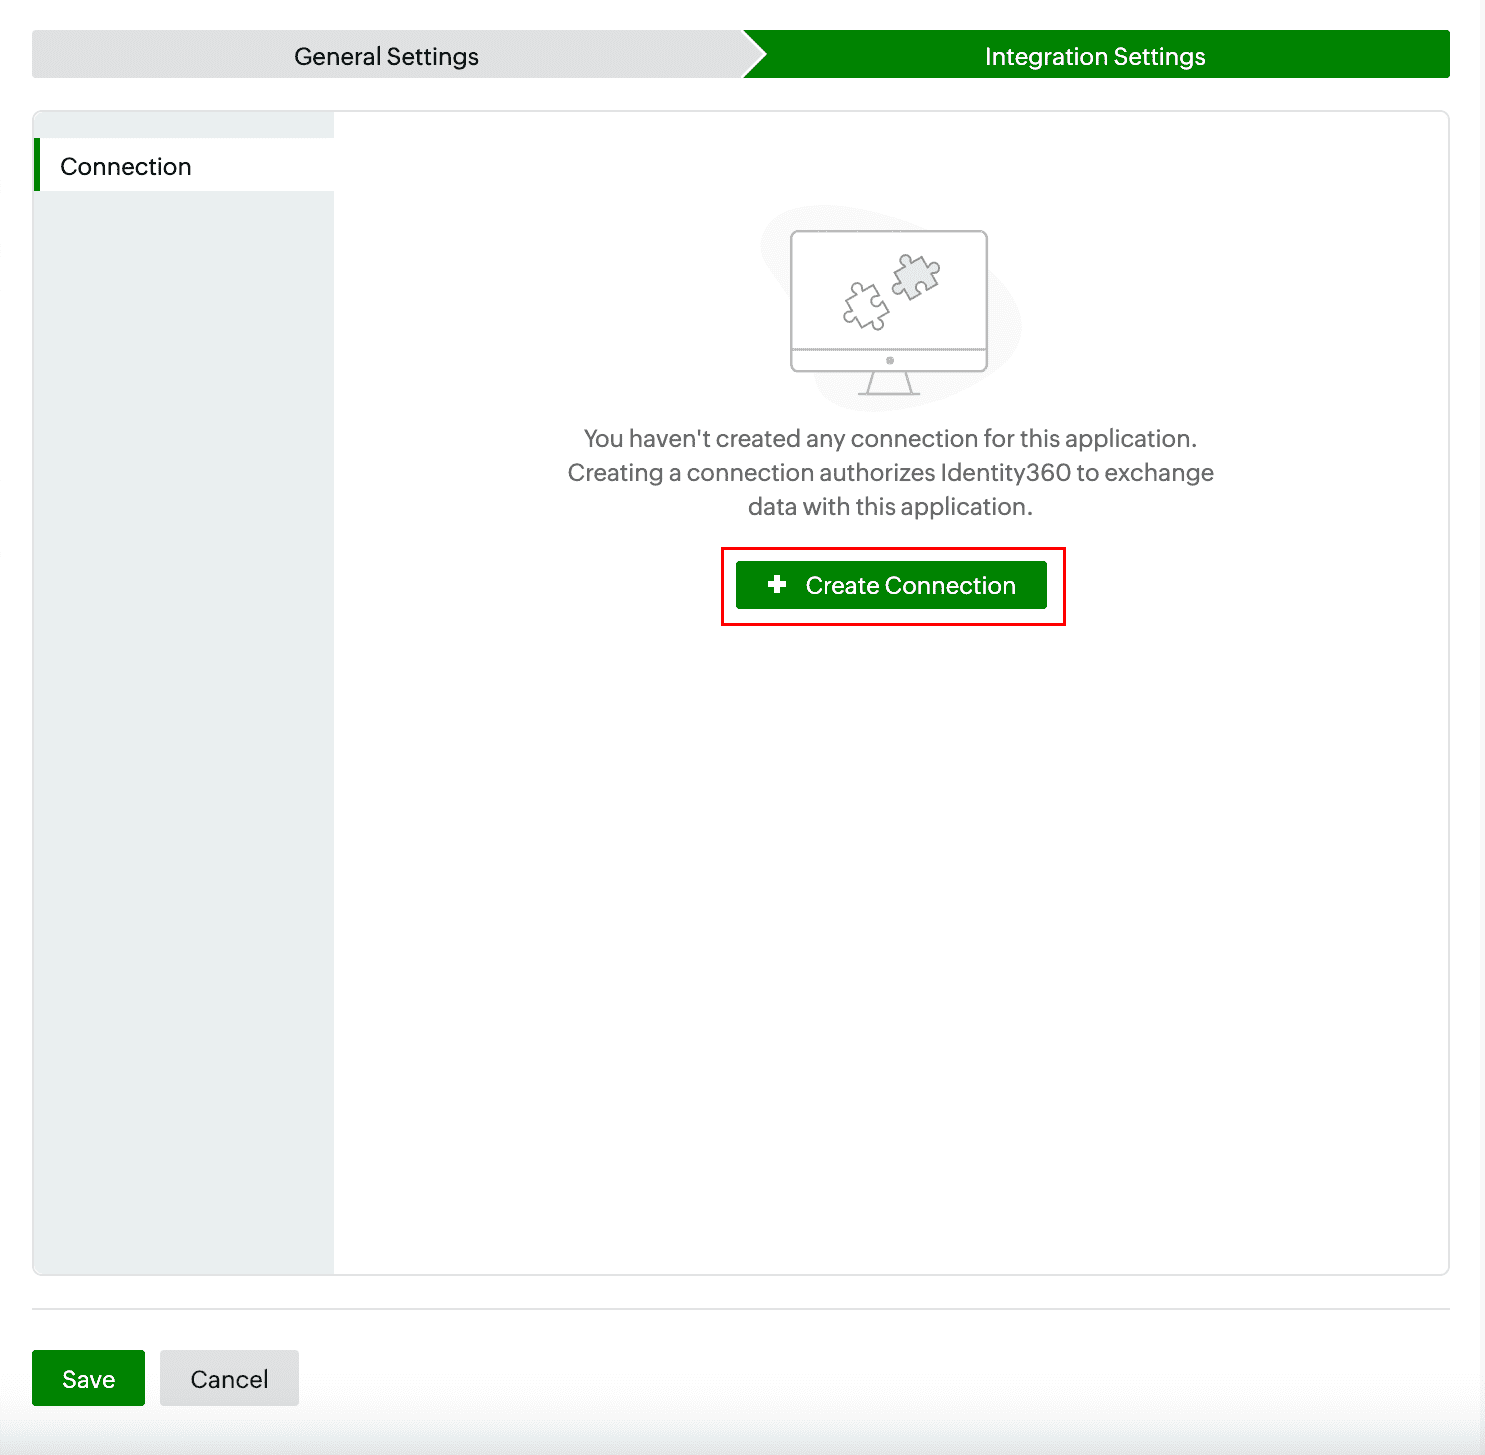
Creating a new application connection for JumpCloud.
  2. In the configuration pane, enter the Connection Name.
  3. Paste the Organization ID value copied during step 3 of the prerequisites.
  4. Enter the API Key value copied during step 9 of the prerequisites.
  5. Click Authorize. In case of any issues with establishing the connection, follow the steps for resolution here.
    Connection configuration for JumpCloud
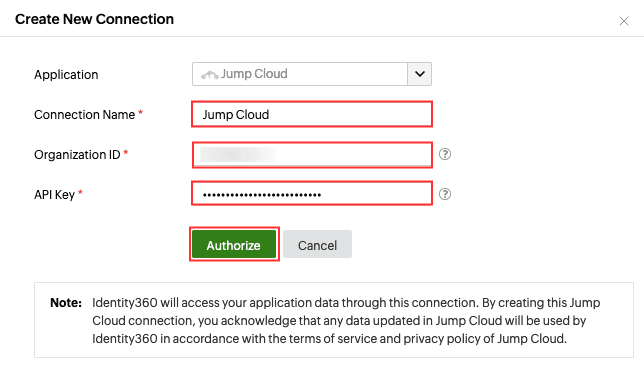
Configuring the connection for JumpCloud.
  6. You can test if the connection is active by clicking Test or reestablish the connection by clicking Reconnect.
    Connection test for JumpCloud
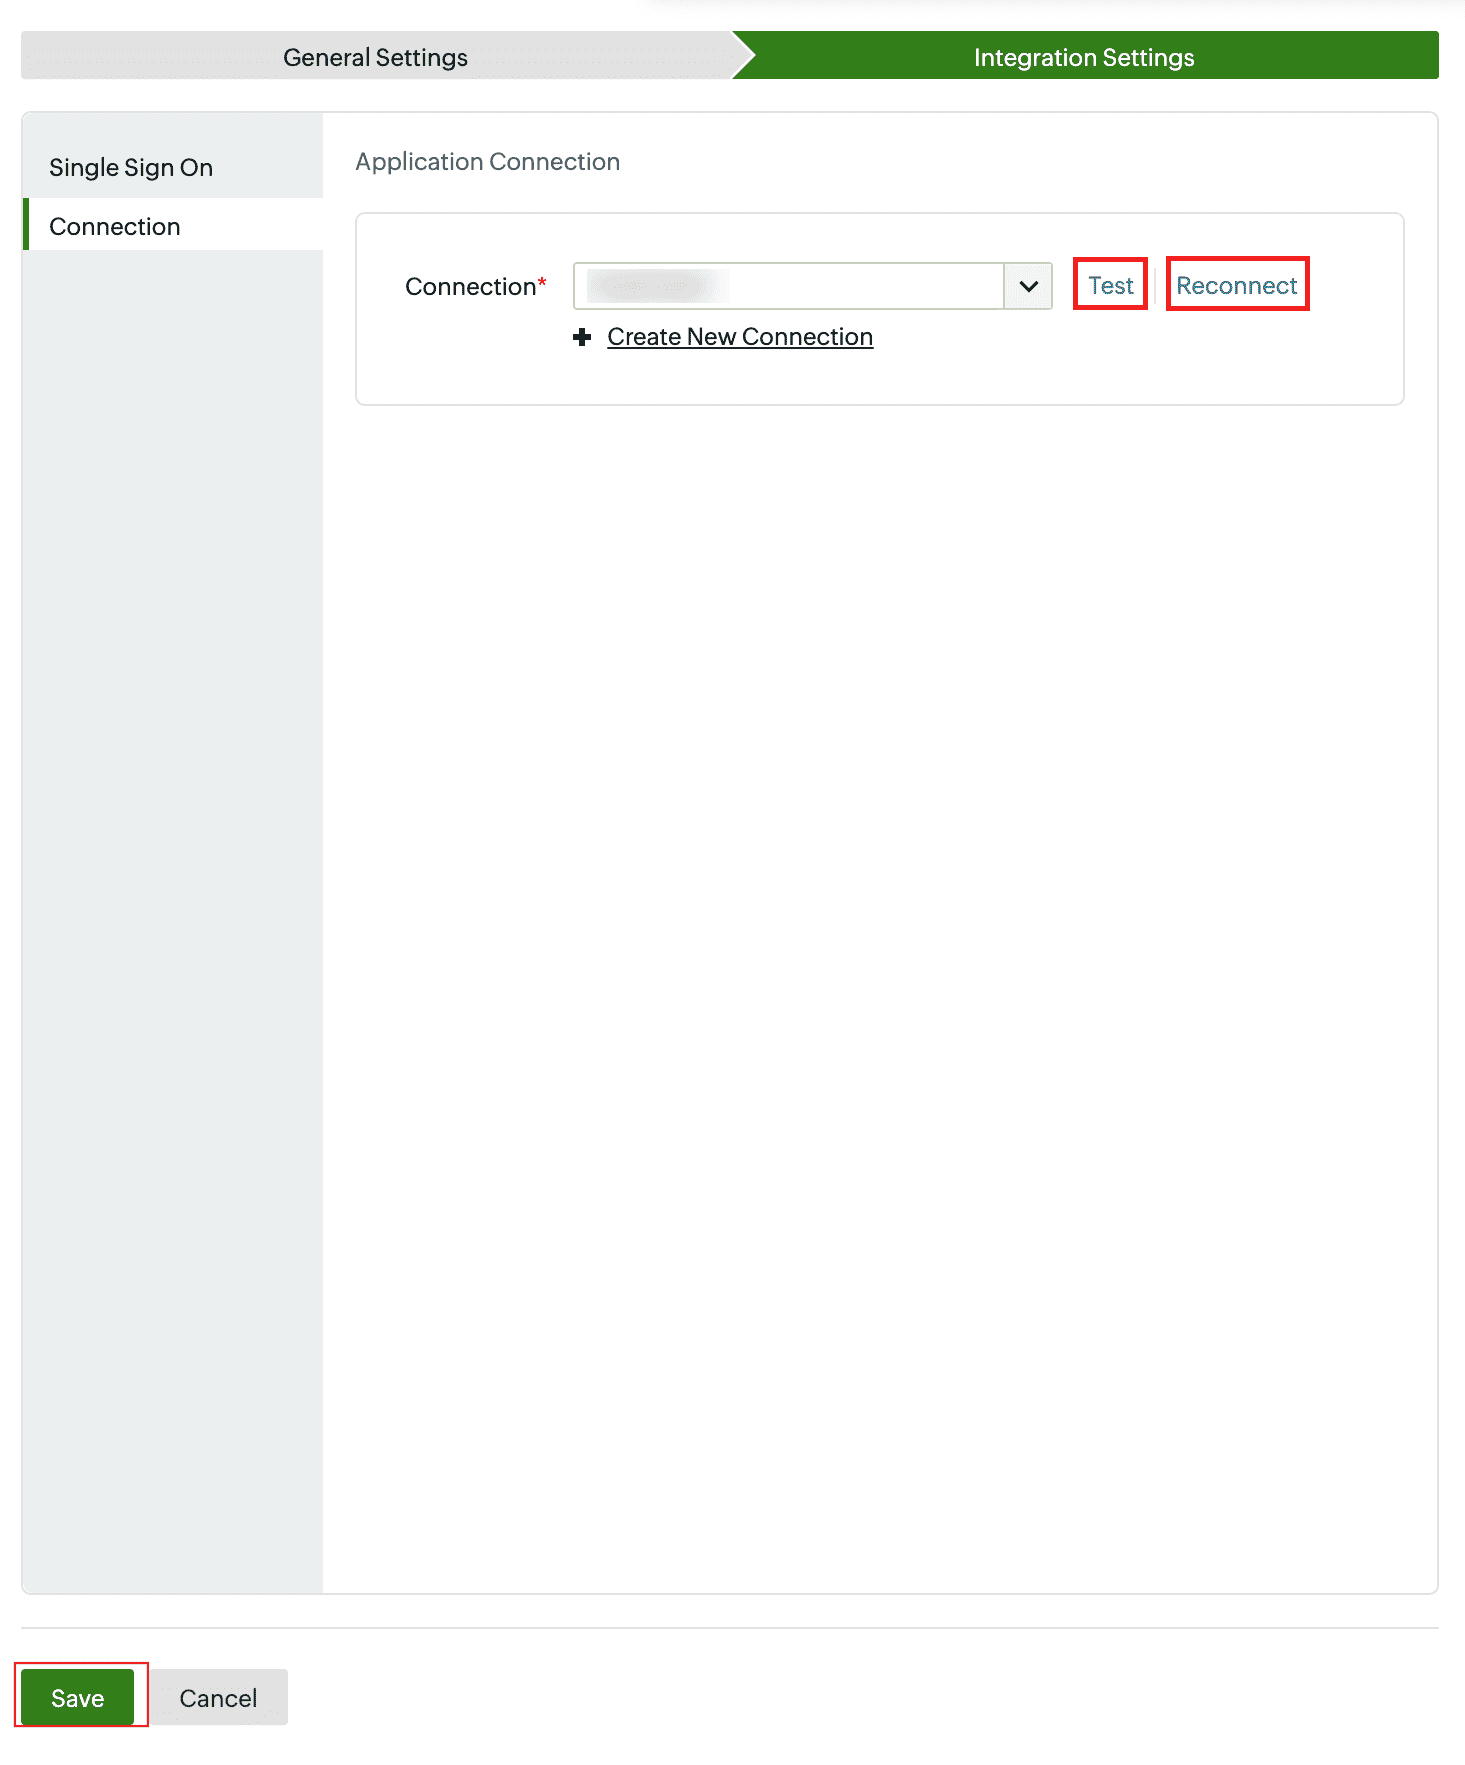
Testing the connection to JumpCloud.
  7. Click Save to complete the application configuration.

Don't see what you're looking for?

  •  

    Visit our community  

    Post your questions in the forum.

     
  •  

    Request additional resources  

    Send us your requirements.