How do I configure Okta SSO using ADManager Plus?
Last updated on:In this article:
Objective
This article explains how to integrate Okta with ADManager Plus using SAML 2.0 to enable secure SSO. This integration allows users to log in to ADManager Plus using their Okta credentials, streamline access, improve authentication security, and reduce password-related overhead for administrators.
Prerequisites
- You must have access to the Okta admin console.
- Ensure you have administrator privileges in ADManager Plus.
- The users should already be present in AD.
Steps to follow
Step 1: Configure ADManager Plus in Okta
- Log in to the Okta admin console and switch to the Classic UI.
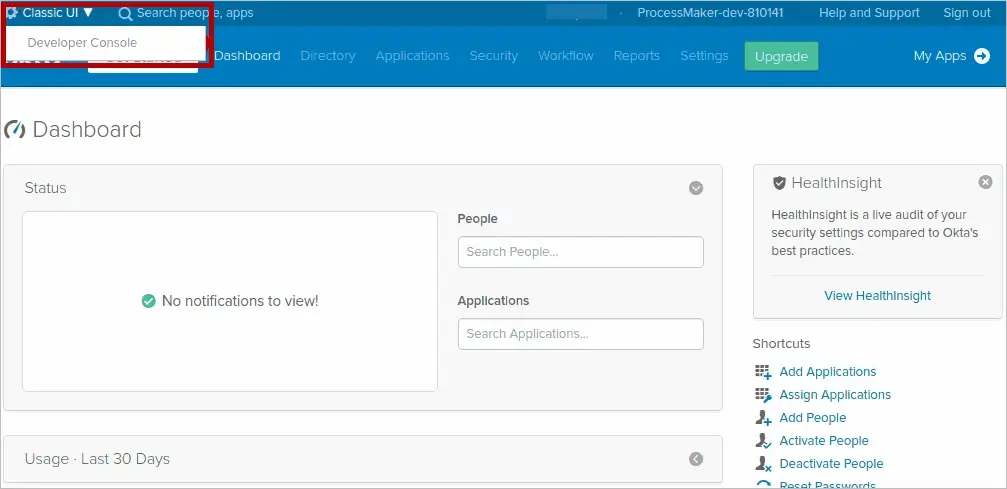
The Okta admin dashboard with the option to switch to the Classic UI. - Go to Applications > Create New App.
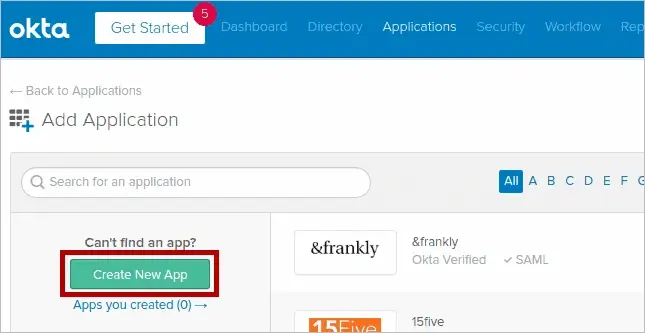
The Okta application catalog with the Create New App option highlighted. - Choose Web as the Platform and SAML 2.0
as the Sign on method. Click Create.
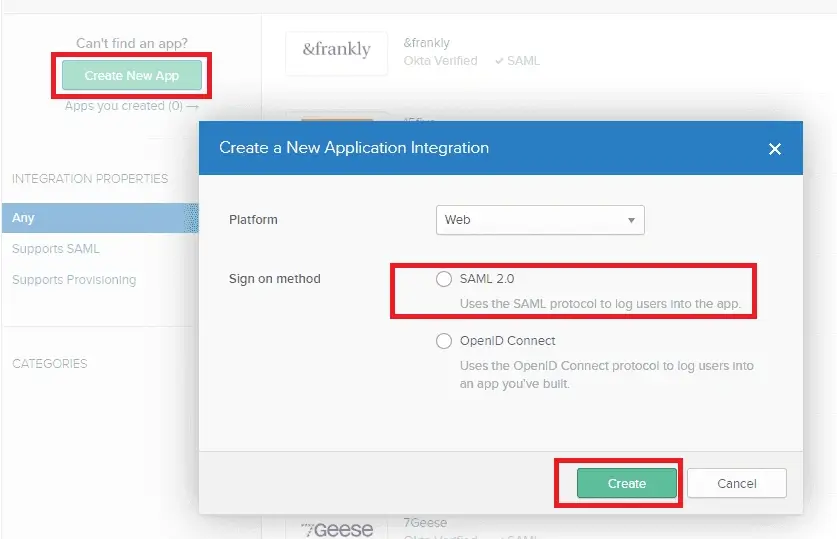
The Create New Application Integration window in Okta with SAML 2.0 selected as the sign-on method. - Under General Settings, enter the application name and upload a logo (optional), then click Next.
- Under the Configure SAML section in Okta, provide the following details by
logging
in to ADManager Plus > Delegation > Configuration > Logon Settings
> Single Sign-On > SAML Authentication. Ensure
Okta is selected as the Identity Provider, and refer to
the Service
Provider Detail section in ADManager Plus for the required values:
- Single sign on URL: Copy the ACS/Recipient URL from ADManager Plus.
- Audience URI (SP Entity ID): Use the Issuer URL/Entity ID from ADManager Plus.
- (Optional) Click Show Advanced Settings in Okta to configure the sign-out URL and certificate details if needed.
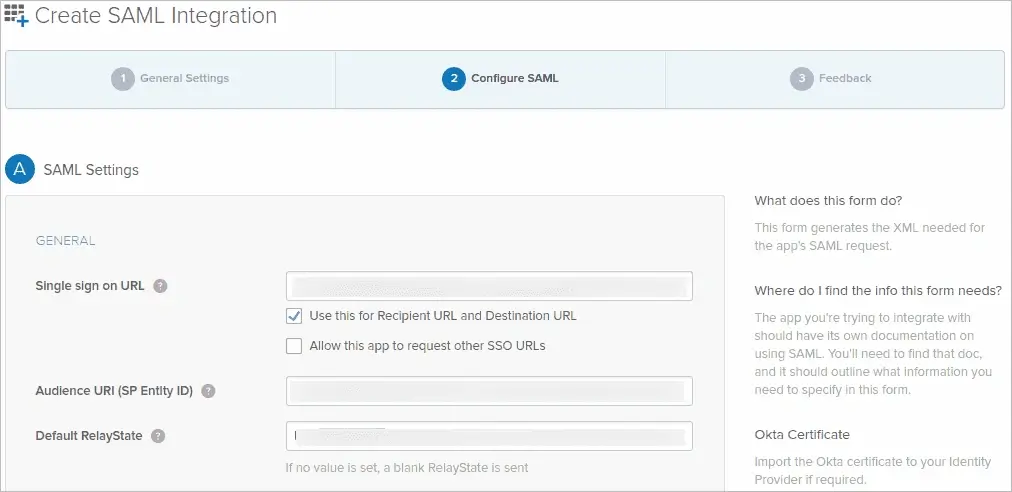
The Configure SAML page in Okta with fields for Single Sign-On URL, Audience URI, and RelayState. 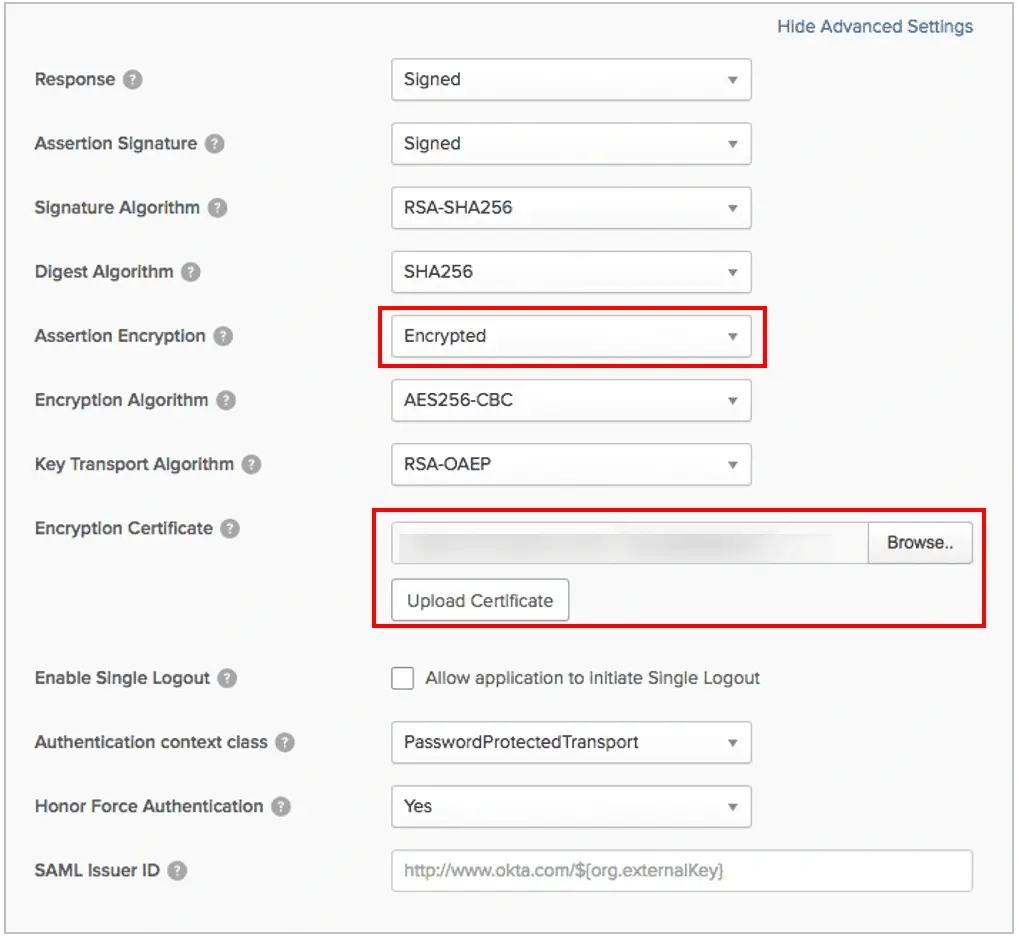
Advanced SAML settings in Okta with assertion encryption enabled and an encryption certificate upload option. - In the Feedback tab, select the appropriate option and click Finish.
- After creation, go to the Sign On tab and find the Metadata URL. Open this URL in a new tab and save it as an XML file.
- Go to the Assignments tab and assign users or groups. Click
Done.
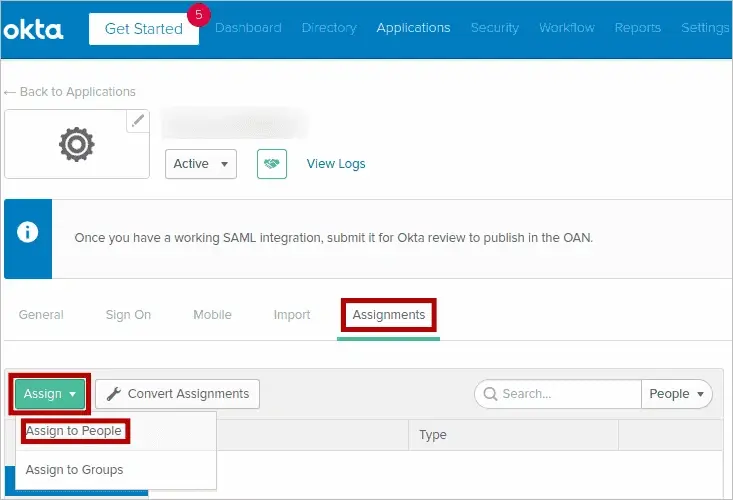
The Assignments tab in Okta with the Assign to People option selected for an application. 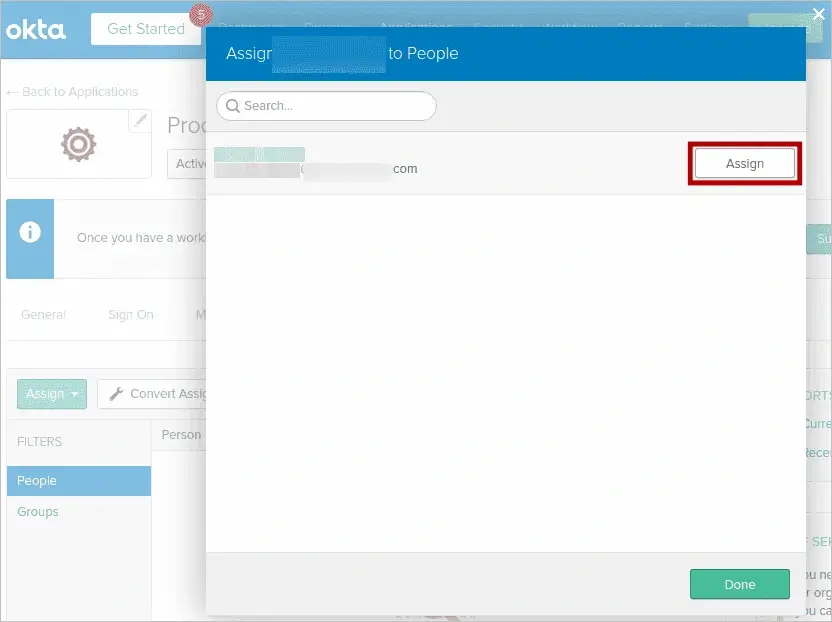
The Assign Application to People dialog in Okta with a user selected for assignment.
Step 2: Configure Okta in ADManager Plus
- Log in to ADManager Plus.
- Navigate to Delegation > Configuration > Logon Settings > Single Sign On.
- Check the Enable Single Sign-on option and choose SAML Authentication.
- Select Okta from the Identity Provider (IdP) drop-down.
- In the SAML Config Mode, choose the Upload Metadata File option. Click Browse and upload the metadata XML file downloaded from Okta.
- (Optional) Check:
- Sign SAML Logout Request
- Sign SAML Logout Response
- In Mapping Attribute Selection, select userPrincipalName.
- To enforce SAML login exclusively, check Force SAML Login.
- Click Save to finalize the integration.
Tips
- If issues occur, verify that ADManager Plus and Okta have matching ACS and Entity ID values.
- Use test users before applying broadly.
- Confirm time sync between servers for token validity.
How to reach support
If the issue persists, contact our support team here.