Key Manager Plus Agent
Key Manager Plus enables users to discover and manage SSL certificates deployed across their network using lightweight Key Manager Plus agents. These agents are the components of the Key Manager Plus server and can be deployed on remote systems to perform certificate-related operations seamlessly.
This guide provides step-by-step instructions for installing and managing the Key Manager Plus agent (hereafter referred to as the agent) on Windows-based remote systems, especially those not directly connected to the Key Manager Plus server.
Note: Before proceeding, ensure you have administrative privileges on the target systems to perform the installation and make necessary configurations.
At the end of this document, you will have learned the following topics in detail:
- Installing the Agent
- Managing the Agent
- Discovering SSL Certificates using Agent
- Signing Certificates using Agent
- Deploying Certificates using Agent
- Deploying Certificates in Multiple Servers using Agent
1. Installing the Agent
Note: Starting from build 6680, it is no longer necessary to install agents on the CA server to manage SSL certificates. Instead, agents can be installed on any server as long as the server can connect to the required CA server.
Notes: (Applicable from build 7030 onwards)
- Agent can be installed using a direct executable file via a seamless installer wizard.
- Agent can be installed on multiple endpoints easily at once using the Windows Group Policy Objects (GPO). To do so, refer to this document for a more detailed installation procedure.
To install the agent, follow these steps:
- Navigate to Discovery >> Agents >> Download Windows Agent. You can also download the agent from SSL >> Windows Agent >> Download Windows Agent.
- From the pop-up that opens, download the agent file (Executable or Zip file). The downloaded package already contains the necessary configurations needed to perform the required operations. Just ensure the account in the server in which the agent is installed has sufficient privileges to perform certificate discovery. Also, copy and save the Install Key in a secure location.
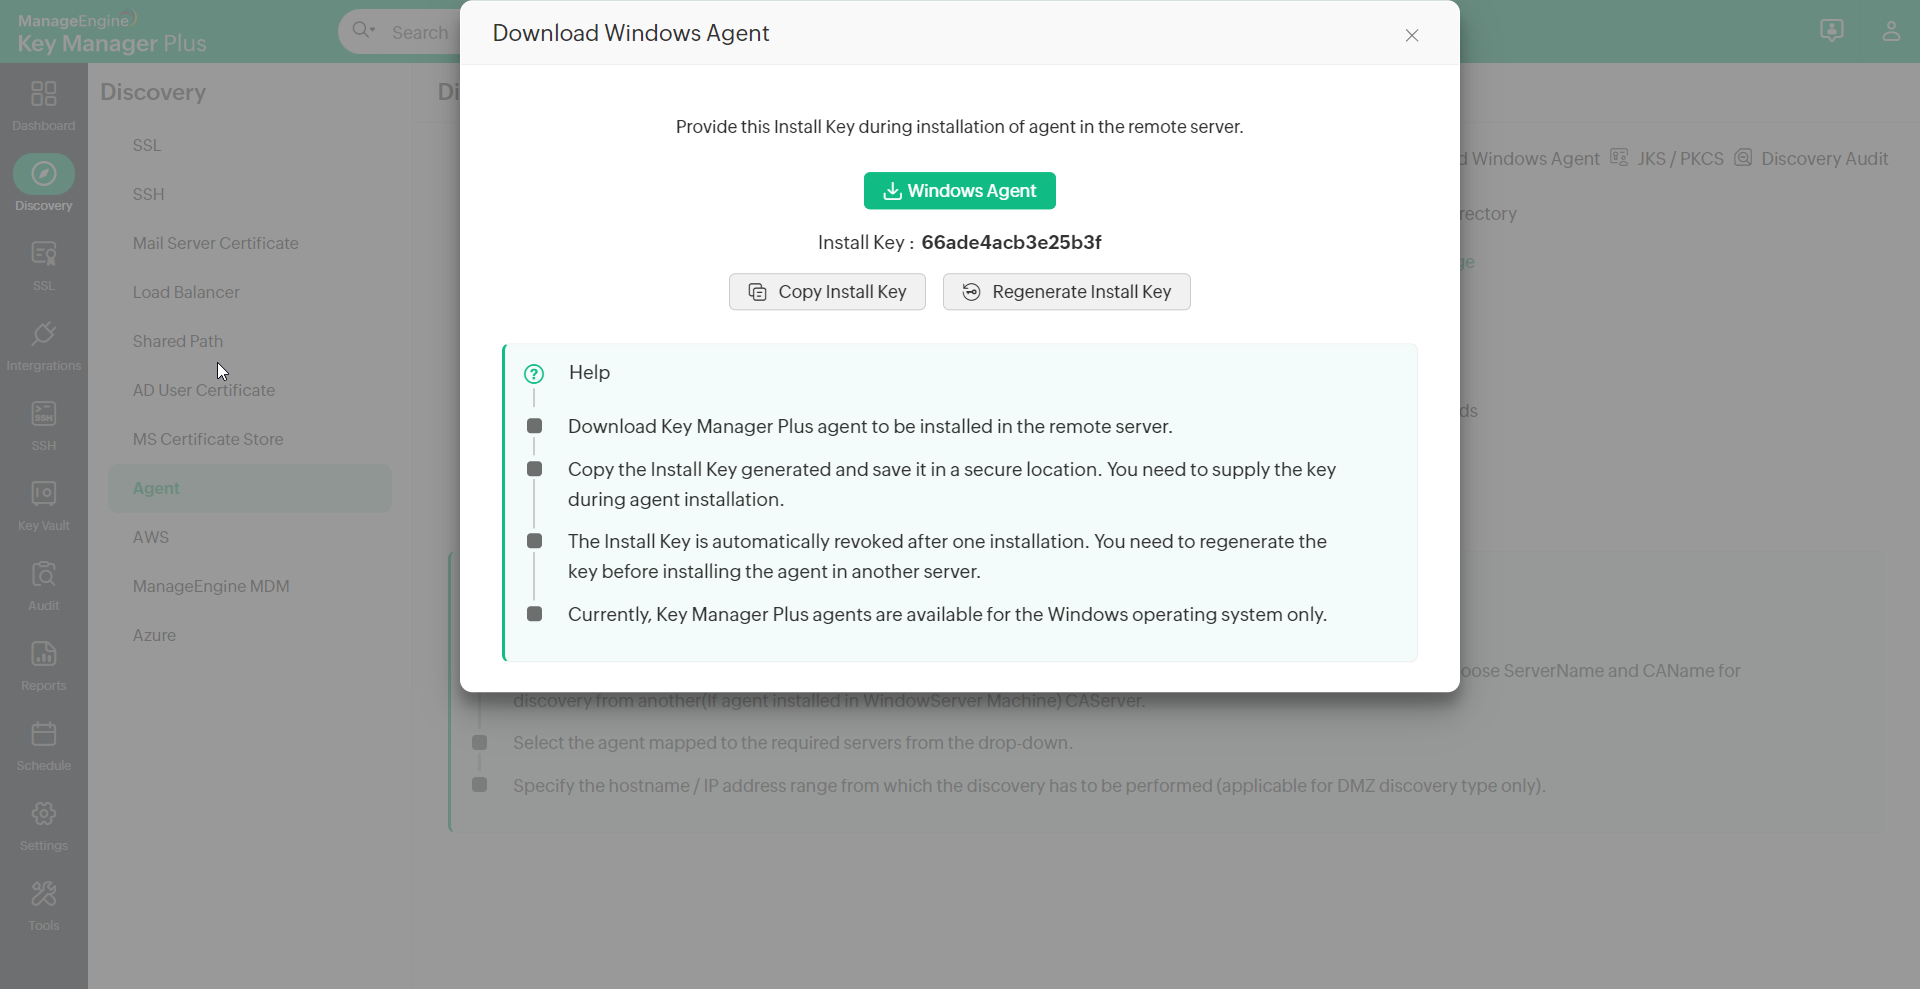
Note: The Install Key is automatically revoked after a single use. To install the agent on another server, you must generate a new Install Key from the Key Manager Plus server and use it during the next installation.
- For builds prior to 7030, follow these steps to install the agent as a Windows service:
- Copy the ZIP file downloaded from the Key Manager Plus server to the target remote server where the agent is to be installed.
- Unzip the file and place the extracted contents in a secure, unshared directory to ensure safe handling of installation files.
- Open Command Prompt with administrator privileges. Navigate to the agent installation directory and execute the following command: AgentInstaller.exe install <Install Key>. Replace <Install Key> with the actual Install Key that was securely stored earlier.
- Execute the command AgentInstaller.exe start to start the agent as a Windows service.
- Execute the command AgentInstaller.exe stop to stop the agent.
- For builds after 7030, follow these steps to install the agent as a Windows service:
- Launch the downloaded executable agent file with the administrator's permission.
- In the installation wizard that opens, continue by specifying the agent installation directory and the copied agent Install Key to complete the installation.
- Upon successful installation, any previously installed agent in the endpoint (KMPAgent) will be removed and the new agent will get started automatically. You can verify the new agent version in Key Manager Plus.
After a successful installation, the deployed agent on the endpoint will appear under the SSL >> Windows Agents section in Key Manager plus, displaying the relevant endpoint details. If the agent does not appear in the Windows Agents section after installation, follow the steps below to troubleshoot and reinstall:
- Open Command Prompt with administrator privileges and navigate to the folder where the agent is installed. For example: C:\Program Files\ManageEngine\KMPAgent
- Execute the command 'Installer.exe setserverconfig'.
- Execute the following command to configure the server IP details for the agent: 'Installer.exe setserverconfig serverip 99.99.99.99'. Replace `99.99.99.99` with the IP address of the server where the agent is installed.
2. Managing the Agents
Key Manager Plus enables administrators to monitor and manage the agents deployed across various remote systems, providing detailed insights into agent activity and performance. To manage Key Manager Plus agents: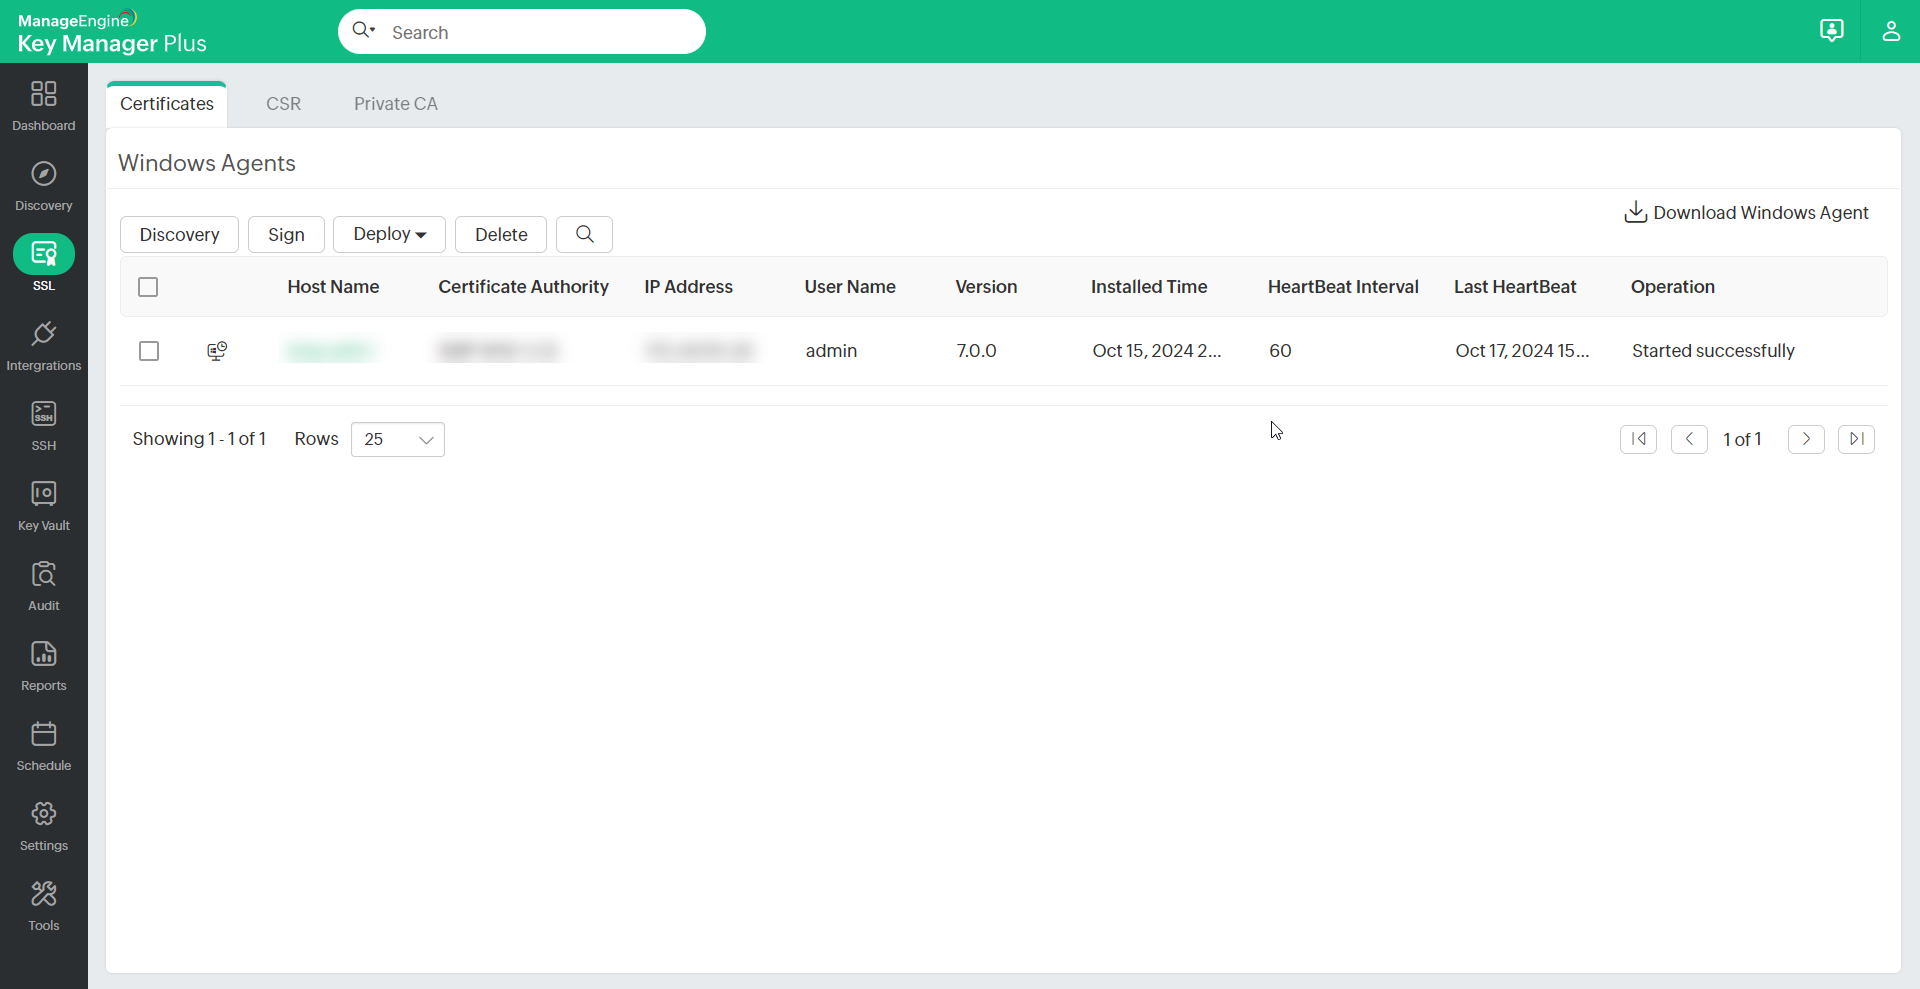
- Navigate to SSL >> Windows Agents.
- In the window that appears, you will see a list of all Key Manager Plus agents installed on remote machines. For each agent, the following details are displayed:
- IP Address
- User Name
- Agent Version
- Installation Time
- HeartBeat Interval
- Last Heartbeat
- Last Operation Performed
- To remove an agent from the list, select the desired agent and click Delete from the top menu.
3. Discovering SSL Certificates using Agents
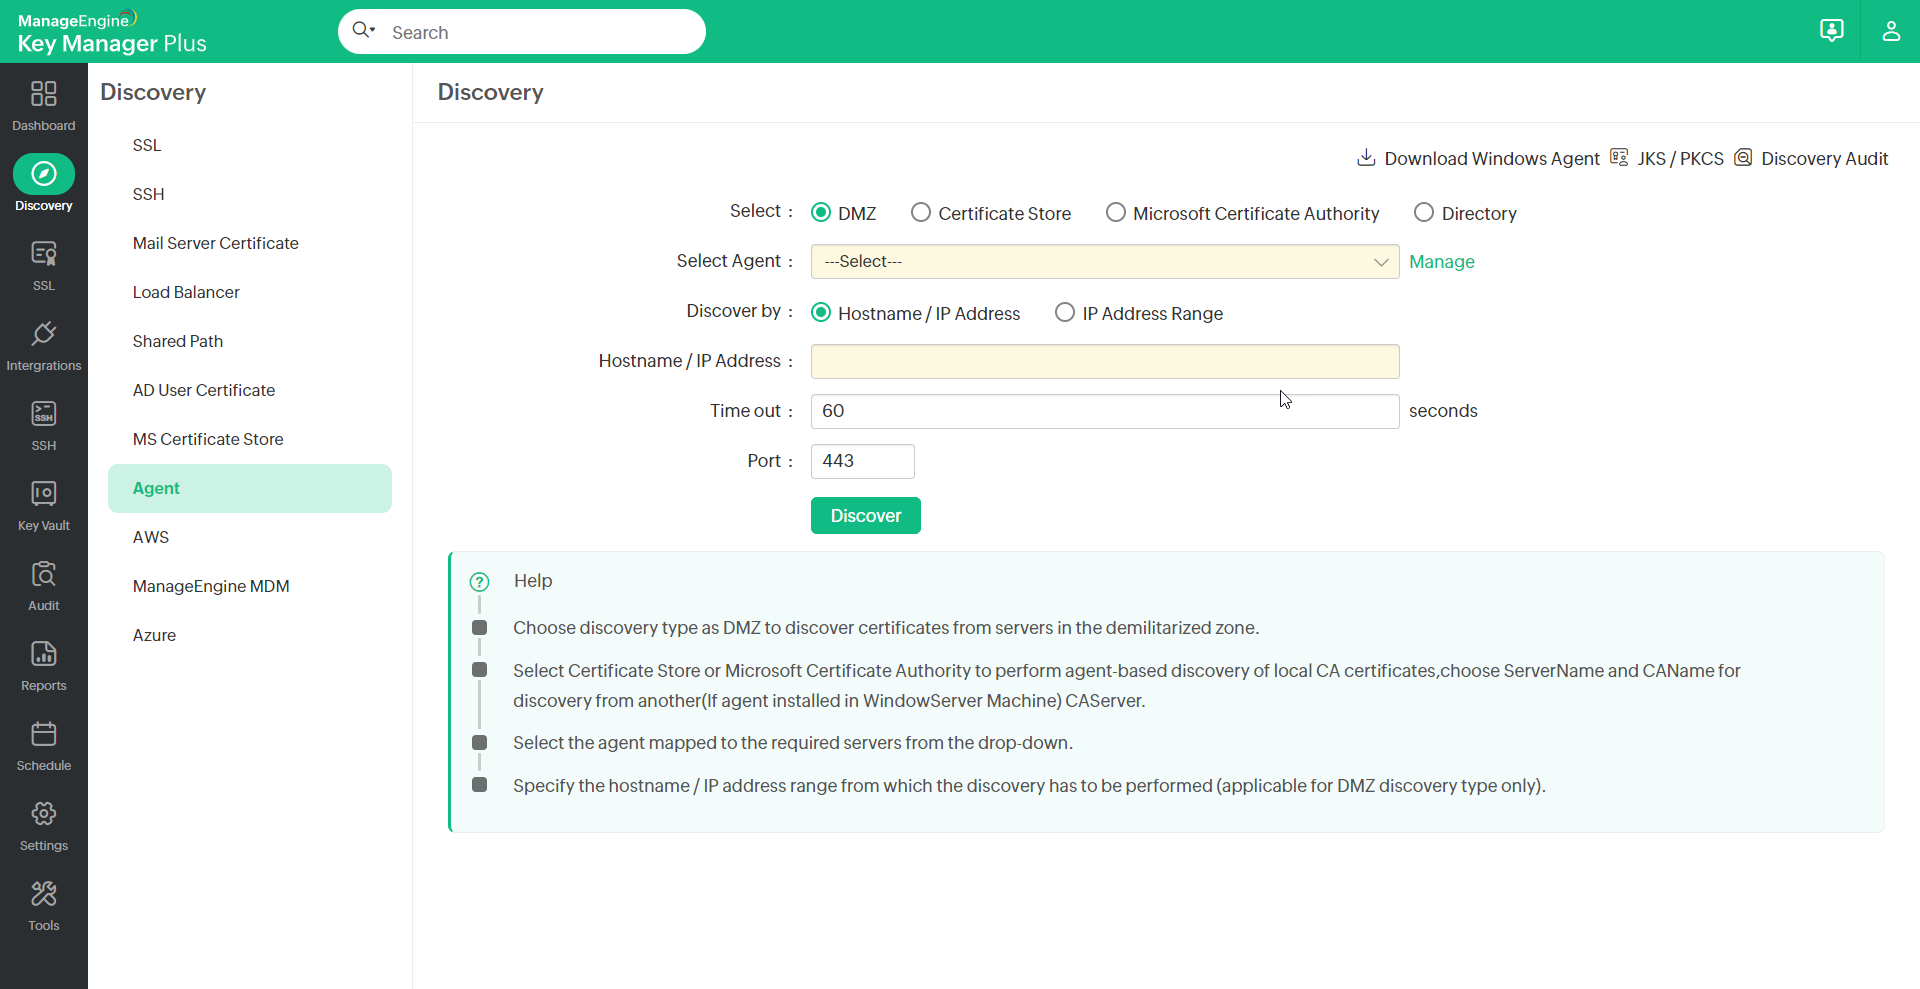
To discover SSL certificates via agents, navigate to Discovery >> Agent and select the desired agent. Alternatively, go to SSL >> Windows Agent, choose the agent, and click Discovery. In the pop-up window, choose one of the following discovery methods:
- DMZ: Use this option to discover certificates from servers located in a demilitarized zone.
- Select the discovery method: Hostname / IP Address or IP Address Range.
- Enter the Hostname/IP Address, Time out value, and Port, then click Discover.
- Certificate Store: For discovering certificates from the local certificate store.
- Enter the Store Name and Time out value.
- Click Get Stores to retrieve available store names, select the desired one from the drop-down, and click Discover.
- Microsoft Certificate Authority: For discovering local CA-issued certificates.
- Enter the Server Name, Certificate Authority, and select the required filters.
- If using Template Name / OID, enter the template name or click Get Templates to retrieve a list of available templates (select up to five).
- Enter the Time out value and click Discover.
Notes:
- The Server Name and Certificate Authority fields are applicable only for Microsoft CA from build 6680 onward.
- From build 6680, the Key Manager Plus agent can be installed on any server that has access to the Microsoft CA server.
- Directory: For discovering certificates from a specific file path.
- Enter the Path and Time out value, then click Discover.
- To import a selected set of certificates from the given path, click Discover Certificate List, select the desired certificates, and click Discover.
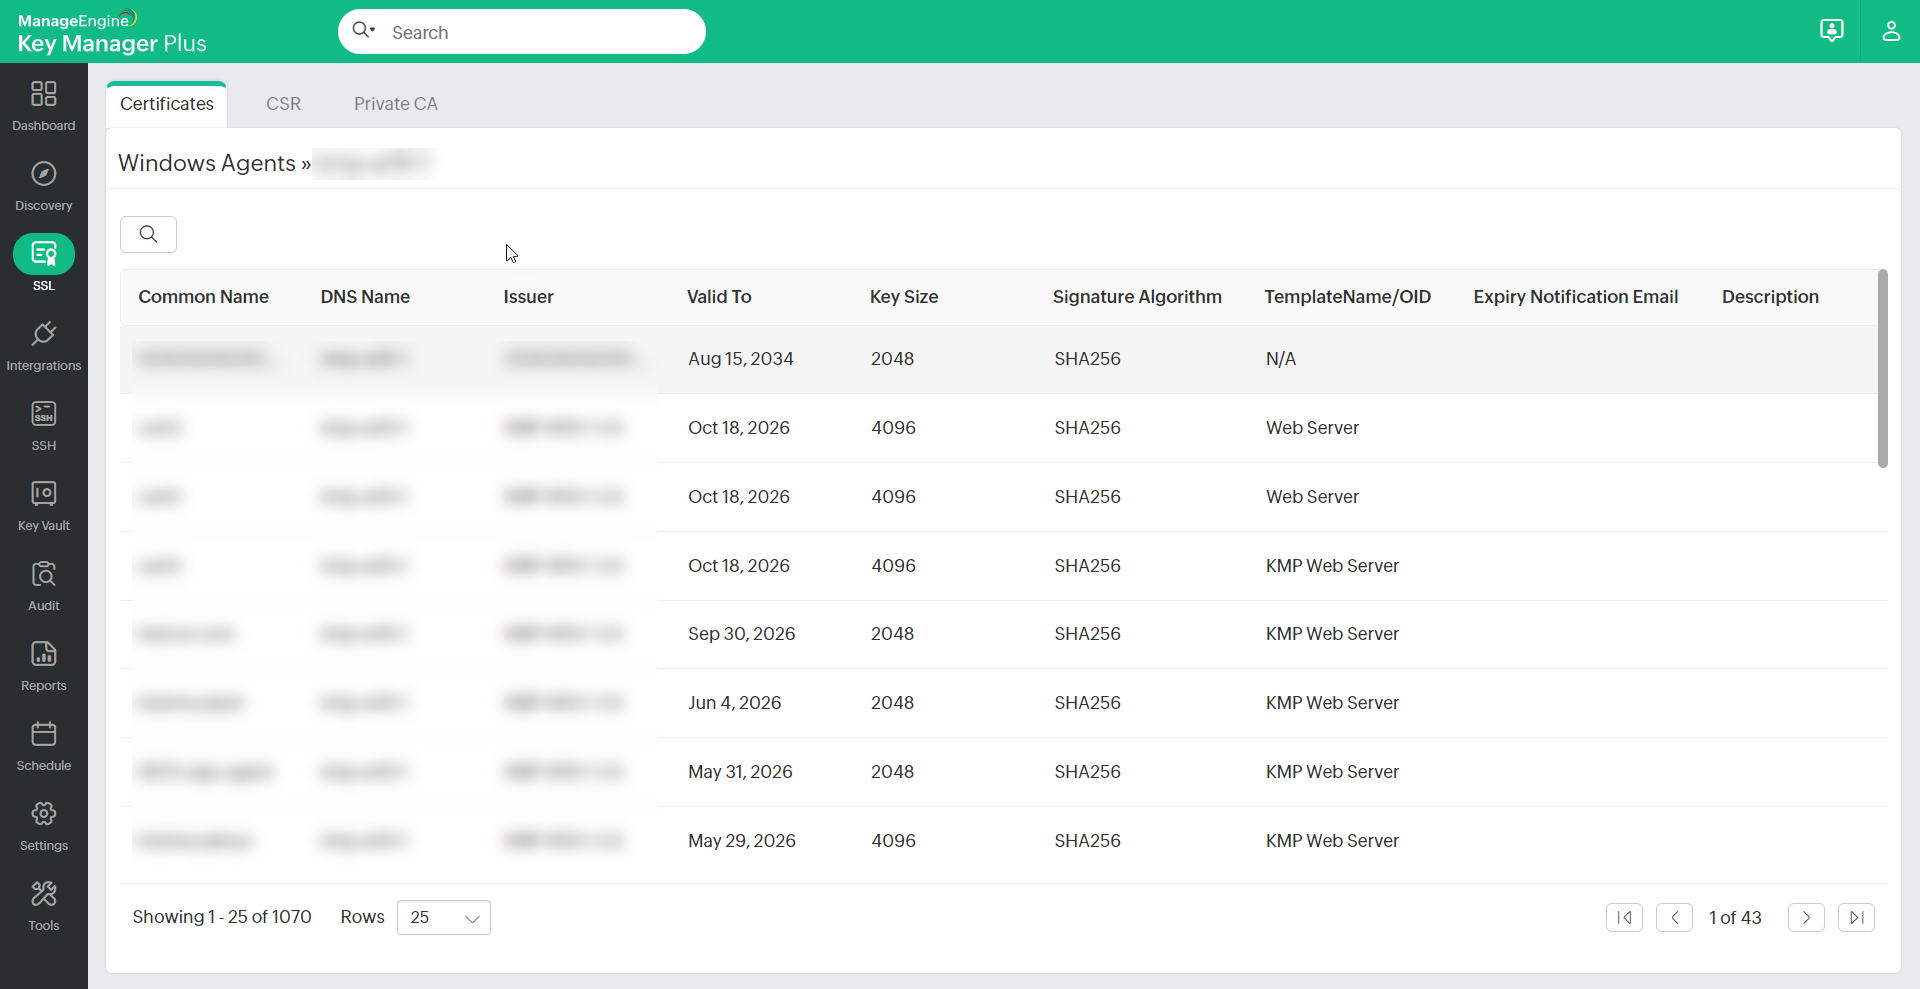
Once discovered, the certificates are imported into the centralized Key Manager Plus certificate repository. You can view them under SSL >> Windows Agents. To see certificates associated with a specific agent, click the Host Name of that agent.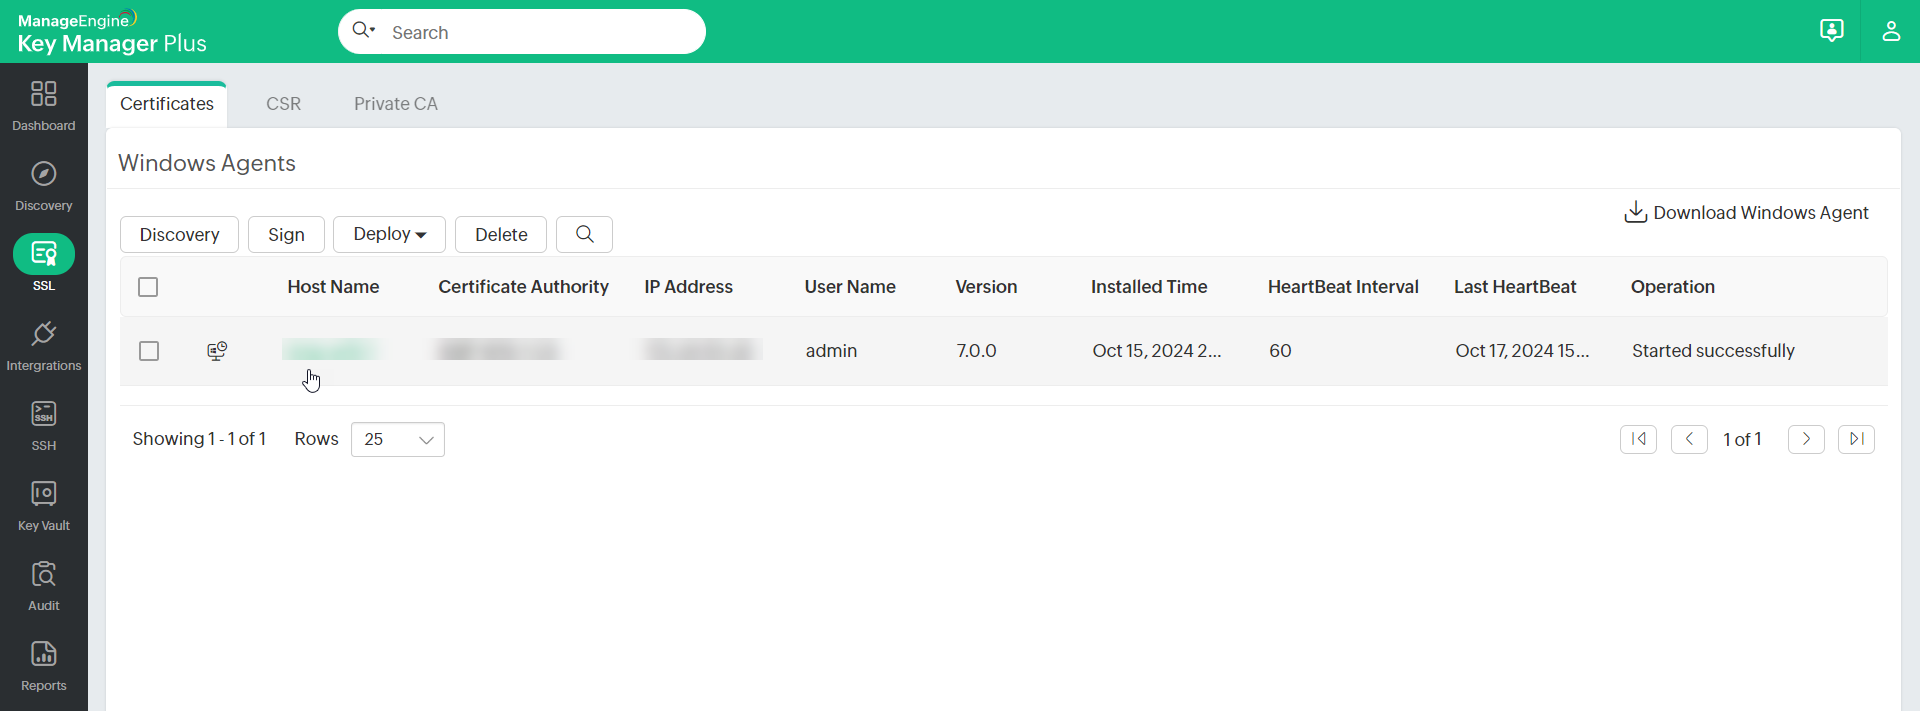
4. Signing Certificates using Agent
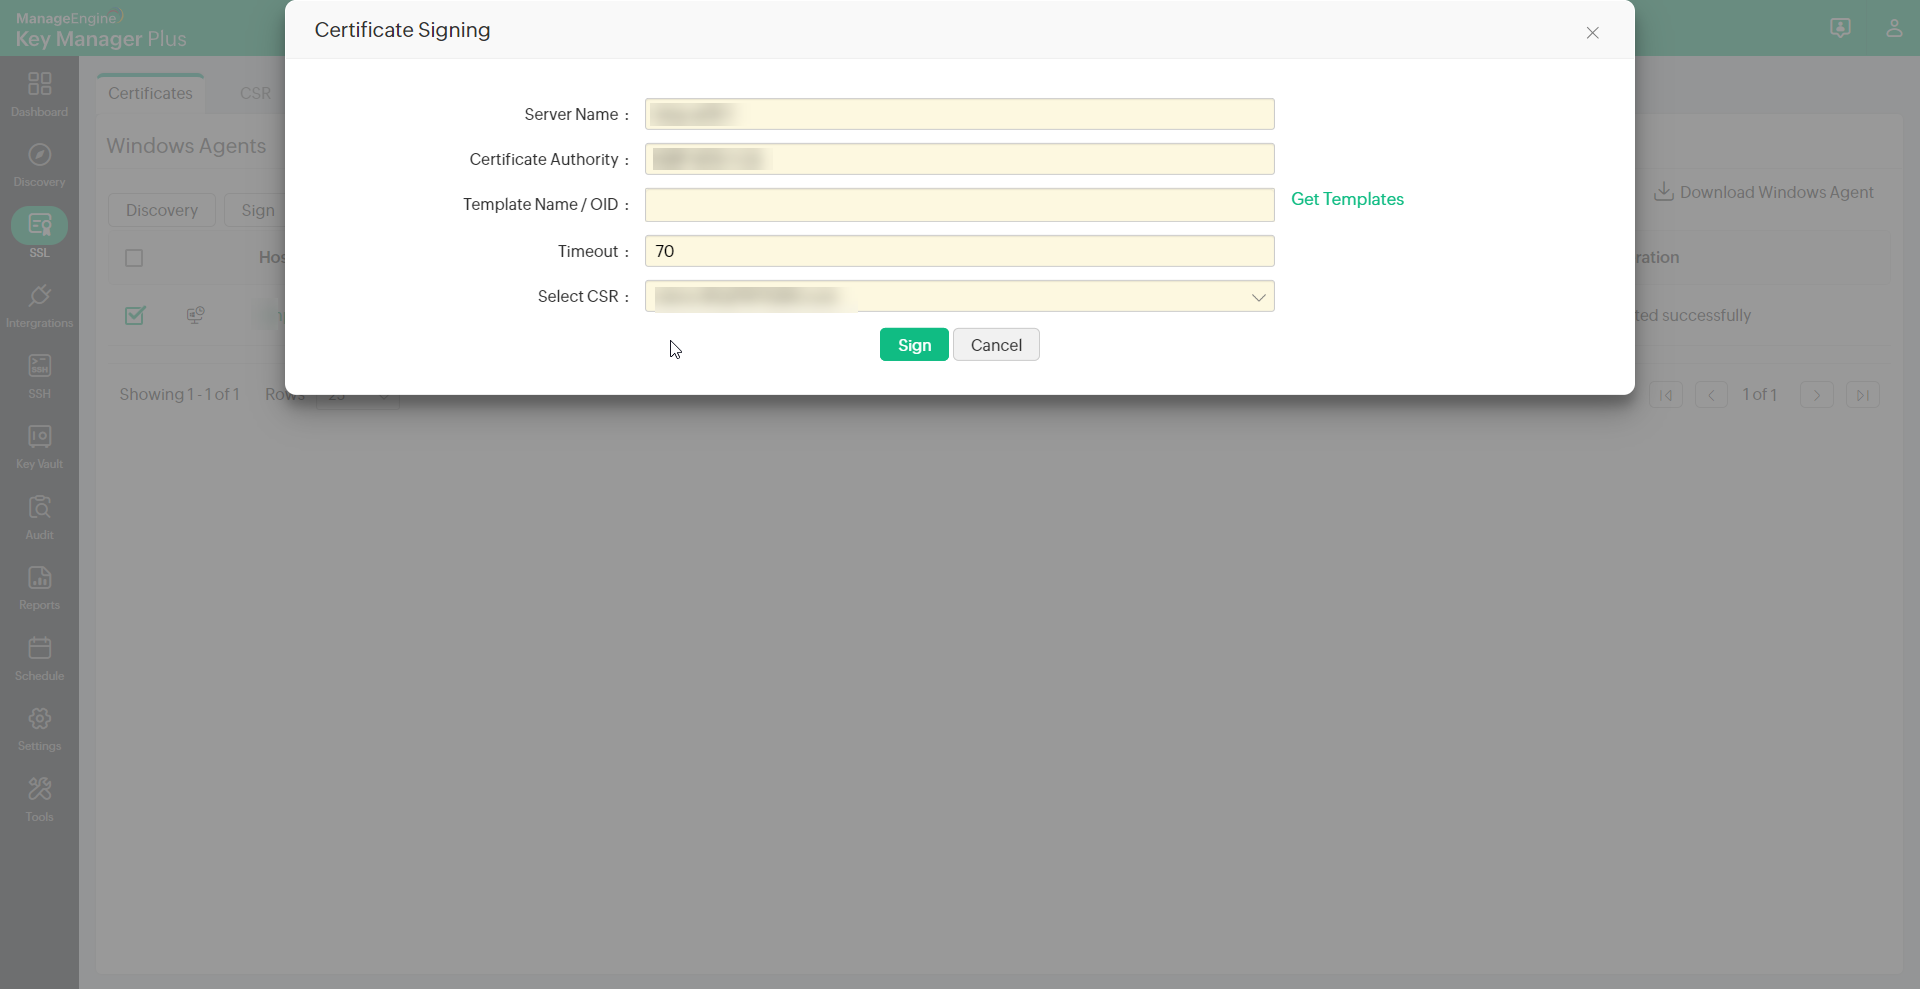
- Navigate to SSL >> Windows Agents, select the agent and click Sign.
- In the pop-up, provide the following:
- Server Name and Certificate Authority (applicable only for Microsoft CA from build 6680 onward).
- Certificate Template, or click Get Templates to fetch the available templates.
- Agent Timeout (in seconds) - the time within which the agent must respond. If the agent does not respond within the set time, the operation will be audited as failed.
- Select the required CSR from the dropdown.
- Click Sign. The certificate will be successfully signed and available in the repository.
5. Deploying Certificates using Agent
- Navigate to SSL >> Windows Agent and select the agent.
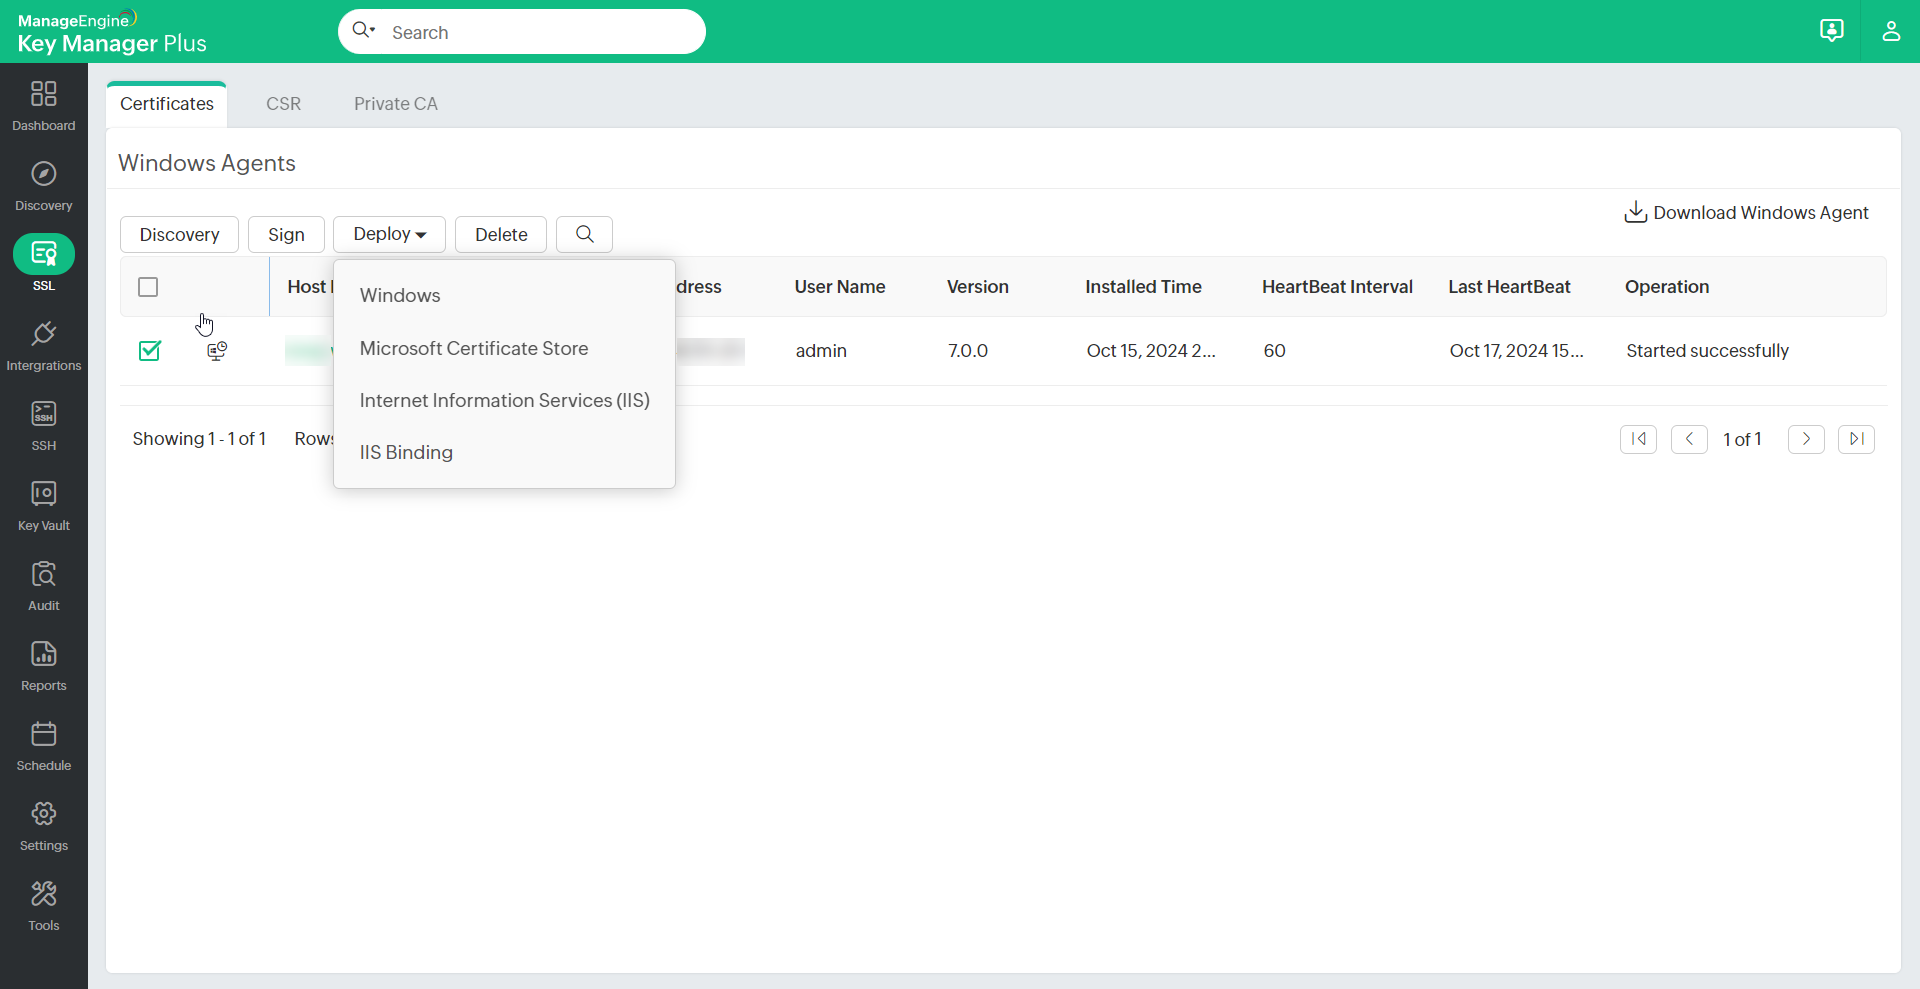
- Click Deploy and choose the target server from the drop-down.
- Based on the deployment target, follow the appropriate steps:
- Windows (using agent): Select the Certificate Group, enter the Path, select the relevant checkbox(es): Certificate and/or JKS/PKCS, and choose the appropriate File Type and/or Keystore Type, then click Deploy.
- MS Store (using agent): Select the Certificate Group and click Deploy.
- IIS (using agent): Select the Certificate Group and click Deploy.
- IIS Binding (using agent): Select the Certificate Group, enter the Site Name and click Get Bindings.
- Click Manage to configure the certificate group, then click Save to apply the changes. Now, the certificate will now be deployed and viewable under the SSL tab.
6. Deploying Certificates in Multiple Servers using Agent
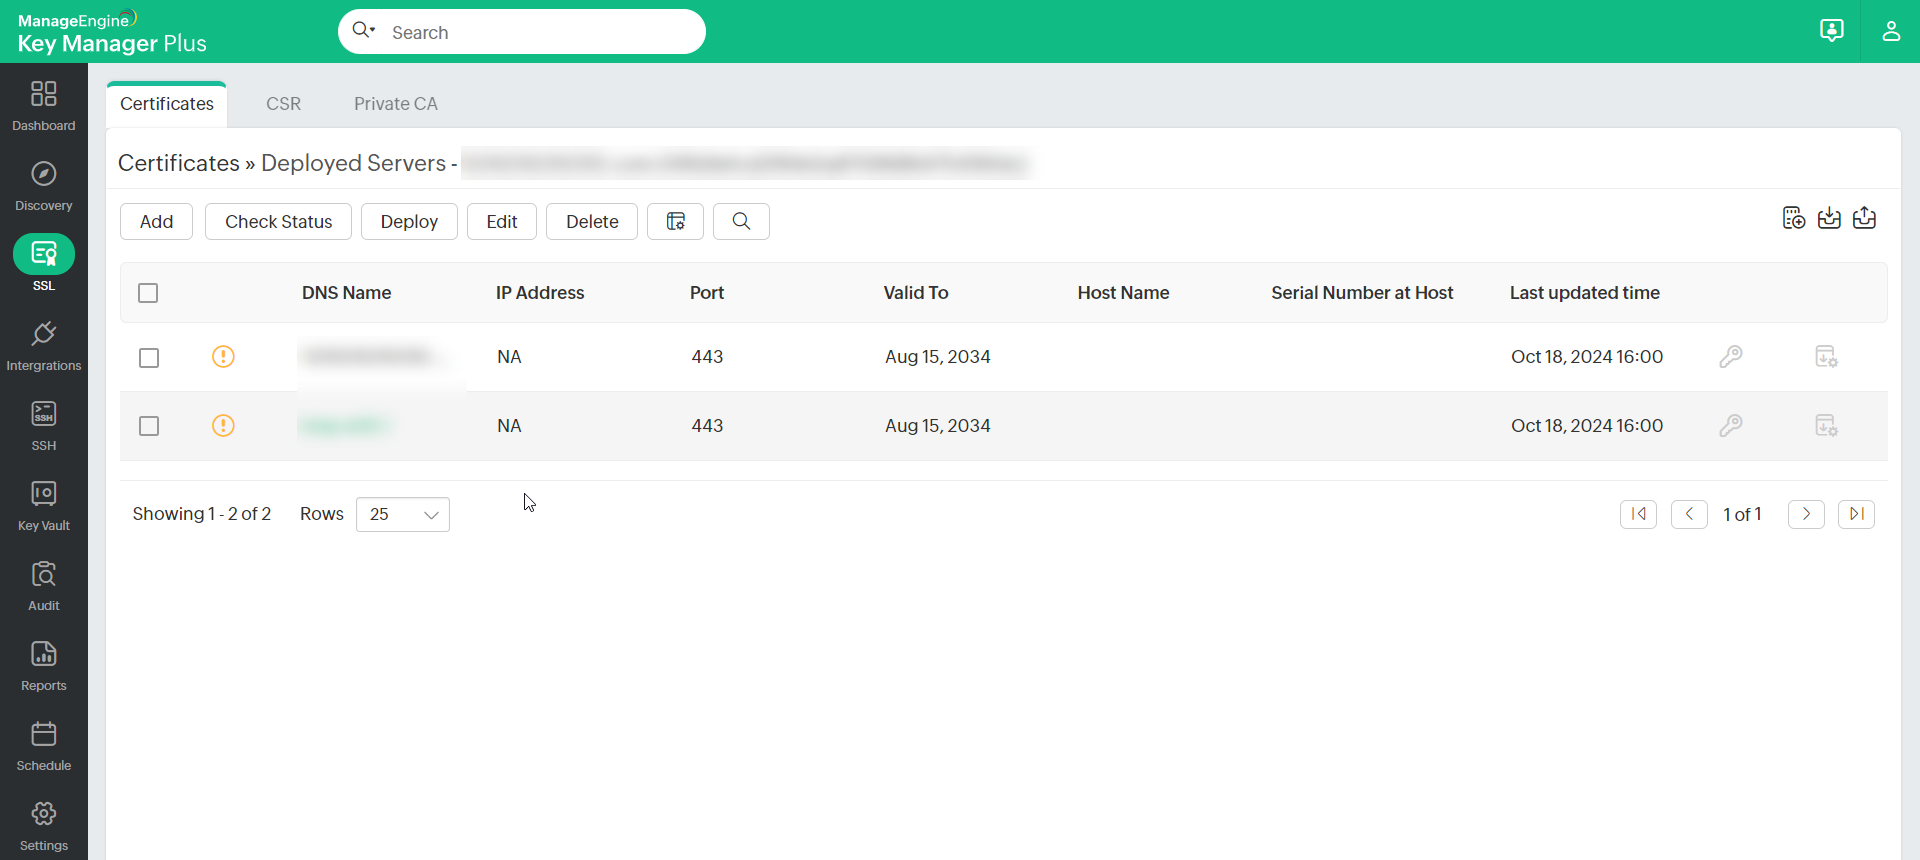
- Go to SSL >> Certificates and click the Multiple Servers icon next to the required certificate.
- A list of servers where the certificate is deployed will appear, displaying details such as IP Address, Port, Certificate Validity, Host Name, Serial Number, and Sync Status.
- Ensure that the DNS Name matches the agent’s name and that the agent is running on the DNS server.
- To modify server details:
- Click the credentials icon next to the certificate.
- Choose the Server Type (using agent) and select the required Agent.
- Specify the Path and check the relevant options.
- For Certificate, choose the File Type and enter the Certificate File Name.
- For JKS/PKCS, select the Keystore Type and enter the Store File Name.
- For Microsoft Certificate Store, select Computer and/or User account.
- To enable private key export after deployment, select Enable PrivateKey Export from MS Certificate Store after deployment.
- Click Save to apply the configurations.
- To edit a deployed server:
- Click the edit icon next to the certificate.
- In the pop-up, edit the DNS Name, IP Address, and Port.
- To enable auto-deployment after certificate renewal, select the desired certificate, click Edit, check Deploy Certificate on Auto Renewal, and click Save.
Note: You will be able to deploy a certificate to all servers on auto-renewal only if the user credentials are available.
- To check Sync Status using the agent, select the desired certificate, click Edit, check Sync Check With Agent, and click Save.
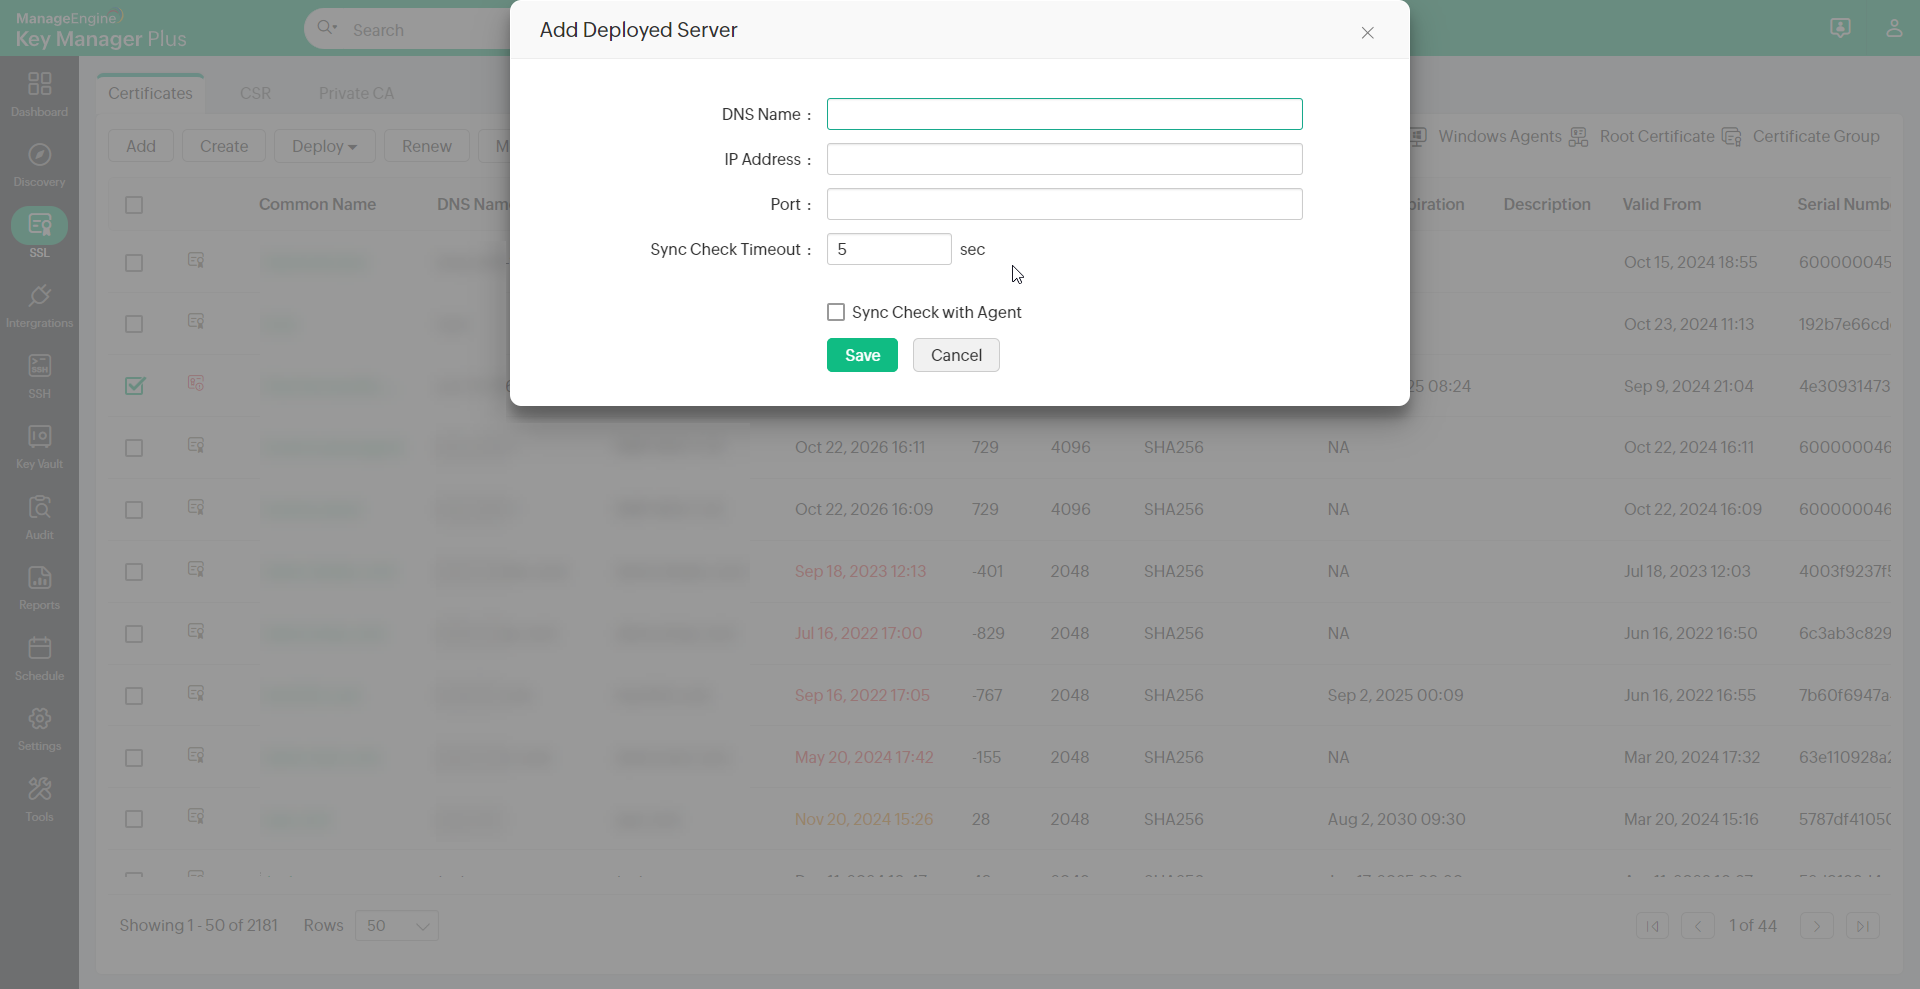
- To add a deployed server manually:
- Click Add, enter the DNS Name, IP Address, and Port, then click Save.
- You can also add deployed servers from SSL >> Certificates >> More >> Add Deployed Server. Refer to this document to learn more about SSL certificate deployment.
- To verify sync status, select the server and click Check Status in the top pane. Key Manager Plus will evaluate the sync status and display it in the corresponding column.
