Working Hour Settings
Last updated on:
In this page
Overview
Working Hour Settings in ManageEngine Log360 allow you to define business hours for accurate trend reporting and network activity analysis. You can:
- Set working hours to analyze events and user activity during operational times.
- Identify activity outside working hours to detect anomalies.
The configured working hours are applied across various modules in Log360. For example:
- In the Reports tab, you can filter report data based on business hours to view events that occurred during or outside working hours.
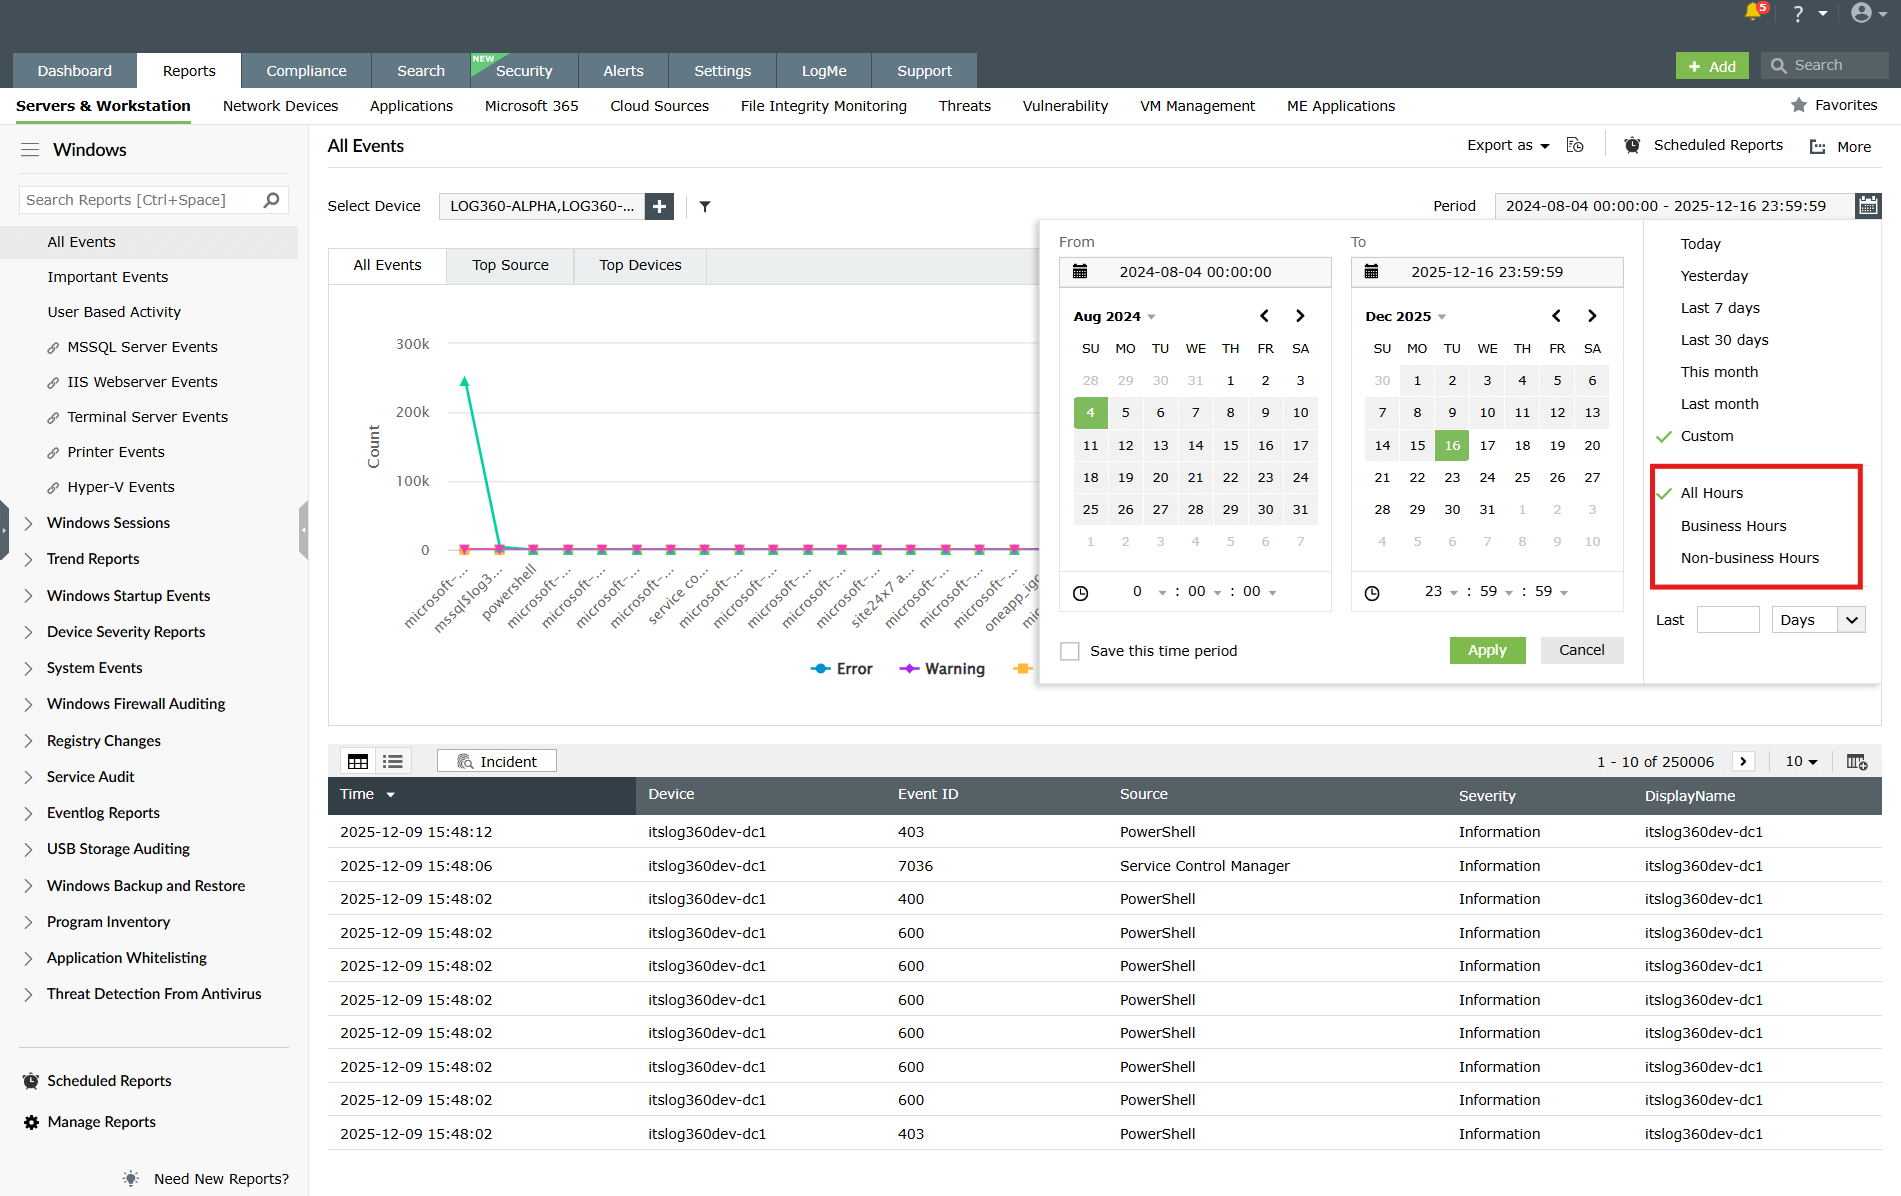
Figure 1: Viewing events occurred during business hours - In the Search tab, you can filter log data to view events that occurred during or outside the defined business hours.
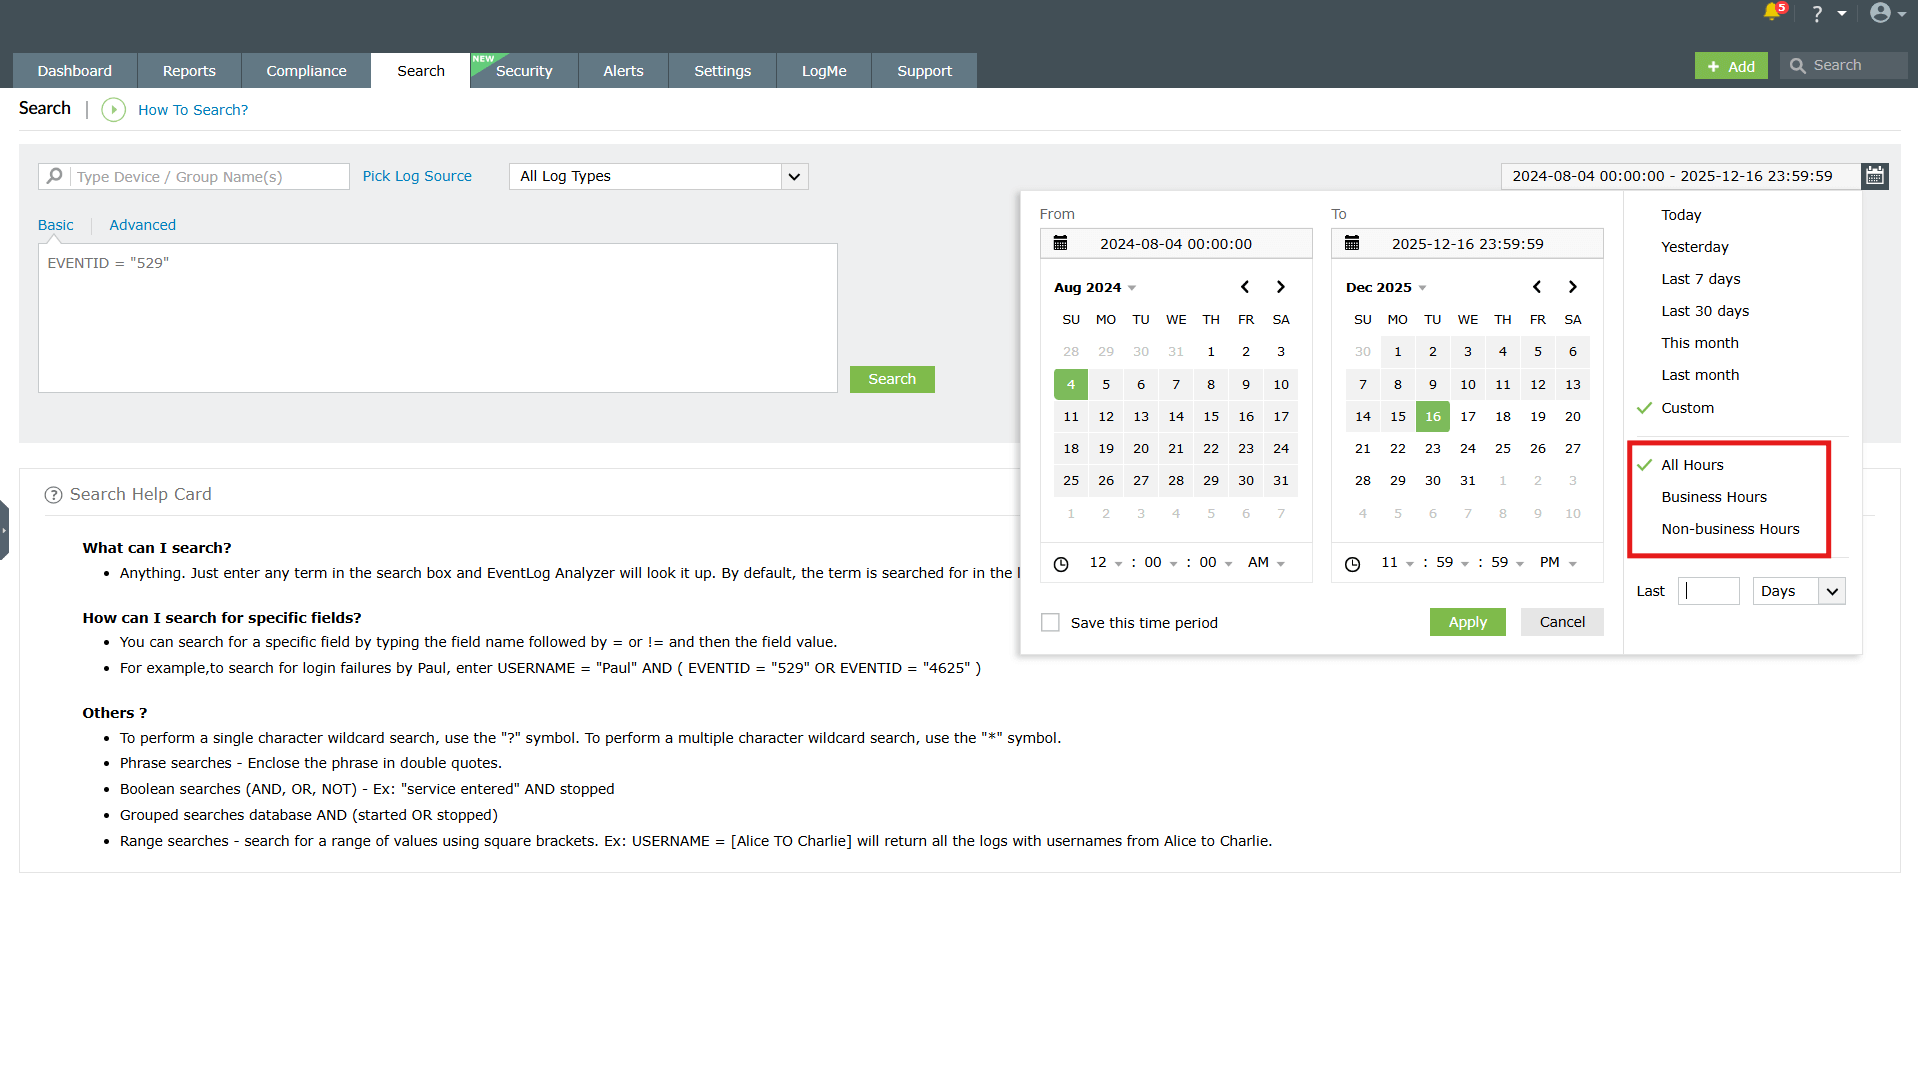
Figure 2: Viewing events occurred during non-business hours - Refer to Creating Alert Profiles for detailed steps on configuring alerts based on defined working hours.
Note By default, standard office hours are applied, but these can be customized to fit your organization's schedule.
Configuring working hours
- Log in to the product console.
- For the On-demand version, navigate to the Settings tab, go to Admin > Product Customization > Working Hour Settings. For the On-prem version, go to the Settings tab, and under General, select Working Hour Settings.
- In the Working Hour Settings window, under Business Hours, set the From and To times for your working day.
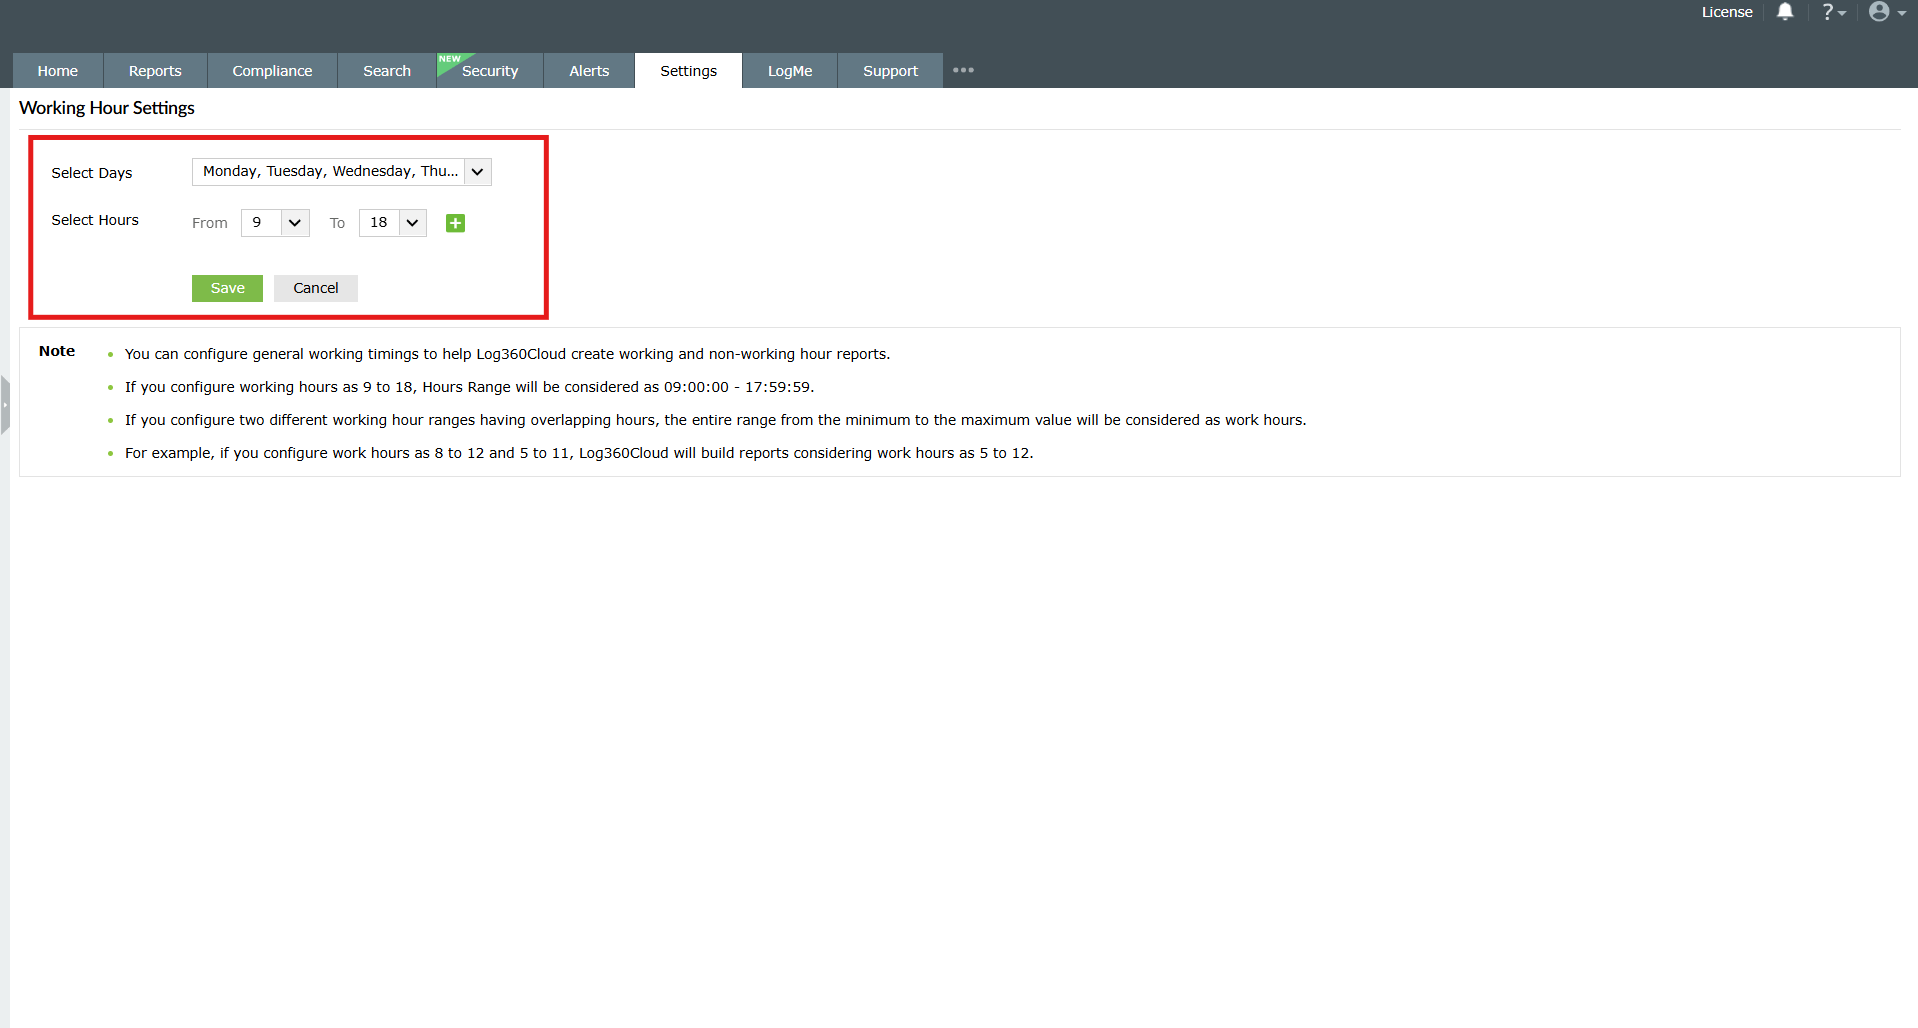
Figure 3: Configuring Working Hour Settings - Click the
 icon to add additional ranges if needed.
 - You can remove additional ranges by clicking the
 icon.
icon.
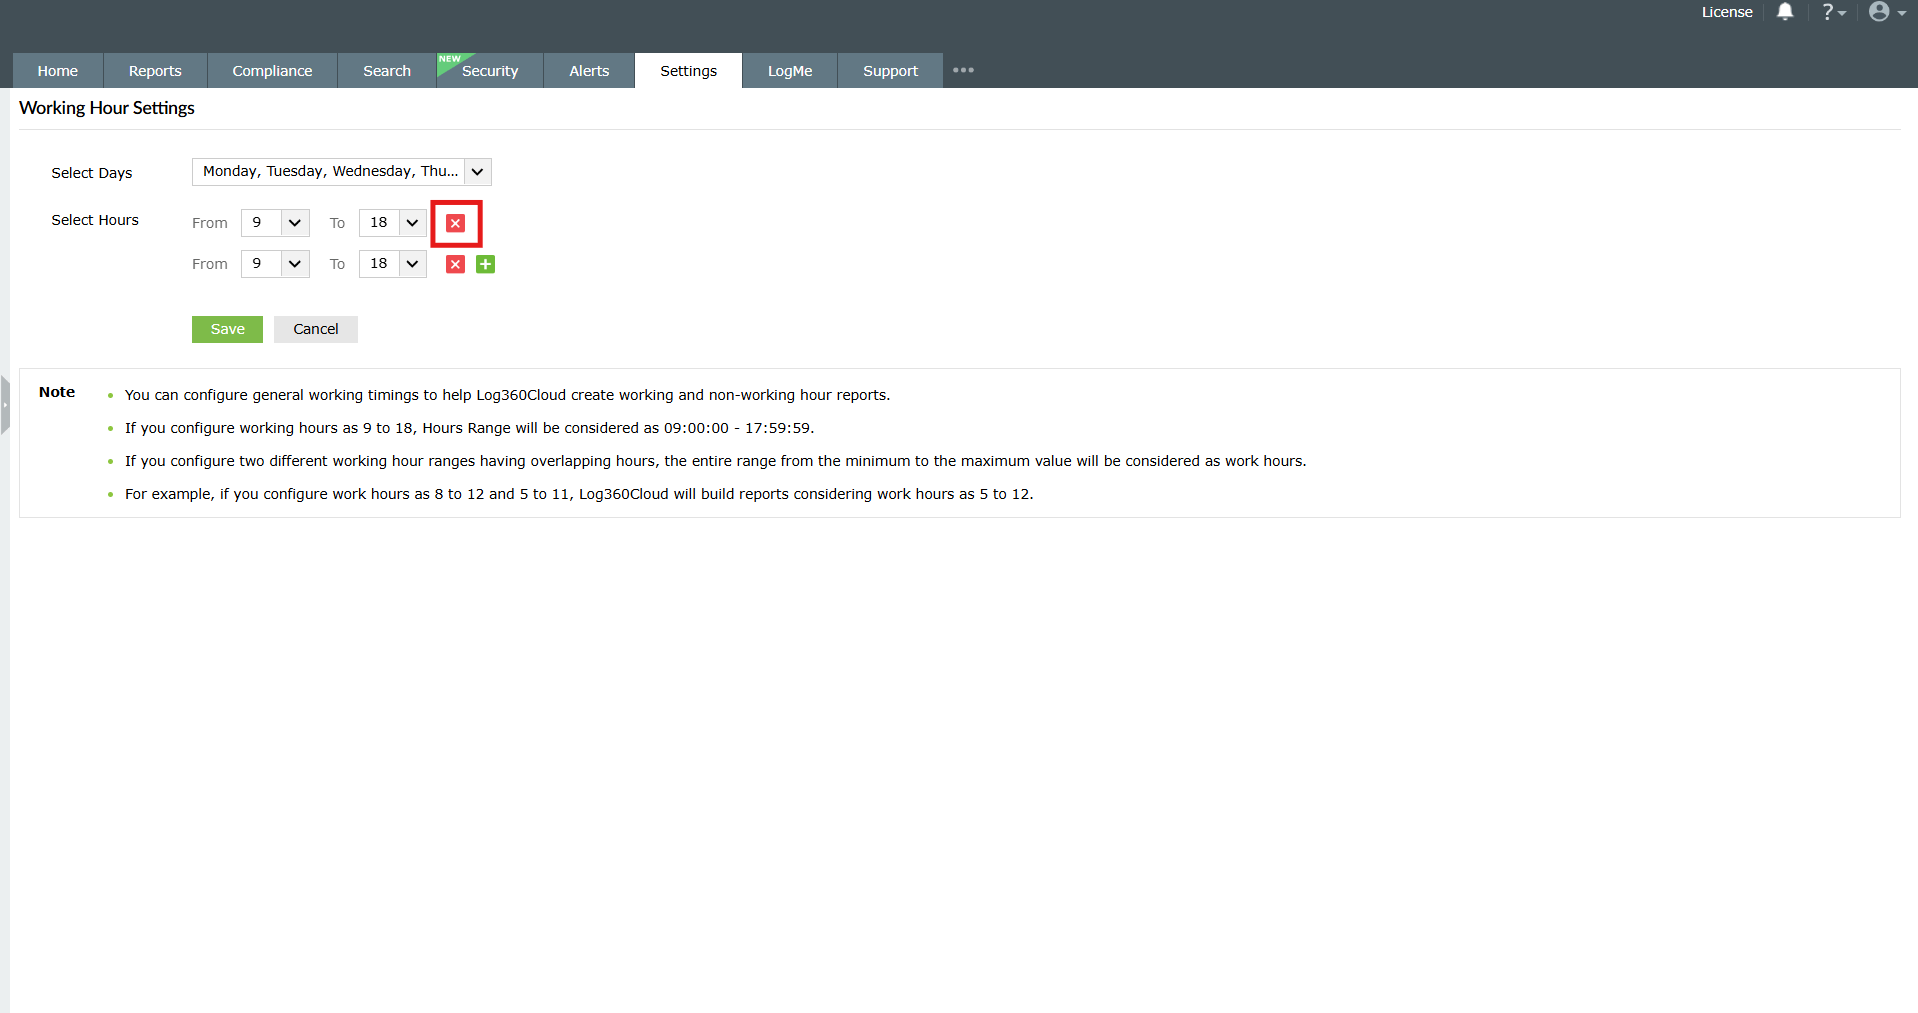
Figure 4: Configuring Working Hour Settings - Click Save to apply your changes.
Note
- You can configure multiple working hour ranges for a day.
- If two ranges overlap, Log360 considers the combined range from the earliest start time to the latest end time. For example, if you set 8-12 and 5-11, the product console treats working hours as 5-12.
Read also:
This page explains how to configure working hours for accurate report generation and network analysis.