User Management
User management covers the addition, deletion and modification of users in the Mobile Device Manager web console.
Adding Users
The admin can add users to the MDM server both locally as well as from External Directory services.Given below are the various ways in which an admin can add user to the Mobile Device Manager Plus server:
Local User in Cloud

When you add a user in MDM Cloud, they'll be sent an invitation mail from Zoho Accounts, because Mobile Device Manager Plus leverages Zoho Accounts to provide access to users.
On accepting the Join Organization invitation , users can access Mobile Device Manager Plus.
Note If the user is not a part of Zoho Accounts, they'll first have to create a Zoho account because user management is based out of Zoho accounts. If user has any existing accounts with any ZOHO services, they already have an active account and will not receive an email to join the organization. They can directly access the Mobile Device Manager console.
For authentication, the user will be prompted to enter a password.
In addition if 2 Factor Authenticaton is enabled, users will have to authenticate via Zoho Authenticator or SMS or Google Authenticator.
Local User in On-Premises
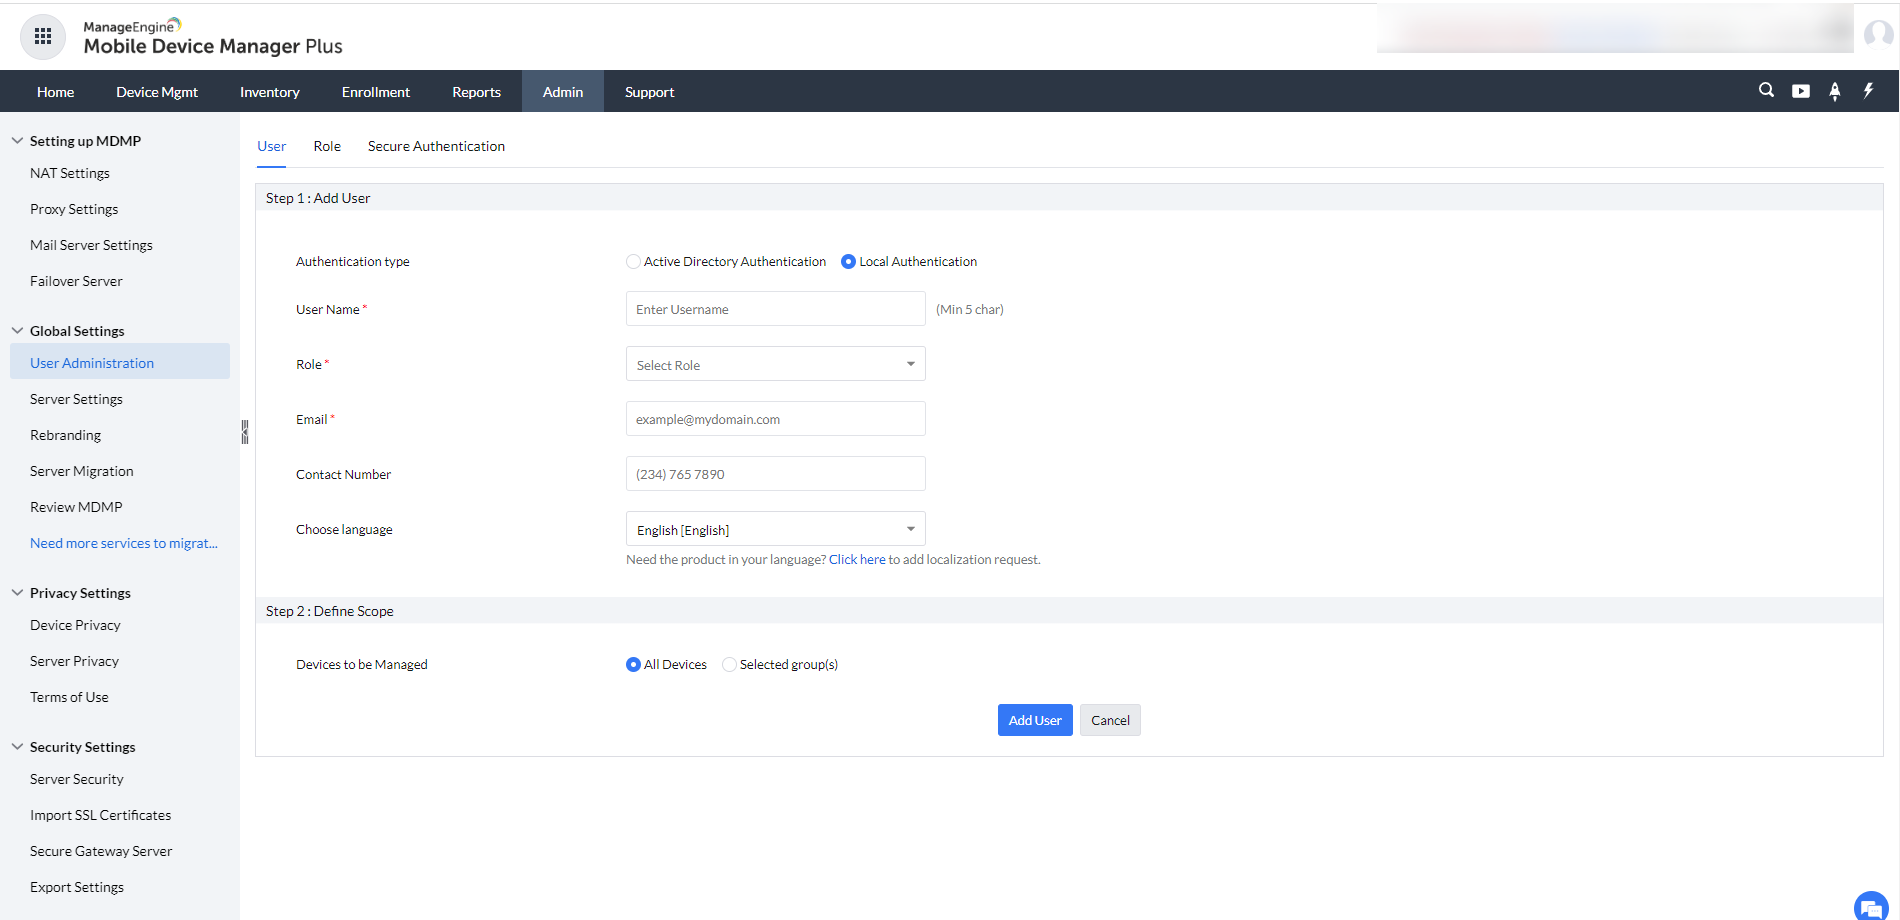
- Login to the account as administrator.
- Navigate to Admin tab > Global Settings > User Administration.
- Click on Add User.
- Choose the authentication type as Local authentication.
- Specify a User Name.
- Specify the Role from the drop-down. You can find all the pre-defined roles, and also the roles that you have created will be rested here.
- Give the Email address of the user. This email is used in creating password as Password mail is sent.
- Phone number of the user and Language is optional.
- Define the Scope and click on Add User.
Once the user is added successfully, a mail with Password creation link will be sent to the user. You can create the Password and login to the MDM console. This link will expire in 24 hours.
Directory Services
Integrating MDM with your organization's directory service, helps to streamline the process of adding and managing users across the MDM console. Based on the configured directory service, Admins can add users and allow them to securely login to the MDM console with their directory credentials.
Click here to learn more about integrating Directory Services.
Modifying User details
Mobile Device Manager Plus offers the flexibility to modify the role of users, to best suit your changing requirements. You can modify the Role by clicking on the ellipsis icon next to each user. However, once the details are modified, the user will lose his existing permissions and be upgraded to the ones set by the admin.
Deleting Users
An admin can remove a user by deleting them from the User list, in case the user leaves the organisation or due to other specific reasons.The user so removed will no longer exercise Module Permissions. The login details of the user will be deleted from the web console, and only the name will be saved in the system to show audit log cases.
Note: When users are deleted, their licenses become available for new users automatically. For example, if you delete 1 user from your 5 Technician licenses, the system will make one license immediately available to assign to a new user.
Secure Authentication
We have 2 methods for user authentication in Mobile Device Manger Plus.
Password Policy
A default password policy exists, which is mandatory to be followed.However, the admin can set the Password complexity according to the security standards of the organization by modifying fields like minimum password length, Password expiry, number of special characters etc.
Note: The password policy set by the admin will be reflected in all Zoho products used by the organisation, because users have a common Zoho account to login into all products.
Two Factor Authentication (2FA)
In addition to a stringent password policy the admin can enable Two Factor Authentication, an additional layer of security for users signing into MDM.
TFA for Cloud
In cloud, the user can choose between the following 2FA policies :
- SMS Authentication
- Google Authenticator
Google Authenticator
The user need to have the Google Authenticator app(iOS / Android) installed for this authentication. On providing the passcode first time after the policy has been applied, you will be shown instructions on-screen for authentication using Google Authenticator. You need to either scan the given QR using Google Authenticator or add the given key manually. Once done, Google Authenticator periodically generates verification codes, which is to be used for authentication.
Note: The Google authenticator apps should be downloaded by user if Google Auth is enabled.
TFA for On Premises
In On Premise , the user can choose between the following 2FA policies :
- Email Authentication
- Google Authenticator
Email Authentication
On providing the password, a verification code is sent to the E-mail address provided by the user previously. You can add the E-mail address by navigating to Admin>User Administration and selecting the User tab. Click on the ellipsis icon under Action, against the user whose e-mail address is to be added. Click on Modify and provide the E-mail address. Once done, click on Modify to save the changes.
Note: The Mail Server settings should be configured for enabling Email authentication.
Google Authenticator
The user need to have the Google Authenticator app(iOS / Android) installed for this authentication. On providing the passcode first time after the policy has been applied, you will be shown instructions on-screen for authentication using Google Authenticator. You need to either scan the given QR using Google Authenticator or add the given key manually. Once done, Google Authenticator periodically generates verification codes, which is to be used for authentication.
Disclaimer : The information below is specific for On-Premises MEMDM Users.
Active session details and session termination
In case you want to know the number of active sessions, the number of sessions from a particular IP/location etc of a user, Mobile Device Manager lets you obtain all this information by checking the LOGON details of users in User list.
Session Termination
If the web console is inactive,then the admin can configure the Mobile Device Manger console to terminate by setting a session timeout. By default the session will be terminated after 60 minutes. However, the admin has the option to configure this by going to : Personalize>Session Expiration>Setting Timeout
Troubleshooting Tips
Unable to send verification code - Mail server is not reachable. Please contact your administrator.
Ensure that the SMTP server settings are correctly configured, the mail server is accessible, and there are no network restrictions blocking the connection. For more details, refer to Zoho Mail SMTP Configuration.