Create Profiles
Profiles are created to impose one or more policies and restrictions to the managed devices/groups. You need to create separate MDM profiles for devices of different OS types and versions. This is to implement/associate policies with the devices. Follow the steps mentioned below to create a profile.
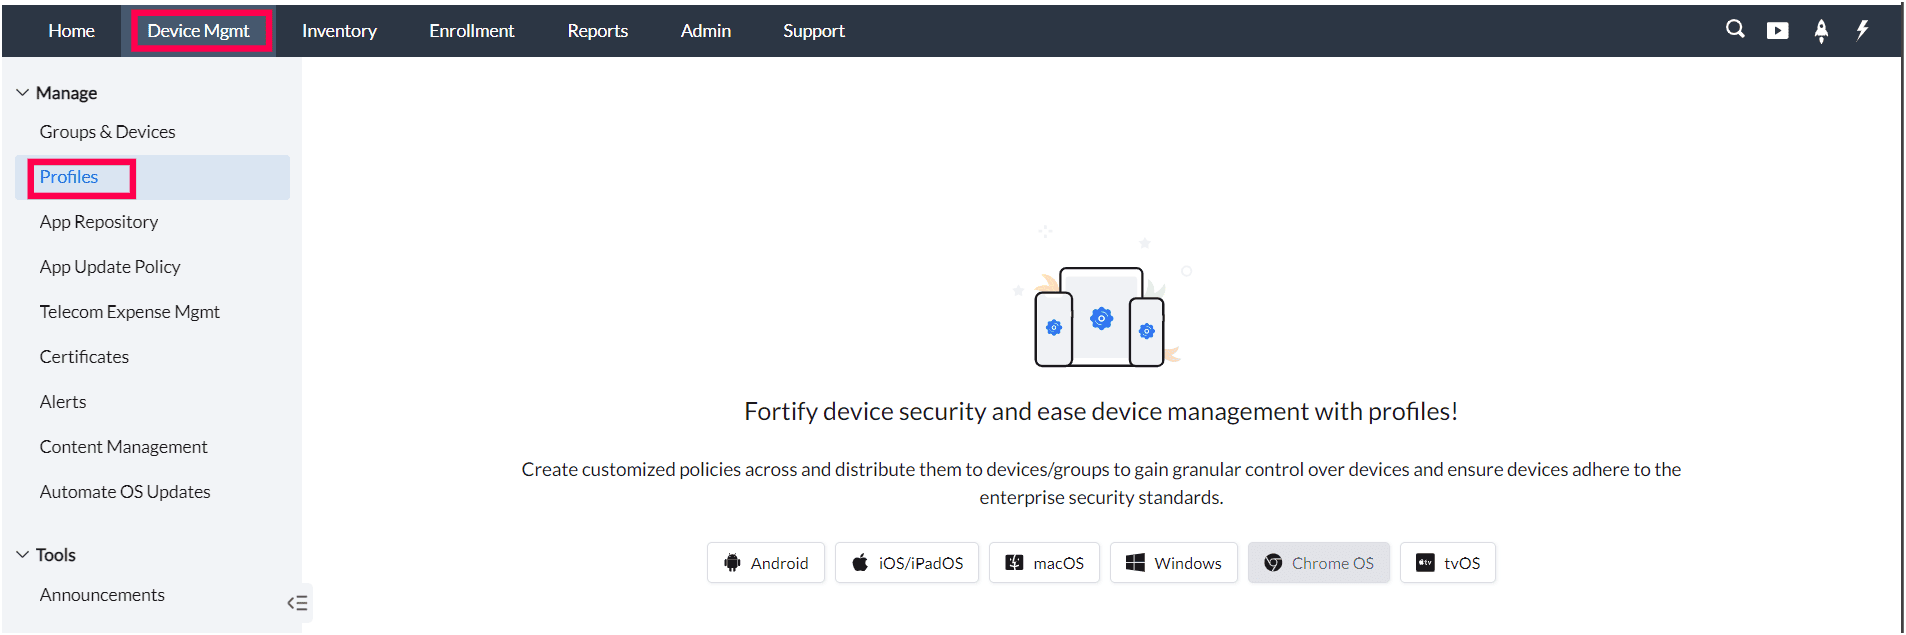
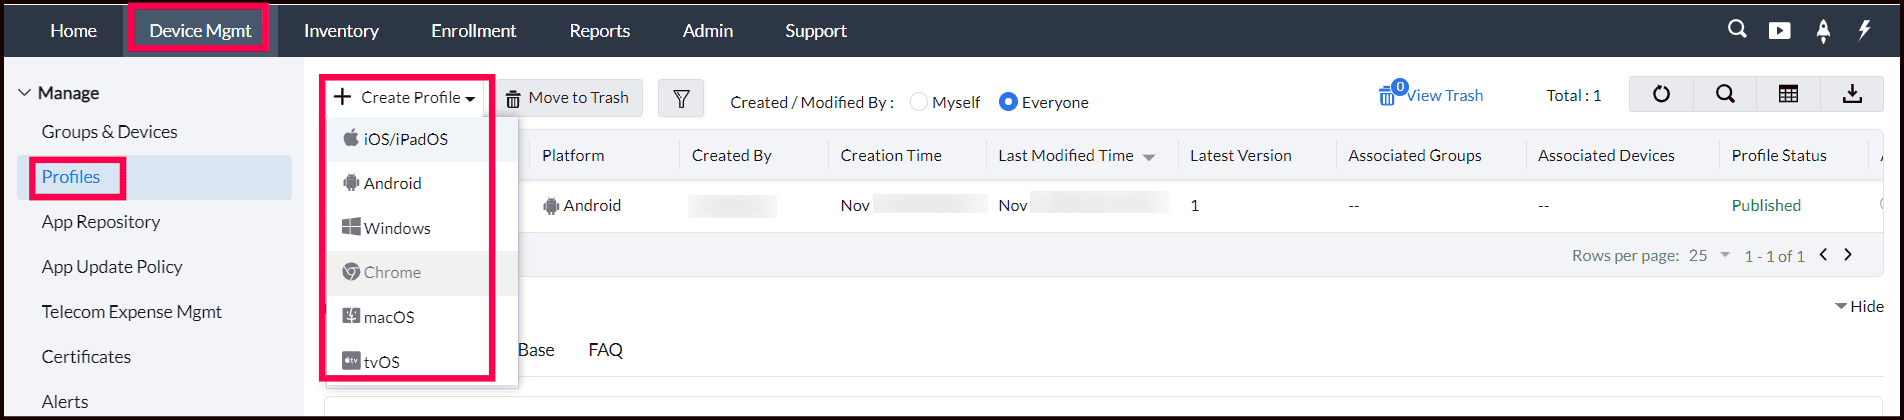
- On the Mobile Device Management web console, navigate to Profiles.
- Profiles can be created for various platforms, including Android, iOS/iPadOS, macOS, Windows, and tvOS. Select the desired platform to proceed with creating a profile tailored to its specific requirements.
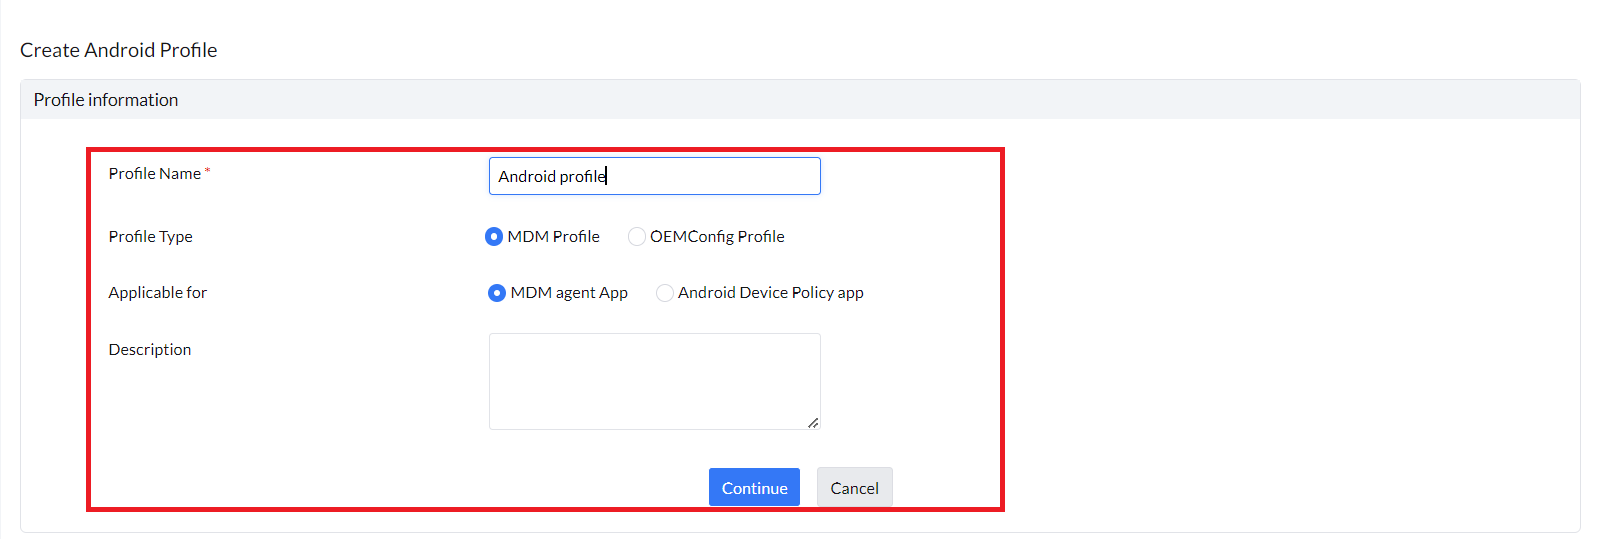
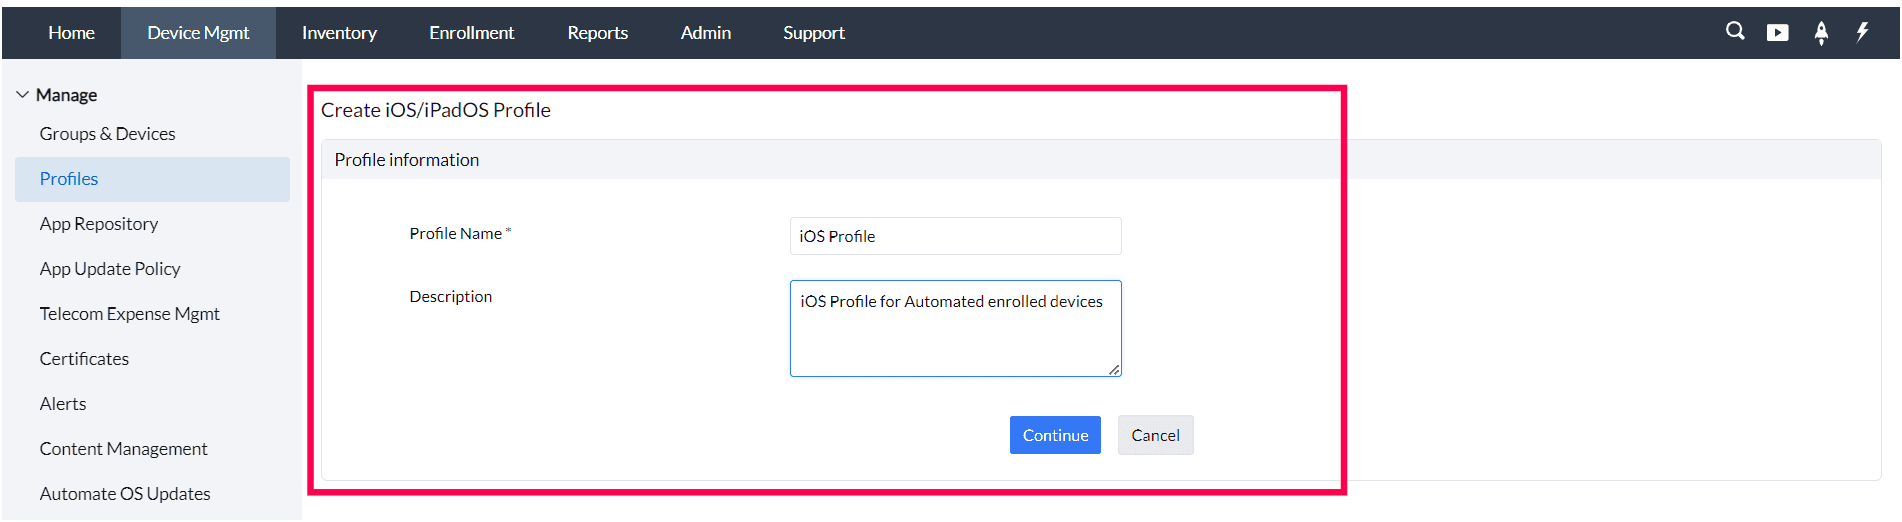
- Provide the below mentioned basic information:
- Name of the Profile: Unique name to identify the profile
- Description: A brief description about the profile.
- Applicable for (Only for Android) : For Android Management Devices, select the Android Device Policy app option to create profiles. For all other Android devices, choose the MDM Profile option to create a profile.
- Profile Type (Only for Android): You can select the profile type as either an MDM Profile or an OEMConfig Profile.
Android Profile creation:
iOS Profile creation:
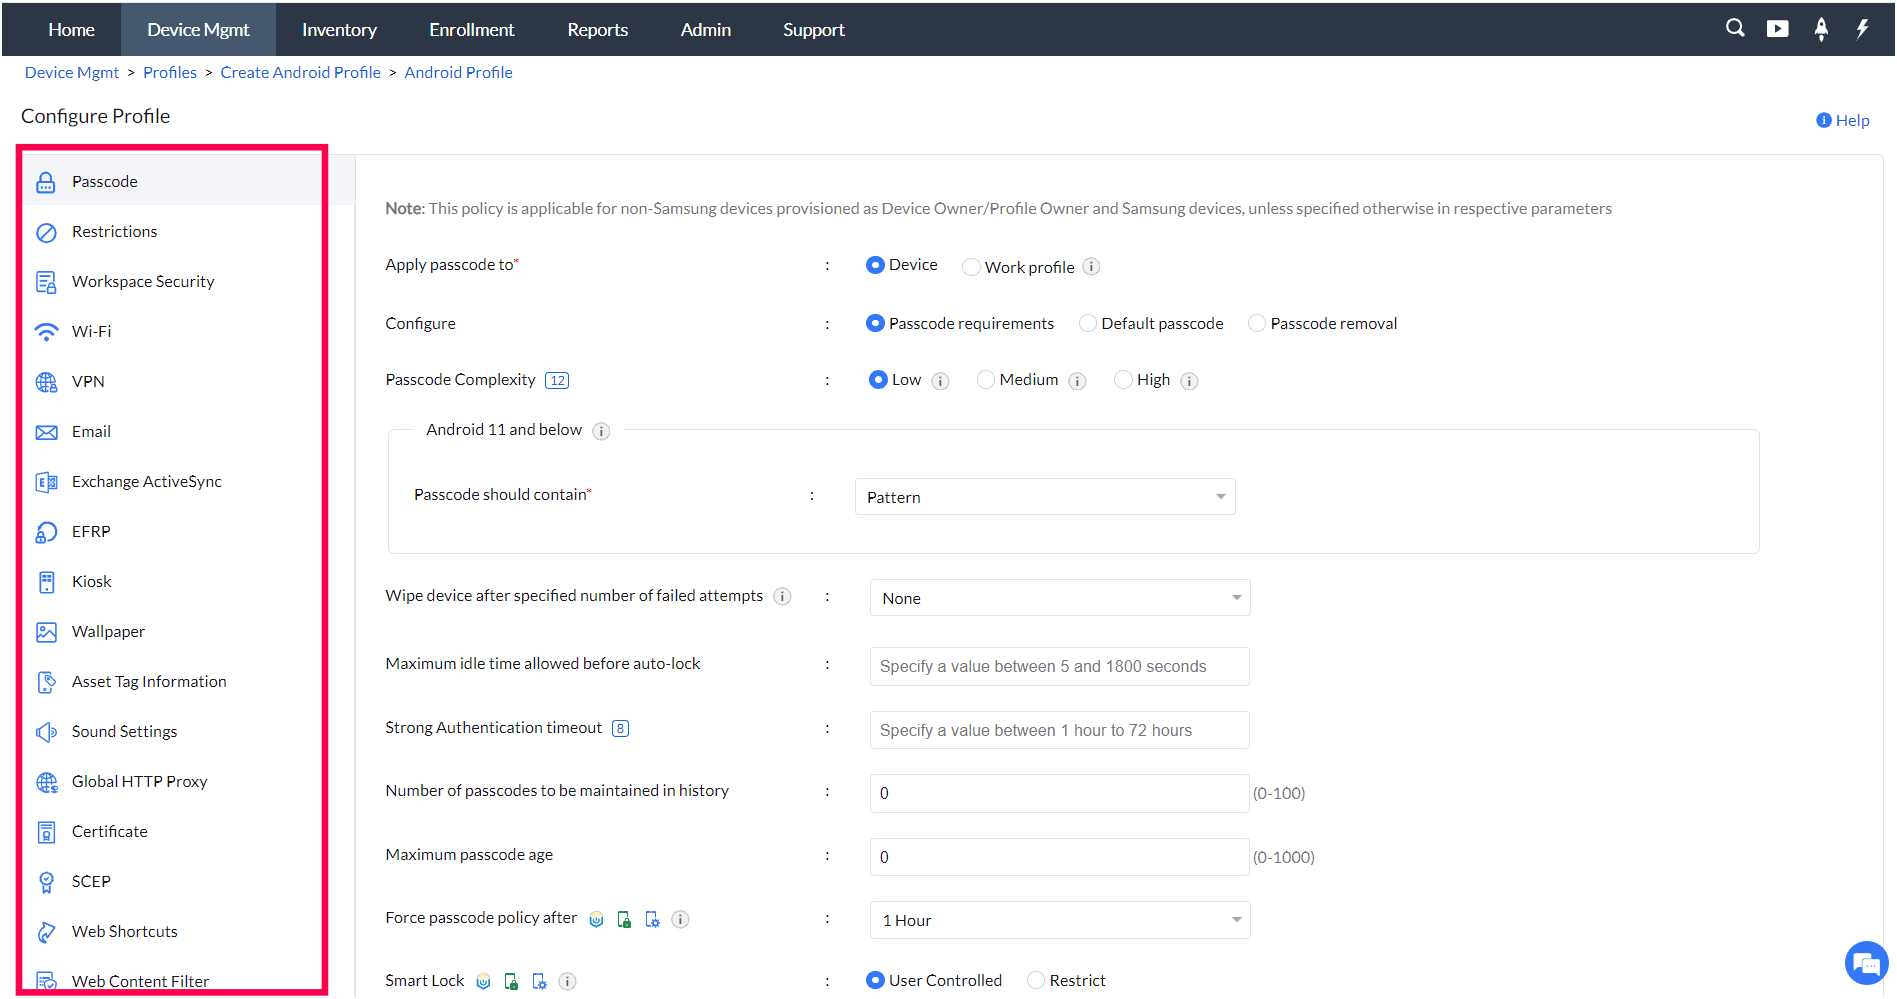
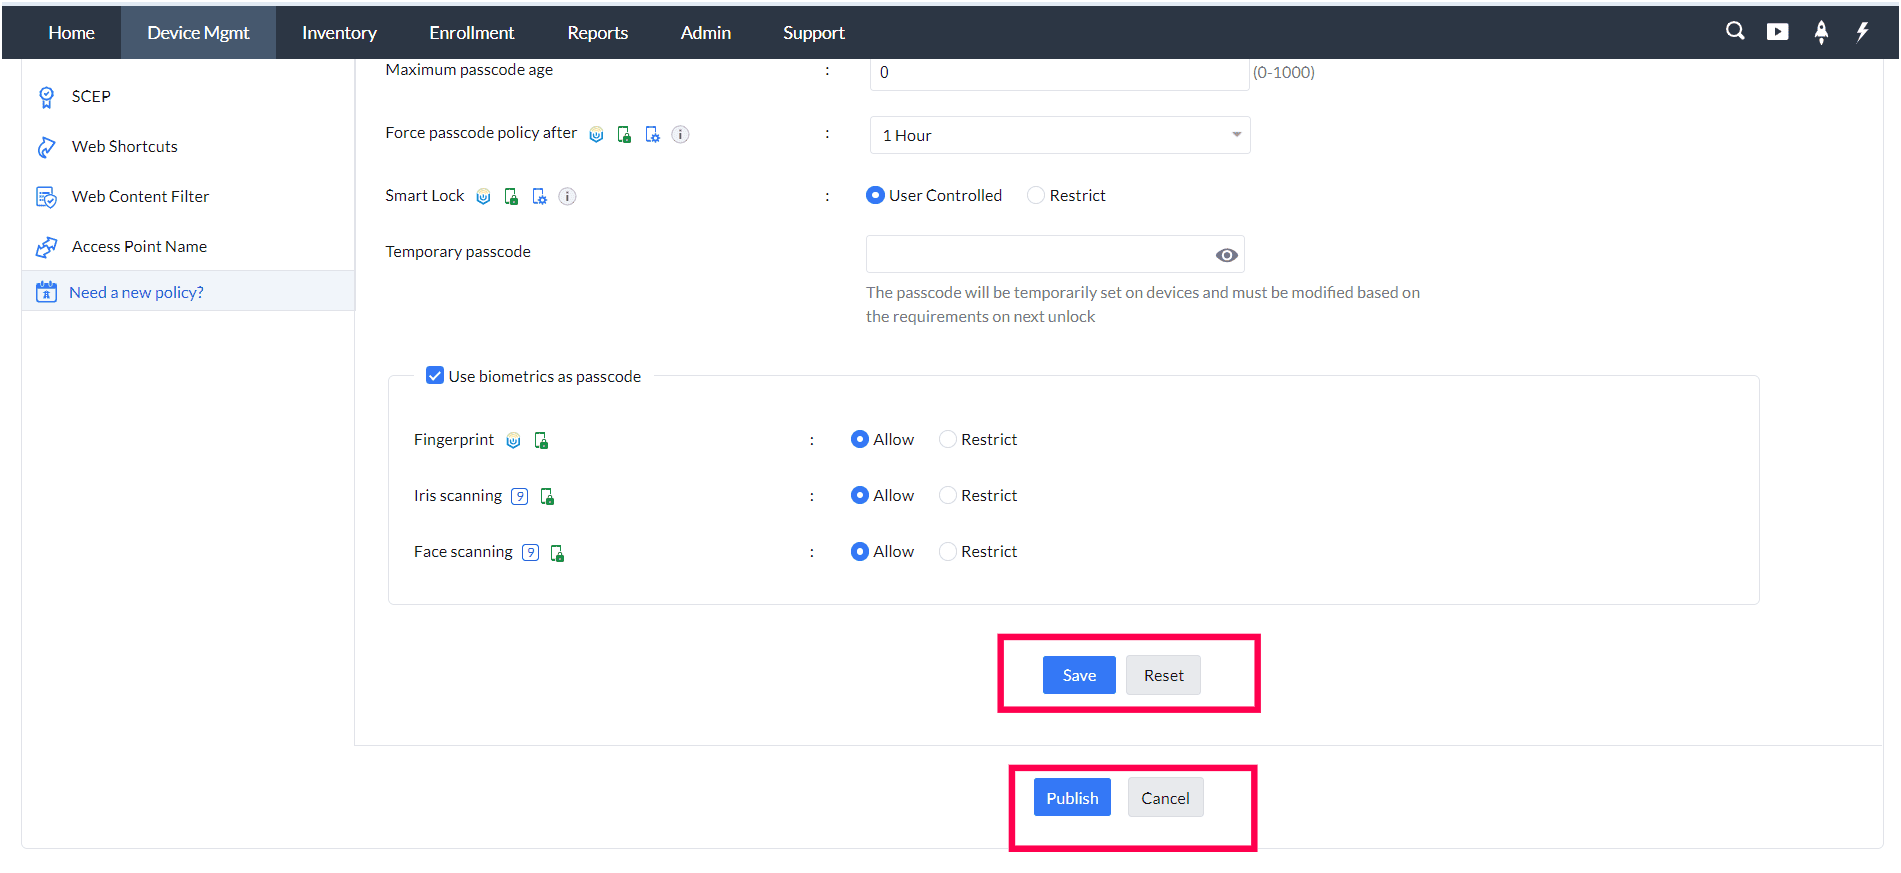
- Click Continue. Under Configure Profile from the left pane, select the configuration profile ( iOS/iPadOS / Android / Windows ) and define the policies and restrictions of the profile. You will have to save the individual configurations before you move on to the next configuration within the same profile.
- After specifying the required configurations, click Publish.
To create the next profile, go to Profiles and click Create Profile. Select the required OS platform, then follow the steps outlined above to create additional profiles for different platforms.

A published profile is not applied to any of the devices until they are associated to the devices or groups.
Associating multiple profiles to the same device
Let us assume you are associating two profiles to the same device:
Profile 1: Restricts camera and sets minimum passcode length as 4
Profile 2: Allows camera and sets minimum passcode length as 6
Let us see how the profiles get applied on the devices:
| PLATFORM | DESCRIPTION | CAMERA | MINIMUM PASSCODE LENGTH |
|---|---|---|---|
| iOS | Most secure combination of settings get applied | Restricted | 6 |
| Windows | Most secure combination of settings get applied | Restricted | 6 |
| Android | Most recent profile settings get applied | Allowed | 6 |
Modify a profile
To modify a profile,
- On the web console, navigate to Device Mgmt > Profiles.
- Here you can view the list of all the profiles that have been created already.
- Click on the ellipsis icon under the Actions column, of the profile that you want to modify and select Modify Profile from the dropdown. You can modify, copy, or move the profile to the trash. Click on the "Modify Profile".

- You can modify the "Profile Name" and "Description" using the following steps. However, the "Profile Type" and "Applicable For" details cannot be modified.

- After making the required changes, click Save to apply them. To make the changes live in the profile, click Publish.

- The profile version details will automatically update after modifying the profile configurations.
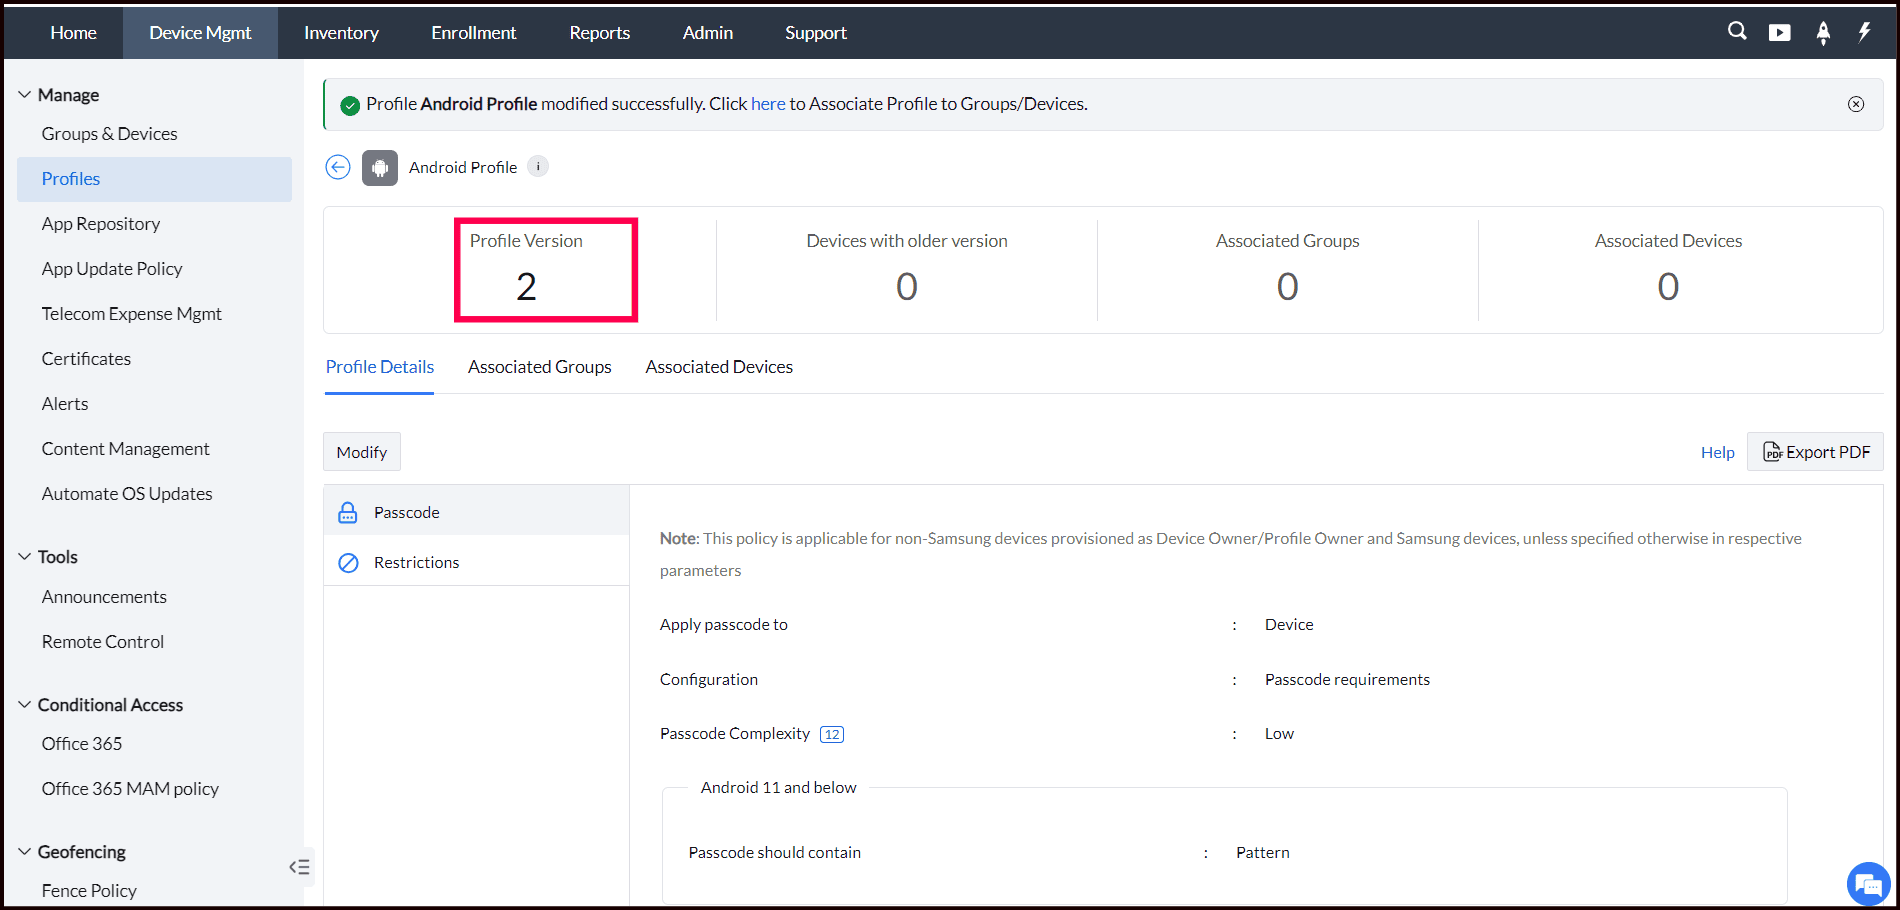
When a profile is modified and published, it is not applied to the devices to which they were applied before. A new version of the profile is listed, you can upgrade the latest version to the group, so that the current members of the group will have the latest version of the profile applied to them. The previous version of profile will be overwritten by the latest version.
Copy a Profile
The Copy Profile feature in Mobile Device Manager Plus (MDM) allows you to duplicate existing profiles, enabling you to reuse previously configured settings without starting from scratch each time. By duplicating a profile, you can adjust policies as needed to meet specific organizational requirements, saving time and effort. MDM distinguishes duplicate profiles from the originals by appending "_Copy" to the profile name, which can be modified if desired. Cloned profiles provide a convenient base, allowing you to customize policies, test them on managed test devices, and then assign them to other devices or specific user groups. This feature streamlines profile creation, making it easy to update policies for select users and reduce repetitive setup tasks.
To duplicate a profile on MDM,
- Navigate to the Device Mgmt tab on the MDM console.
- On the left pane, click on the Profiles tab to view the list of profiles which have been previously created.
- Choose the profile that you want to duplicate and click on the ellipsis under the Actions column. Now, click on Copy Profile.
- Save the profile after making changes to the profile name/policies, if required.
- Click on Publish to save the changes.
- Modify a profile to make changes to the existing profile. This alters the configuration of the profile.
- Copy a profile to duplicate the existing profile which can subsequently be modified, without having to disturb the original profile's configuration.
Moving a profile to Trash
When you want to delete a profile associated with devices/groups, you can simply move the profile to Trash. Moving profiles to Trash ensures the profiles are automatically disassociated from the devices/groups. These profiles are automatically deleted after 90 days. The profiles can also be deleted or restored manually from Trash by the user. However, the restored profiles don't automatically get associated with the previously associated groups/devices. These restored profiles can be associated to the devices/groups.
The following steps explain the moving of profiles to Trash:
- On the web console, navigate to Profiles
- Under Profiles tab, you can view the list of all the profiles that have been created already.
- Select the profiles to be moved to Trash.

- Click on the Move to Trashbutton and the profiles are moved to Trash.

The profiles can be viewed by clicking ![]() . The profiles can be deleted or restored from here.
. The profiles can be deleted or restored from here.

Best Practices
- Policies which require constant changes such as Restrictions should not be grouped with e-mail account related policies such as Exchange, Wi-Fi etc., as every time a modified version of the profile containing all these policies is re-distributed, the passcode for the account-based services such as Exchange and configurations such as Wi-Fi preferences, previously synced mails etc., specified in the account-related policies is reset and has to be manually entered by the user again. Consider the case of Exchange - as MDM uses third-party mail clients such as Gmail, Samsung mail to configure Exchange, even reassociating the same policy (with/without modification) removes the existing configuration and then configures Exchange based on the newly associated policy. This may require some user input.
- SCEP and the associated account policies which are to utilize the certificate provisioned by SCEP must be configured in the same profile. This ensures the same SCEP certificate is used for all the account-related policies configured in the profile.