3D Floor Views
OpManager's 3D Floor View is a data center modelling feature that lets the user visualise their data center layout. After creating racks using Rack Views, you can place them on a floor with walls, aisles, and paths to build a complete 3D floor view, providing a visual representation of your data center.
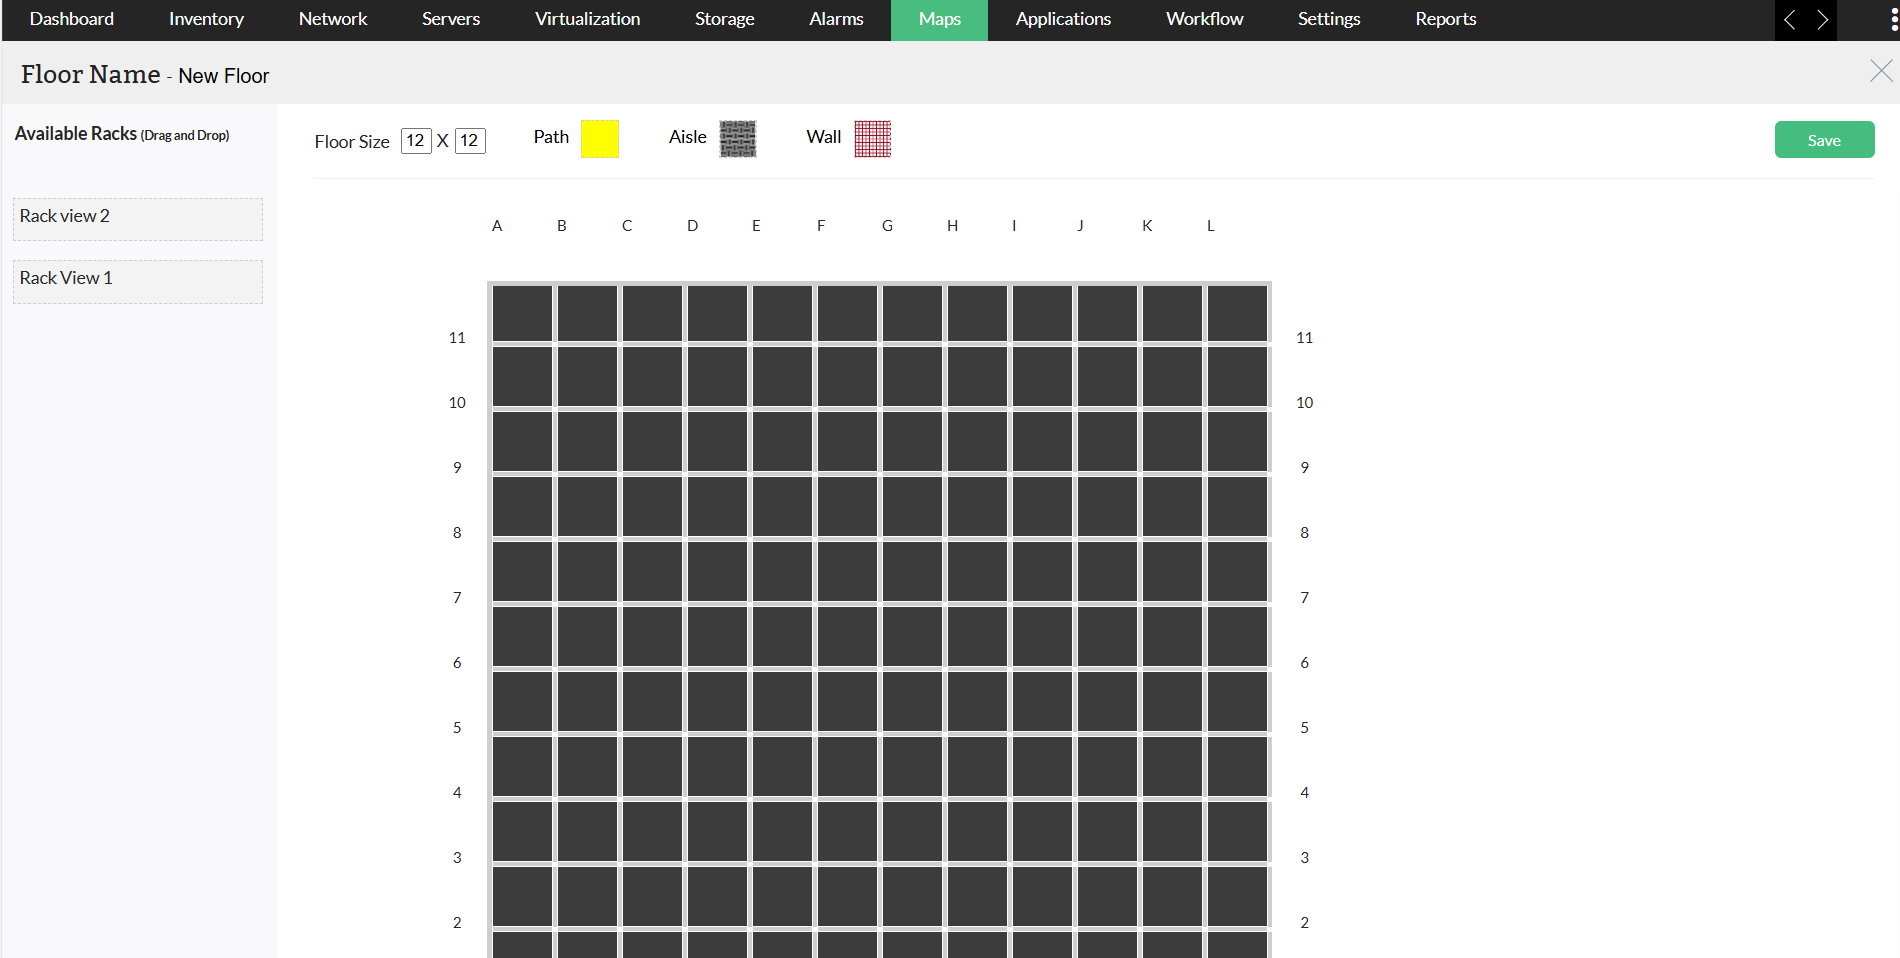
Creating a 3D Floor View
- Go to Maps -> 3D Floor Views -> Create New
- Enter the Floor size.
- Add the Wall, Path, and Aisle to customize the floor.
- Drag and drop the Available Racks to the floor.
- Click on Save.
Note: Once a rack is added to a floor, it will not be available for another floor. So only unassigned racks will appear under Available Racks.
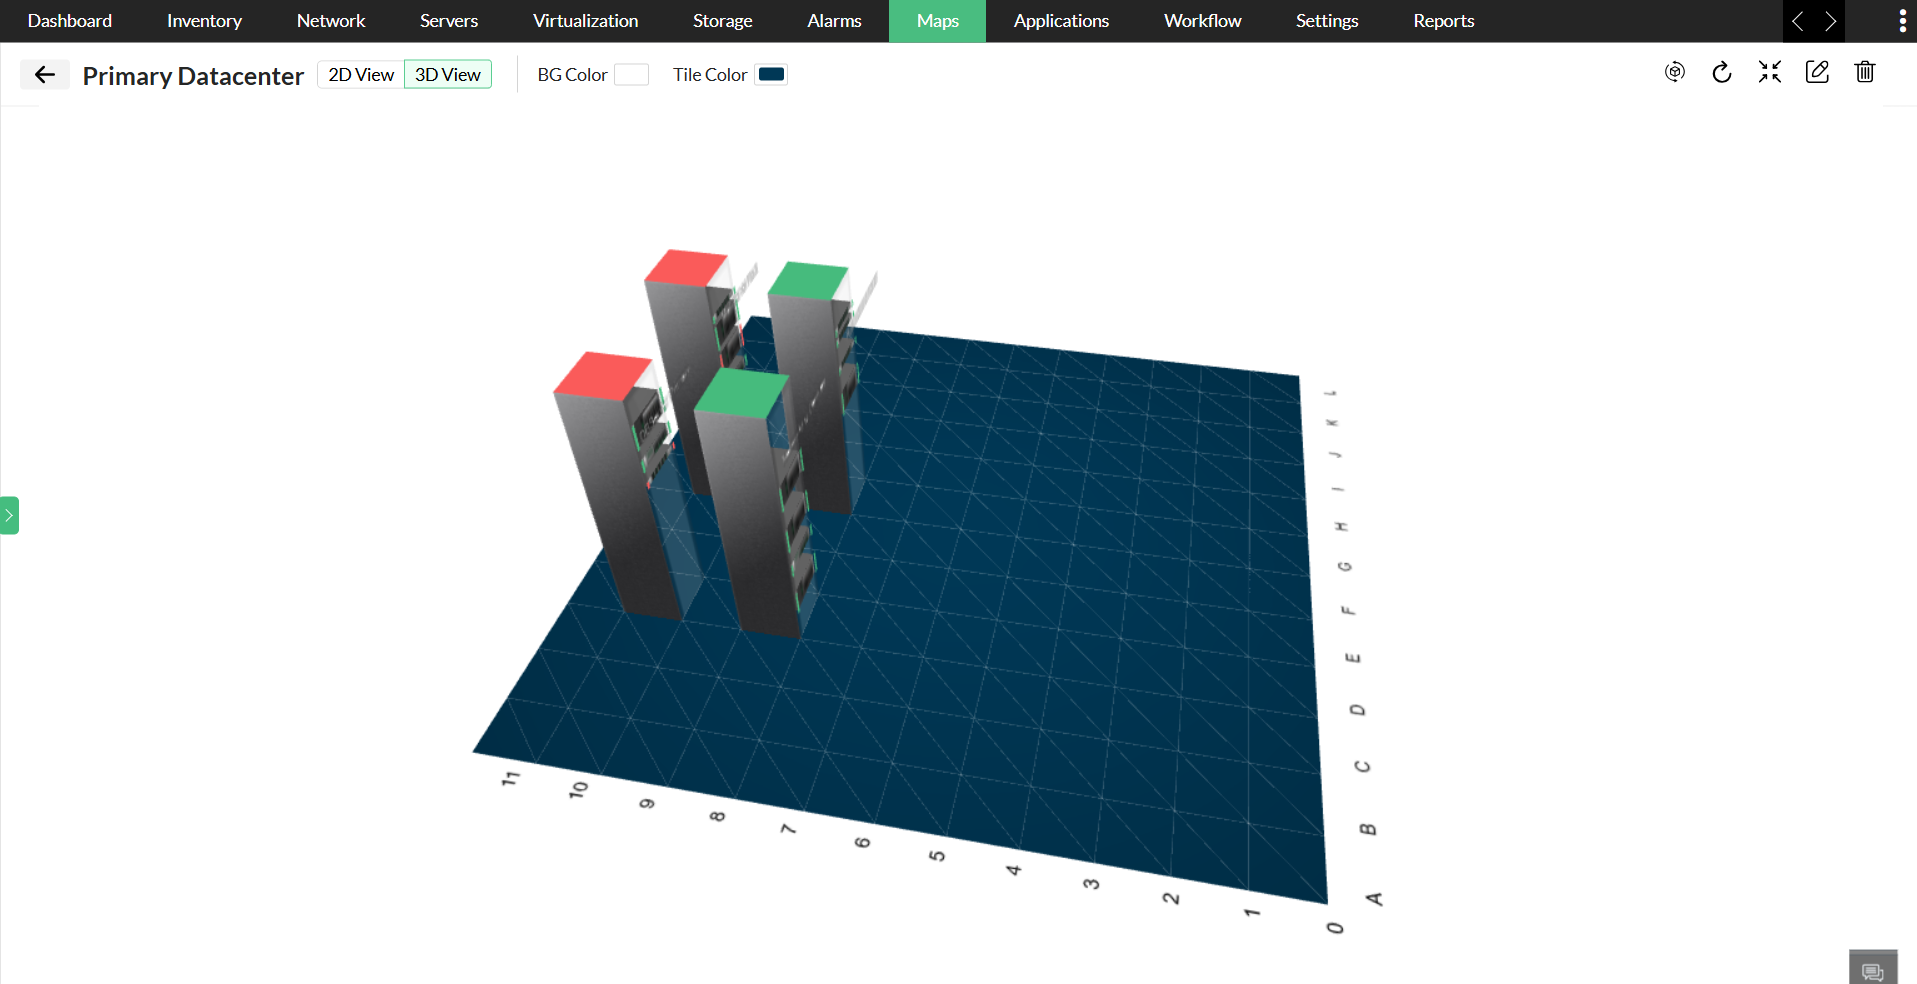
2D and 3D Models
For improved usability, in OpManager, racks can be viewed in multiple dimensions, from 2D to 3D models. The floor view allows to create a room structure for the data center.
To see the racks and floors in 2D or 3D view,
- Go to Maps -> 3D Floor Views -> Choose the floor created with racks
- Choose the 2D view or 3D view option.
- Under 2D view, you can enable the Show Rear View option to see both front and rear views of the rack.
- In 3D view, you can change the background color, tile color and adjust the rotation by auto or manual options.