Uninstalling OpManager agent from network devices
Similar to installation, you can uninstall the OpManager agent in 3 different ways. Note that deleting the agent from the client machine directly will stop all monitoring activities. To resume monitoring, you can simply re-install the agent in that client computer.
1. From OpManager's web console
- Go to the Monitoring agents page under Settings → ITOM Agent → Monitoring Agents. You can find the list of active agents in OpManager.
- Click on the Bin icon next to any of the agents to remove it from OpManager. Note that the agent will be uninstalled from the monitored device, and the device will also be removed from OpManager.
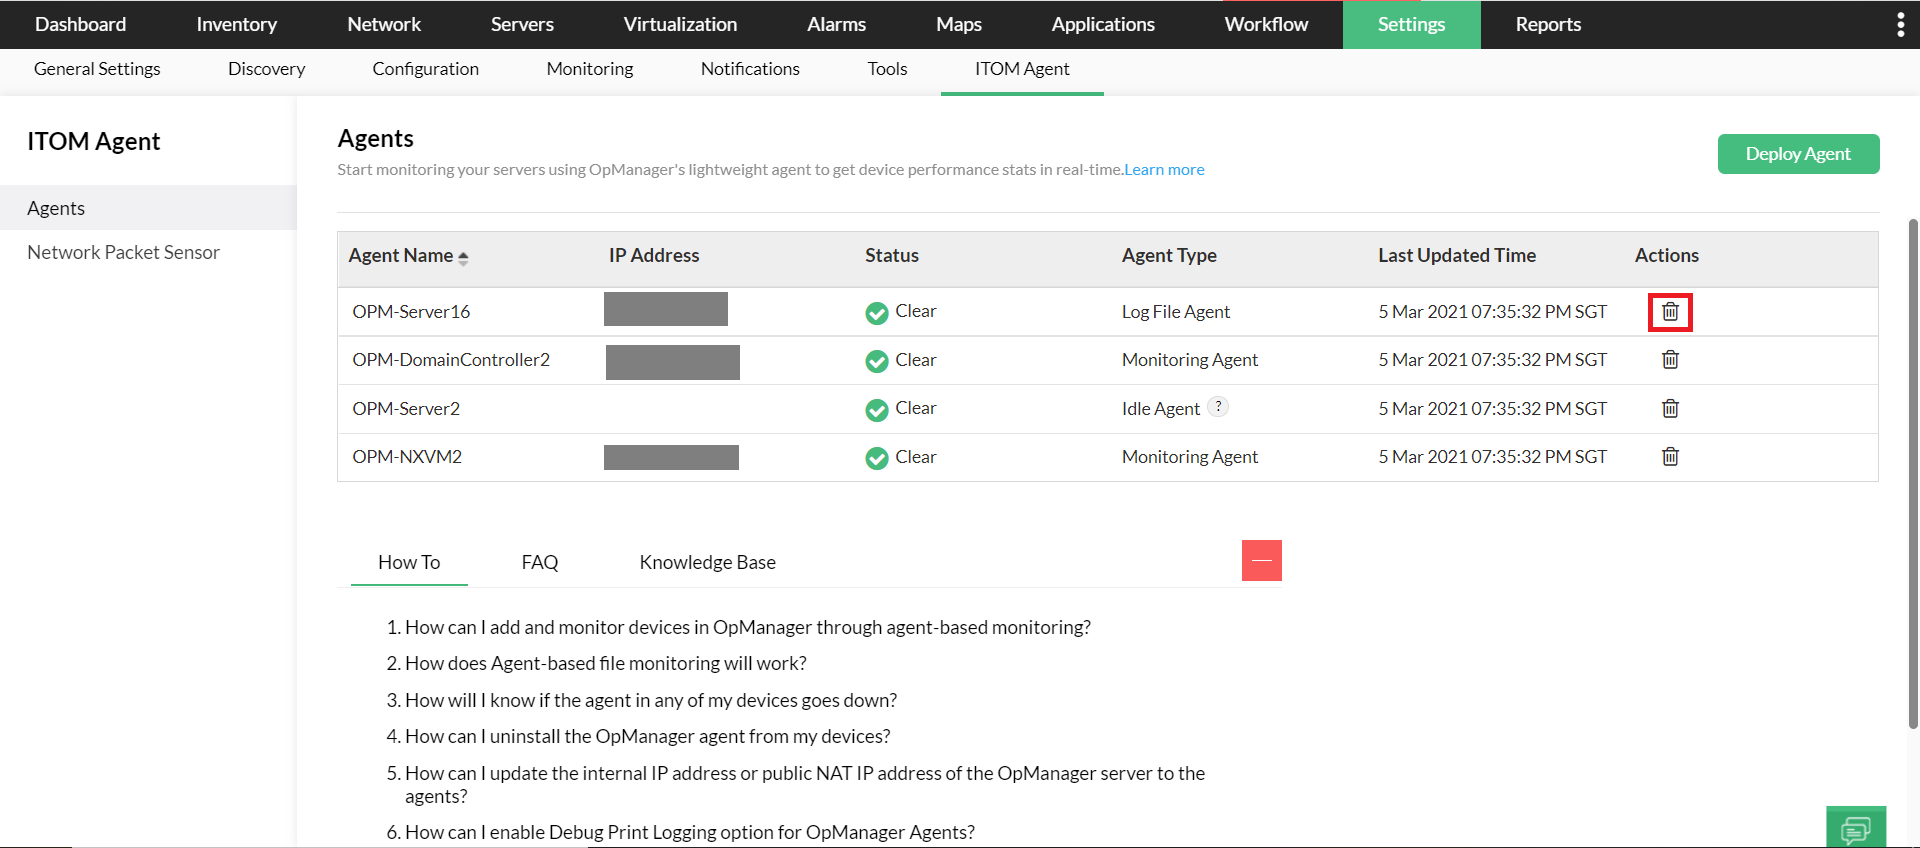
- If you wish to remove the agent from multiple devices, you can do that from the Inventory page in OpManager. Just select the device you wish to remove and click 'Delete', and OpManager will automatically remove the devices from OpManager and also uninstall the agent from those devices.
2. Manual uninstallation
To uninstall in this method, you would need physical/remote access to the client computer(s). Manual uninstallation can also be done in two methods:
- From Control Panel: You can manually remove the OpManager agent from the device by uninstalling it from Control Panel → Programs and Features.
- Using script:
- Download the script file UnInstallOPMAgent.txt
- Rename the file to UnInstallOPMAgent.vbs
- Now, run this script on the device from Command Prompt: CSCRIPT UnInstallOPMAgent.vbs
3. Using Active Directory (bulk uninstallation)
Using Active Directory, you can uninstall the agent from multiple devices at once. Follow the steps mentioned below in your Active Directory server:
- First, download the script file UnInstallOPMAgent.txt and rename it to UnInstallOPMAgent.vbs.
- Before you begin with the process, make sure the file association of .vbs files is set to "Microsoft Windows (r) Based Script Host" in all the client computers. If this is set to any other text editor, the script will not be executed properly.
- Open Start → Run, and type gpmc.msc.
- Right-click on the domain, and select Create and Link a GPO here.
- Provide a name for the GPO.
- Select the corresponding GPO from the tree. Check if Security Filtering in the Scope tab has the Authenticated Users group added.
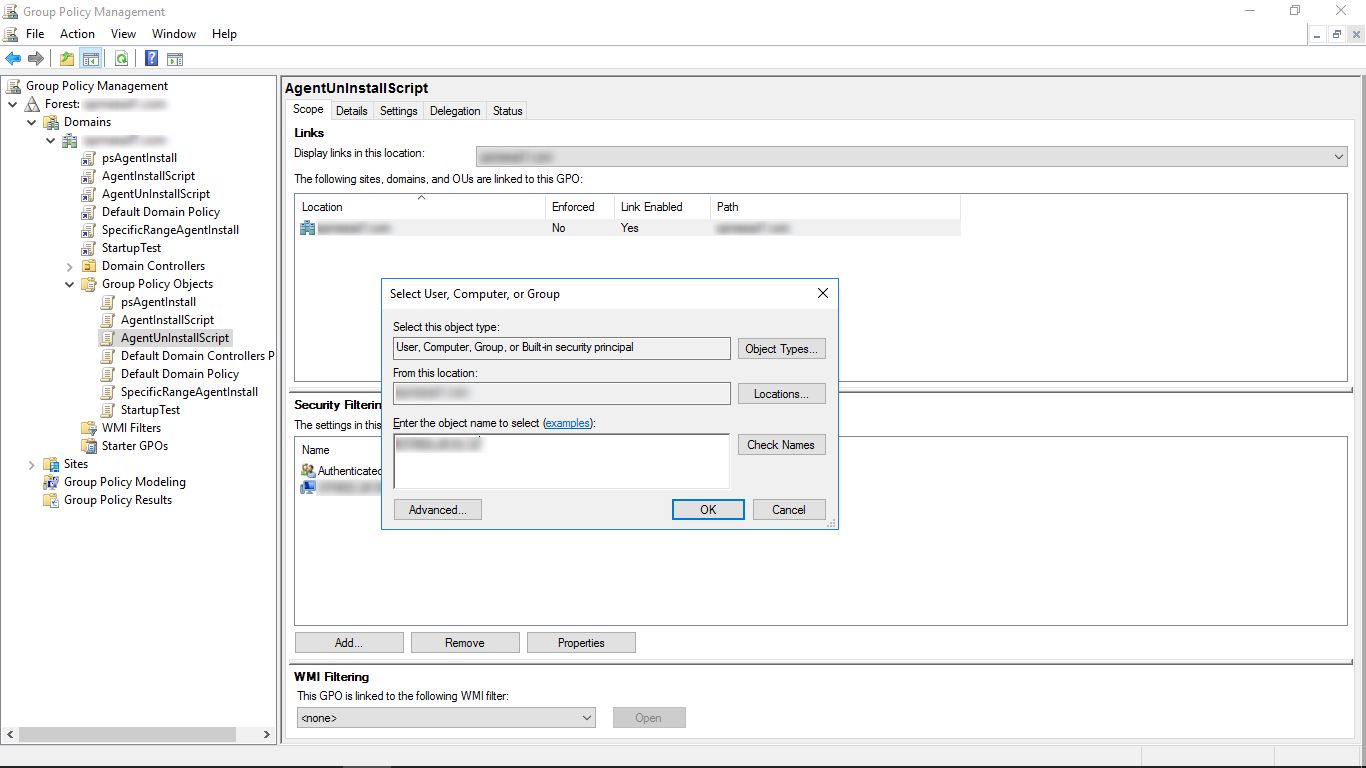
- Right-click on the GPO, and select Edit.
- Expand Computer Configuration, and go to Windows Settings → Scripts.
- Right-click on Startup and select Properties.
- Click Show Files, and drag-and-drop the UnInstallOPMAgent.vbs. Once done, close the window.
- In the Startup Properties dialog box, click 'Add' and browse to select the UnInstallOPMAgent.vbs script.

- Click OK to close the Add a Script dialog, and click OK again to close the Startup Properties dialog.
- Finally, close the Group Policy Object Editor and the Group Policy Management dialog.
- If configured properly, the agent will be removed from the devices during next startup.
Note:
It is advised to remove all the agents from your client computers before uninstalling OpManager. If you failed to remove them and accidentally uninstalled OpManager, you can use the Manual uninstallation or the Bulk Uninstallation methods to uninstall the agent from your client computers.