Managing Users
There are multiple ways to add users to Access Manager Plus. Access Manager Plus allows you to edit and delete users based on preference. It also allows you to change the roles of the users you have created. Users can be given different levels of permissions based on their roles.
Allowed Actions on Users
- Editing Users
- Deleting Users
- Transferring Ownership
- Adding User to Multiple Groups
2.1 Deleting the In-Built Admin User
2.2 Handling User Accounts Deleted from AD/Azure AD/LDAP Directories
2.3 Managing Notification Email Addresses in Access Manager Plus
1. Editing Users
You can modify the details and can enable or disable two-factor authentication for any user at anytime.
- Navigate to Users >> User Actions(against the desired user) >>Edit User.
- In the dialog box that opens, you can edit the following:
- First Name
- Last Name
- Email ID
- Password policy
- Department
- Location
- User Certificate
- Language
- Click Save.

- You can also enable or disable Two-Factor Authentication for a particular user.
- In case RSA SecurID is used as the second authentication factor, you need to ensure that the user name in RSA Authentication Manager and the corresponding one in Access Manager Plus are the same.
- In case, for the already existing RSA users, if the user name in Access Manager Plus and RSA Authentication Manager are different, you can do a mapping of names in Access Manager Plus instead of editing the name in RSA.
- Mapping can be done from here through RSA SecurIDUserName. (Assume the scenario that in Access Manager Plus you have imported a user from Active Directory, who has the username (say) ADVENTNET\rob in Access Manager Plus. In RSA Authentication Manager, assume that the username is recorded as rob. In normal case, there will be mismatch of usernames between Access Manager Plus and RSA Authentication Manager. To avoid that, you can do a mapping in AMP-ADVENTNET\rob will be mapped to rob).
2. Deleting Users
Administrators can remove the users who are no longer required by Deleting them. This operation is permanent and cannot be reverted.
To Delete a user,
- Navigate to Users >> User Actions(against the desired user) >> Delete user.
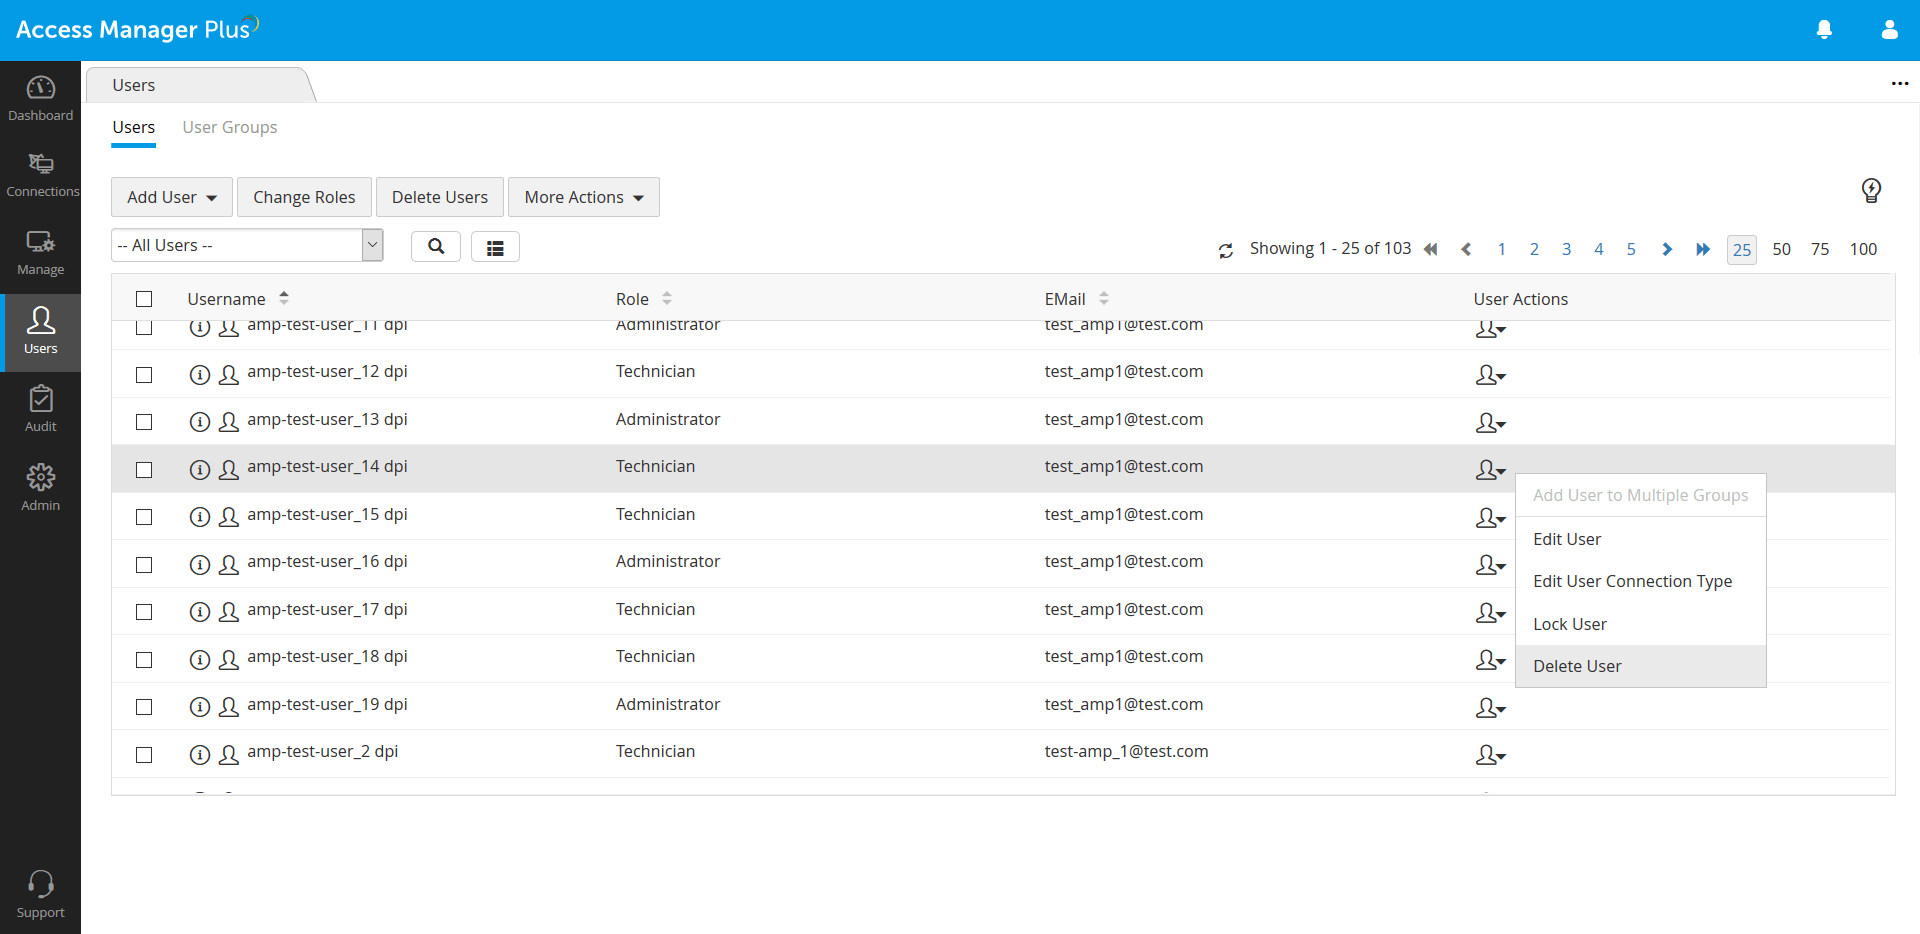
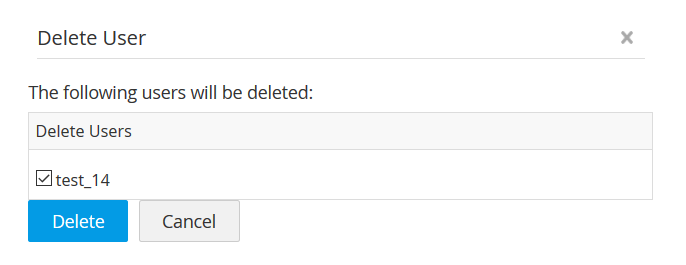
- A Delete User pop-up window appears in which to delete an intended user permanently, select the user name and click Delete.
Note: Access Manager Plus will allow users to be deleted only if the user/users do not own any session. If the user owns any session, then you need to transfer the ownership of all the sessions to some other user with an administrator-type role. The currently logged in user will not be allowed to delete themselves.
2.1 Deleting the In-built Admin User
Before proceeding to delete the admin user, check if the admin user owns any session. If so, the sessions should be transferred to another user with an administrator-type role.
- Click the Users tab.
- In case the admin owns sessions, transfer all those sessions to another user by clicking on User Actions icon against the admin user and selecting Transfer Ownership from the drop down.
- If you have logged in as the admin user who has to be deleted, then you have to request some other administrator to delete your account, because the currently logged-in user cannot delete themselves.
- The above procedure holds good for deleting any user with an administrator-type role.
2.2 Handling User Accounts Deleted from AD/Azure AD/LDAP Directories
- Whenever a user account is deleted directly at the user directory from which it was imported to Access Manager Plus (AMP) i.e. from AD, Azure AD or LDAP directory, Access Manager Plus identifies those deleted user accounts the next time a respective synchronization schedule is run. The identified user accounts are then subsequently disabled in Access Manager Plus and held as locked accounts. Note that Access Manager Plus will identify deleted user accounts only if you have set up synchronization with the respective user directory.
- After disabling the user accounts, Access Manager Plus informs the administrators (and users whose roles permit them user management privileges) via email as well as an alert notification within the product.
- The administrator can review the disabled accounts and then choose to delete those user accounts permanently from Access Manager Plus by clicking the Delete button in the dialog box above. On the other hand, to activate the accounts,
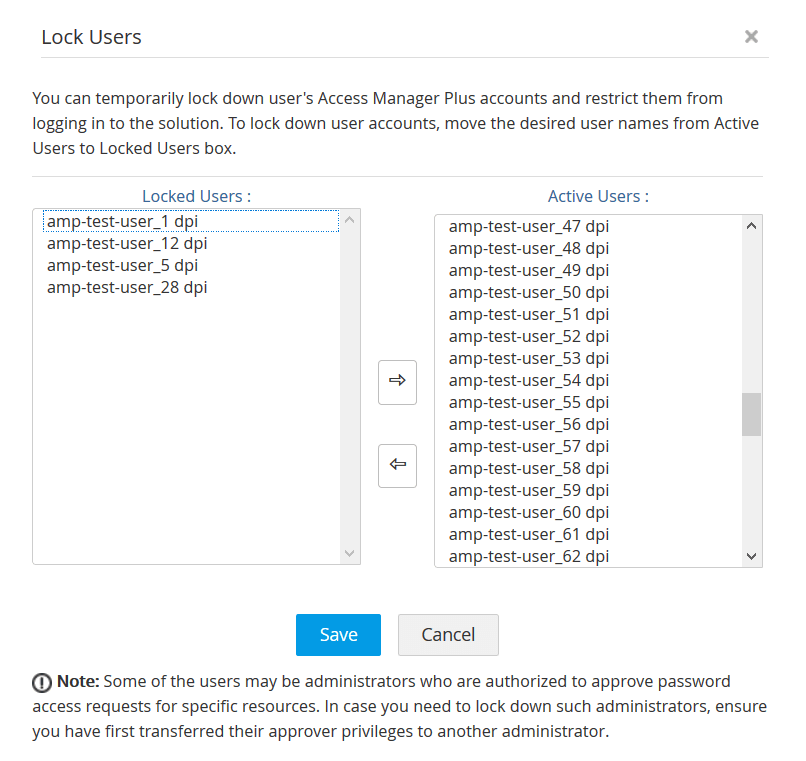
- Navigate to Users >> More Actions >> Lock Users.
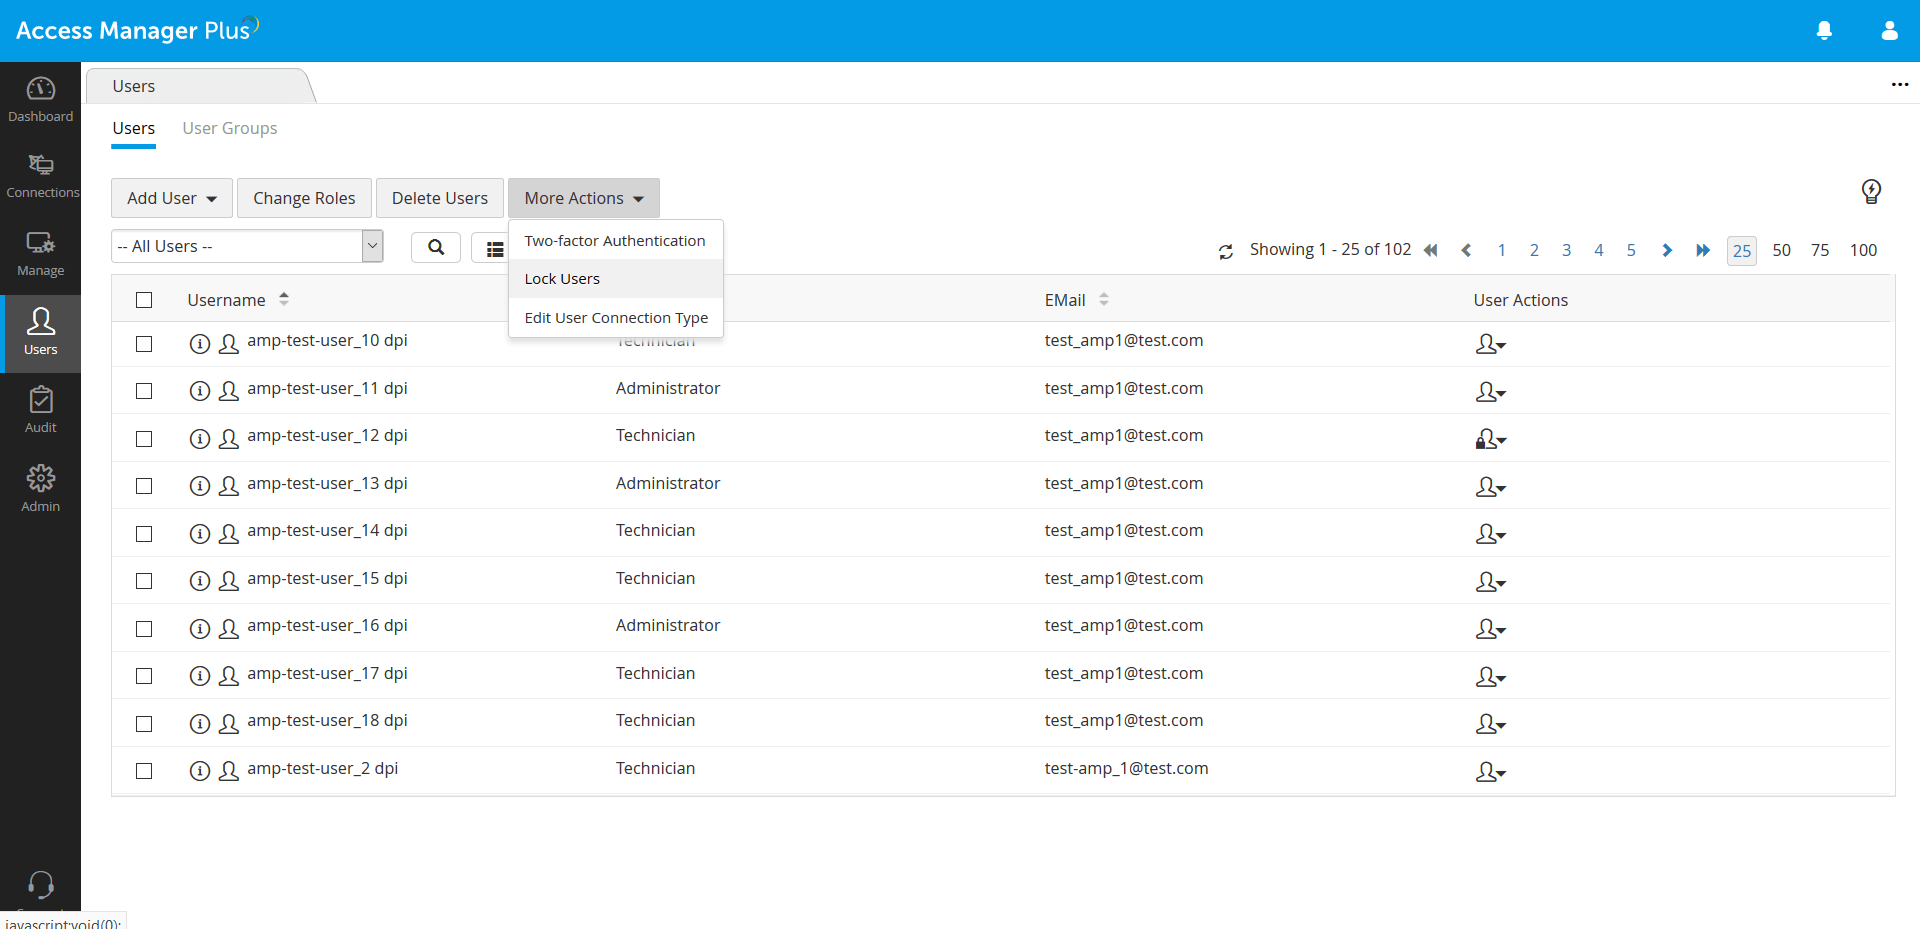
- In the new window that opens, you will find the disabled user accounts listed under the Locked Users column. Move the required account to the ActiveUsers column and click Save as shown below:
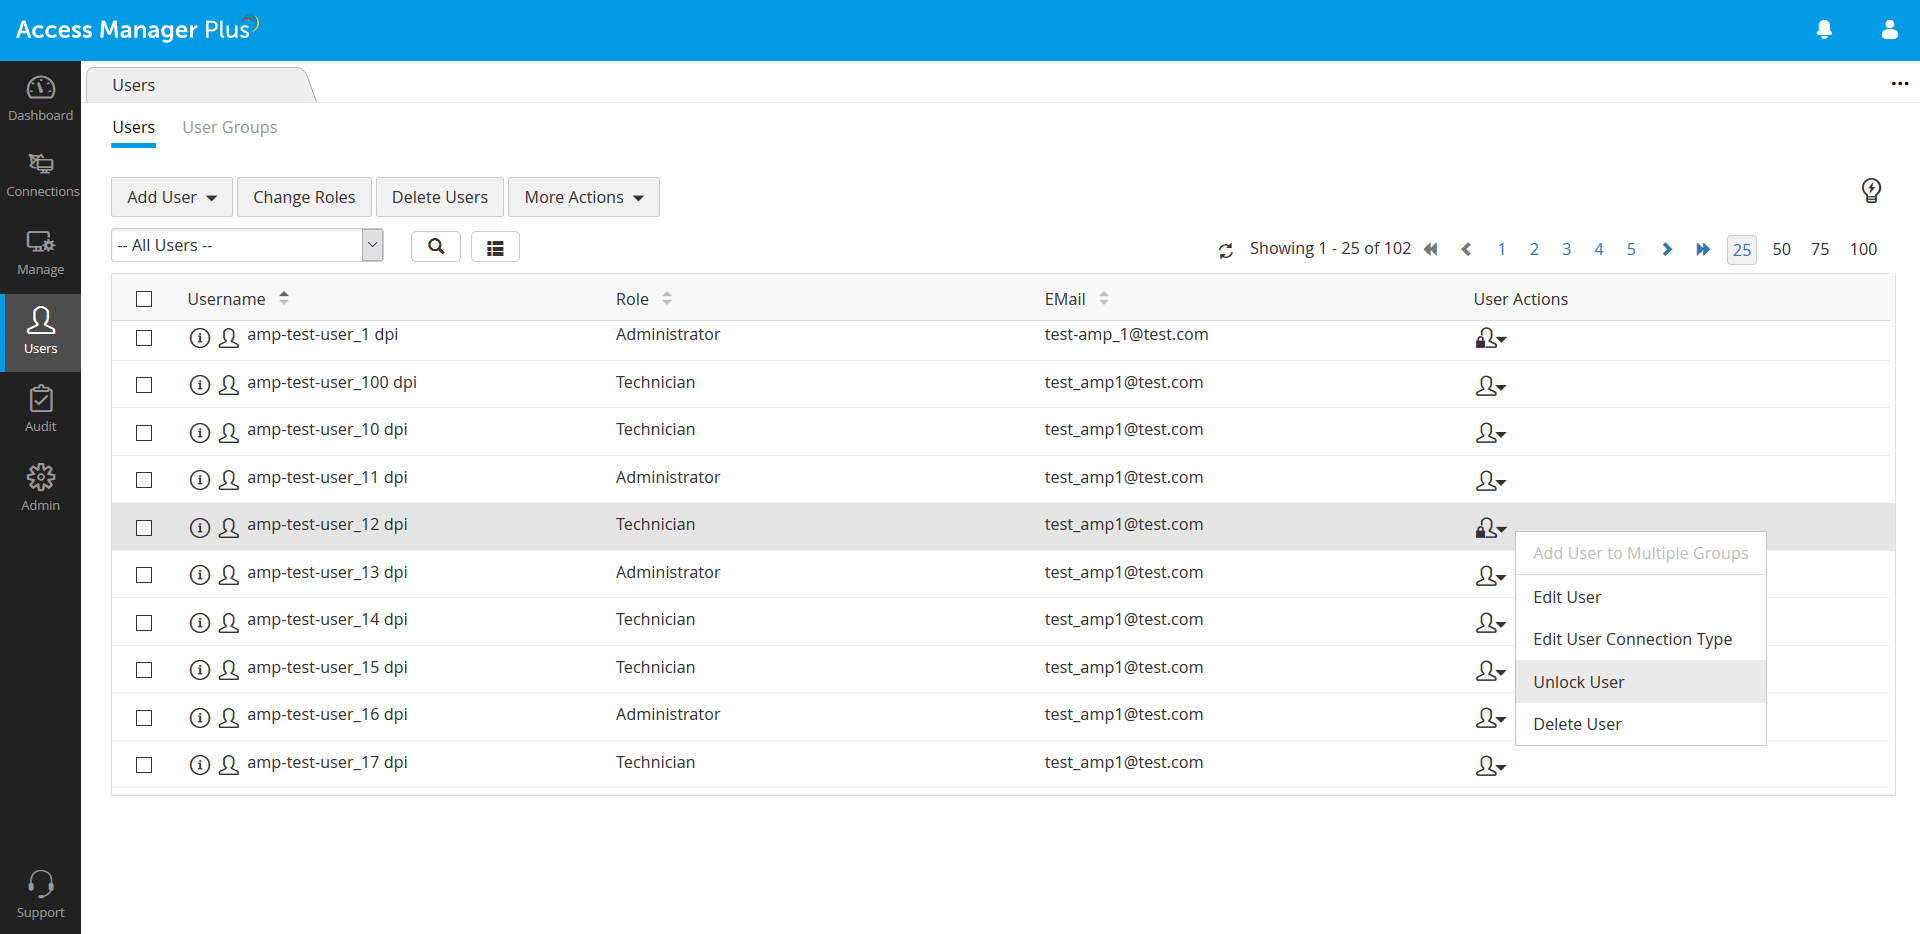
- Alternatively, you can also activate individual user accounts by locating the required user, clicking on User Actions icon beside the user, and selecting UnlockUser from the drop down menu as shown below:
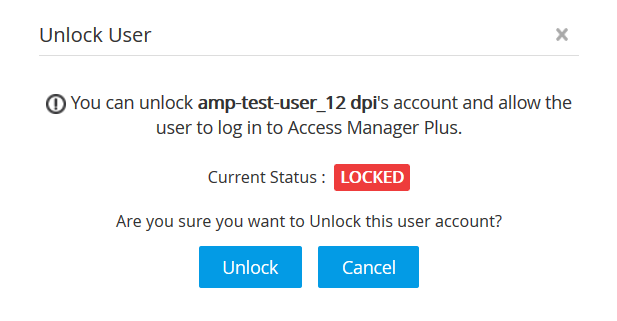
- In the dilalog box that opens, click Unlock to confirm the action and the disabled user will be restored.
- Navigate to Users >> More Actions >> Lock Users.
2.3 Managing Notification Email Addresses in Access Manager Plus
Access Manager Plus allows you to configure generic email addresses as recipients of notification emails for scheduled tasks' completion statuses and license expiry alerts. You can keep track of all such external email addresses being used in Access Manager Plus and also delete them if needed. Additionally, the email addresses of users captured in the User Sessions audit can also managed using this provision, in the event of those users being removed from Access Manager Plus.
To view the list of notification email addresses,
- Navigate to Admin >> Configuration >> Notification Email IDs.
- In the new dialog box that opens, you will find the email addresses listed under four different sections: Schedules, License Expiry Notifications, SSH/SSL Notifications, and User Sessions Audit, if there are any.
- Review the listed email addresses under each section, select the one that you want to delete and click Delete.
3. Transferring Ownership
- Navigate to the Users tab.
- Click the User Actions >> Transfer Ownership.
- In the pop-up form that appears, select the user to whom the ownership has to be transferred and click Save.
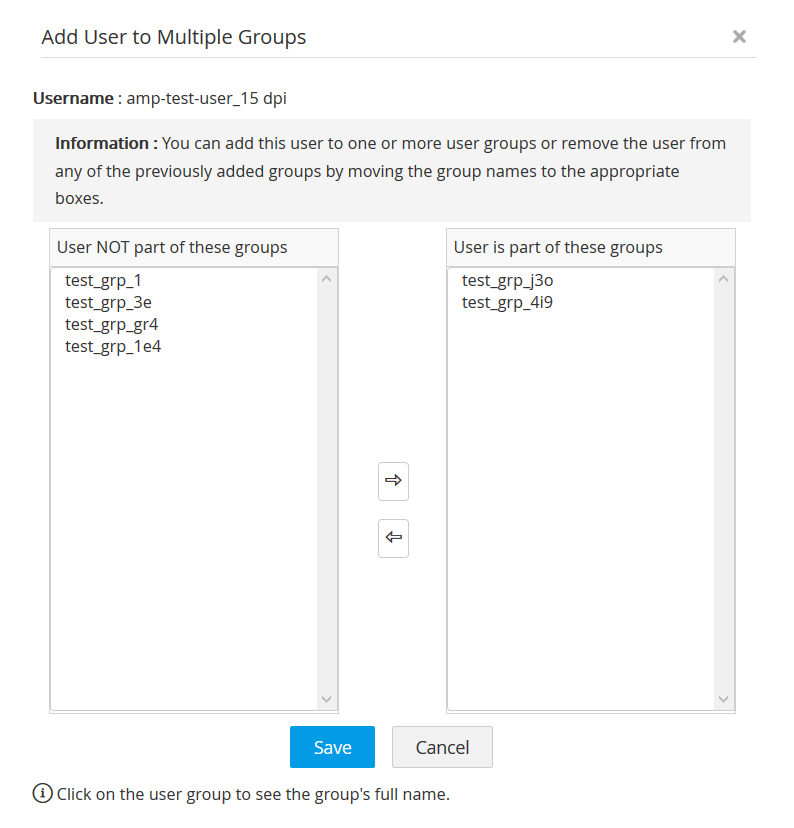
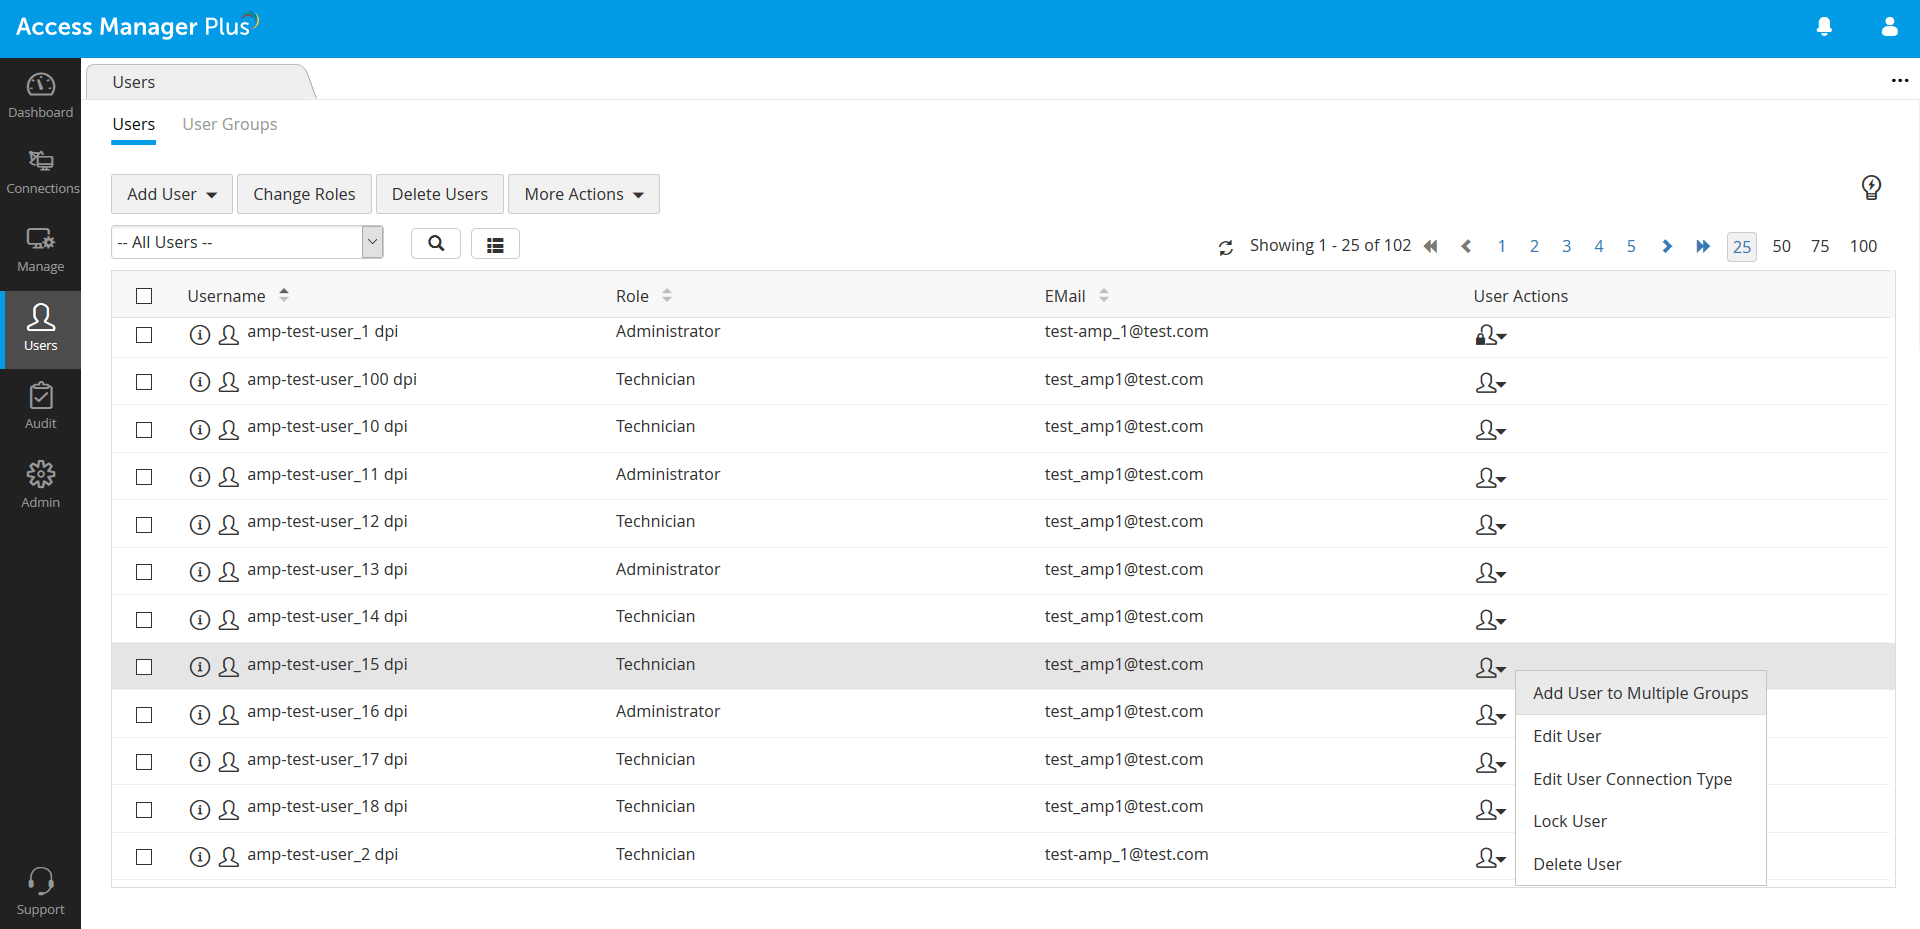
4. Adding User to Multiple Groups
- Navigate to the Users >> User Actions(against the desired user) >> Add User to Multiple Groups.
- In the pop-up that appears,
- Move the group's name to the appropriate box to add this user to one or more groups.
- You can also remove the user from one or more groups by moving the group's name to the appropriate box.
- Click Save.