- Related Products
- AD360
- Log360
- ADAudit Plus
- ADSelfService Plus
- EventLog Analyzer
- Exchange Reporter Plus

Help Document
SMS server settings
You can configure ADManager Plus to use your own Global System for Mobile Communication (GSM) modem for sending SMS messages, or you can configure your own custom SMS gateway.
GSM modem configuration
- Log in to ADManager Plus.
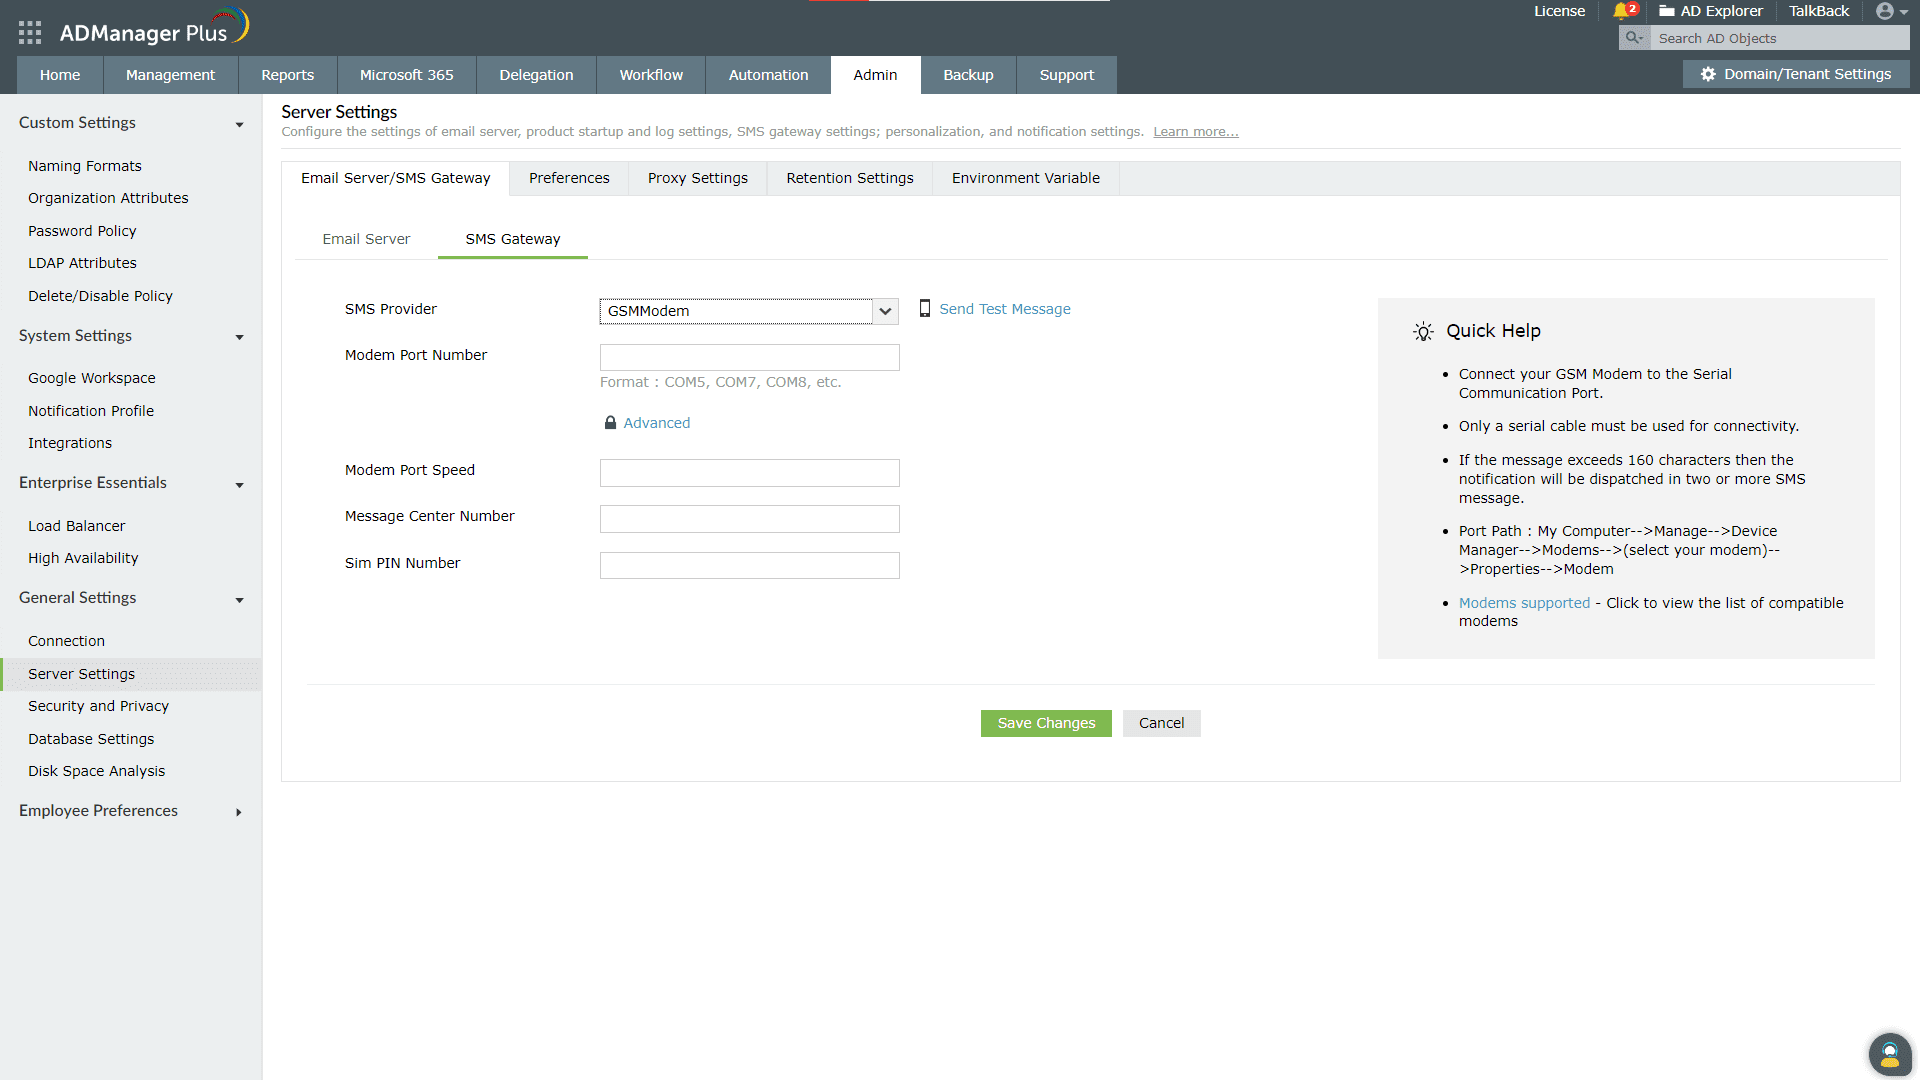
- Navigate to the Admin tab > General Settings > Server Settings > Email Server/SMS Gateway > SMS Gateway.
- Select GSM Modem from the SMS Provider drop-down.
- Specify the modem's port number in the Modem Port Number field. Refer to this section below for more details.
- Click Advanced to configure other fields such as the Modem Port Speed, Message Center Number, and SIM PIN.
- Click Save Changes.
Configuring the modem port and modem port speed
Connect your GSM modem to the serial port of your machine using a serial cable. Now, within ADManager Plus, enter the port number to which the modem is connected in the Modem Port Number field. The port number for Windows devices will be COMx.
Example: COM7 or COM8
Requirements for establishing the SMS server connection
Fulfilling these criteria allows ADManager Plus to support your modem or mobile phone.
- The modem or mobile phone must have GSM functionality, along with the provision to insert a SIM card.
- The modem or mobile phone must support 7-bit (GSM default alphabet), 8-bit, and Unicode (UCS-2) encoding.
Configuring a custom SMS provider
You can configure your own custom SMS gateway if the gateway is HTTP- or SMTP-based.
Steps to configure an HTTP-based SMS provider
- Log in to ADManager Plus and navigate to the Admin tab.
- In the left pane, go to General Settings > Server Settings > Email Server/SMS Gateway.
- Click the SMS Gateway tab.
- Select Custom from the SMS Provider drop-down.
- Select HTTP or HTTPS from the Send SMS drop-down.
- Select either Get or Post HTTP Method to send SMS messages.
- Enter the HTTP URL of your SMS gateway provider.
- Enter the HTTP parameters specific to your SMS provider. Depending on the SMS provider, the formats (plaintext, JSON, or XML), the parameters needed, and their values can vary. Refer to the SMS provider's documentation and add the appropriate values and formats.
Note:
- For additional security, before including passwords in HTTP parameters, store them as environment variables. Then, when adding the parameters, use %env.password% instead of the actual passwords. The steps to create an environment variable can be found here.
- HTTP parameters can be added in plaintext, JSON, or XML formats. Here are a few samples:
- Plaintext format
userName=xxx&password=yyy&mobileNumber=%mobNo%&message=%message%&date=%timestamp%&SignatureNonce=%nonce%.
- JSON format
{"apikey":"123456789","message":"%message%","mobile":"%mobNo%","SignatureNonce":"%nonce%"}
- XML format
<SMS>
<authentication>
<username>test</username>
<password>test</password>
</authentication>
<message>
<sender>Testing</sender>
<text>%message%</text>
<recipients>
<mobile>%mobNo%</mobile>
</recipients>
</message>
</SMS>
- Supported parameters
Parameter Type Detail %mobNo% Macro The user's mobile number %message% Macro The content of the SMS to be sent %timestamp% Macro The request time
- Plaintext format
- Custom parameters can be created as required.
- Sample custom parameter 1
"Content-MD5": "MD5({"ecName":"testing","apId":"abcd","mobiles":"%mobNo%","params":"%message%","sign":"123abc"})"
In the above JSON format example, the MD5 algorithm is used for computing the hash value of the string. {"ecName":"testing","apId":"abcd","mobiles":"%mobNo%","params":"%message%","sign":"123abc"}. The result is later assigned to the Content-MD5 parameter.
- Sample custom parameter 2
Signature=HMAC-SHA1(AccessKeyId=LTAI4G8x27gm&Action=SendSms&Message=%message%&PhoneNumbers=%mobNo%&RegionId=ap-southeast-1&SignatureMethod=HMAC-SHA1&SignatureNonce=%nonce%&Timestamp=%timestamp%&secretKeyForHash=YpyFfCrkpJtBJchdp59)
In the above example, we use the HMAC-SHA1 algorithm to construct a hash value with the secret key, and YpyFfCrkpJtBJchdp59 for this string: AccessKeyId=LTAI4G8x27gm&Action=SendSms&Message=%message%&PhoneNumbers=%mobNo%&RegionId=ap-southeast-1&SignatureMethod=HMAC-SHA1&SignatureNonce=%nonce%&Timestamp=%timestamp%
- Sample custom parameter 1
- In the Response from Provider field, specify the response that you would like to receive from your provider to determine whether the SMS message has been sent successfully or not.
- Click Advanced to configure the following:
- Enter the HTTP Request Headers specific to your SMS provider.
- Check Convert Message into Unicode to send SMS messages in Unicode format.
- Check Encode Message to encode the parameters.
- Check Allow New Lines in Message to include line breaks in messages.
- Select the appropriate encoding method, URL Encode or Base 64, from the Encode Method drop-down.
- Select any of the following options as the Encode Type.
- Message Only: Select this if you would like to encode only the message content.
- Values Only: Select this if you would like to encode only the values mentioned in the URL parameters.
- All: Select this if you would like to encode all the keys and values.
- Click Save Changes.
Steps to configure an SMTP-based SMS provider
- Log in to ADManager Plus and navigate to the Admin tab.
- In the left pane, go to General Settings > Server Settings > Email Server/SMS Gateway > SMS Gateway.
- Select Custom from the SMS Provider drop-down.
- Select SMTP from the Send SMS via drop-down.
- In the From Address field, enter the email address from which you want to send the SMS message (Example: noreply@admanagerplus.com).
- In the To Address field, enter the %mobNo% macro, followed by the email address of your provider. Refer to your SMS provider to know the exact values
- Example: %mobNo%@clickatell.com
- Enter the details required in the Subject field. Generally, it would be either a mobile number or a message, depending upon your SMS provider.
- Enter the details required in the Content field. This also depends on your SMS provider. Please refer to your SMS provider to know the exact values.
- Click SMTP Server Settings provide the required details as given below, to configure the SMTP server
- SMTP Server: Enter the name or IP address of the server.
- SMTP Port: Enter the port number of your SMTP server.
- Username: Enter the username of the SMTP server.
- Password: Enter the password of the SMTP server.
- Connection Security: Select whether you would like to make an SSL or TLS connection.
- Click Save Changes.
Note: If you do not configure the SMTP server settings, then the email server configured under the Email Server tab will be used.