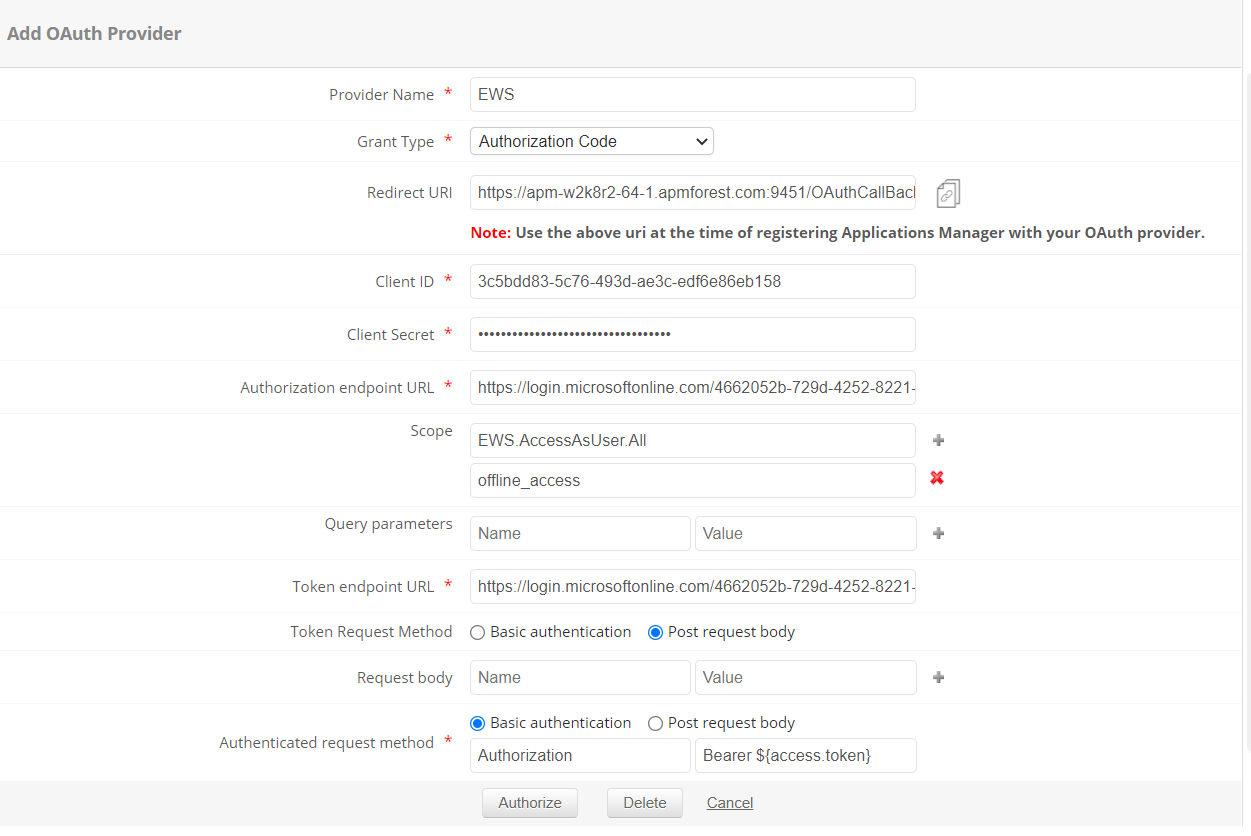
Configuring OAuth for EWS Server (Deprecated from Applications Manager v180000)
Steps to configure OAuth for EWS Server:
Log in to portal.azure.com.
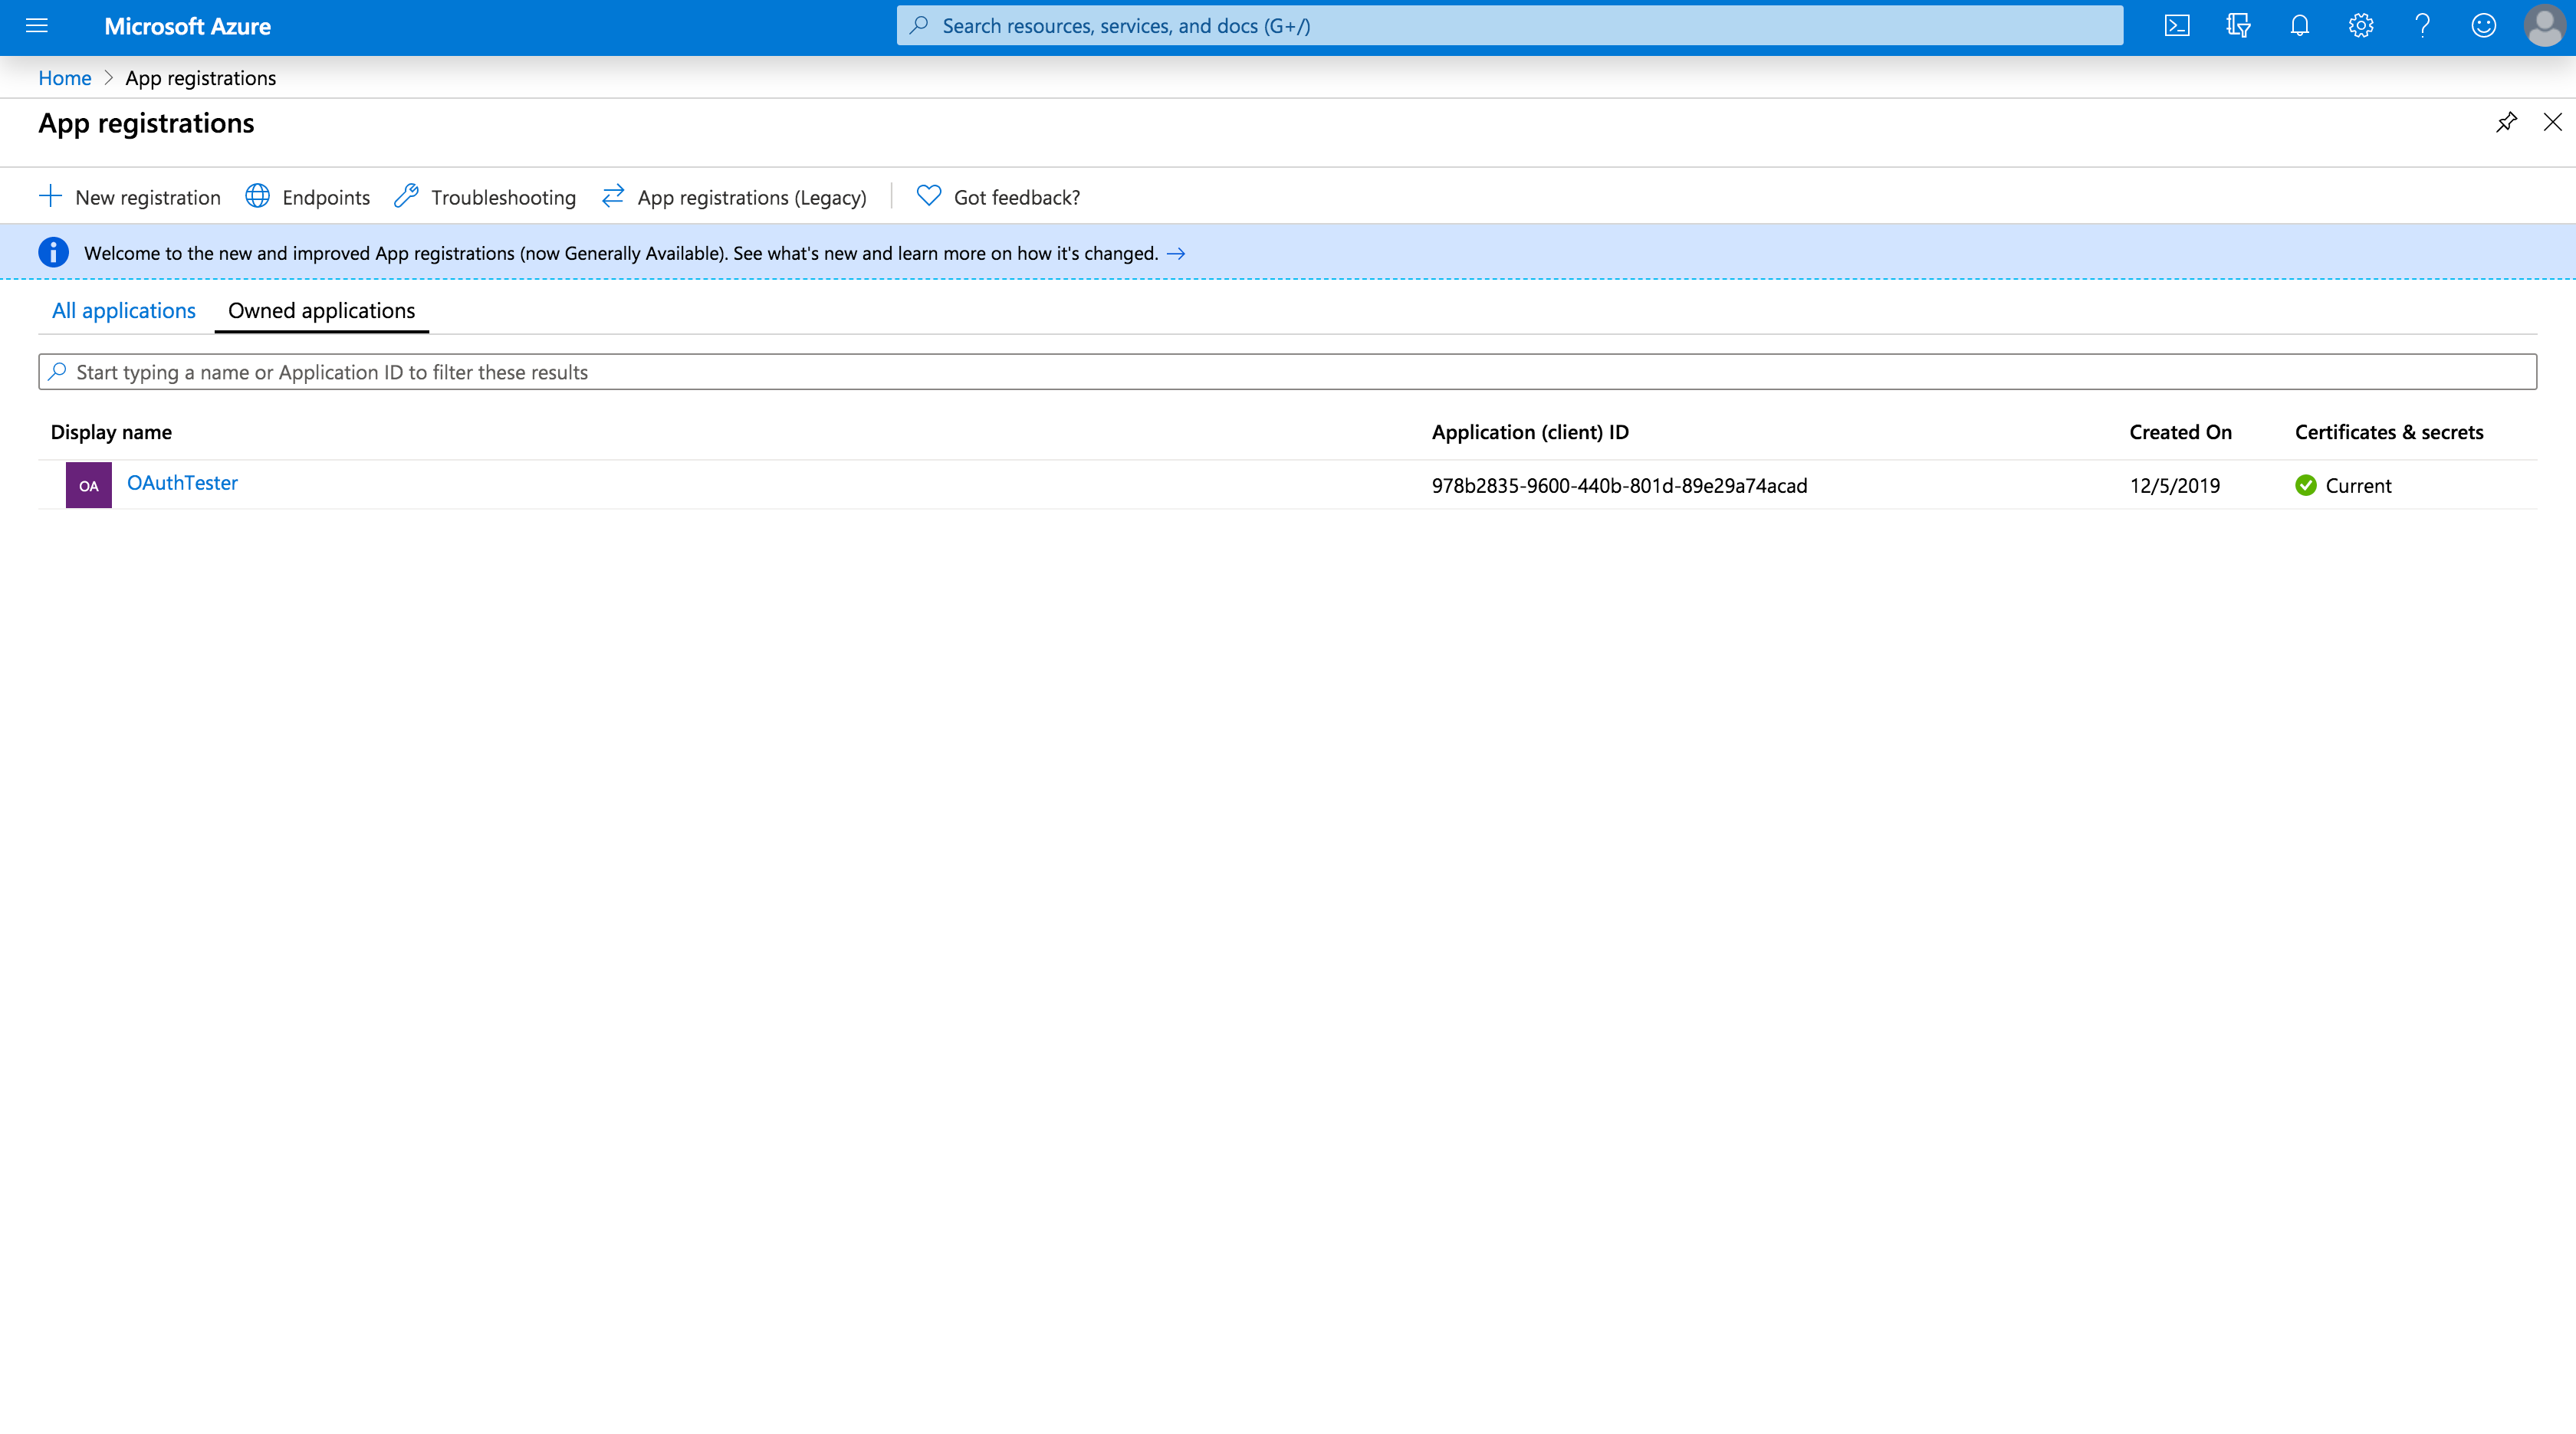
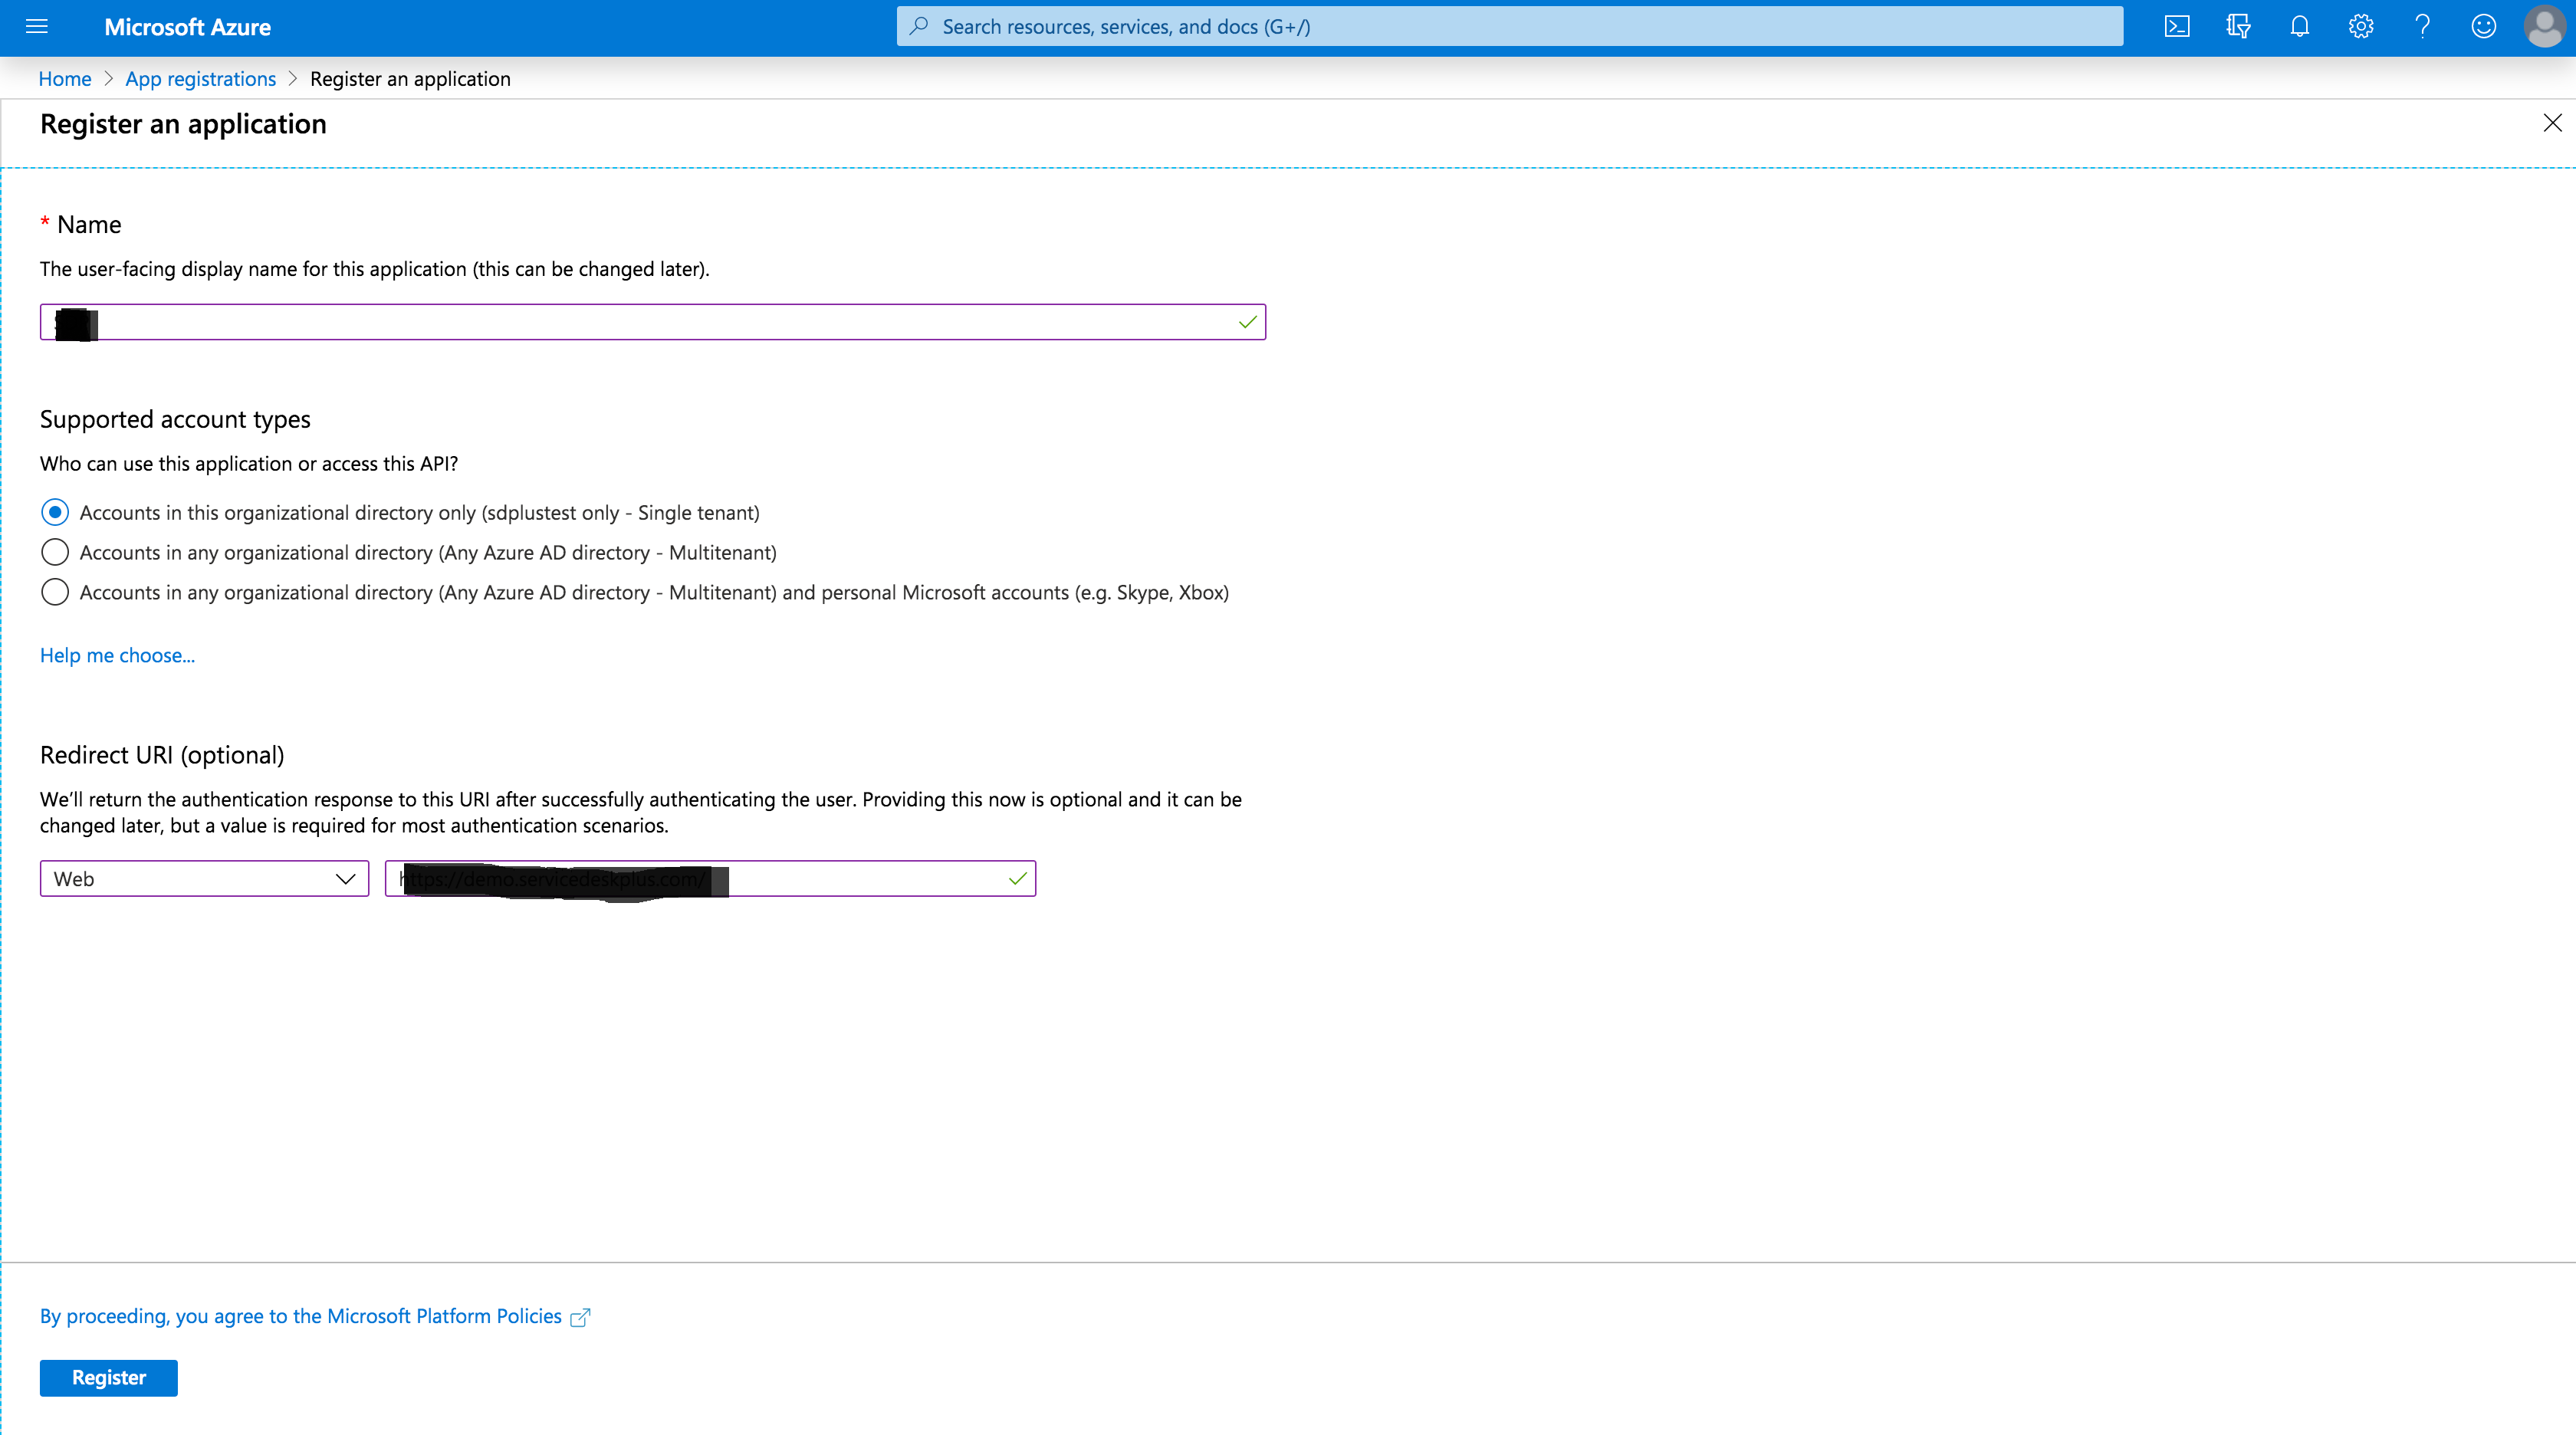
Under Azure services, navigate to App registrations -> New registration.
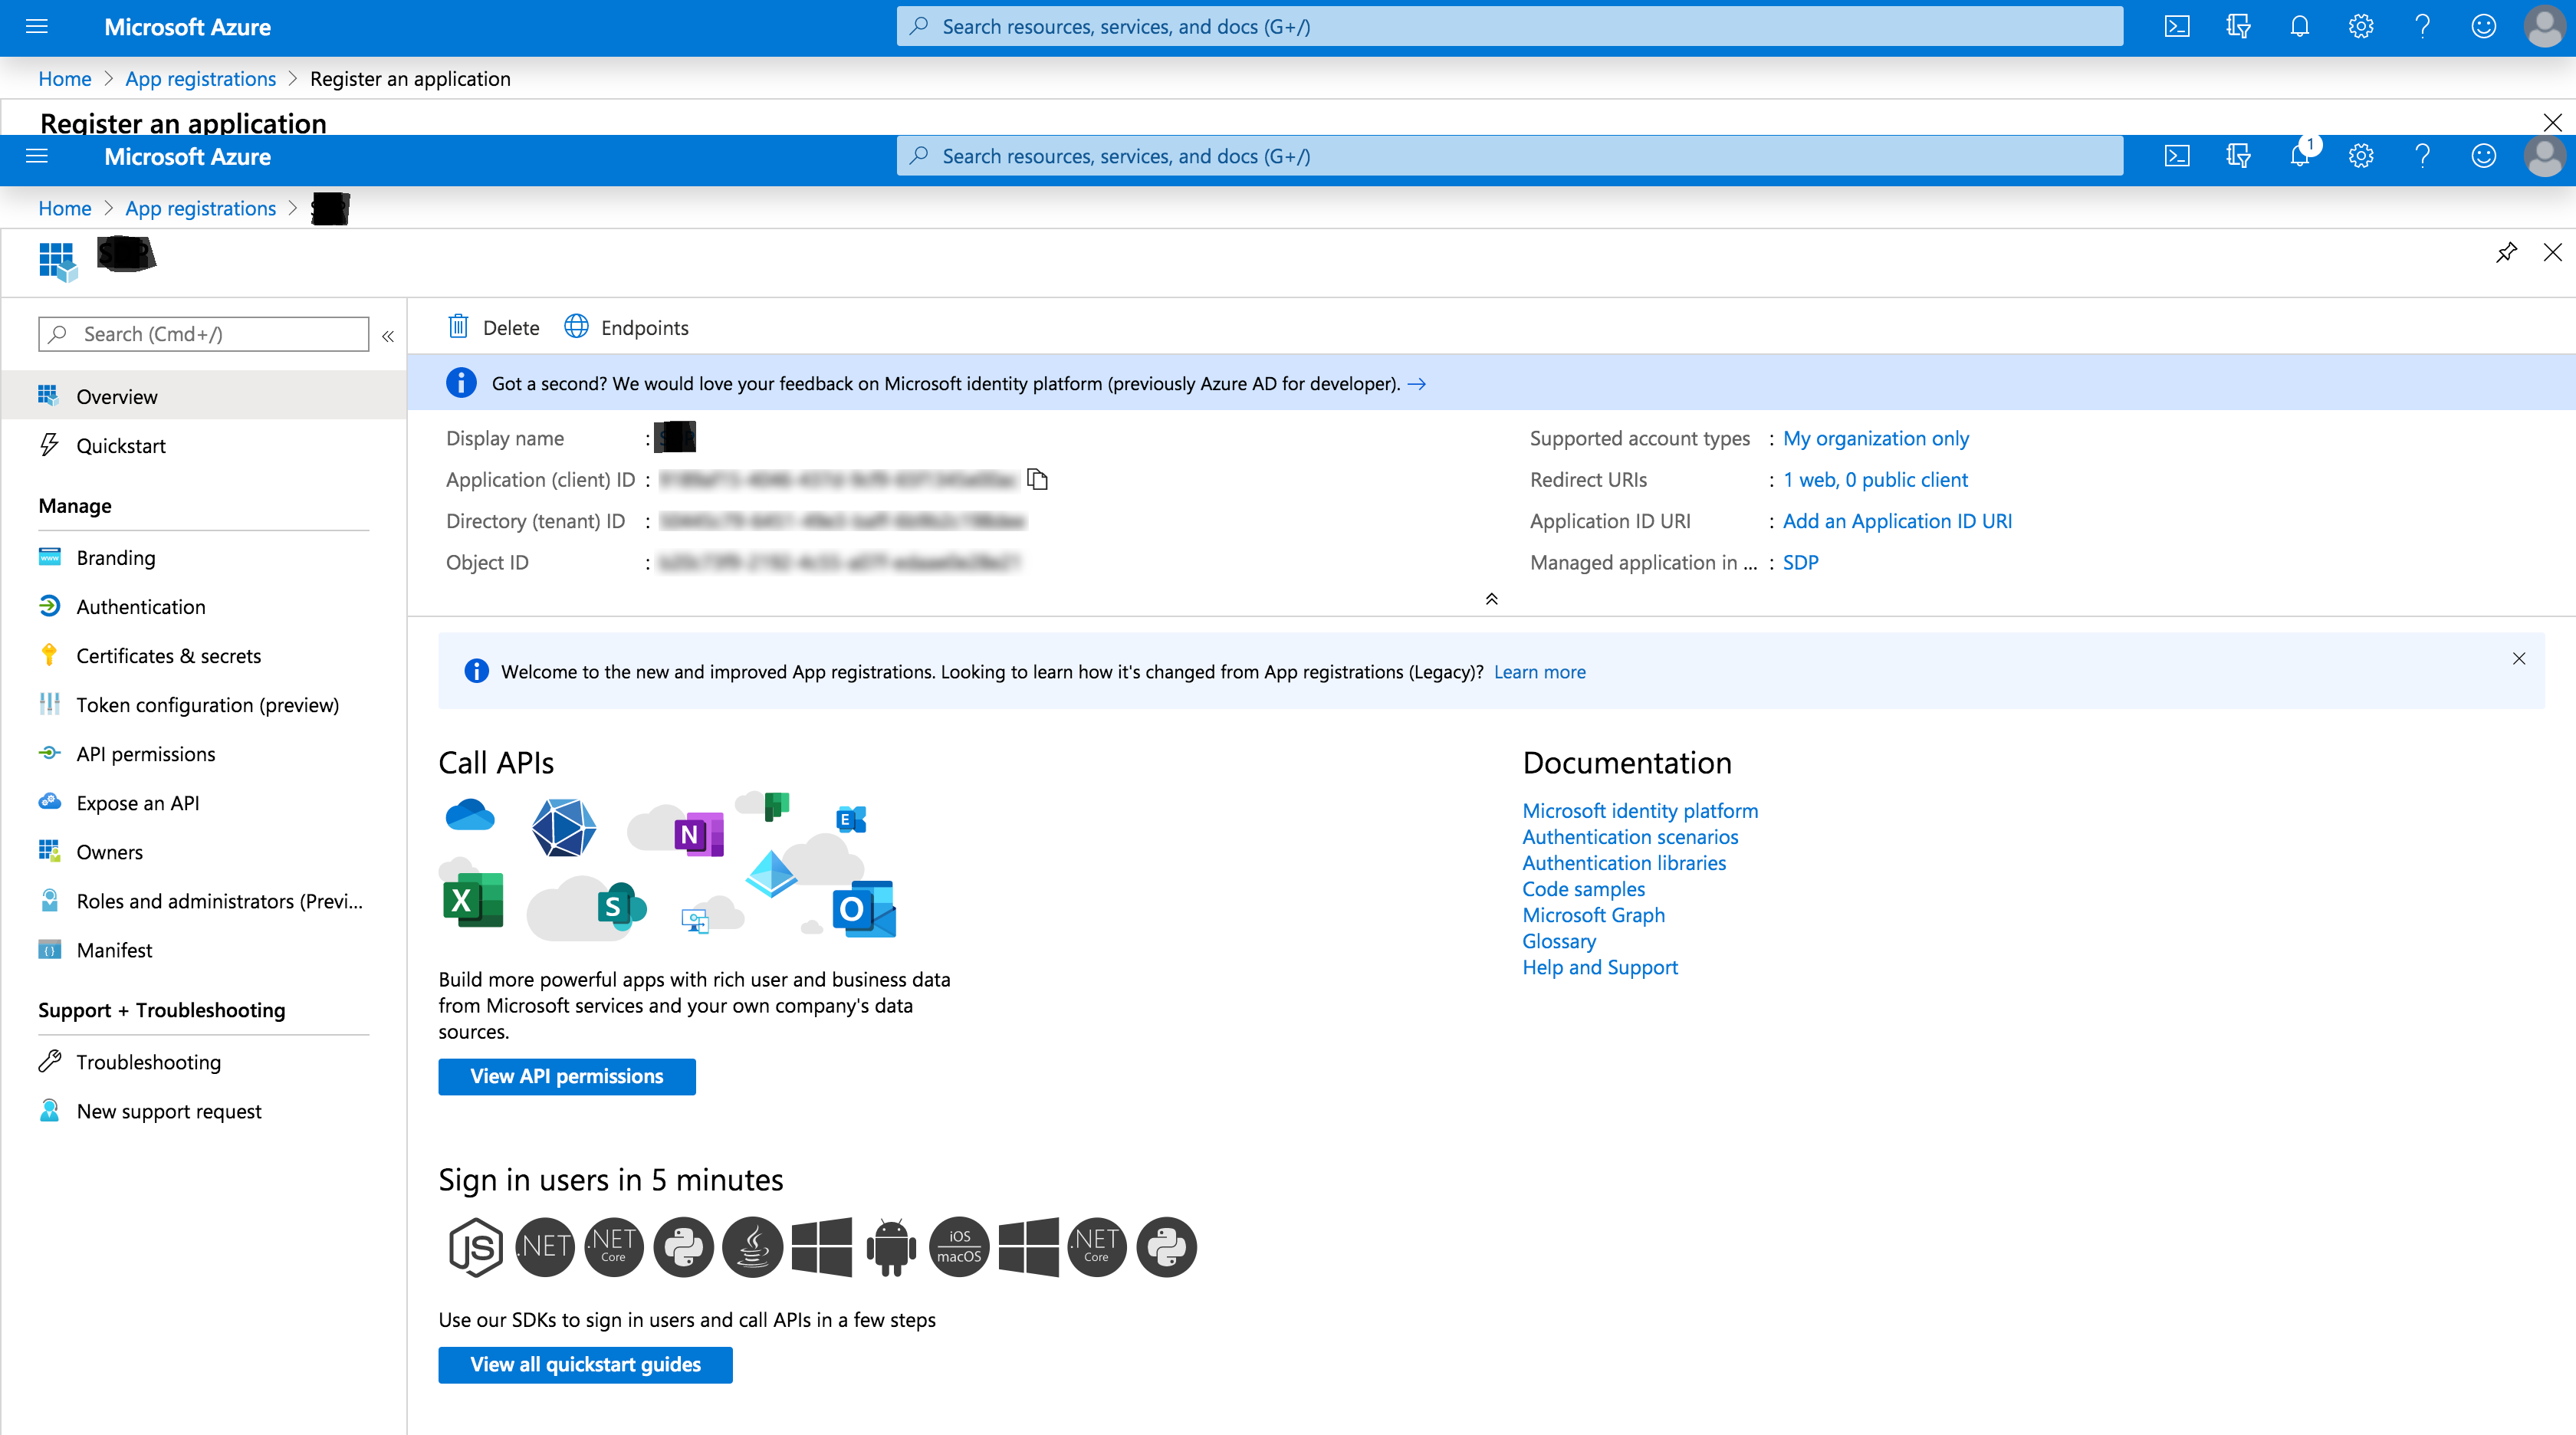
- In the displayed page, enter a Name of your choice and choose the Supported account types.
In the Redirect URI field, copy-paste the Redirect URL of APM.
In the next page, you will find the application details. Copy the Client ID to APM.
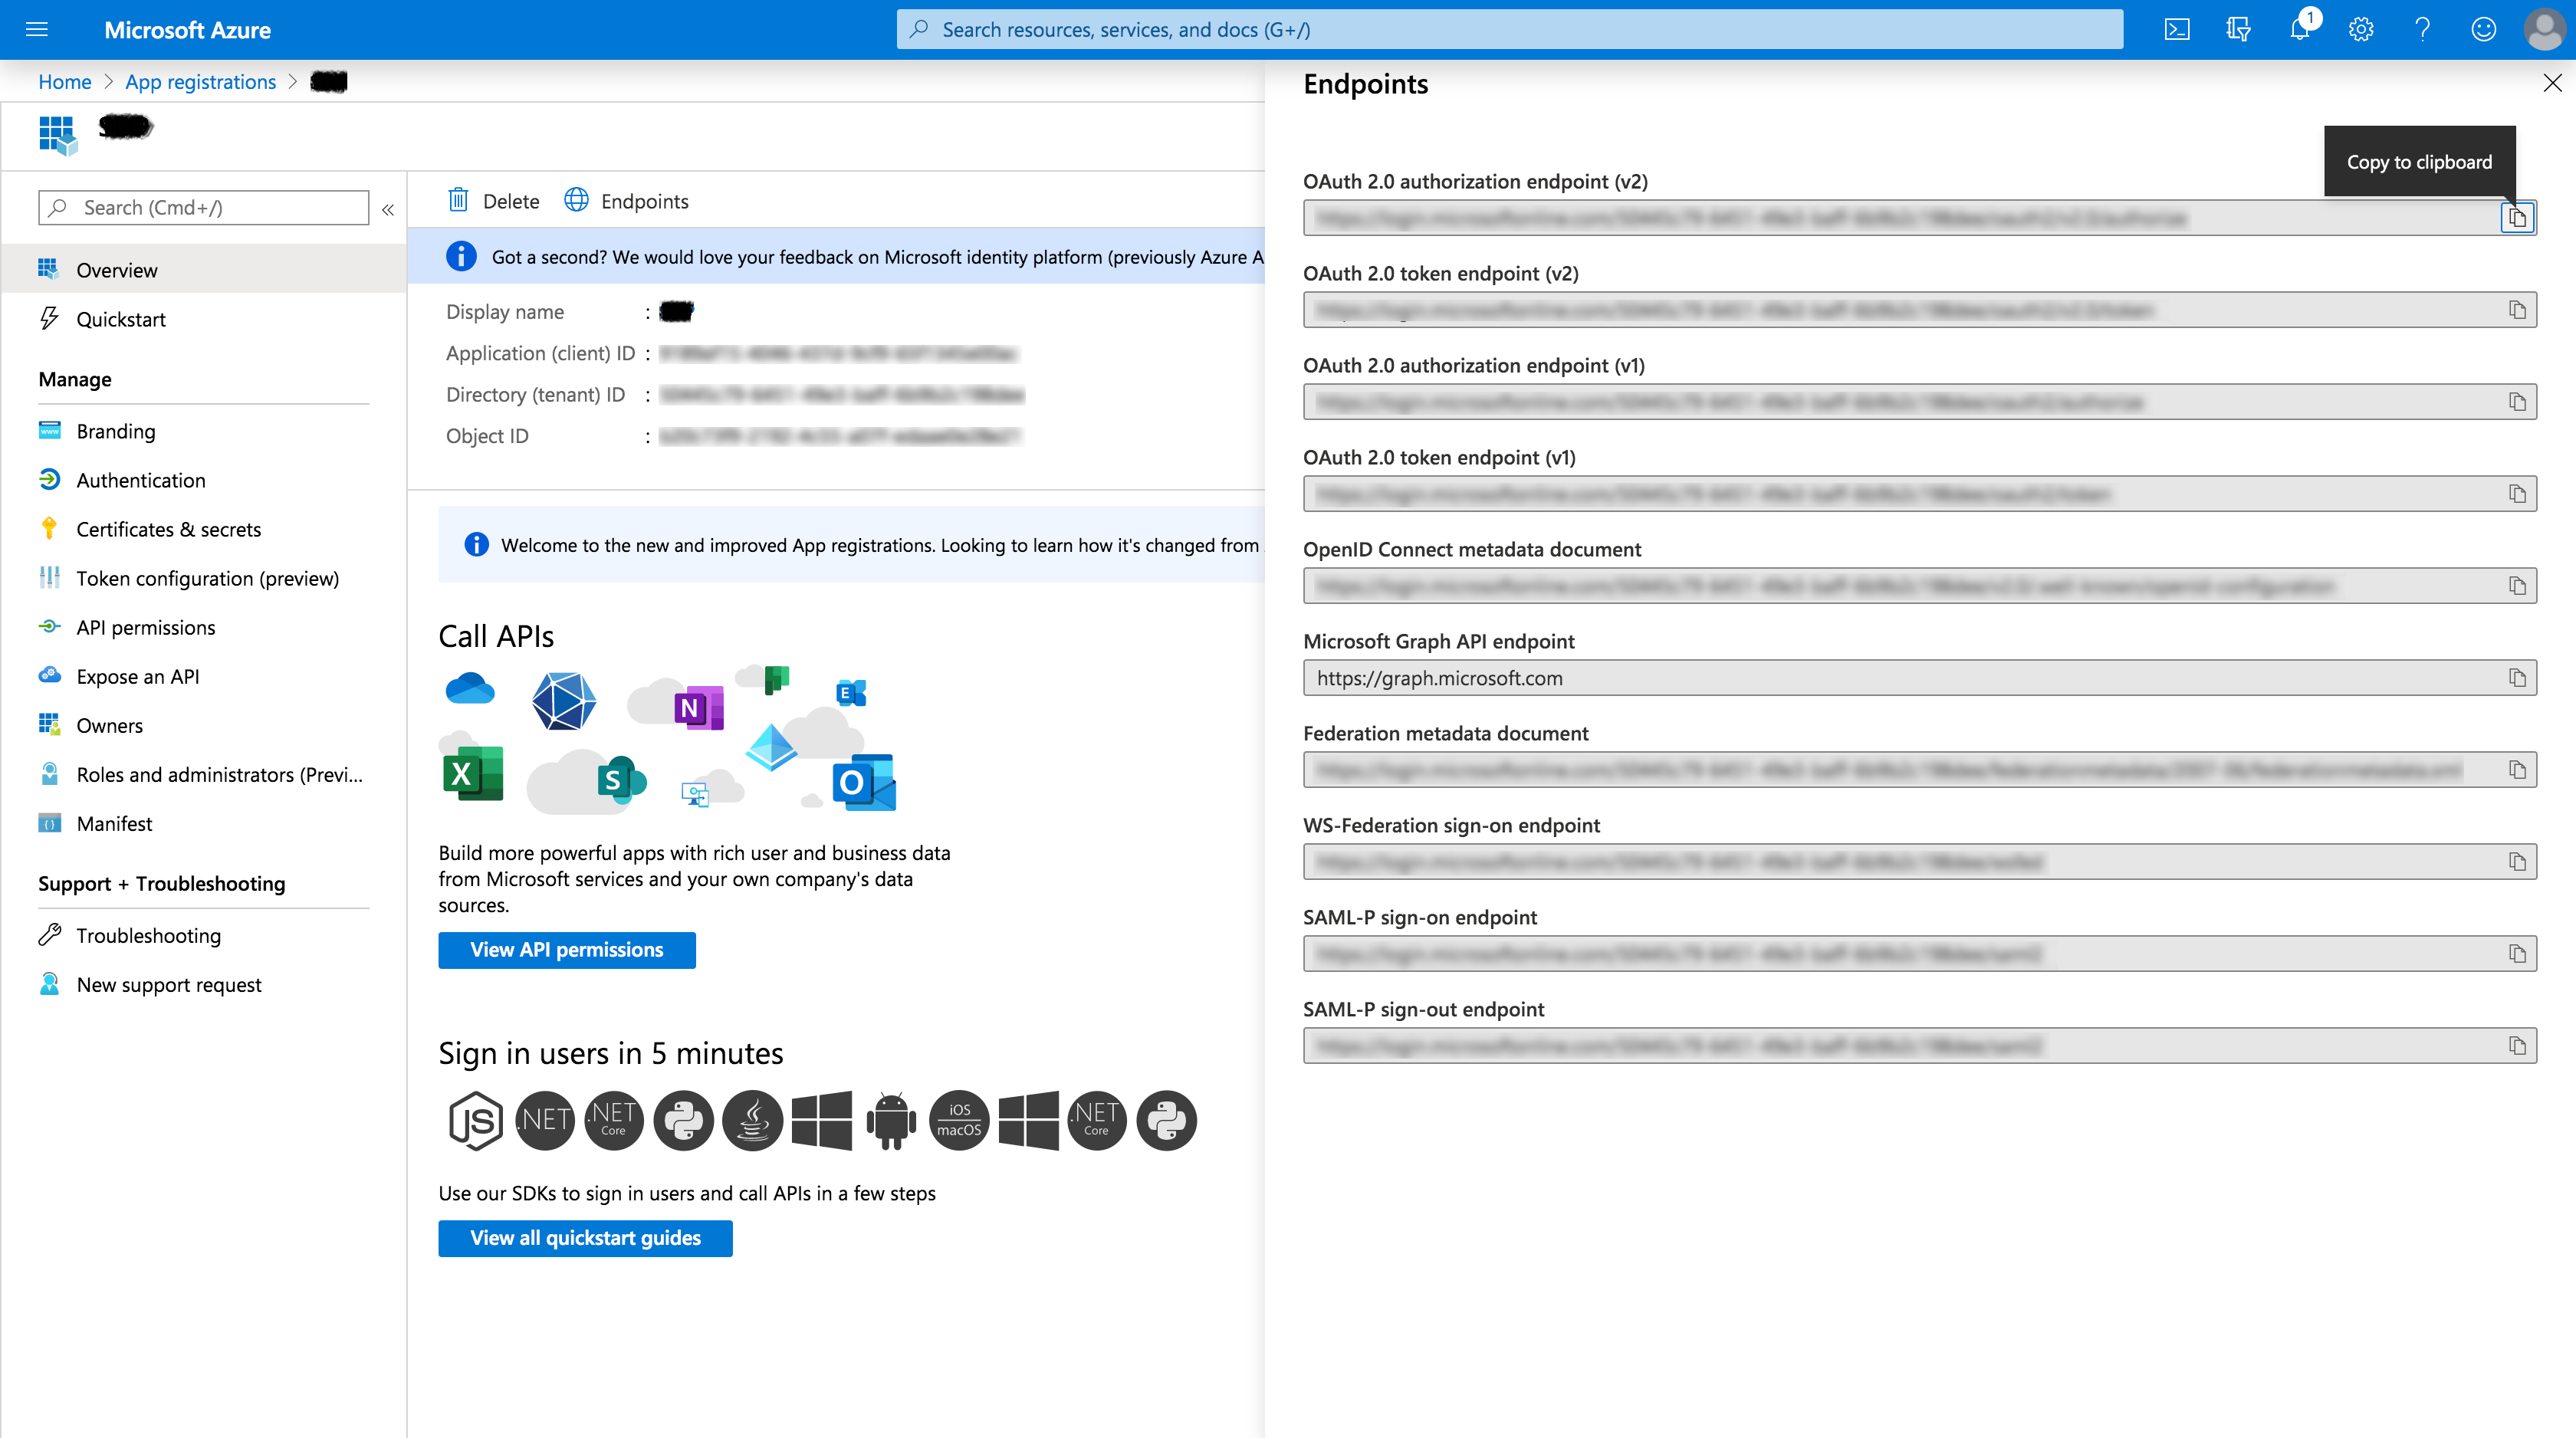
- Click on Endpoints to open the right panel containing all endpoints.
Copy OAuth 2.0 authorization endpoint (v2) and OAuth 2.0 token endpoint (v2) to Authorization URL and Token URL in APM respectively.
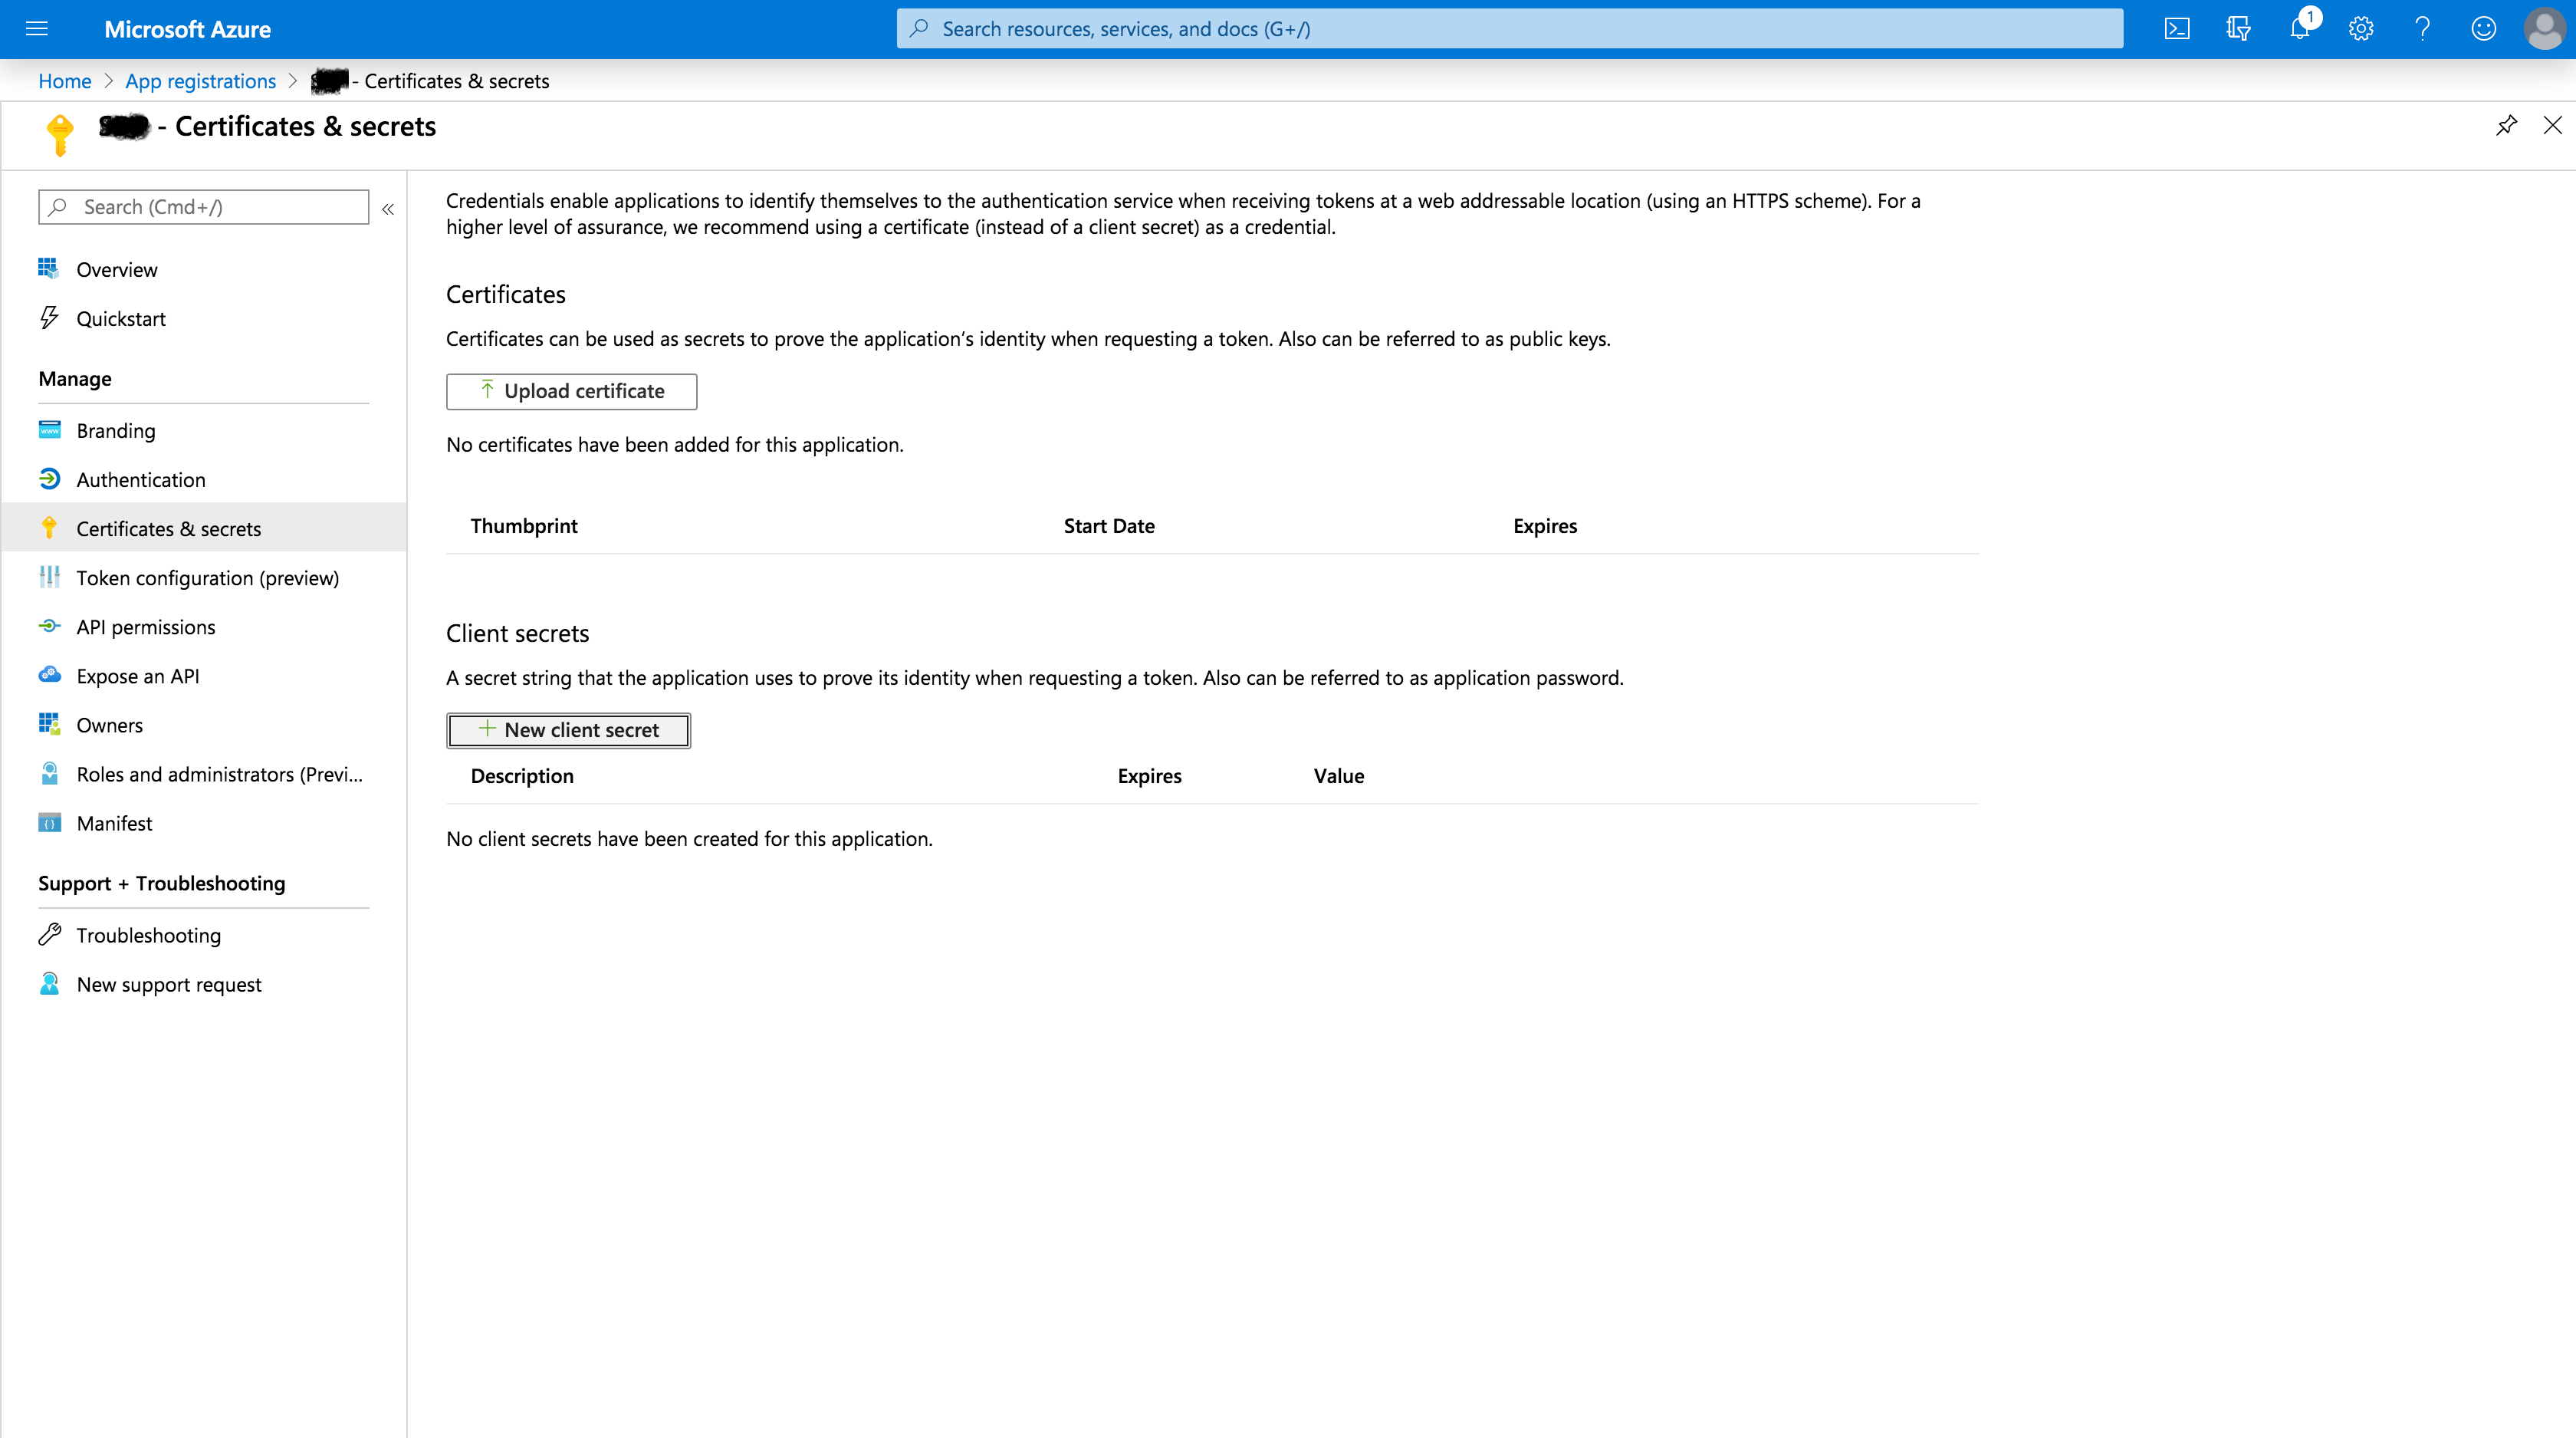
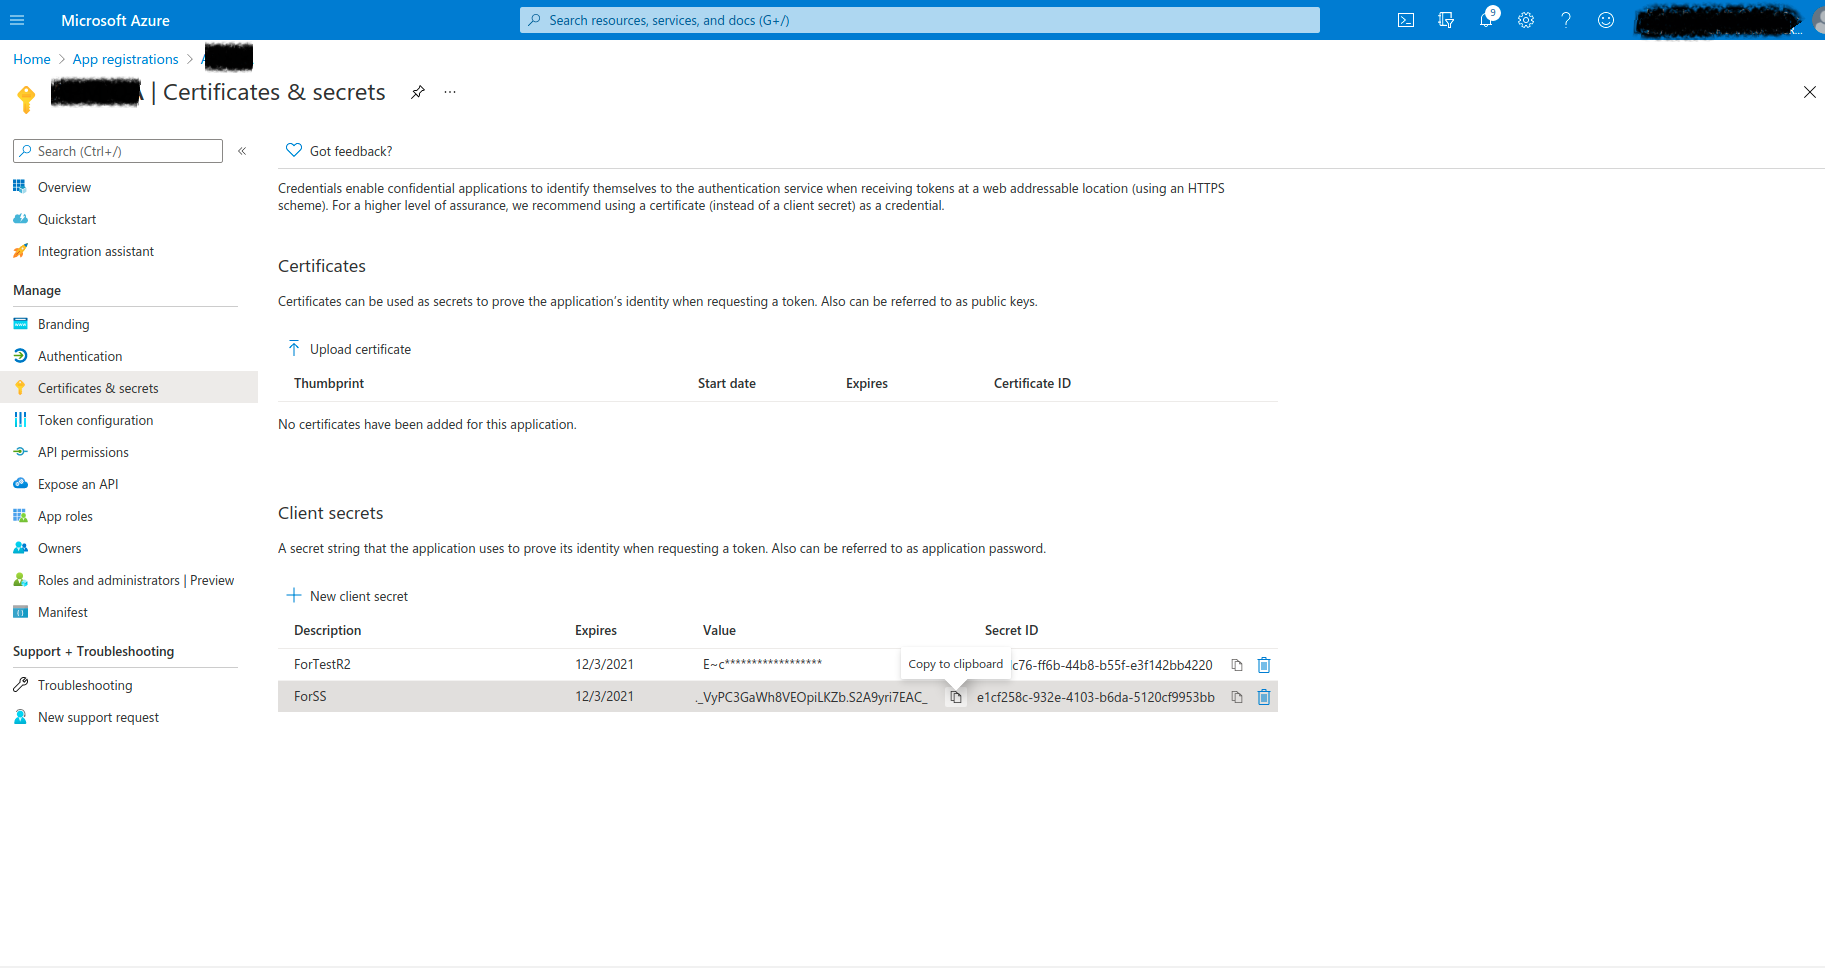
From the left panel, navigate to Certificates & secrets -> New client secret.
- In the displayed page, provide a Description for the client secret.
Under Expires, choose the validity of the client secret and click on Add.
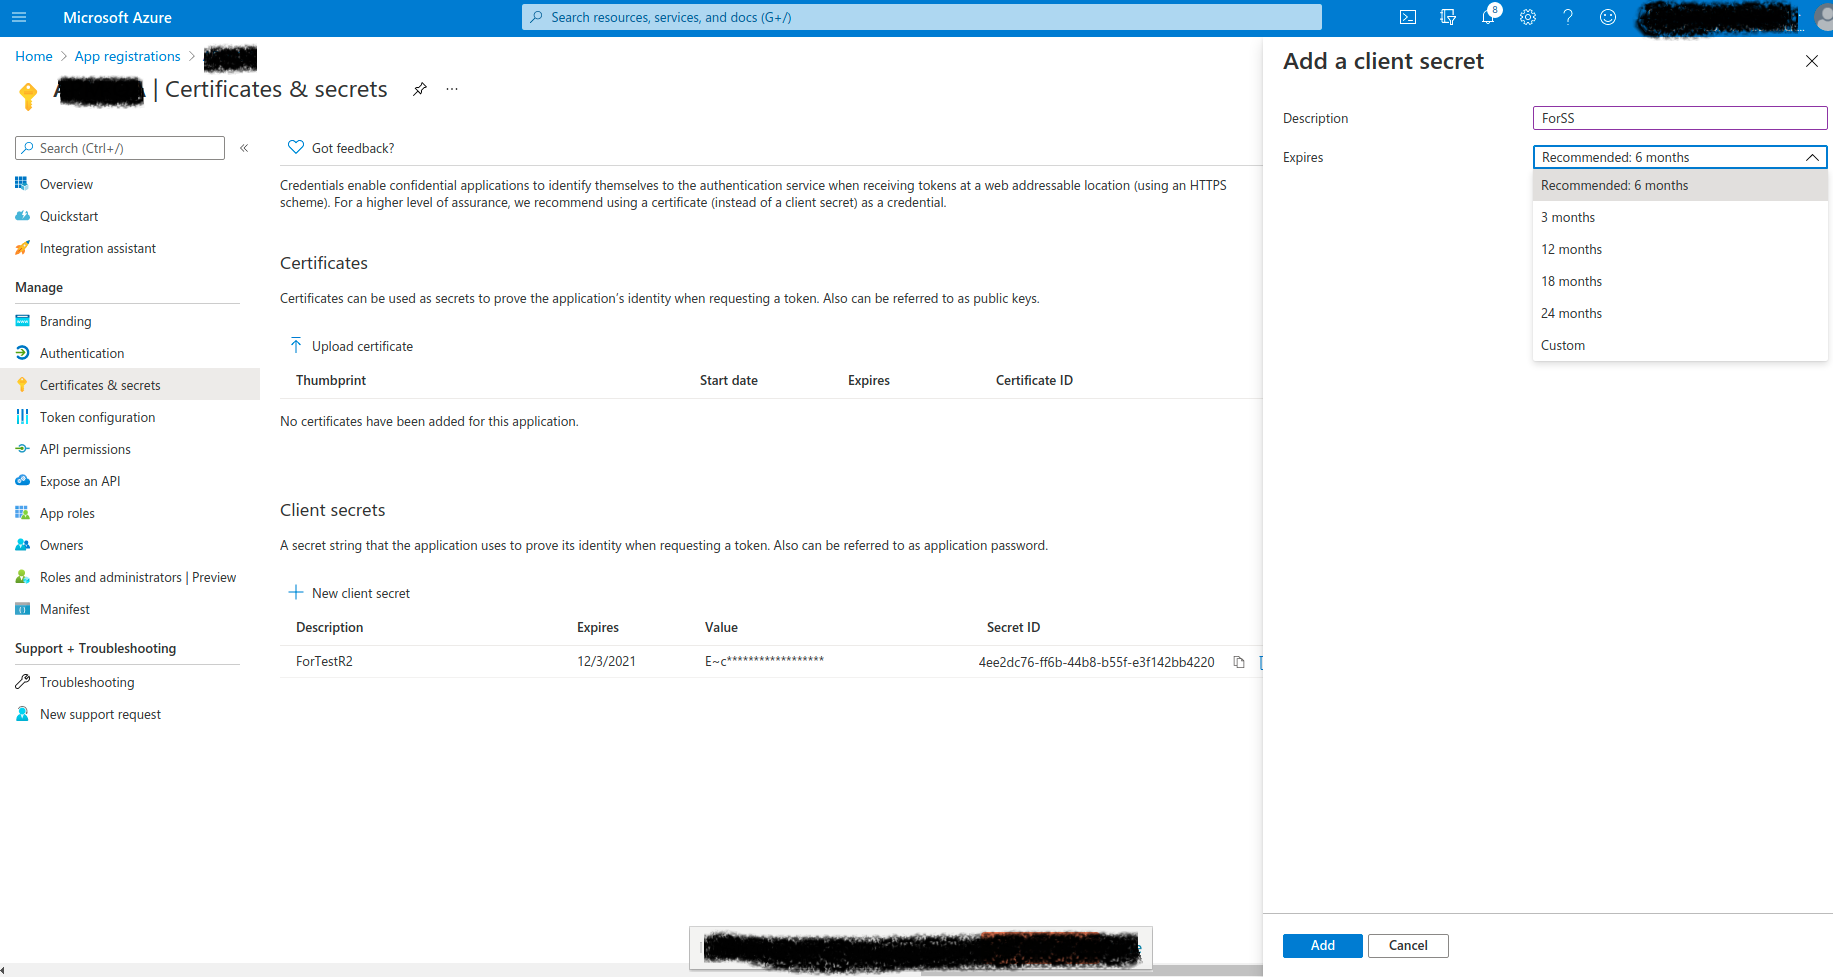
You will find the client secret generated. Copy it to the Client Secret in APM.
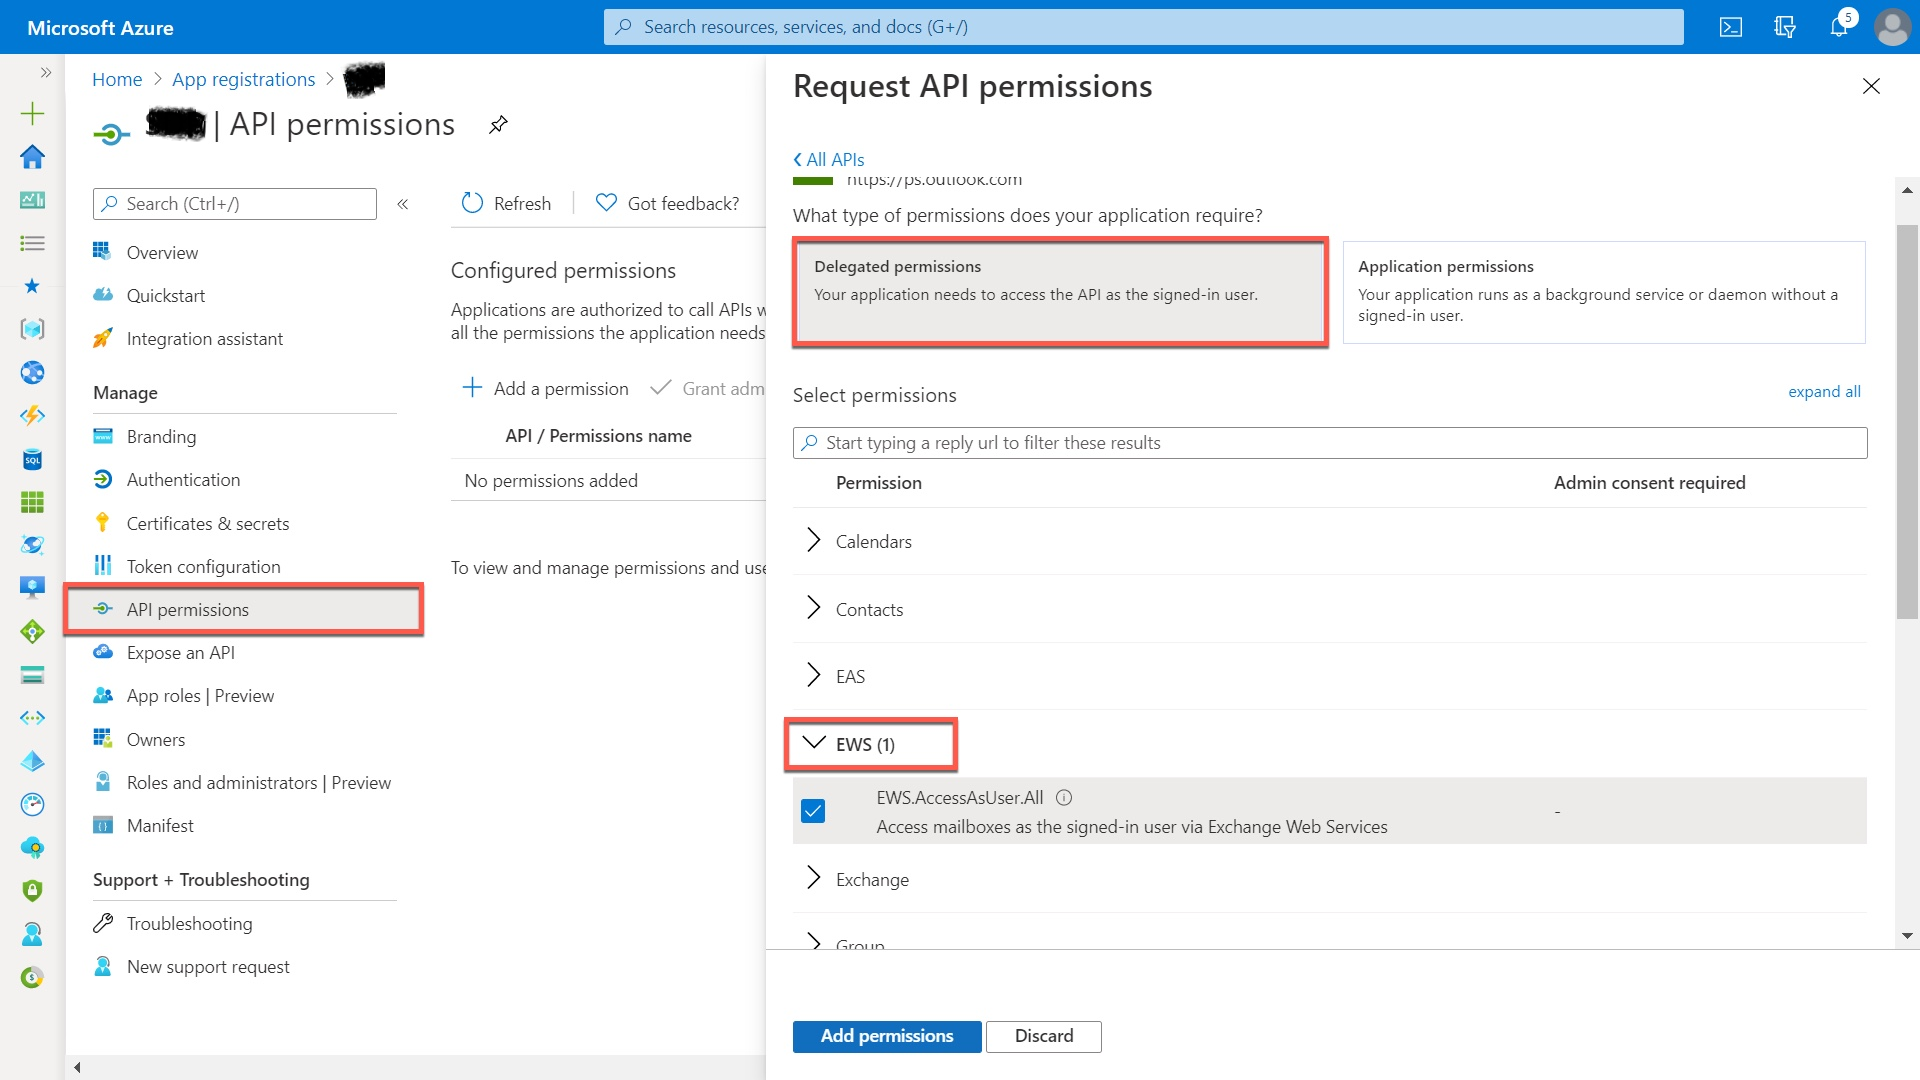
- In the left panel, navigate to API Permission -> Add a permission.
From the right panel that pops up, click on APIs my organization uses. Enter Office 365 in the search bar and select Office 365 Exchange Online from the displayed list of APIs.

Choose Delegated Permissions -> EWS and enable the checkbox to add the corresponding permission.
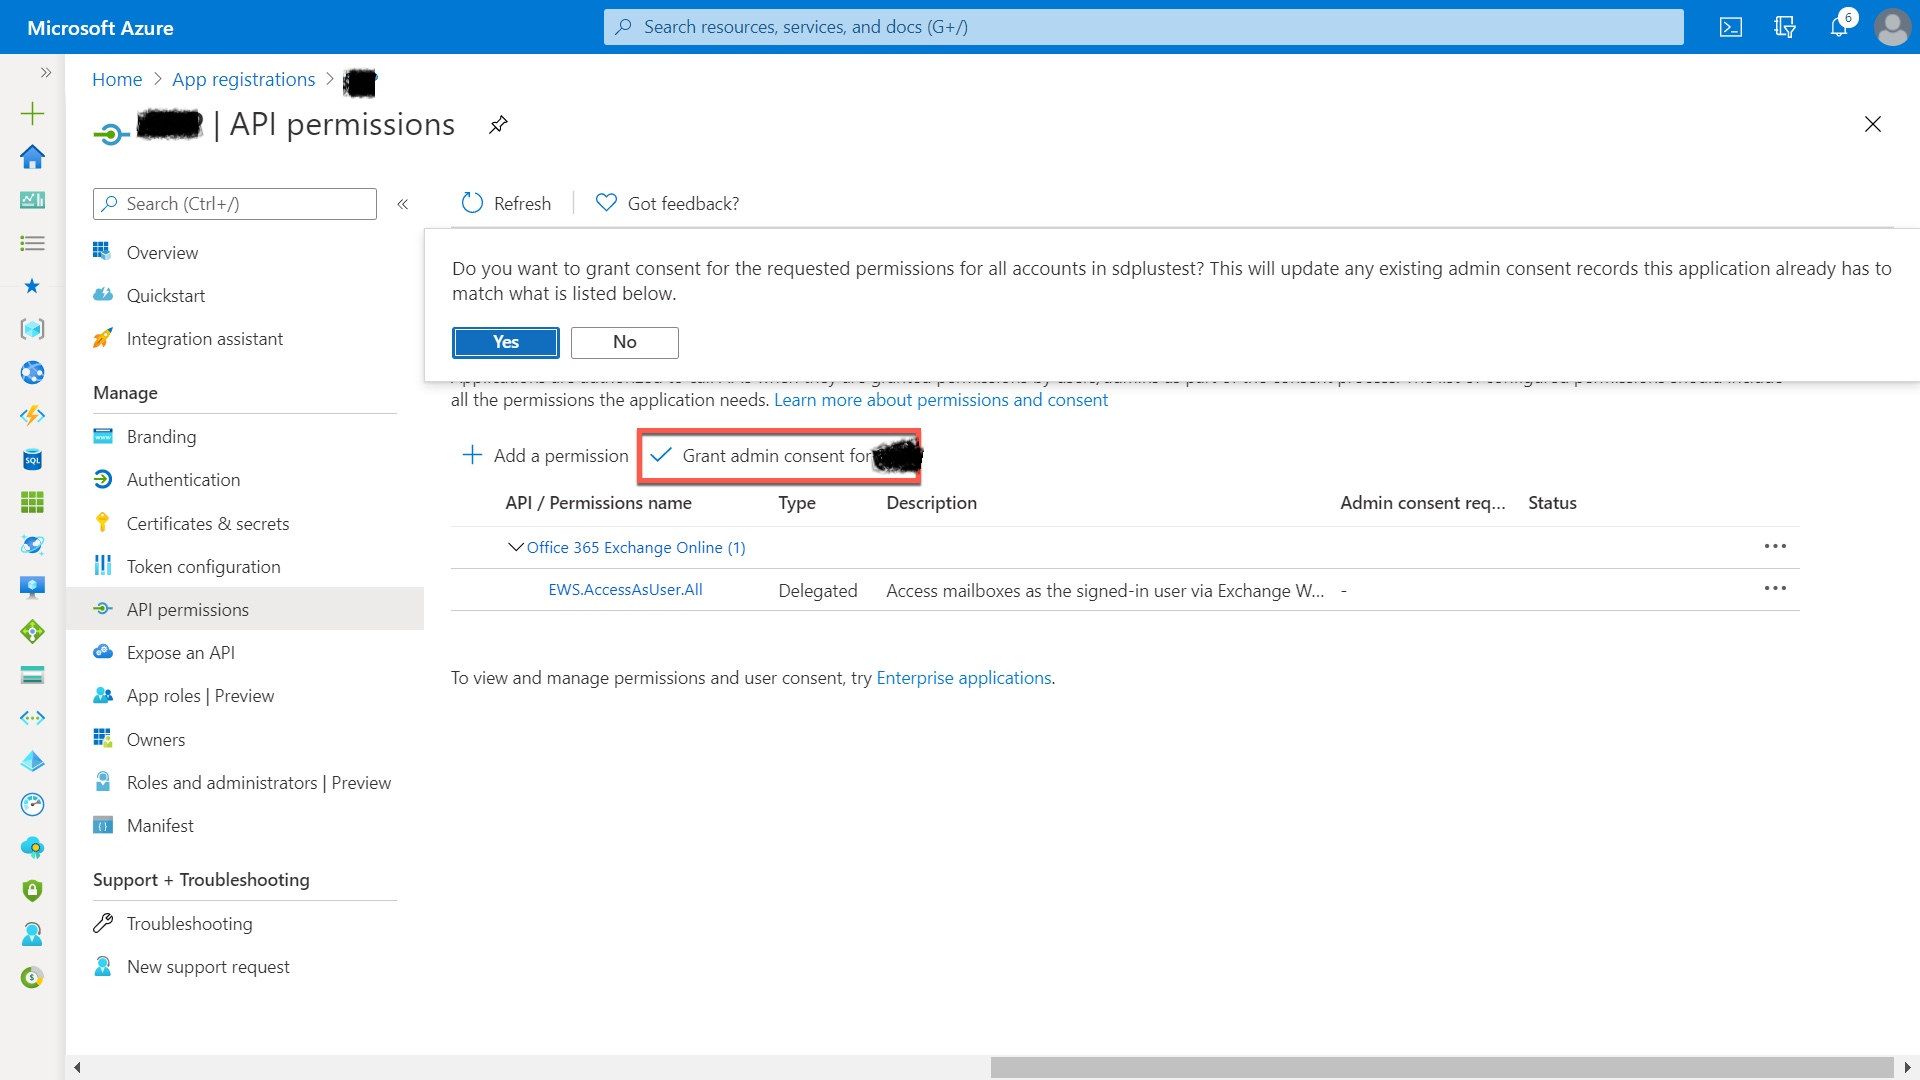
Click on Grant admin consent for <application name>. A confirmation window will be displayed. Click Yes to proceed.
You have now configured Microsoft Azure as the authorization server for your organization using Microsoft Outlook as the mail server.
Note:
- Scope :
EWS.AccessAsUser.All
offline_access - Token Request Method :Post request body