Configuring OAuth for G-Suite Server
Steps to configure OAuth for G-Suite Server:
- Log in to console.developers.google.com.
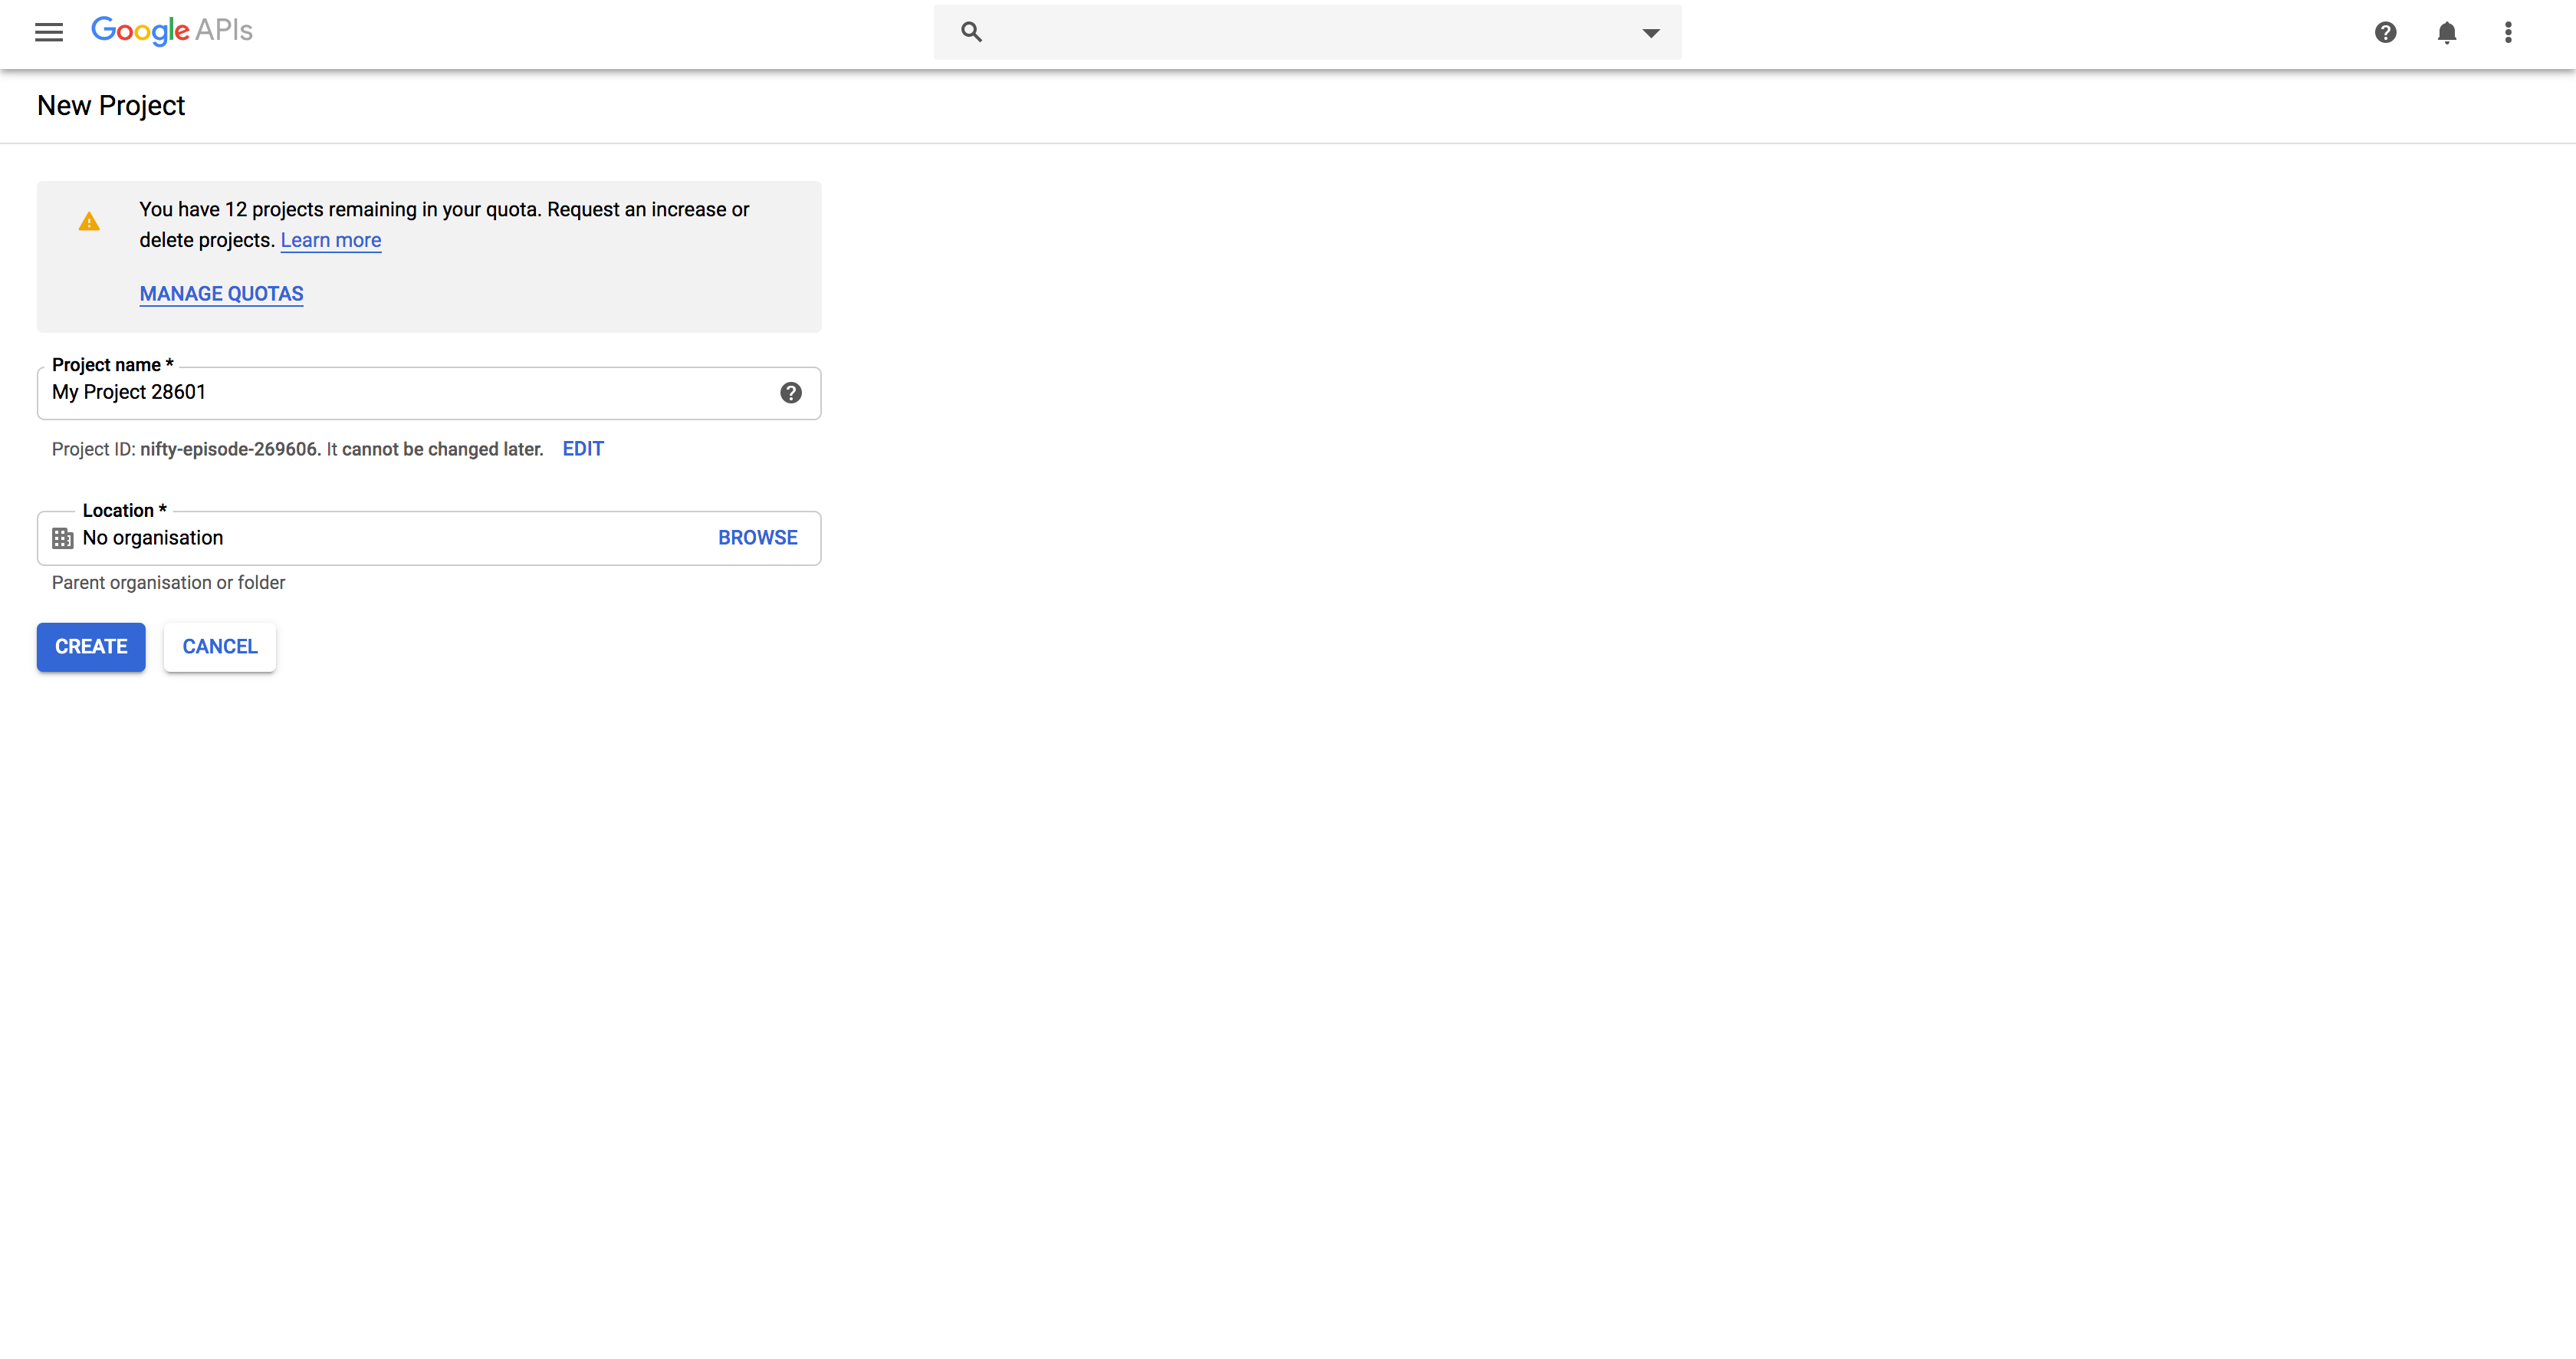
- In the dashboard, click Create Project to create a new project.

- Enter the Project Name.
- For Location, click on Browse and select the parent organization.
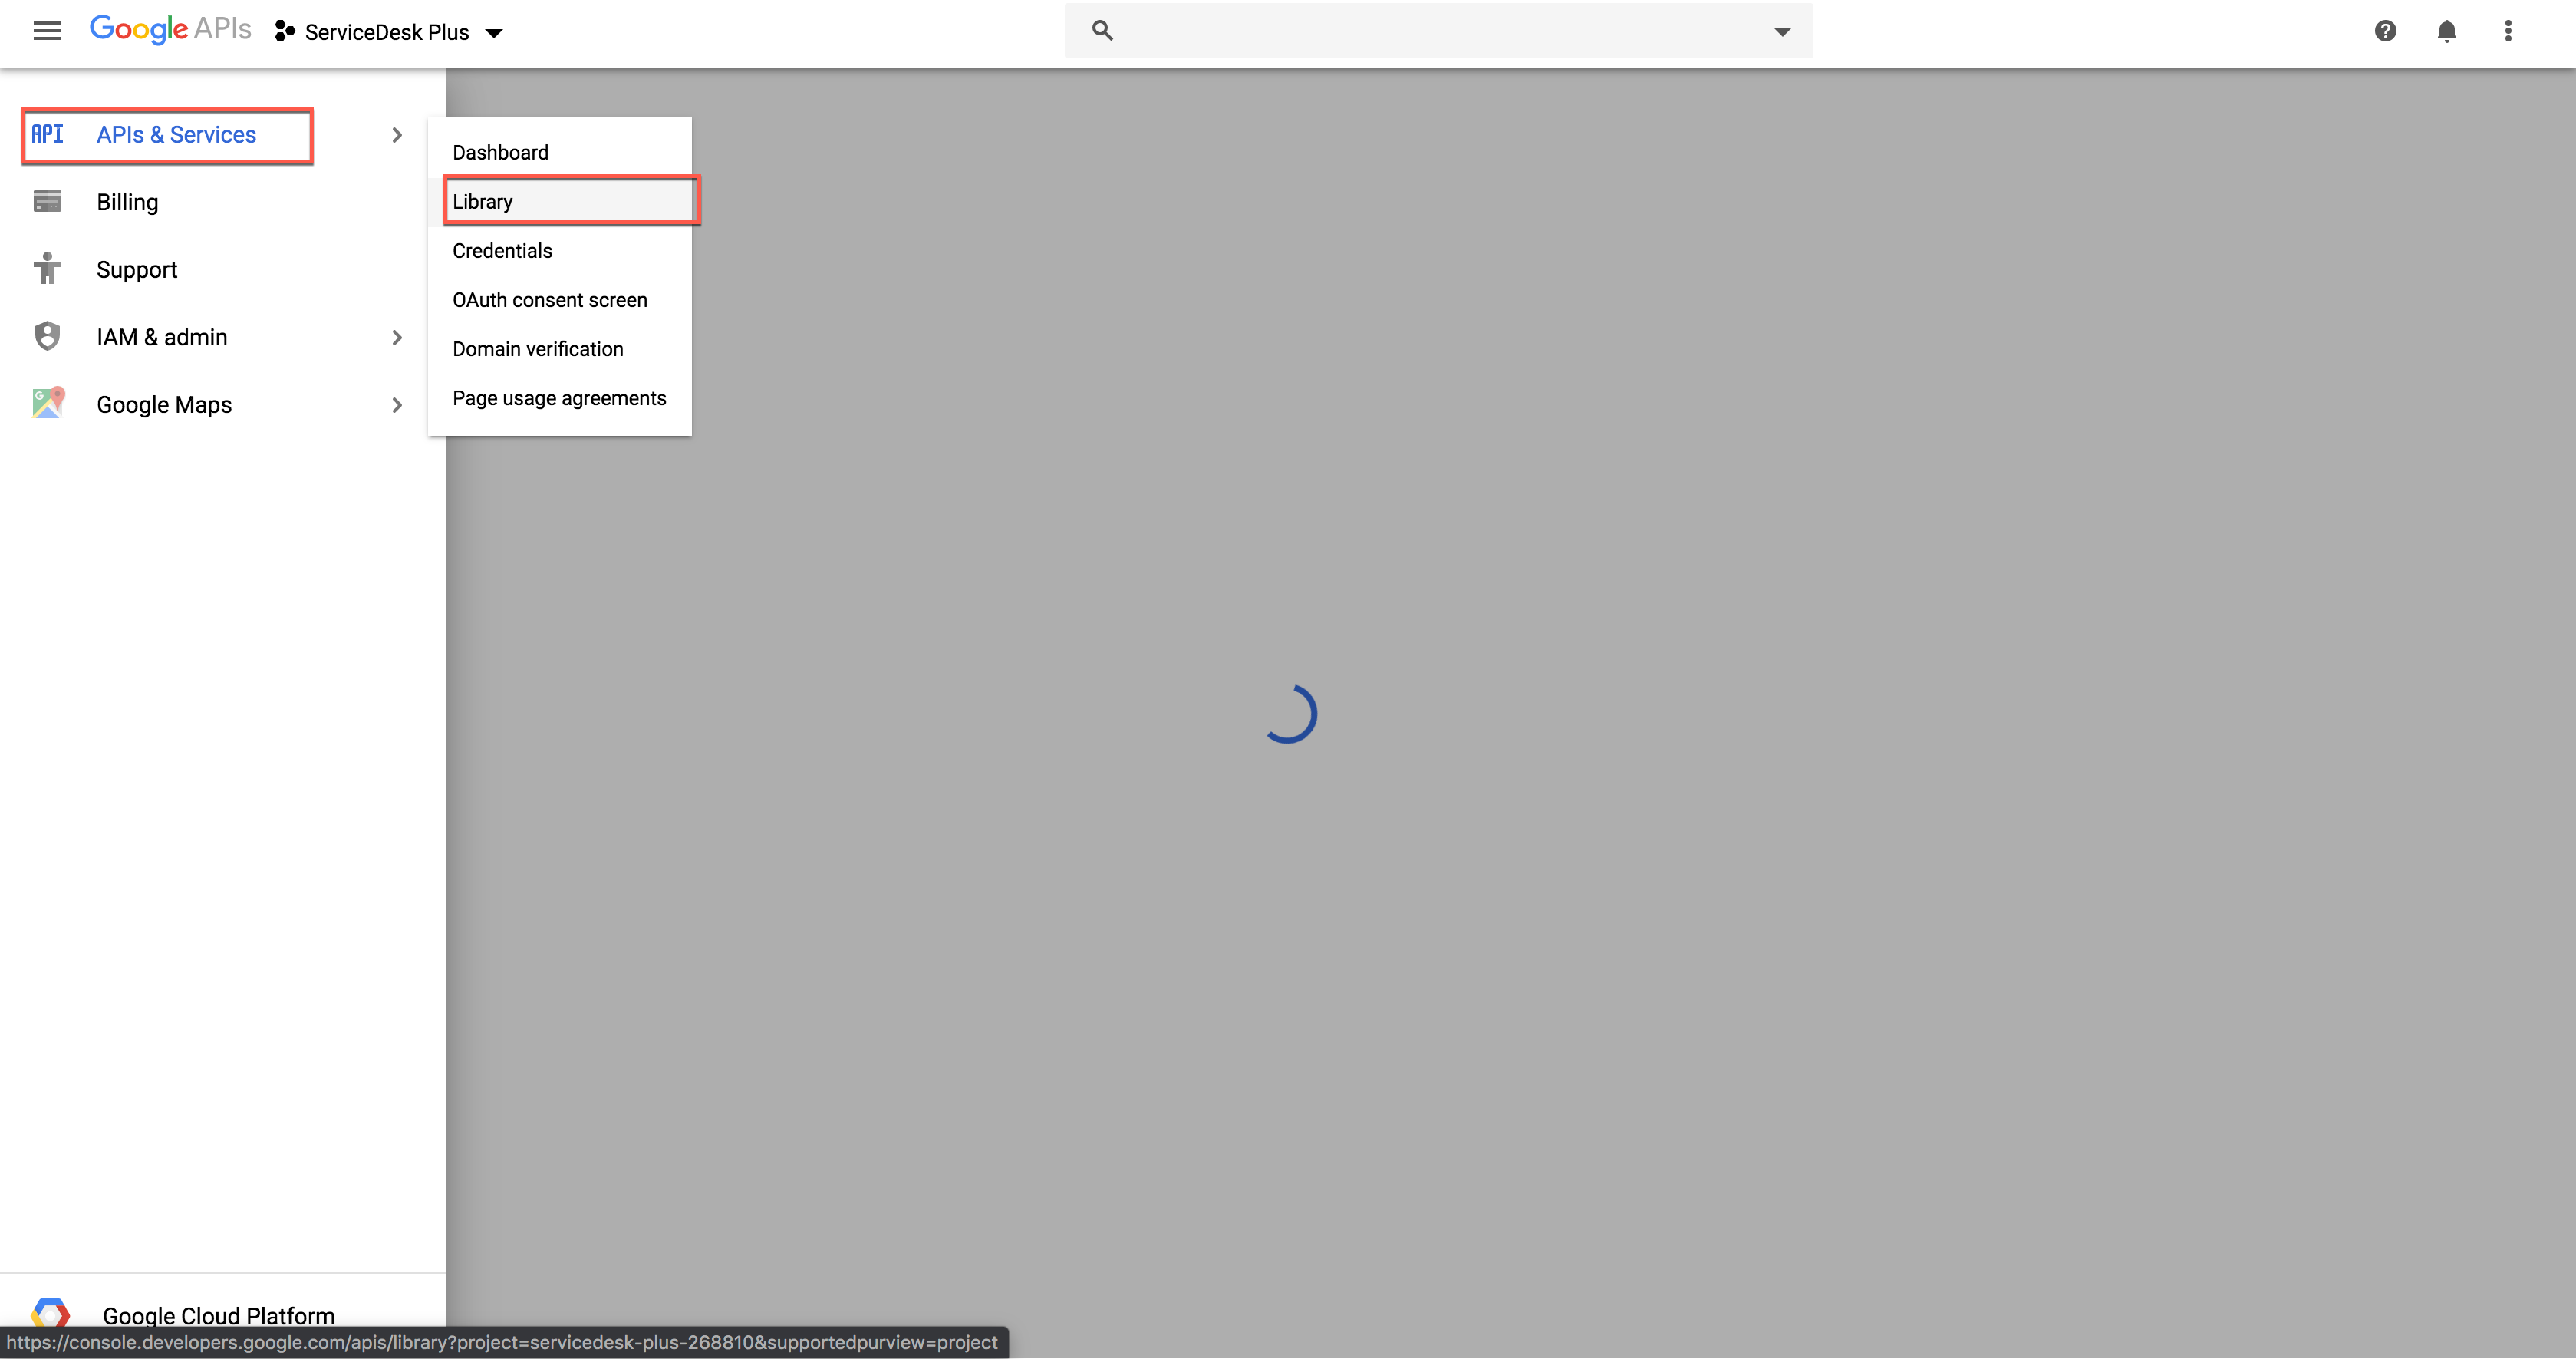
- In the left panel of the displayed project details page, navigate to APIs & Services -> Library.
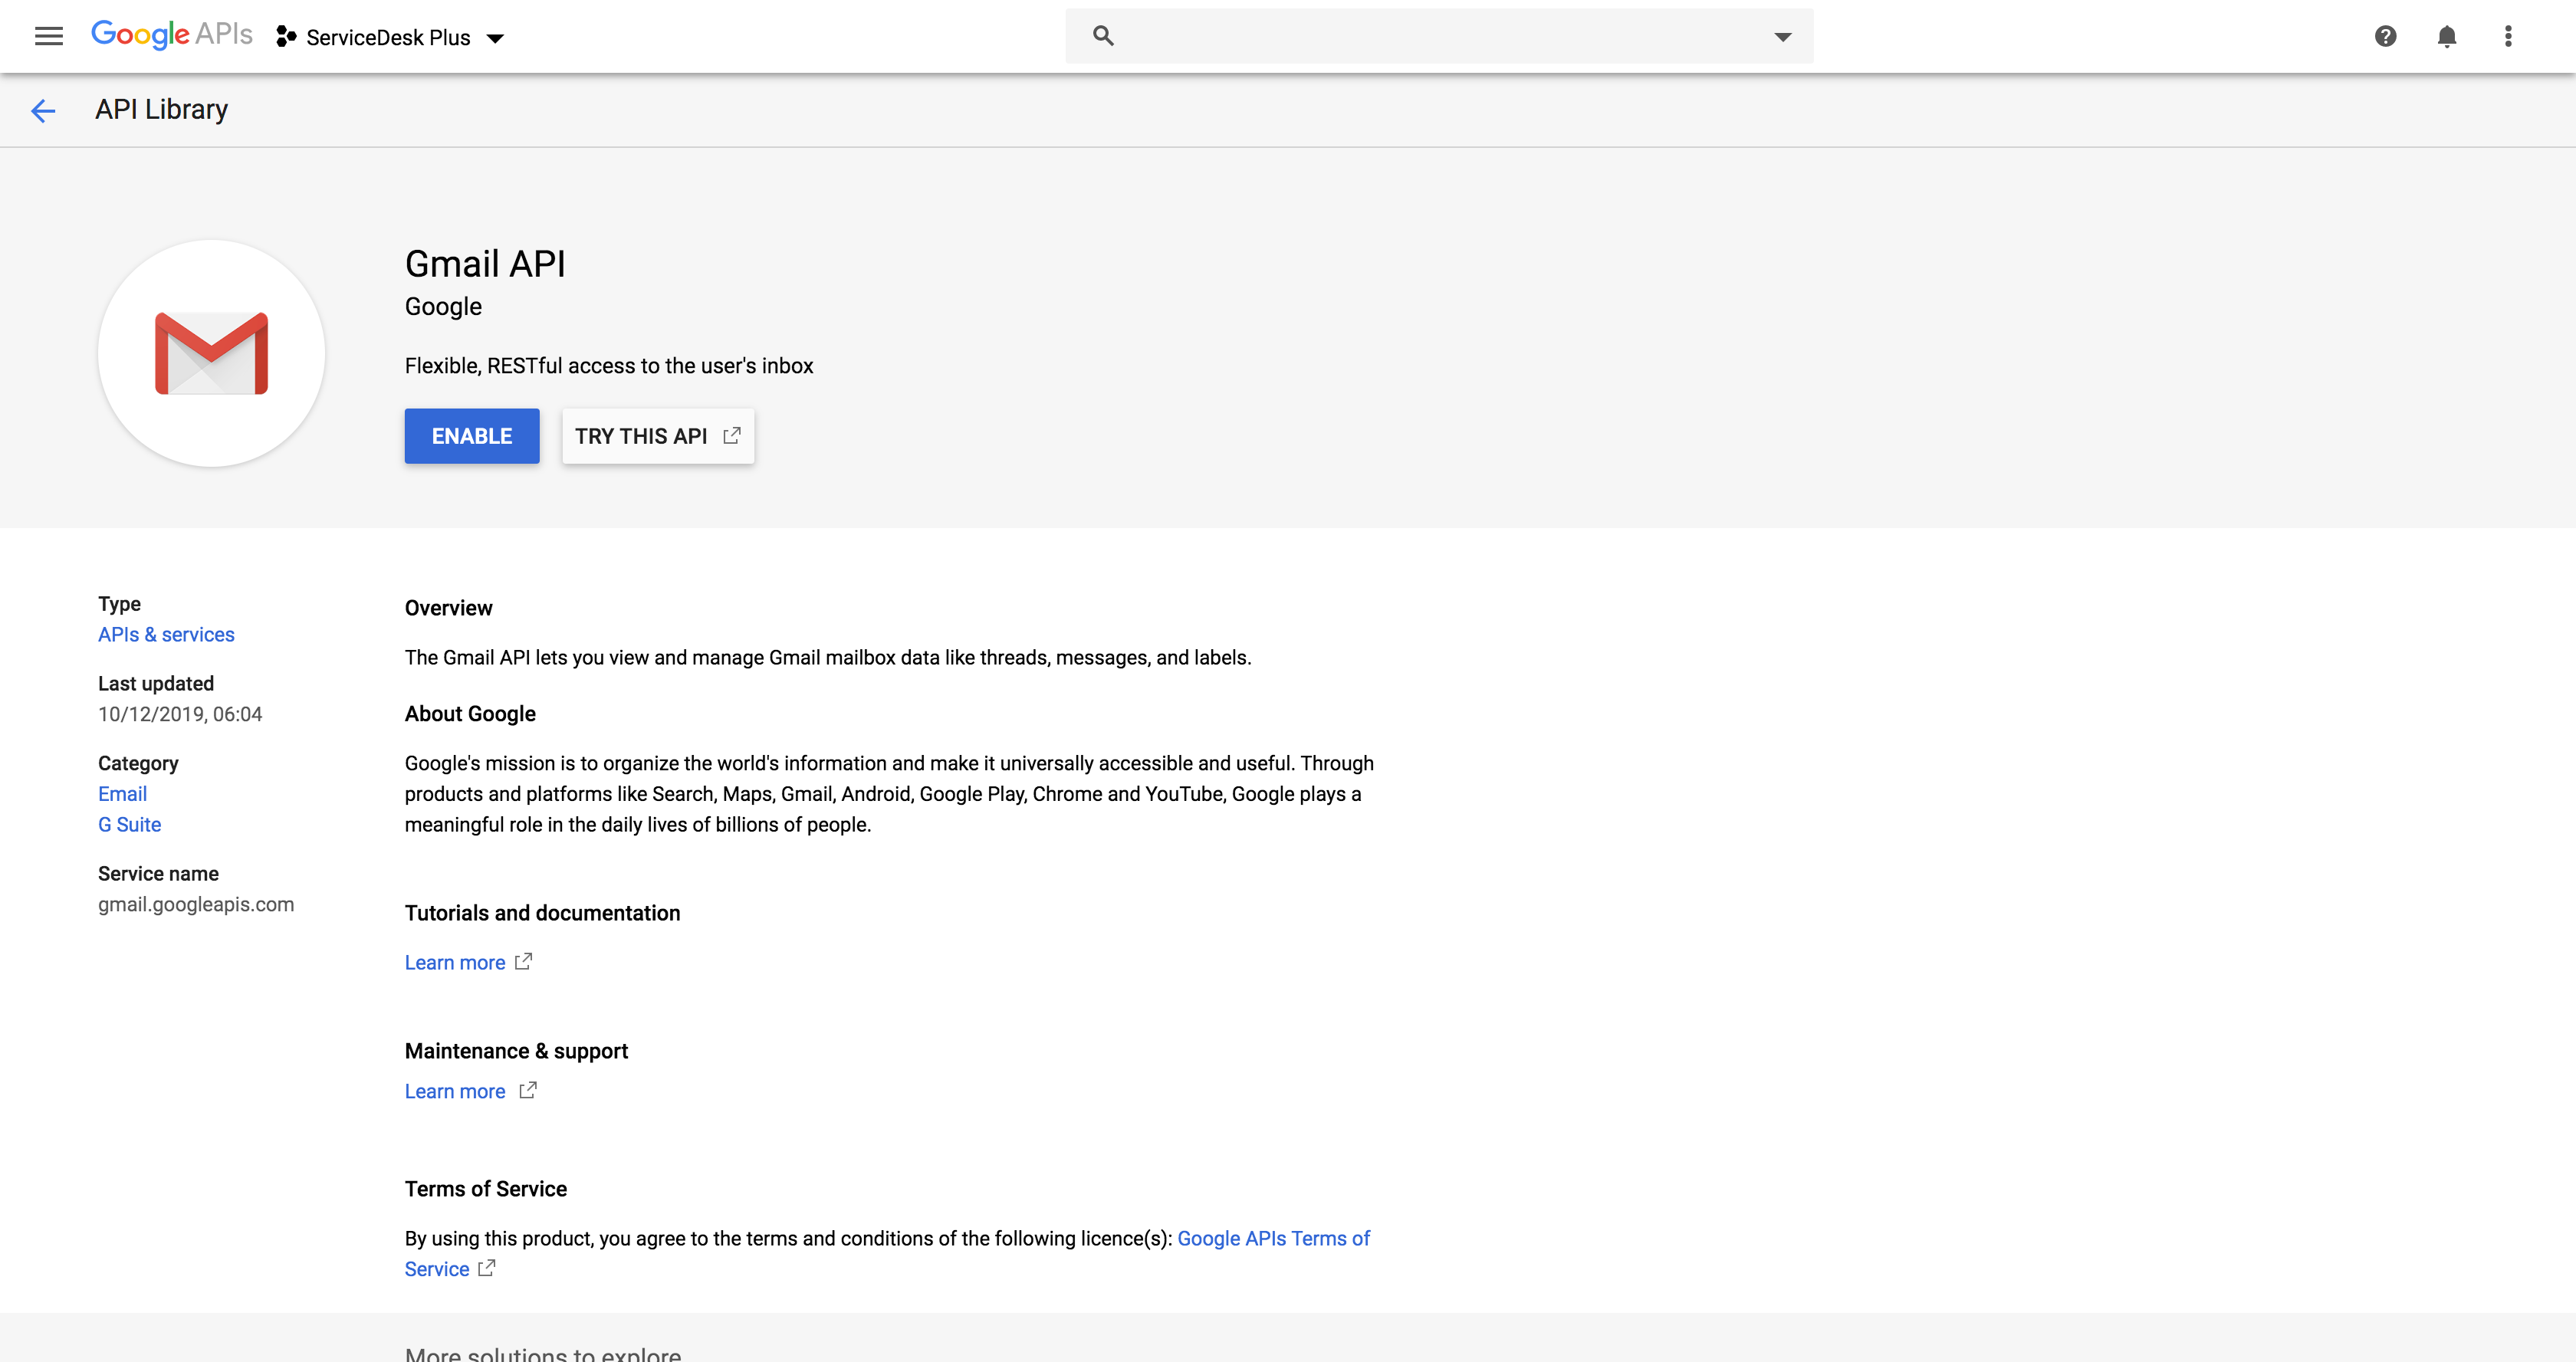
- From the available list of APIs, select Gmail API and click on Enable. You can use the search option for quicker results.
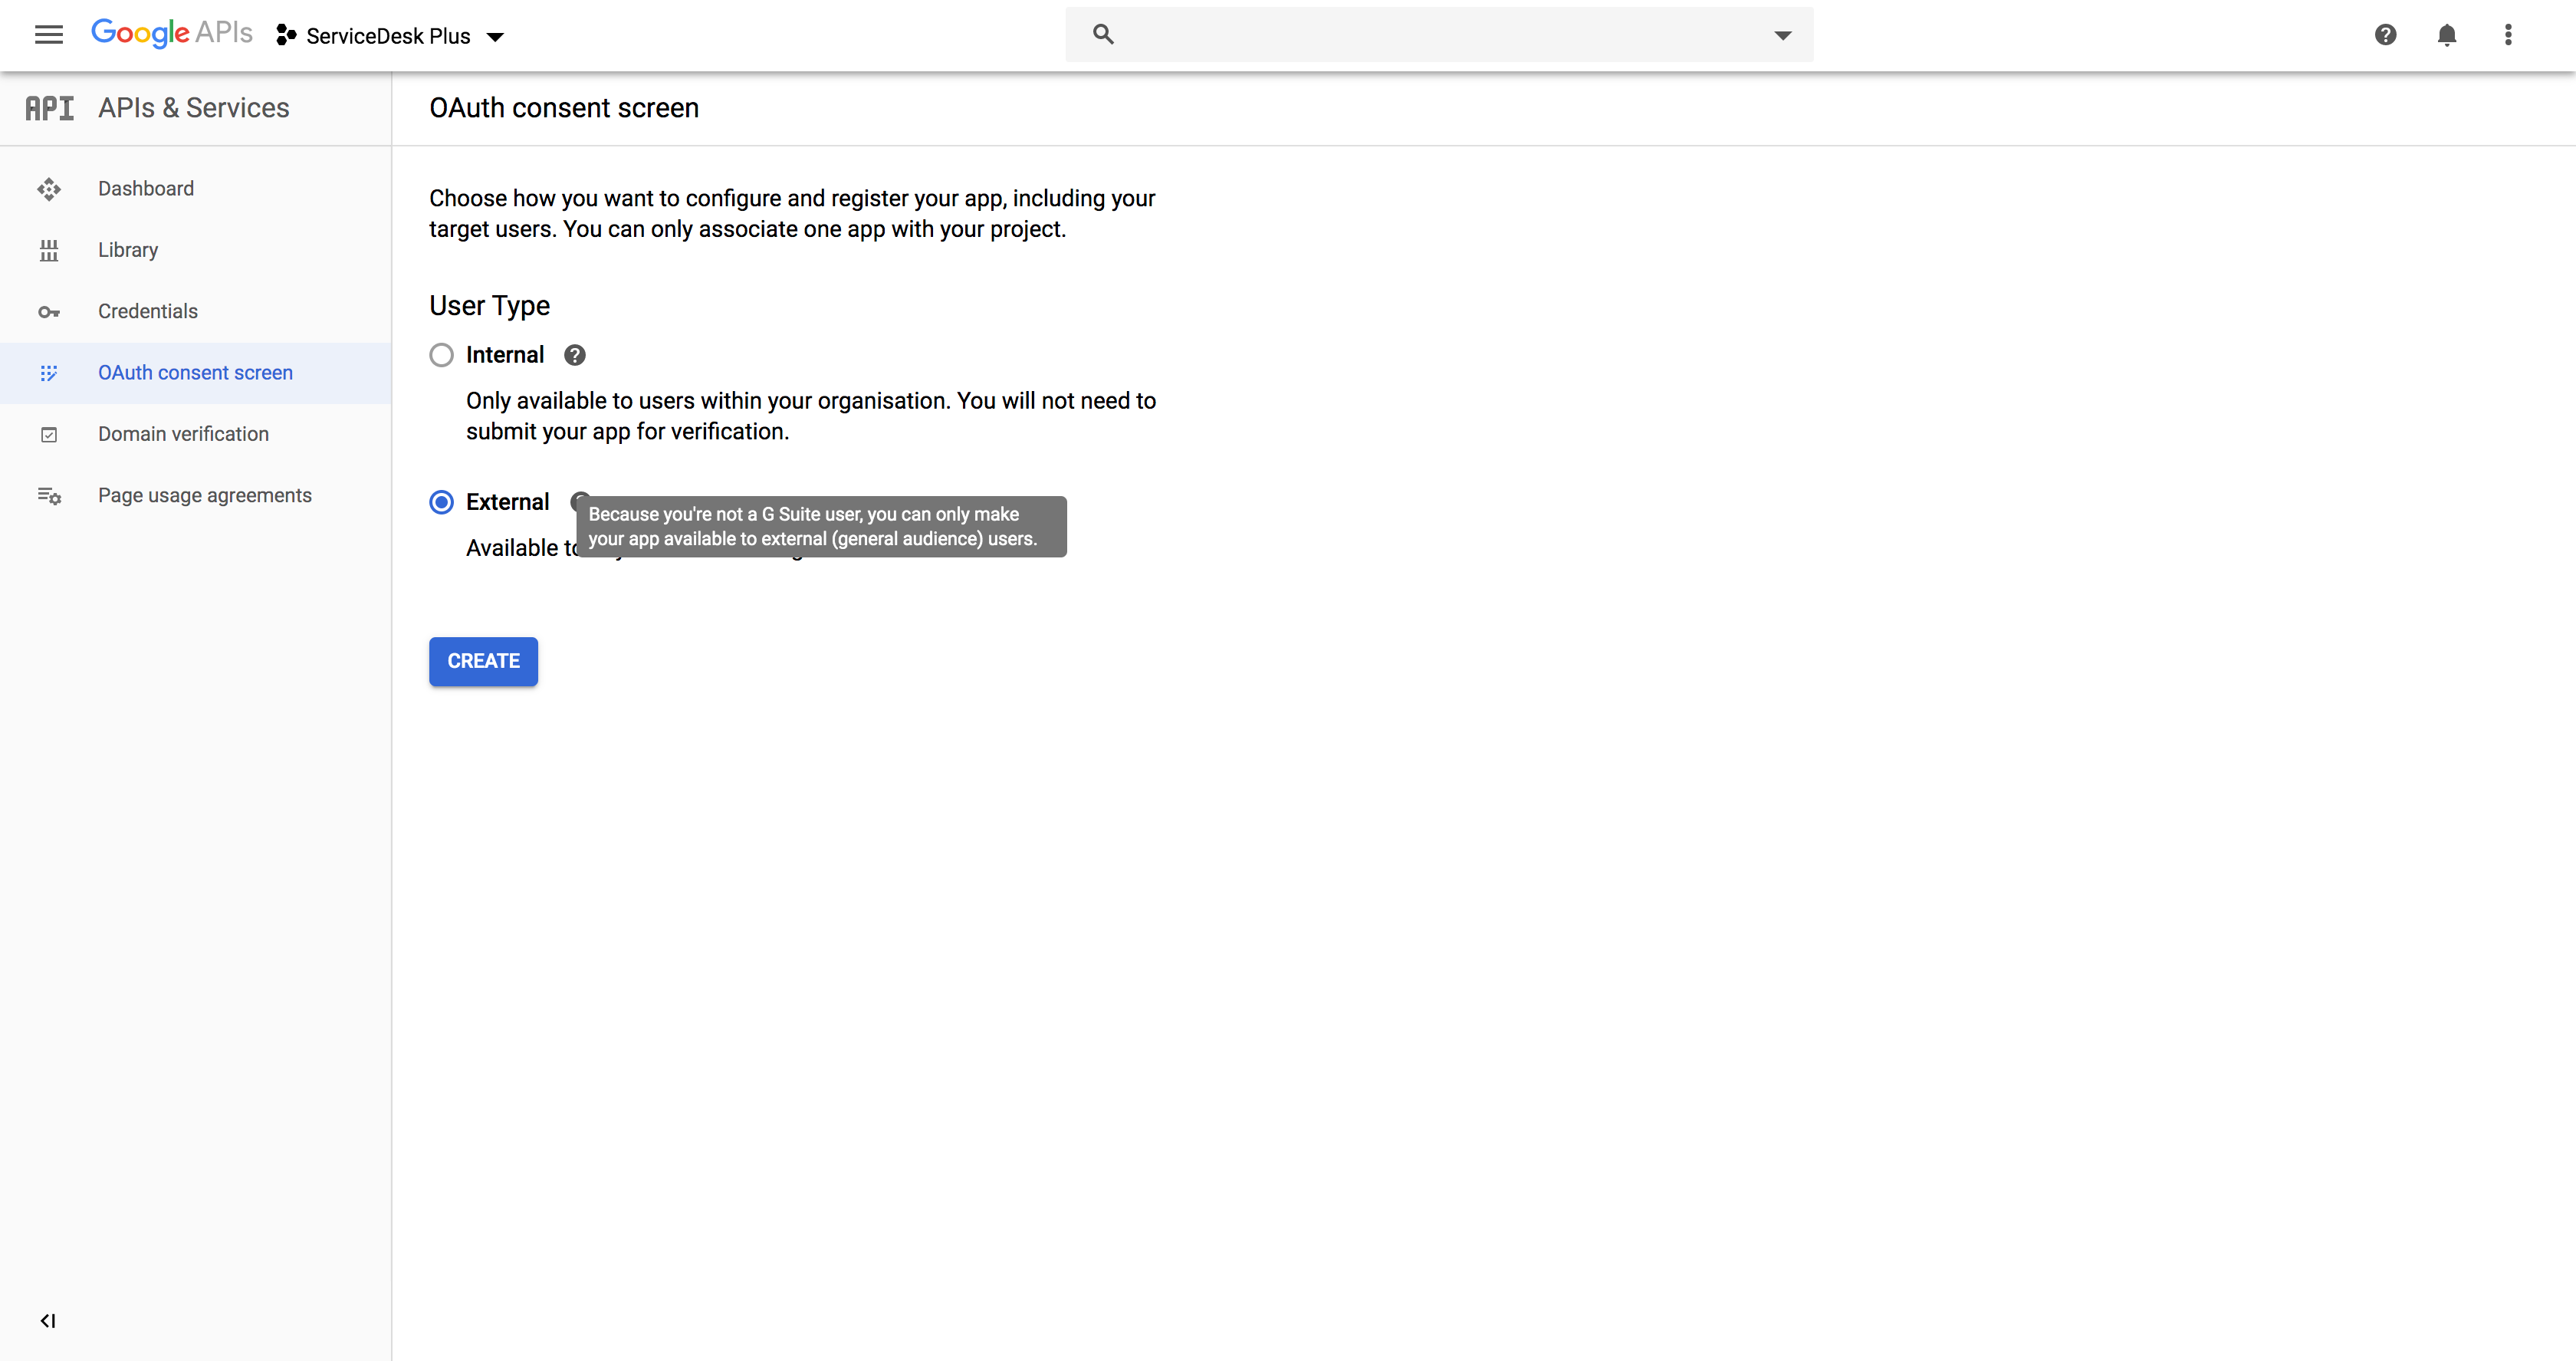
- In the left panel, click on OAuth consent screen and choose the User Type and click on Create.
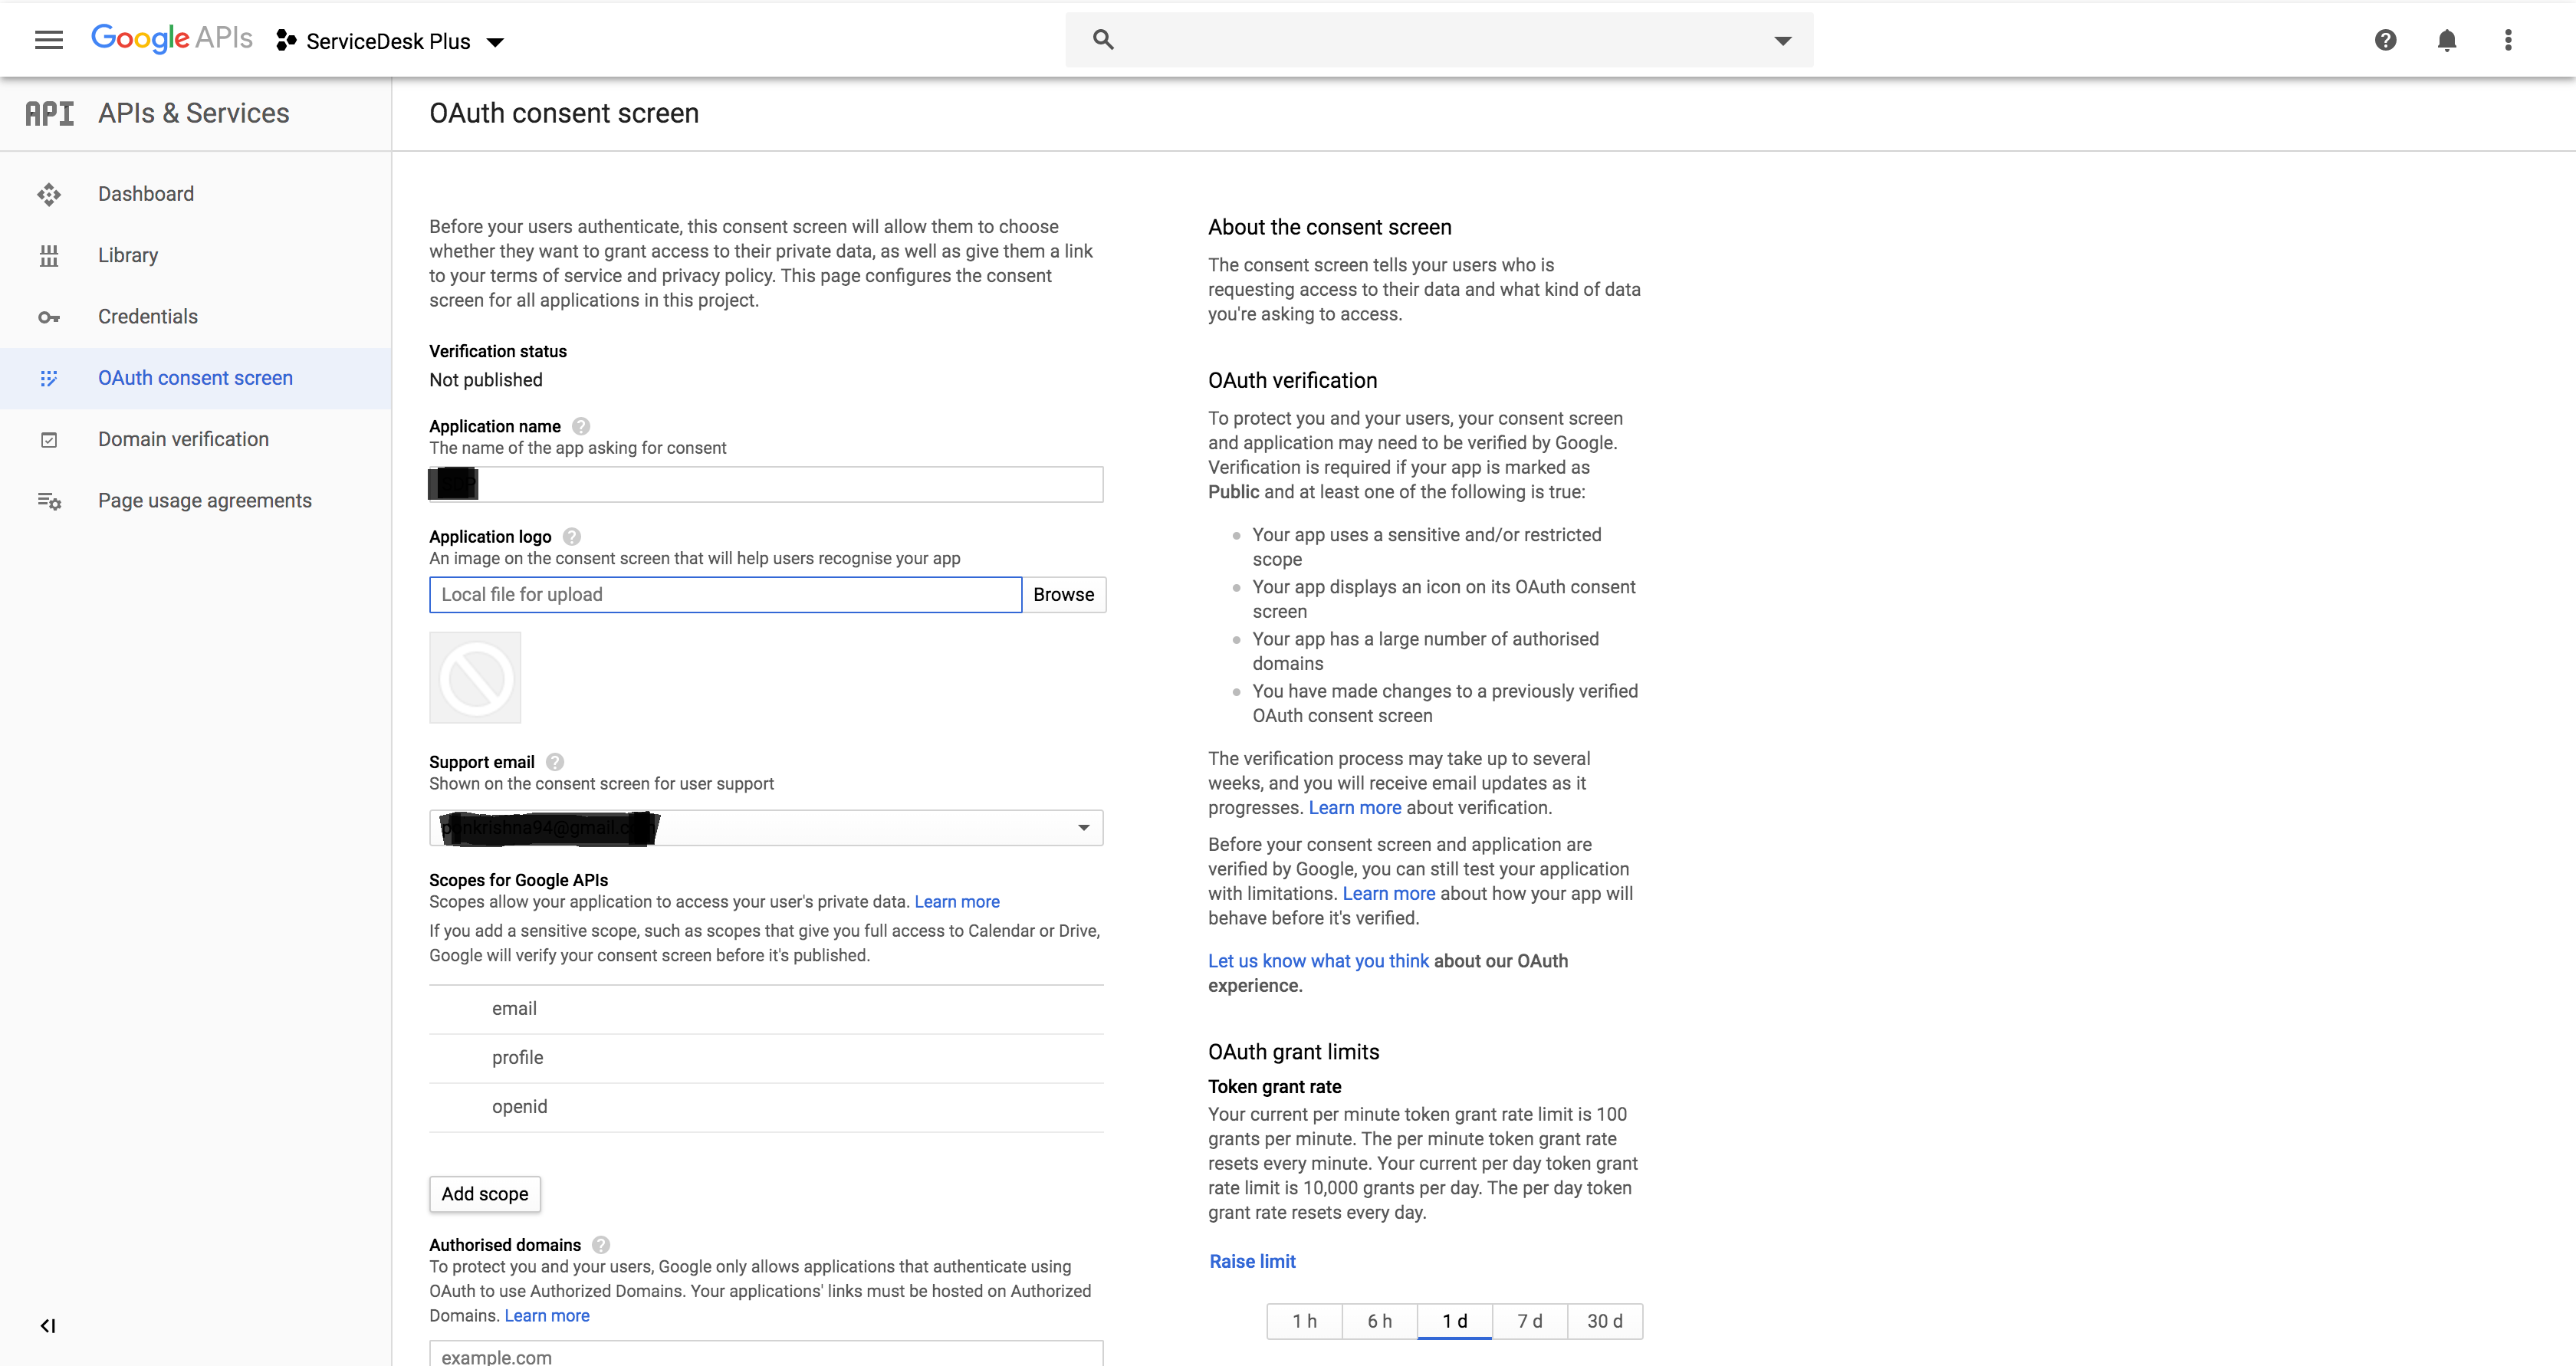
- In the displayed page, provide the Application Name, Application Logo, and Support email of your APM.
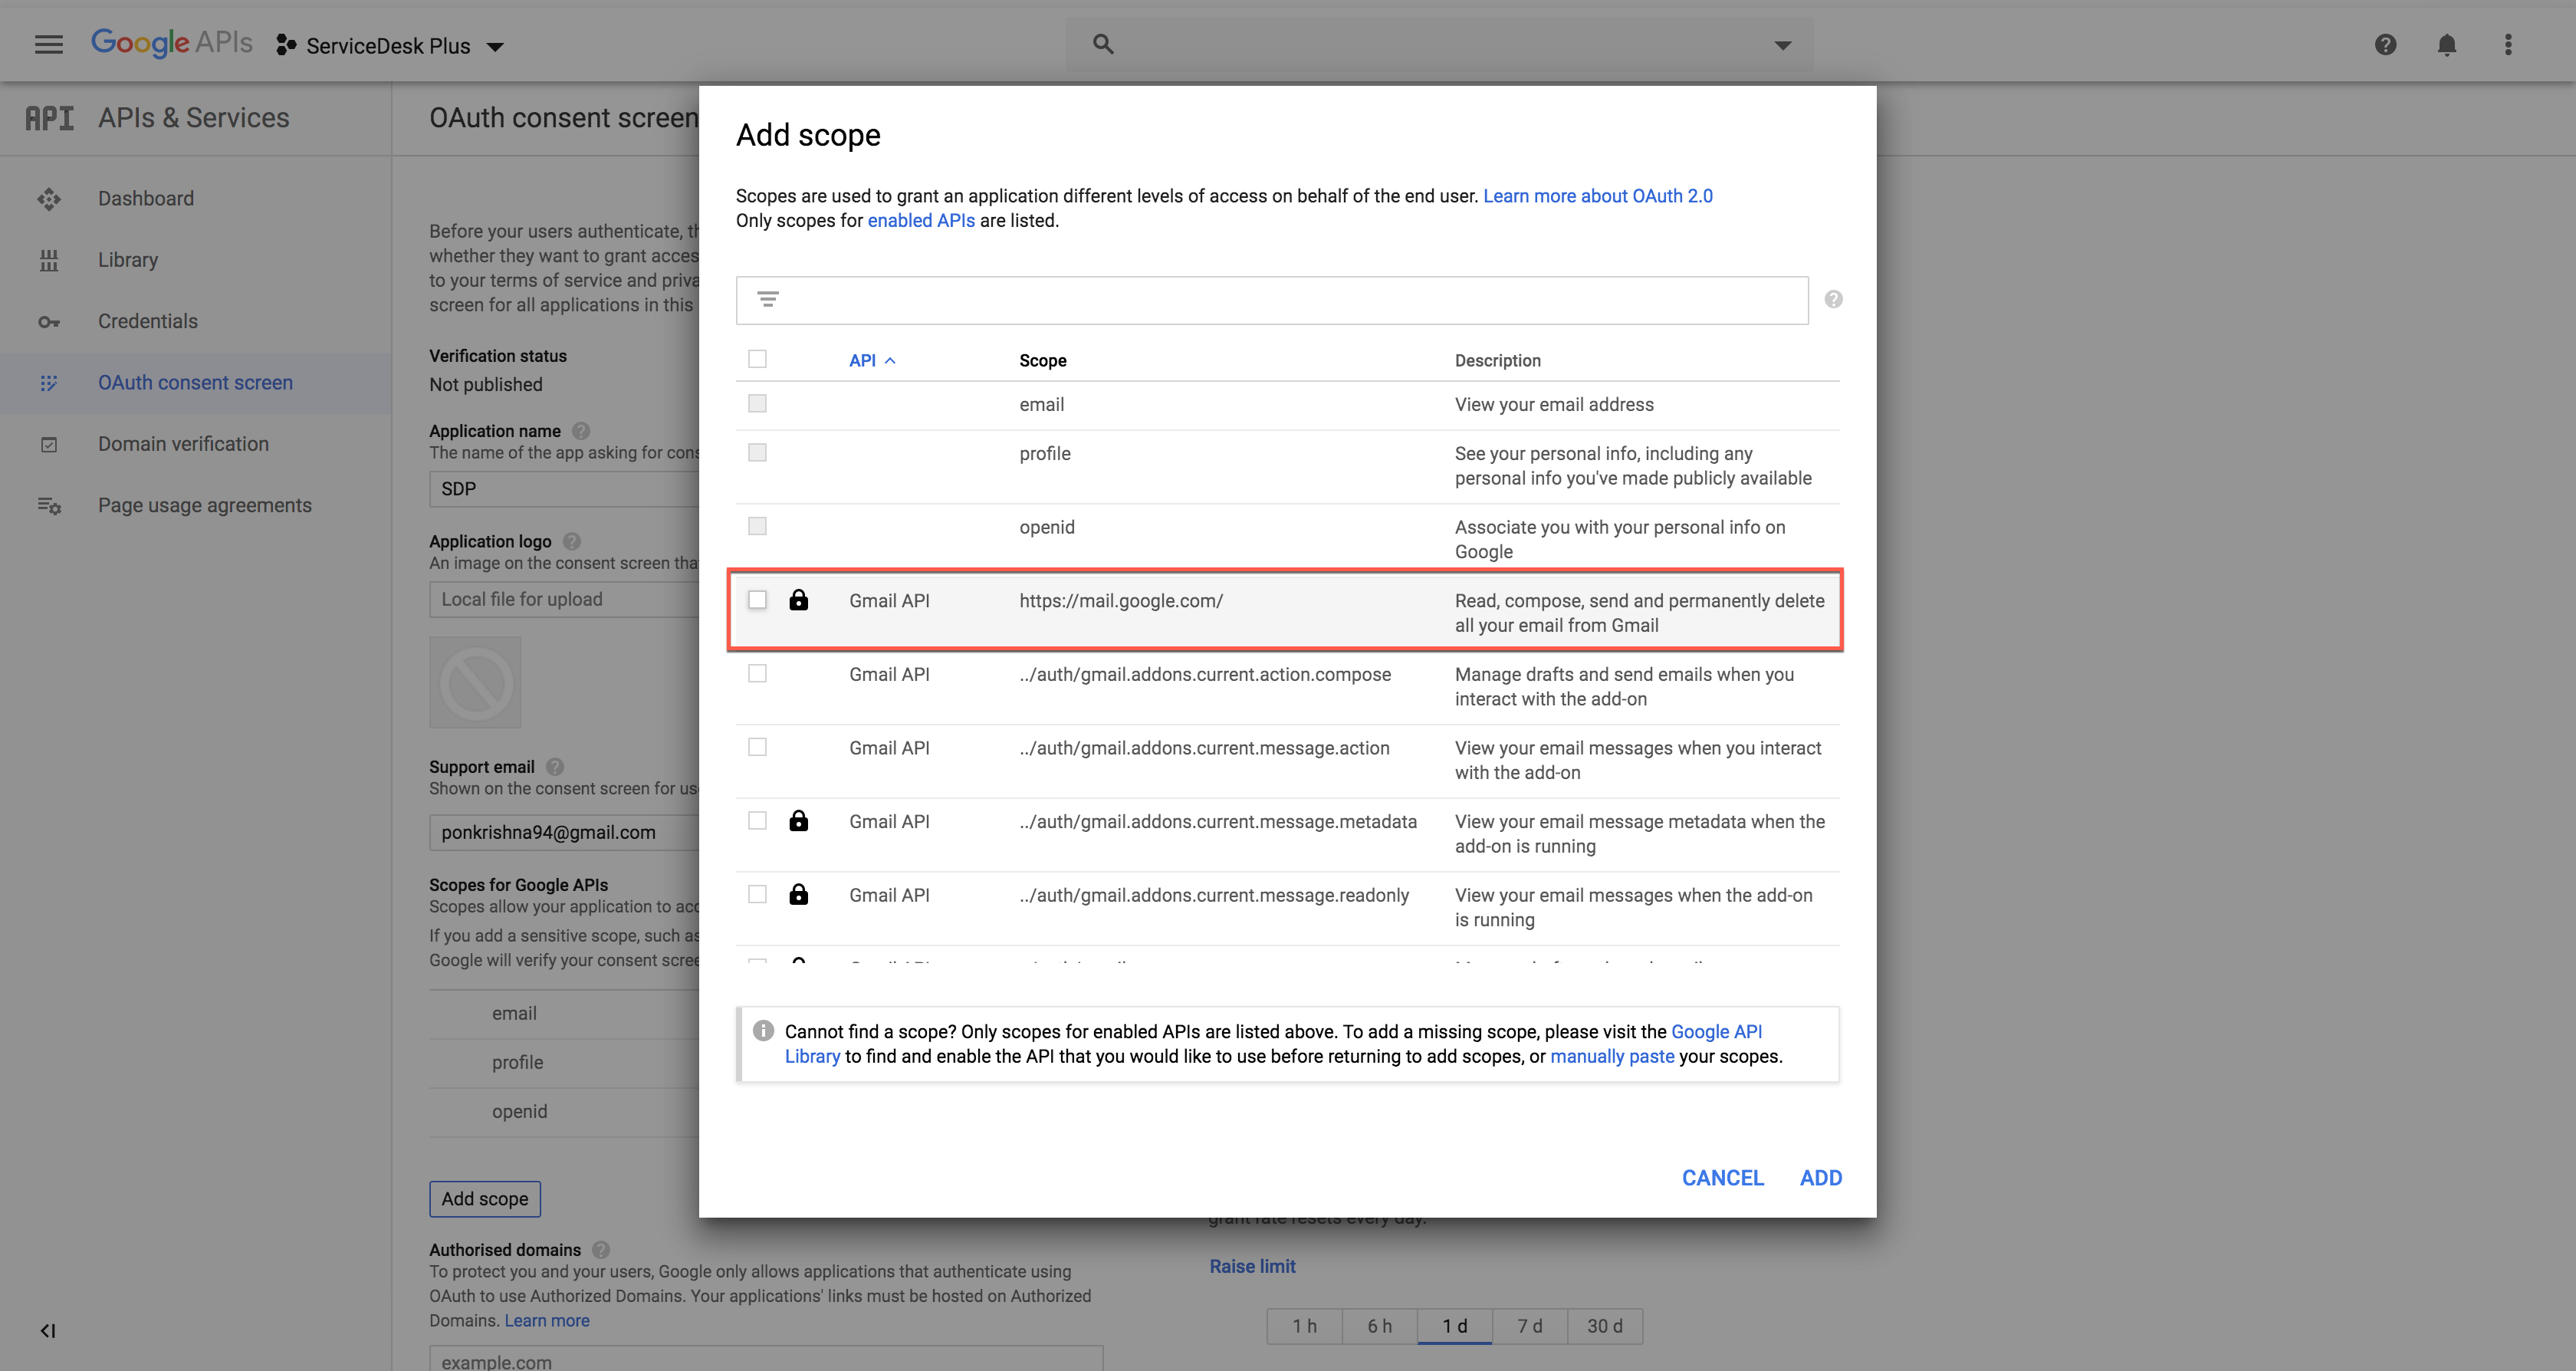
- Click on Add Scope, choose Gmail API and click on Add.
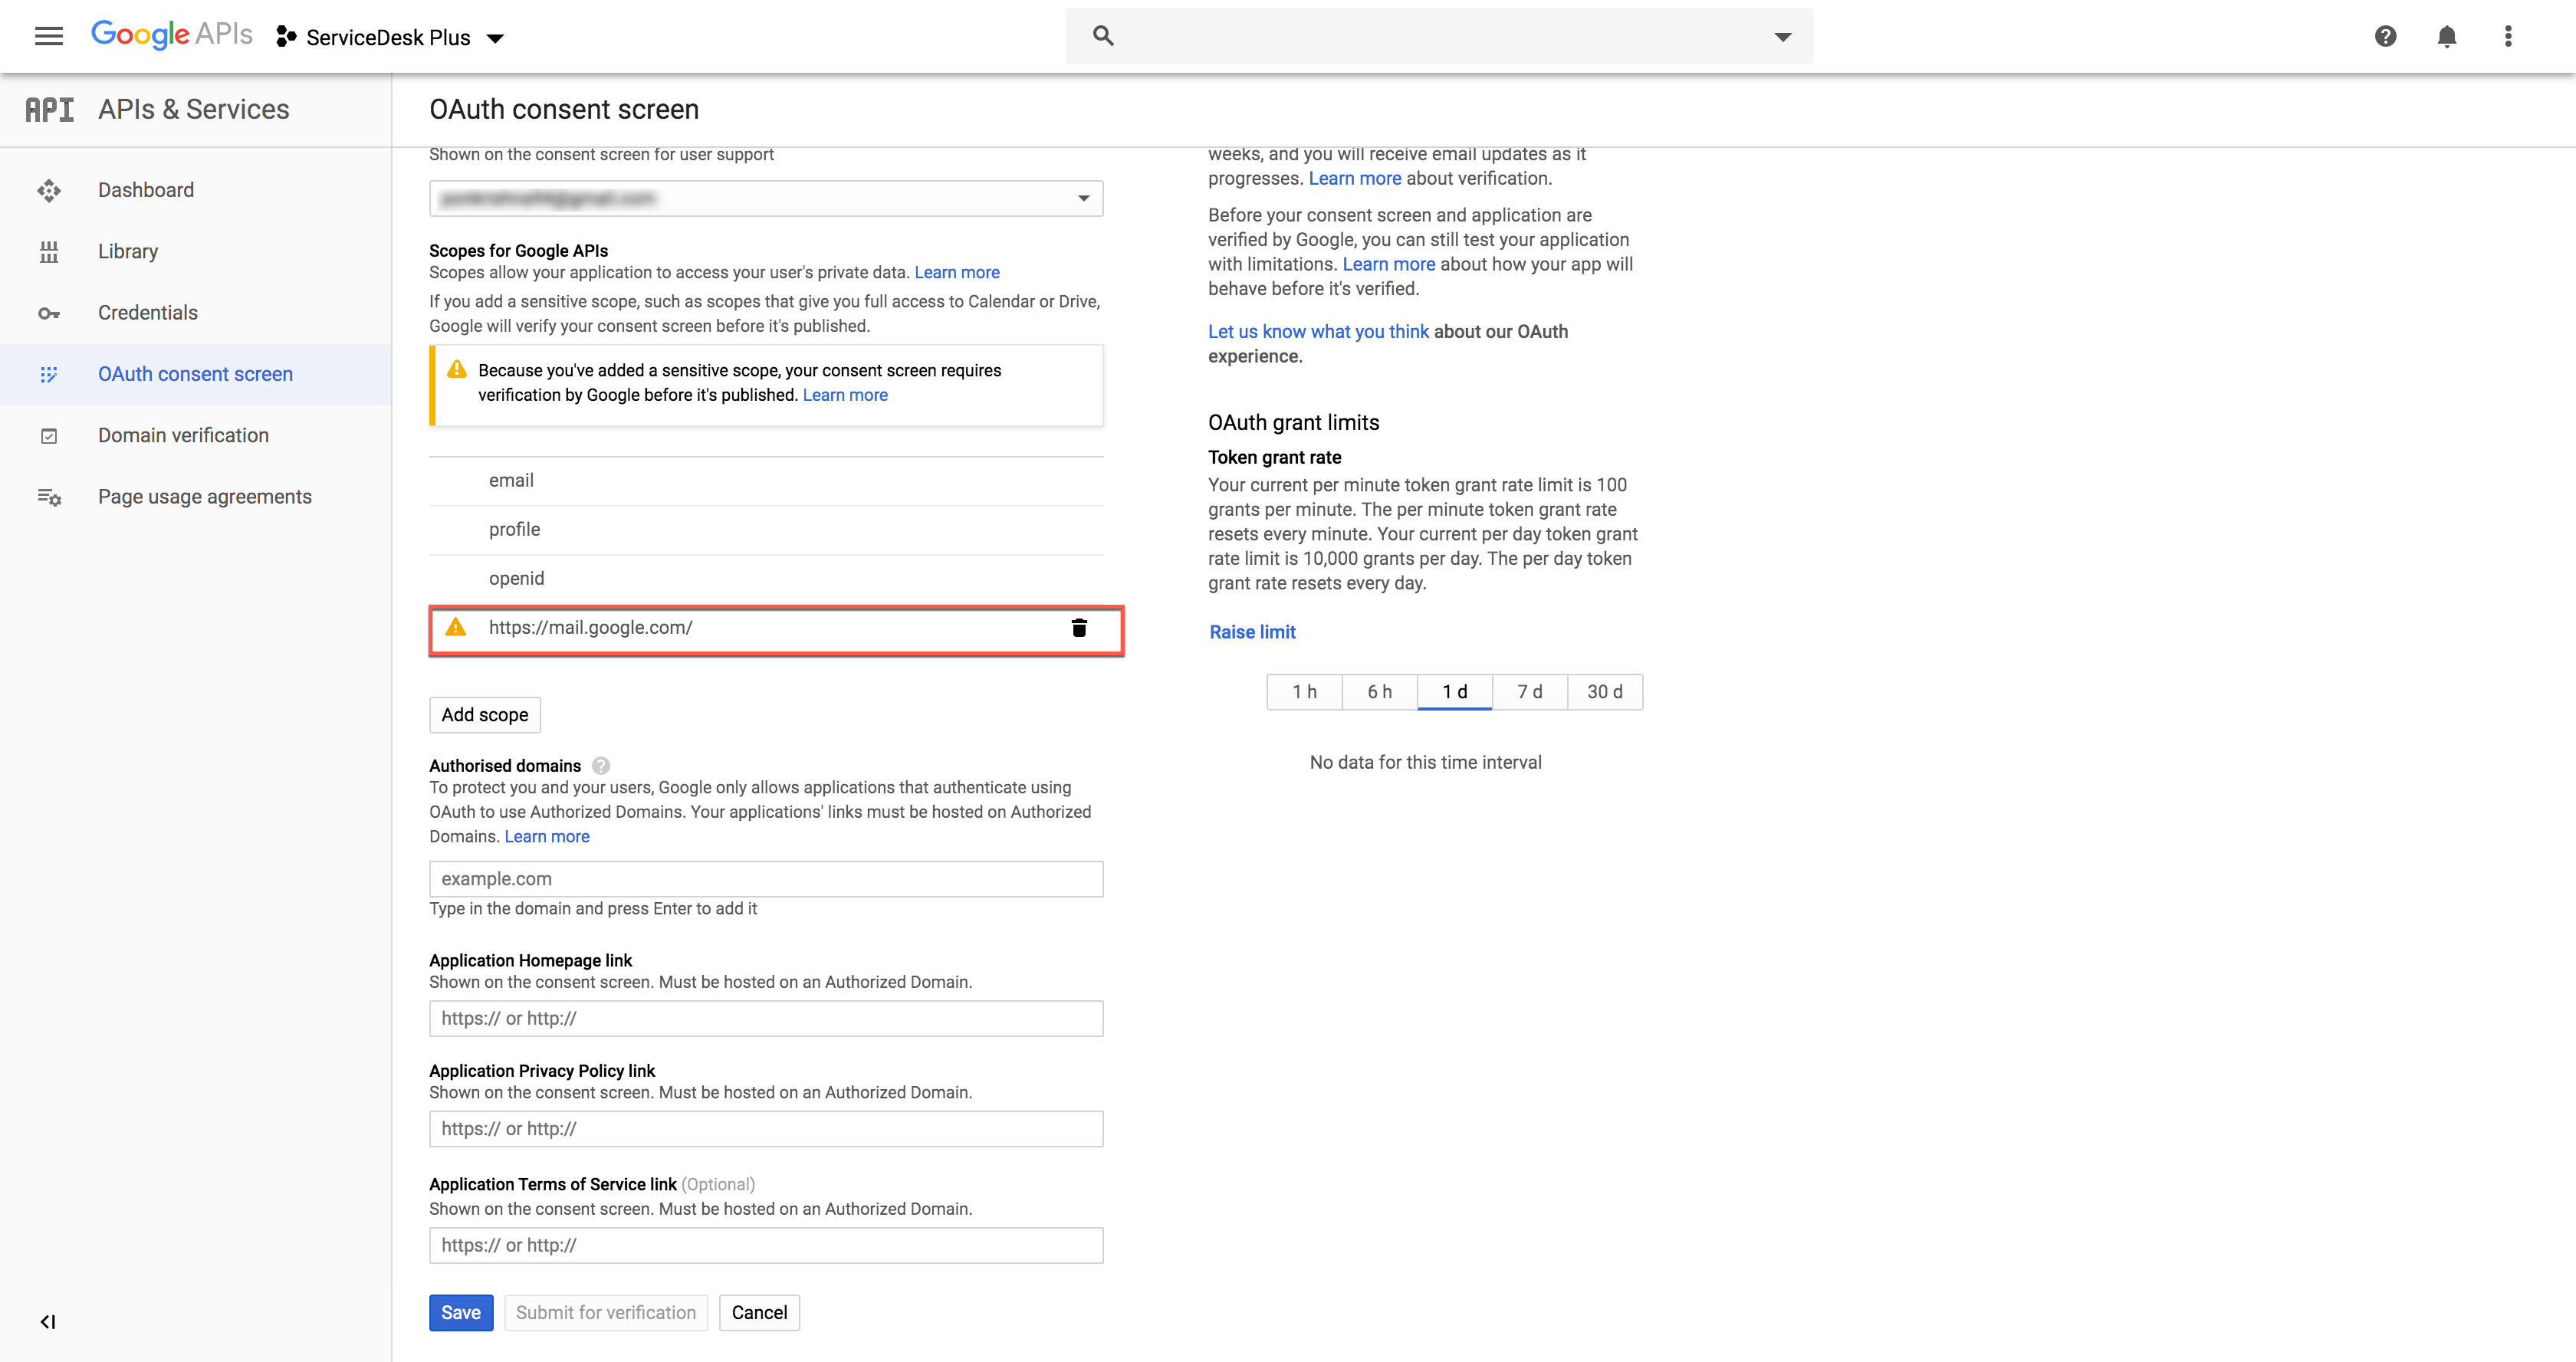
- The scope will be displayed as shown in the below screenshot. Copy the Scope to APM and click on Save.
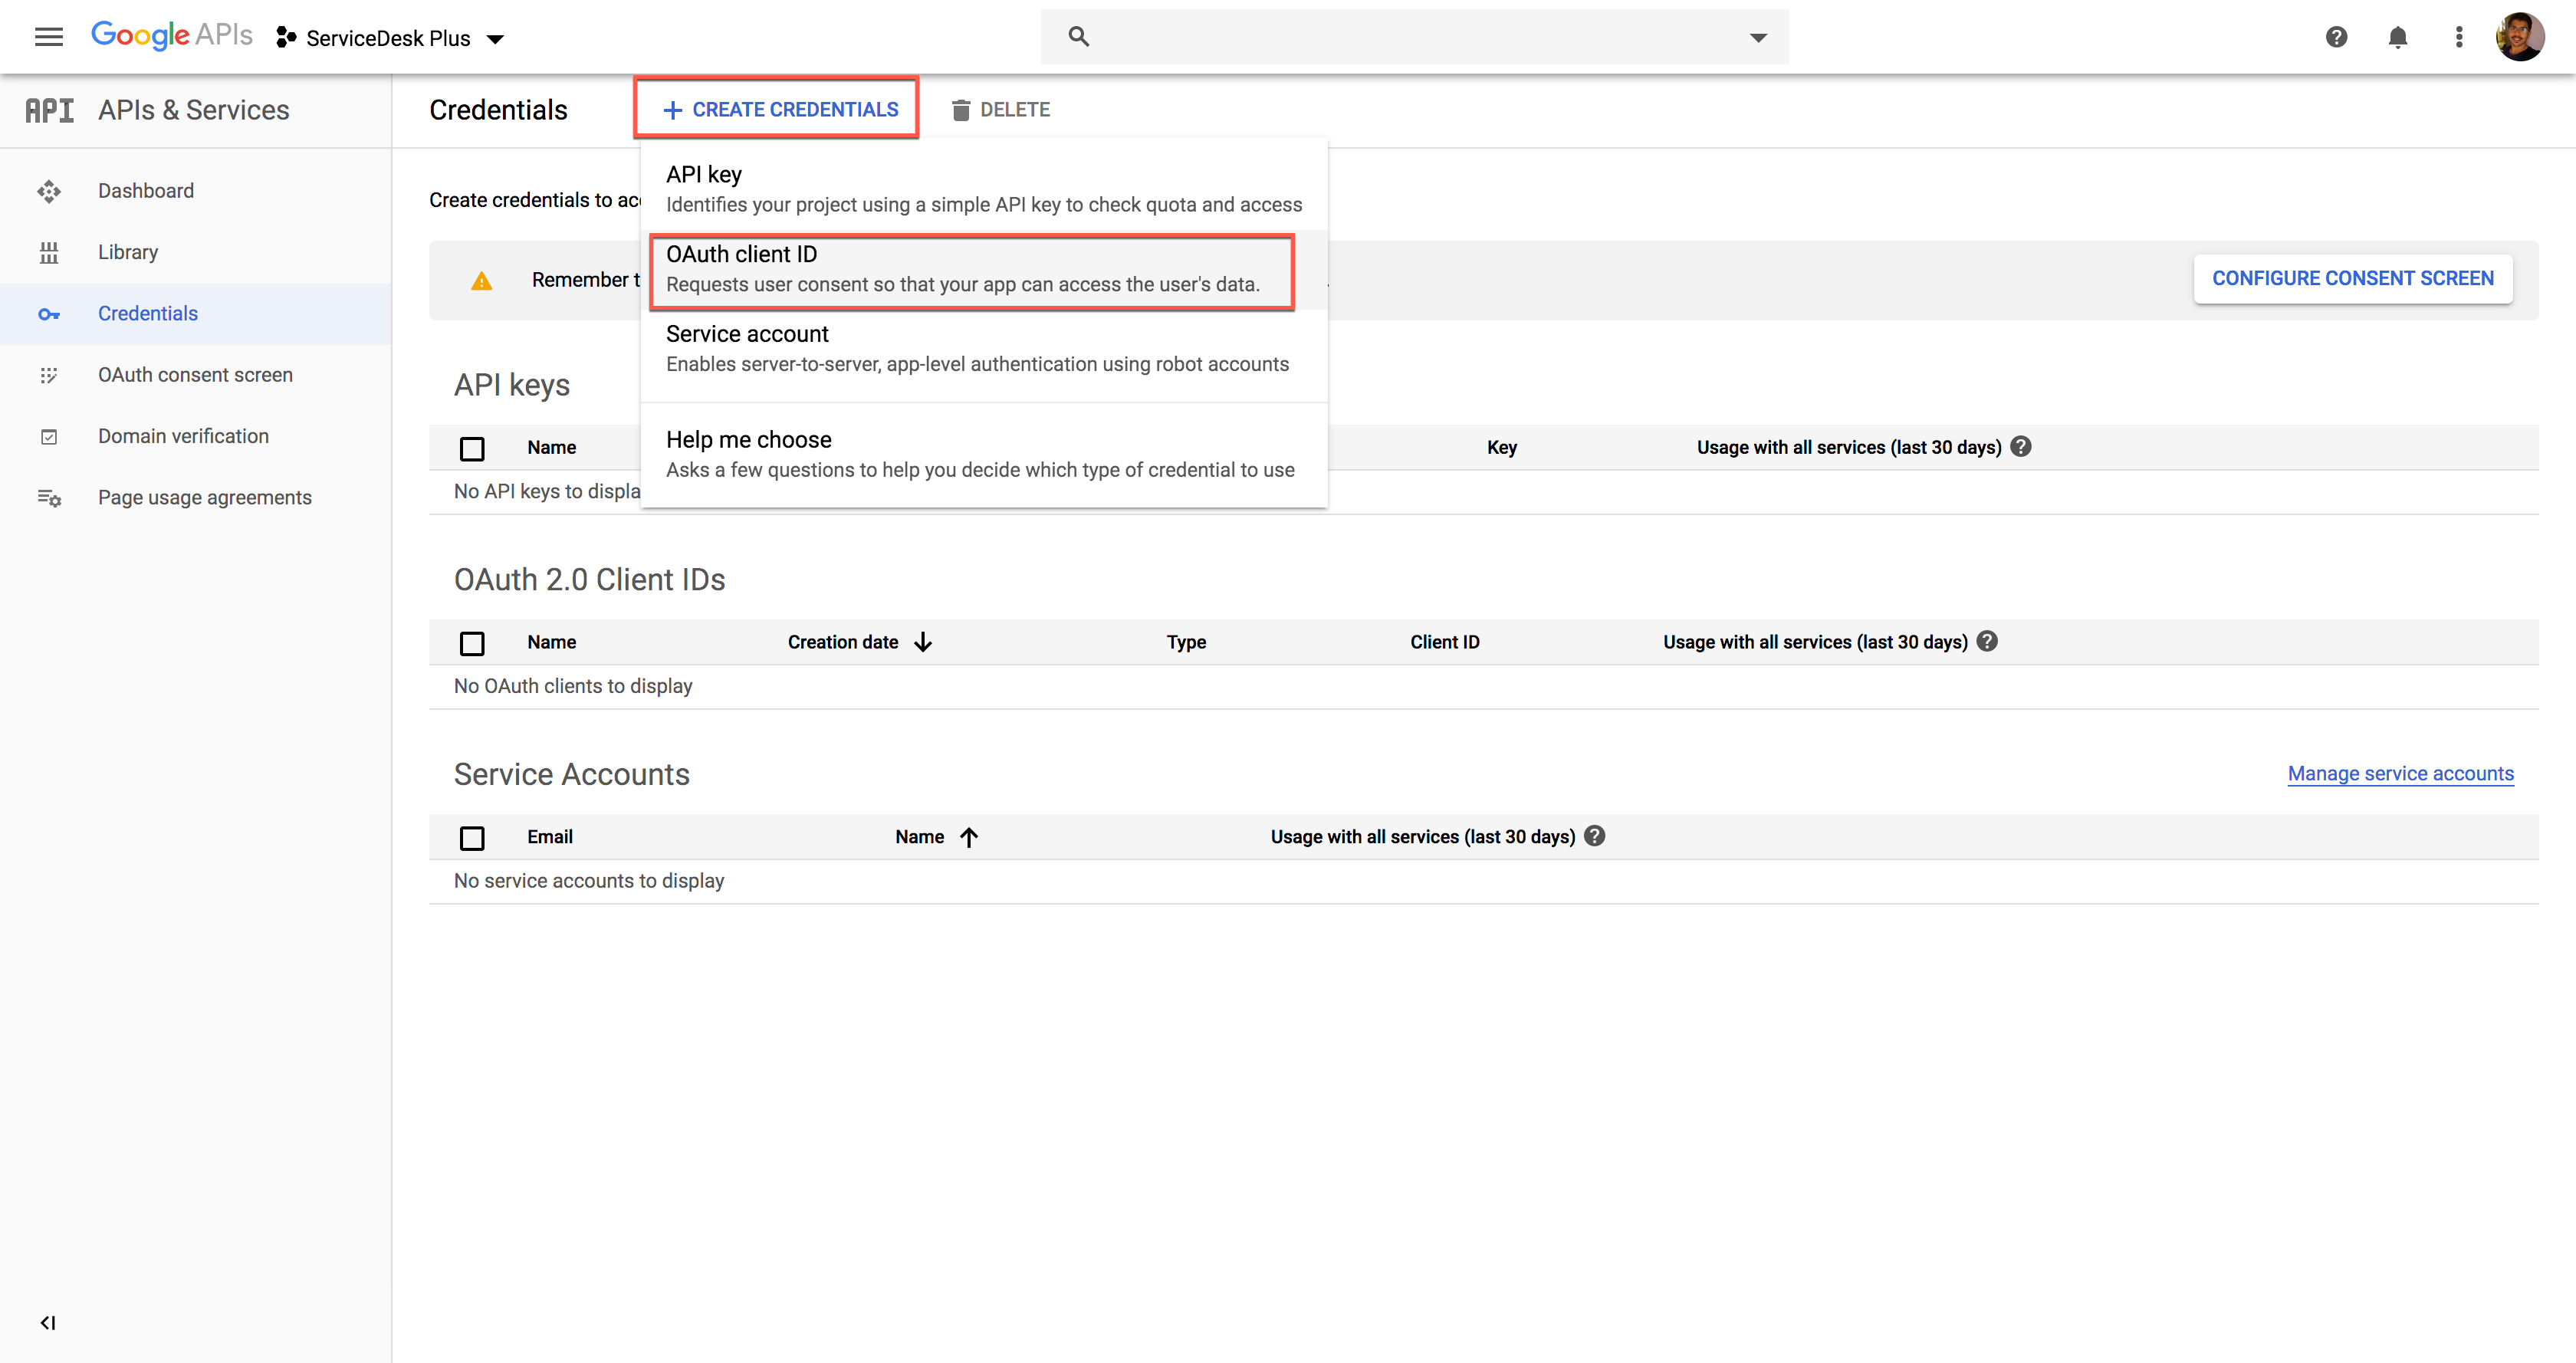
- In the left panel, click on Credentials -> Create Credentials -> OAuth Client ID.
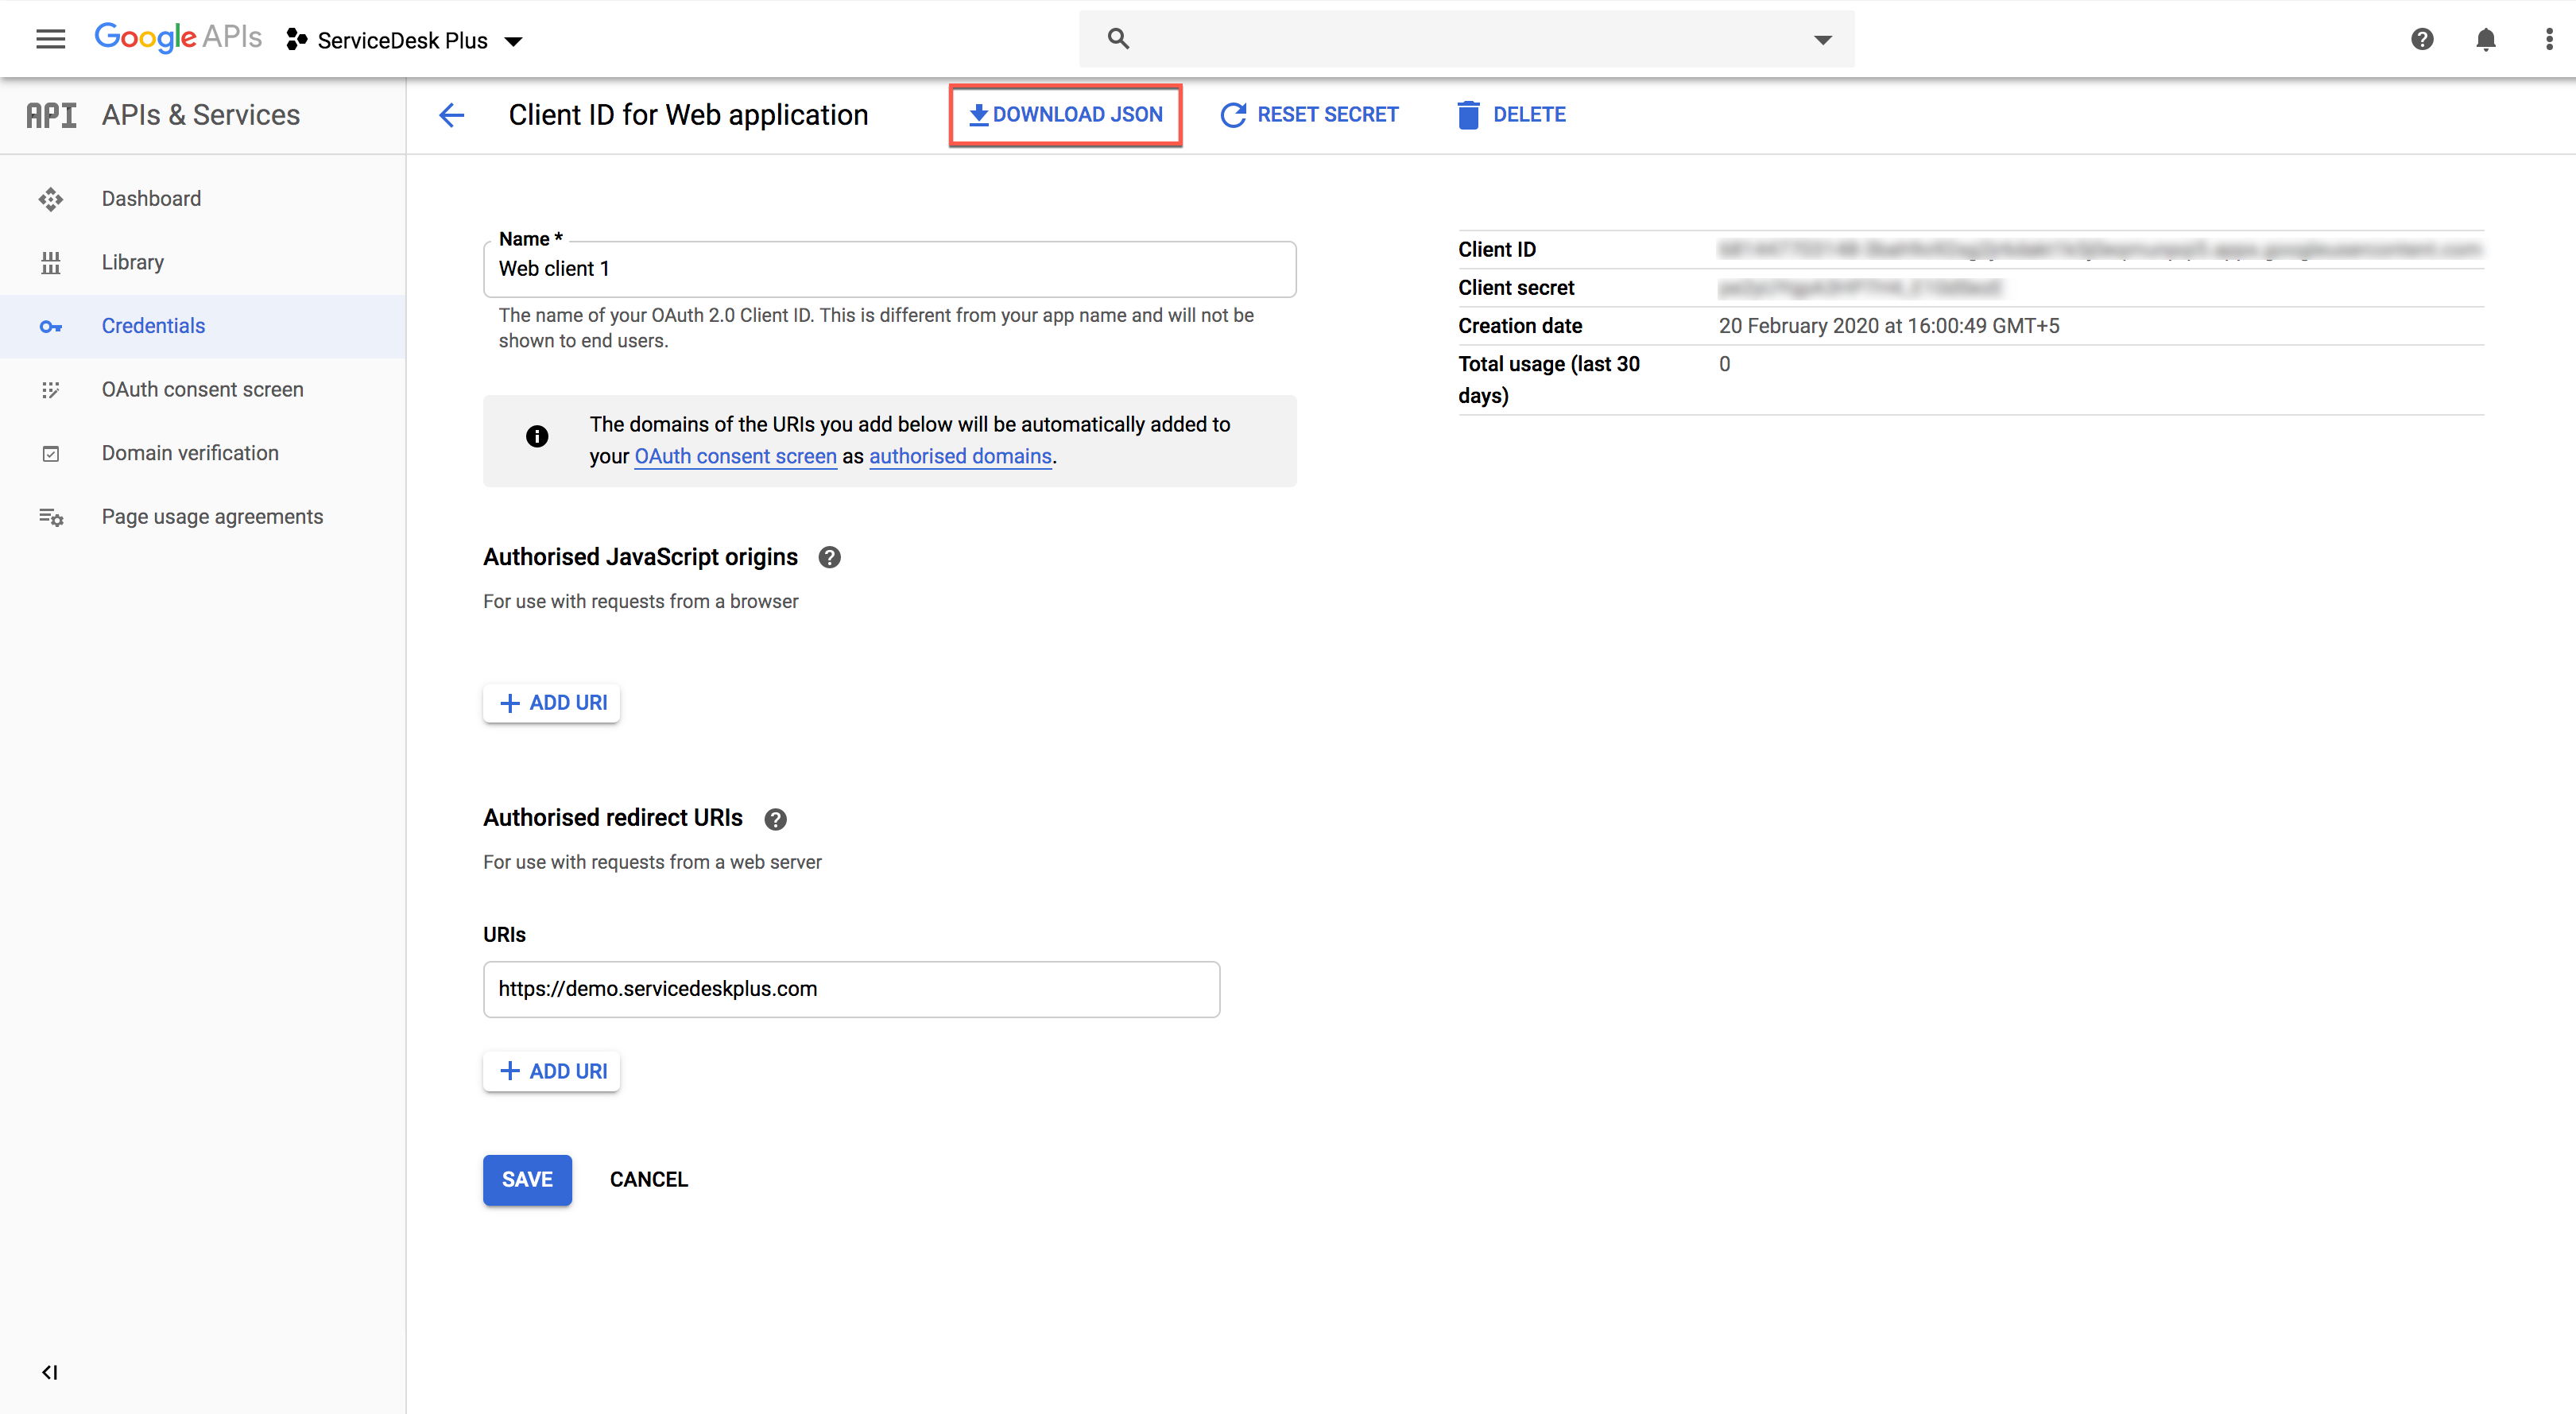
- Click on DOWNLOAD JSON to download the file containing the authorization server details. Copy these details to Client Details in APM.
- Provide a Name of your choice.
- In Authorized Redirect URIs field, copy-paste the Redirect URL of APM and click on Save.
You have now configured G-Suite as the authorization server for your organization using Gmail as the mail server.
Note:
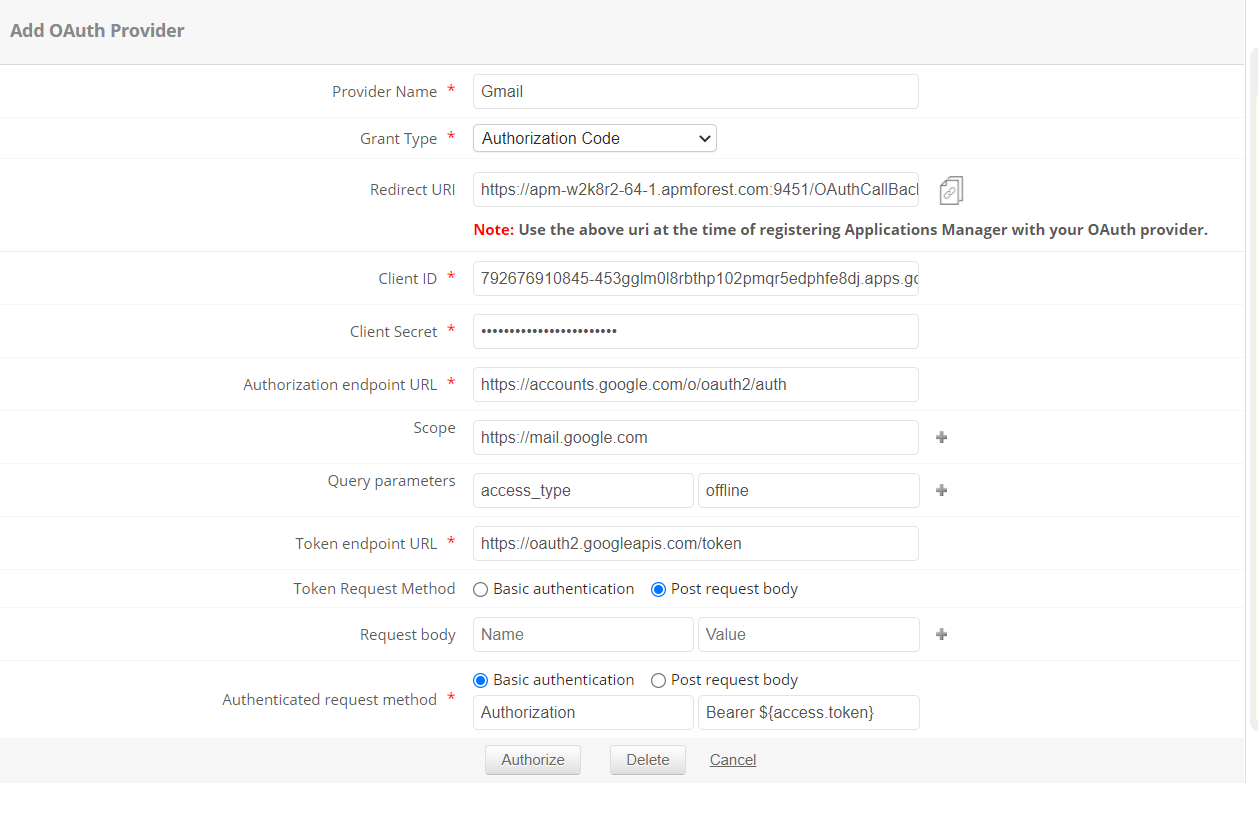
Use the following values to configure OAuth setup for G-Suite:
- Authorization endpoint URL :https://accounts.google.com/o/oauth2/auth
- Scope : https://mail.google.com
- Query Parameters :
Name -access_type
Value -offline - Token endpoint URL :https://oauth2.googleapis.com/token
- Token Request Method :Post request body