Downtime Scheduler
Scheduled downtimes for planned outages
IT-operations distinguish between two types of outages: planned and unplanned. Planned Outages are necessary to carry out essential maintenance. But the monitoring system initially cannot know if a detected outage was planned or not. If a monitor/ service is removed from the network, or rebooted, for maintenance, then you will see unnecessary alarms indicating that the monitor or application is unavailable when polled for status.
With the concept of scheduled downtimes in Applications Manager, the system can be informed of planned outages by a host or service by defining a scheduled downtime for the corresponding object. To prevent the monitors/services from being monitored for status during maintenance, you can schedule a maintenance task for such monitors.
Downtime Scheduler Overview
- Go to the Settings tab.
- Click on the Downtime Scheduler view.
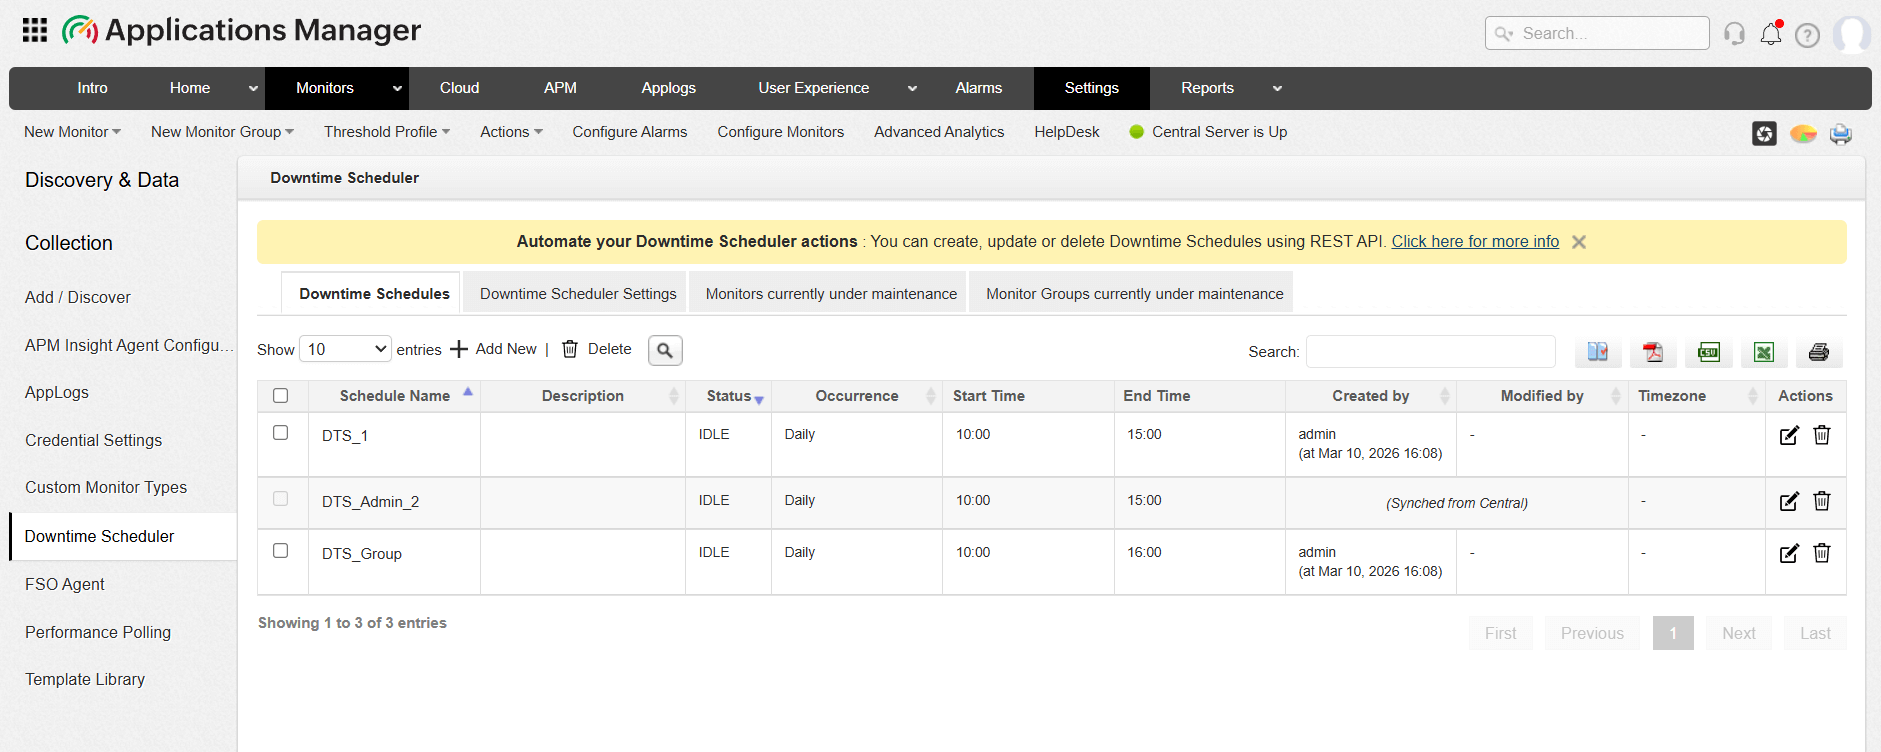
The Downtime Schedules page displays 4 tabs:
- Downtime Schedules (How to create a new schedule)
- Downtime Scheduler Settings
- Monitors currently under maintenance
- Monitor Groups currently under maintenance
Downtime Scheduler Synchronization in Enterprise Edition
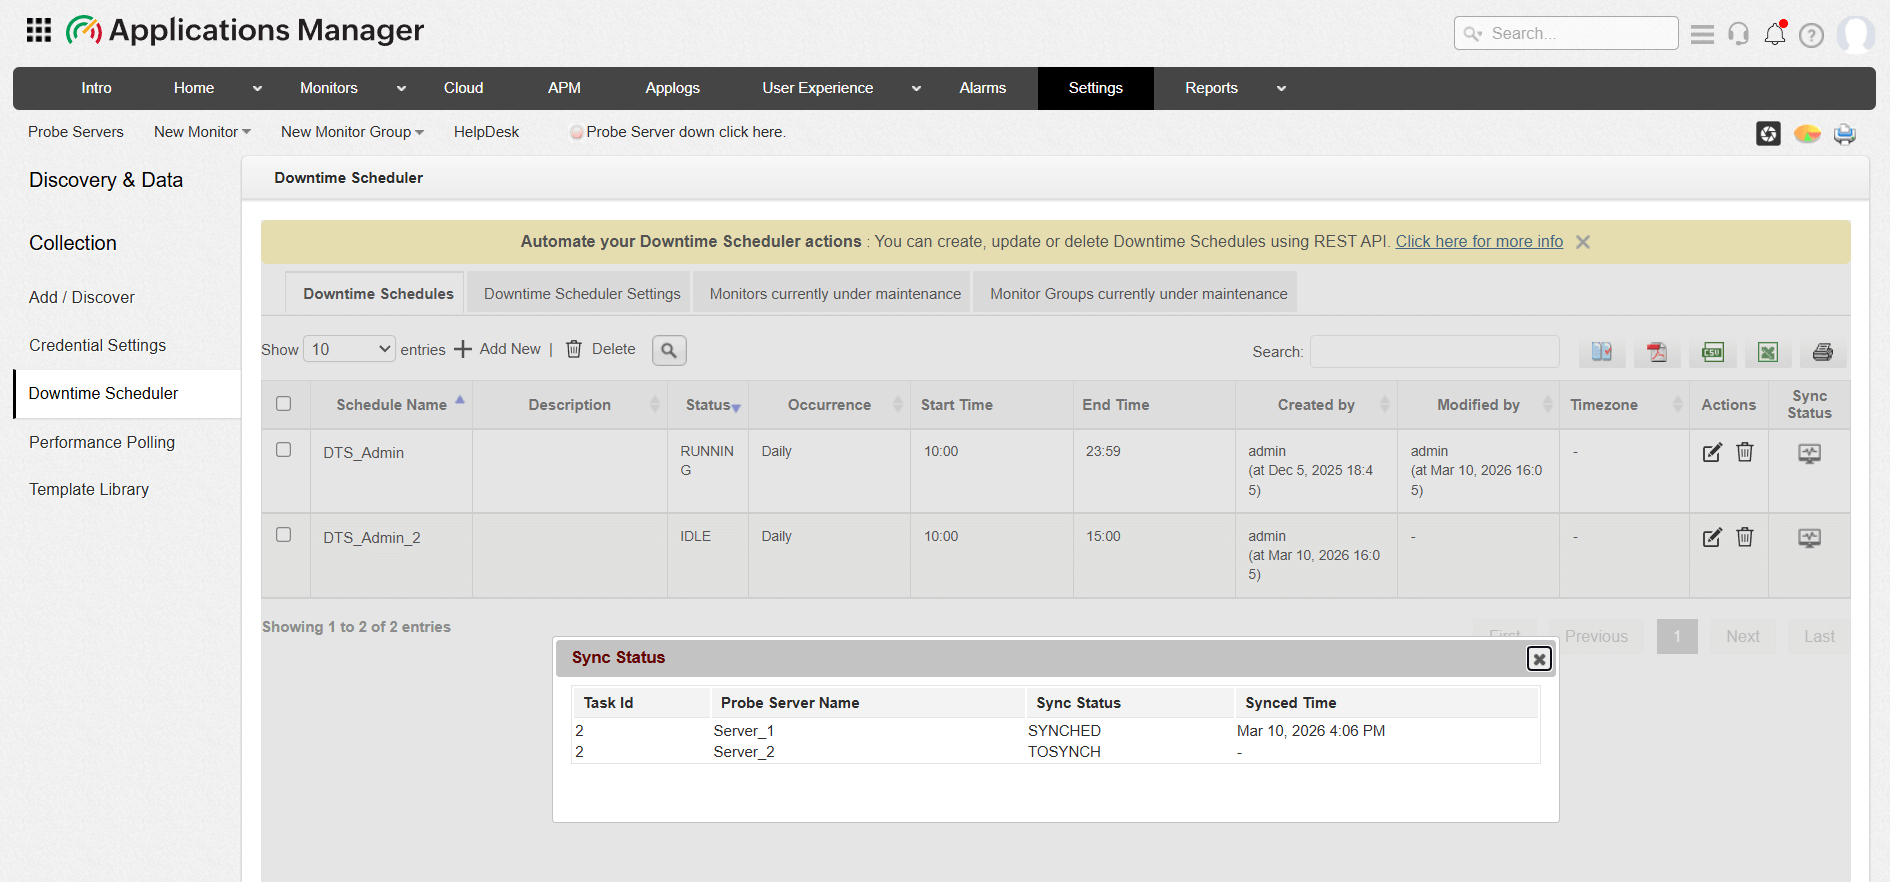
In Enterprise Edition, downtime schedules can be synchronized between the Central Server and Probe Servers. This ensures that downtime configured for specific monitors is consistently applied across the distributed environment.
1. Central to Probe server sync
When a downtime schedule is created in the Central Server, it is automatically synchronized with the Probe Servers that contain monitors associated with that downtime.
Sync interval
The sync process occurs every five minutes, ensuring that the Downtime is reflected on the Probe Servers within 5 minutes of its creation in the Central Server.
Sync behavior
- Downtimes created from the Central Server are read-only on the Probe Server.
- These synchronized Downtimes cannot be edited or modified from the Probe Server interface.
Viewing sync details
The sync details from Central to Probe Server can be viewed in the Downtime List View from the Central server. Clicking on the Sync Status button will display the sync details such as the Task ID, Prober Server to be synched, Sync Status, and Sync Time.
2. Probe to Central server sync
Downtime schedules created directly in a Probe Server are not synchronized back to the Central Server. These downtimes remain local to the Probe Server where they were created and will not appear in the Central Server.
