SAML Authenticator for ADFS
Security Assertion Markup Language (SAML) is an open-standard for exchanging user information between the identity and service provider. It is an XML-based markup language protocol which is used by the Active Directory Federation Service (ADFS) to authenticate the URLs. Applications Manager's SAML Authenticator allows you to perform the authentication and creates a session which will be used for monitoring the URLs.
Two types of bindings are supported in the authenticator—Redirect and POST.
Note: Currently, the SAML authenticator is supported only for HTTP(s) URL monitors.
Adding a new SAML authenticator
Follow the steps given below to add a new SAML authenticator profile:
- Under Settings tab, navigate Discovery and Data Collection → Credential Settings → SAML Authenticator for ADFS.
- Click on Add New link.
- Enter the display name for your authenticator.
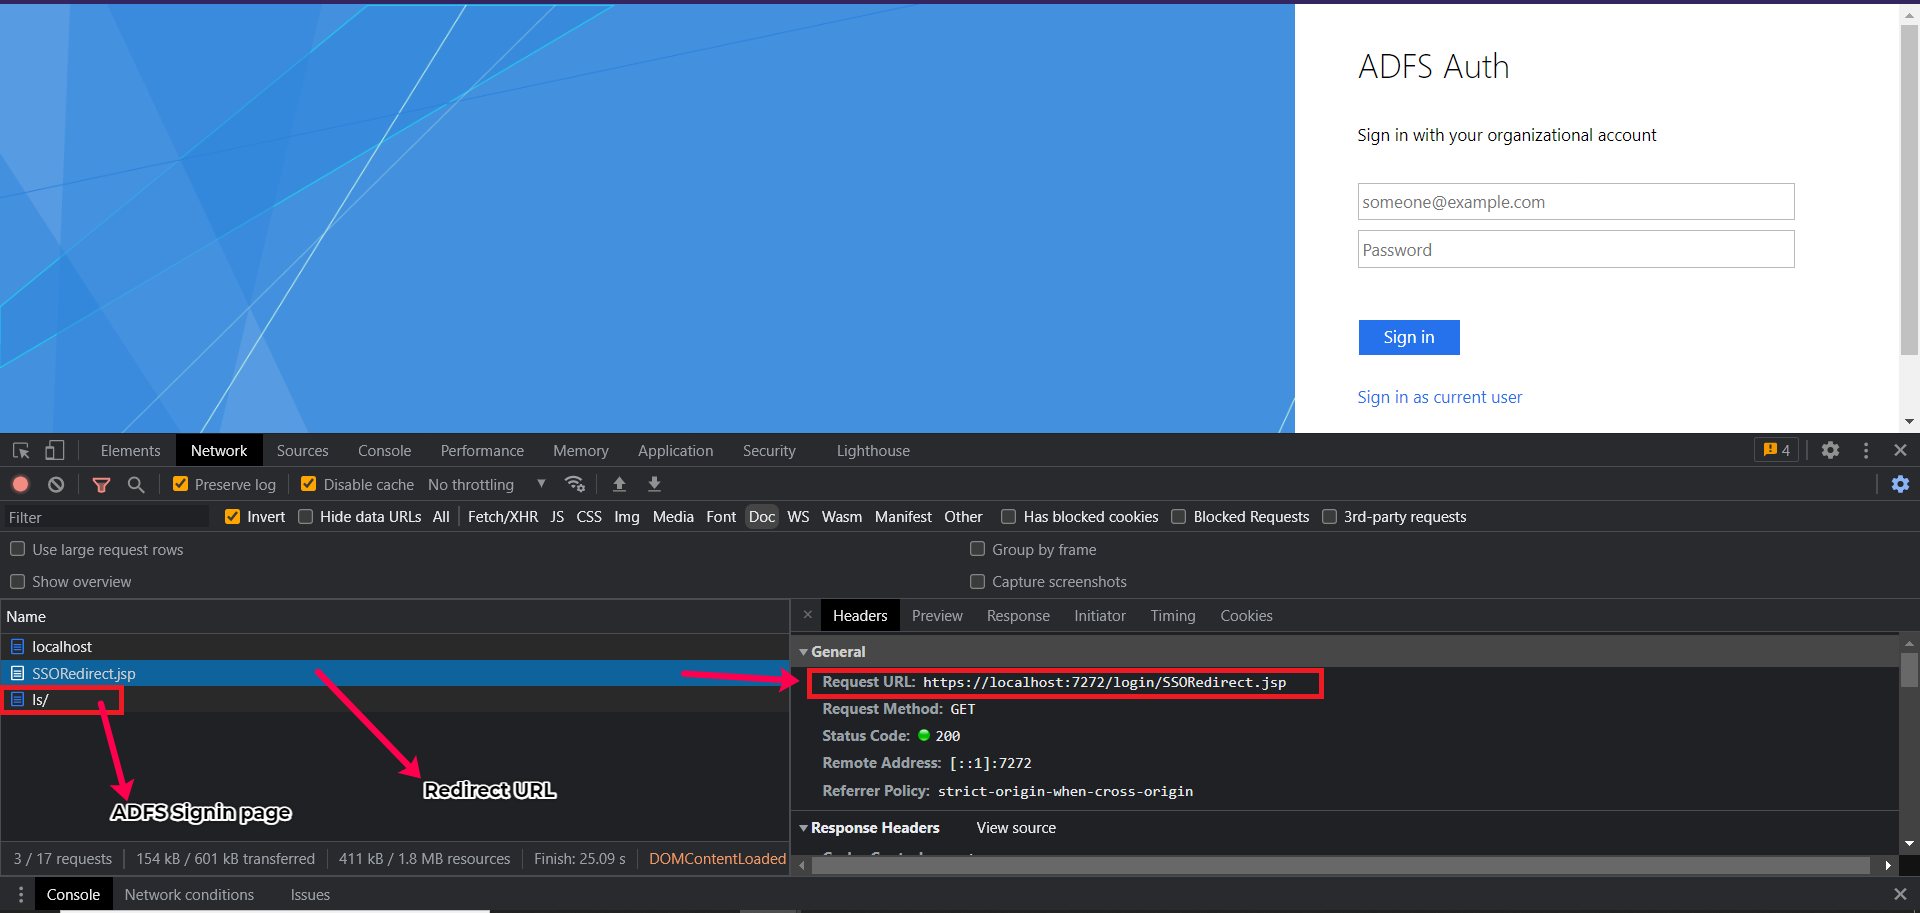
Specify the Redirect URL of the service provider which upon accessing will create SAML Request and redirect to ADFS (using which the application is configured) for authentication.
Choose the Form Submission Method used to access the redirect URL using any one of the following HTTP methods: GET or POST. If you select POST method, you will be asked to choose the Request Body Type from the following options:
- FORM: If you select this, enter the Request body in a line-by-line format.
- XML: If you select this, enter the Request body in XML format.
- JSON: If you select this, enter the Request body in JSON format.
- Text: If you select this, enter the Request body in text format.
Example inputs:
- FORM:username=john&password=Secured@0722
- XML:<?xml version="1.0" encoding="utf-8"?> <Request><Login>login</Login><Password>password</Password></Request>
- JSON:{username:john,password:Secured@0722}
- Text:name1,name2,name3
- Specify additional Custom HTTP(S) Headers required to establish a connection with the redirect URL.
- Choose the SSL version required for establishing connection with the Redirect URL.
- Enable the Form Redirect checkbox if the redirection to ADFS is to be performed by submitting a HTML form containing SAMLRequest. Once the checkbox is enabled, enter the following details:
- Request Binding: Request binding type used by your application for SAML SSO. (Redirect or POST)
- Form name: Name of the HTML form to be submitted for ADFS redirection. If the form name is not specified, then the first form on the page will be taken. For example, if ABC is the application you are going to monitor and XYZ is ADFS, then SAMLRequest has to be sent from ABC to XYZ. To make this work, a simple HTML FORM containing SAMLRequest and other required data will be submitted automatically to redirect to ADFS which will be constructed by ABC application.
- Specify the Sign-in URL of your ADFS. This should be in the following format: https://<yourDomainName>.com/adfs/ls
- Enter the ADFS user credential which is used for logging into the service provider.
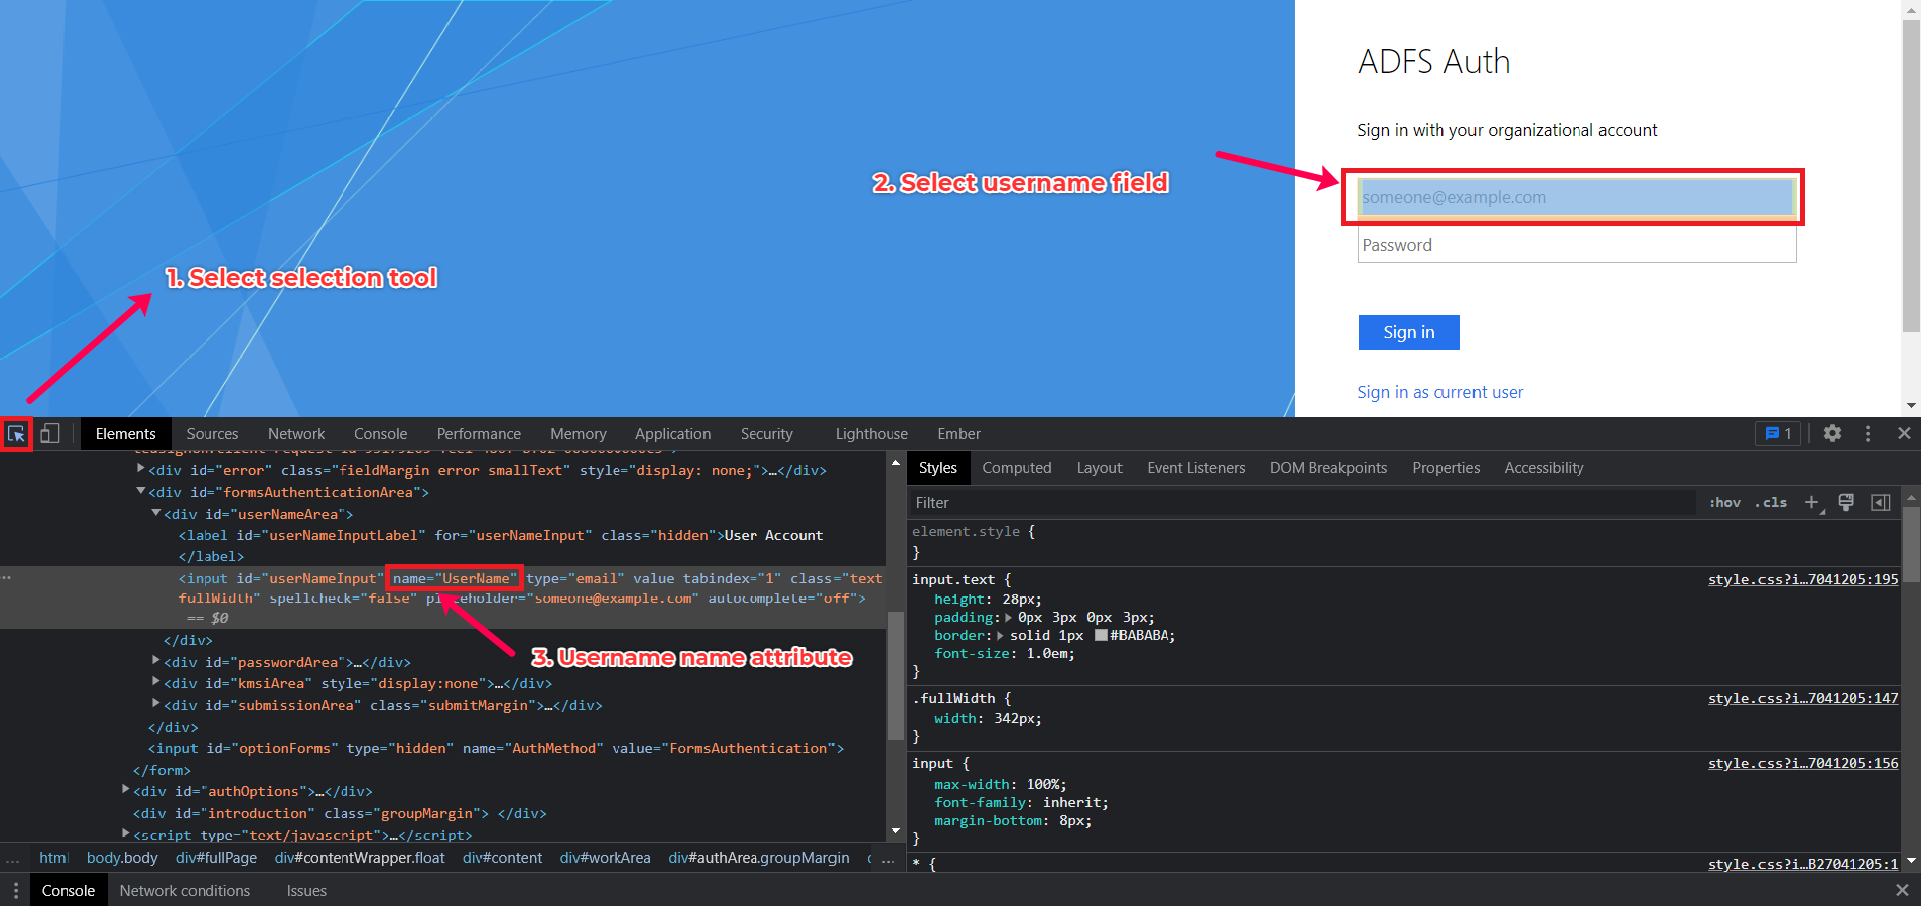
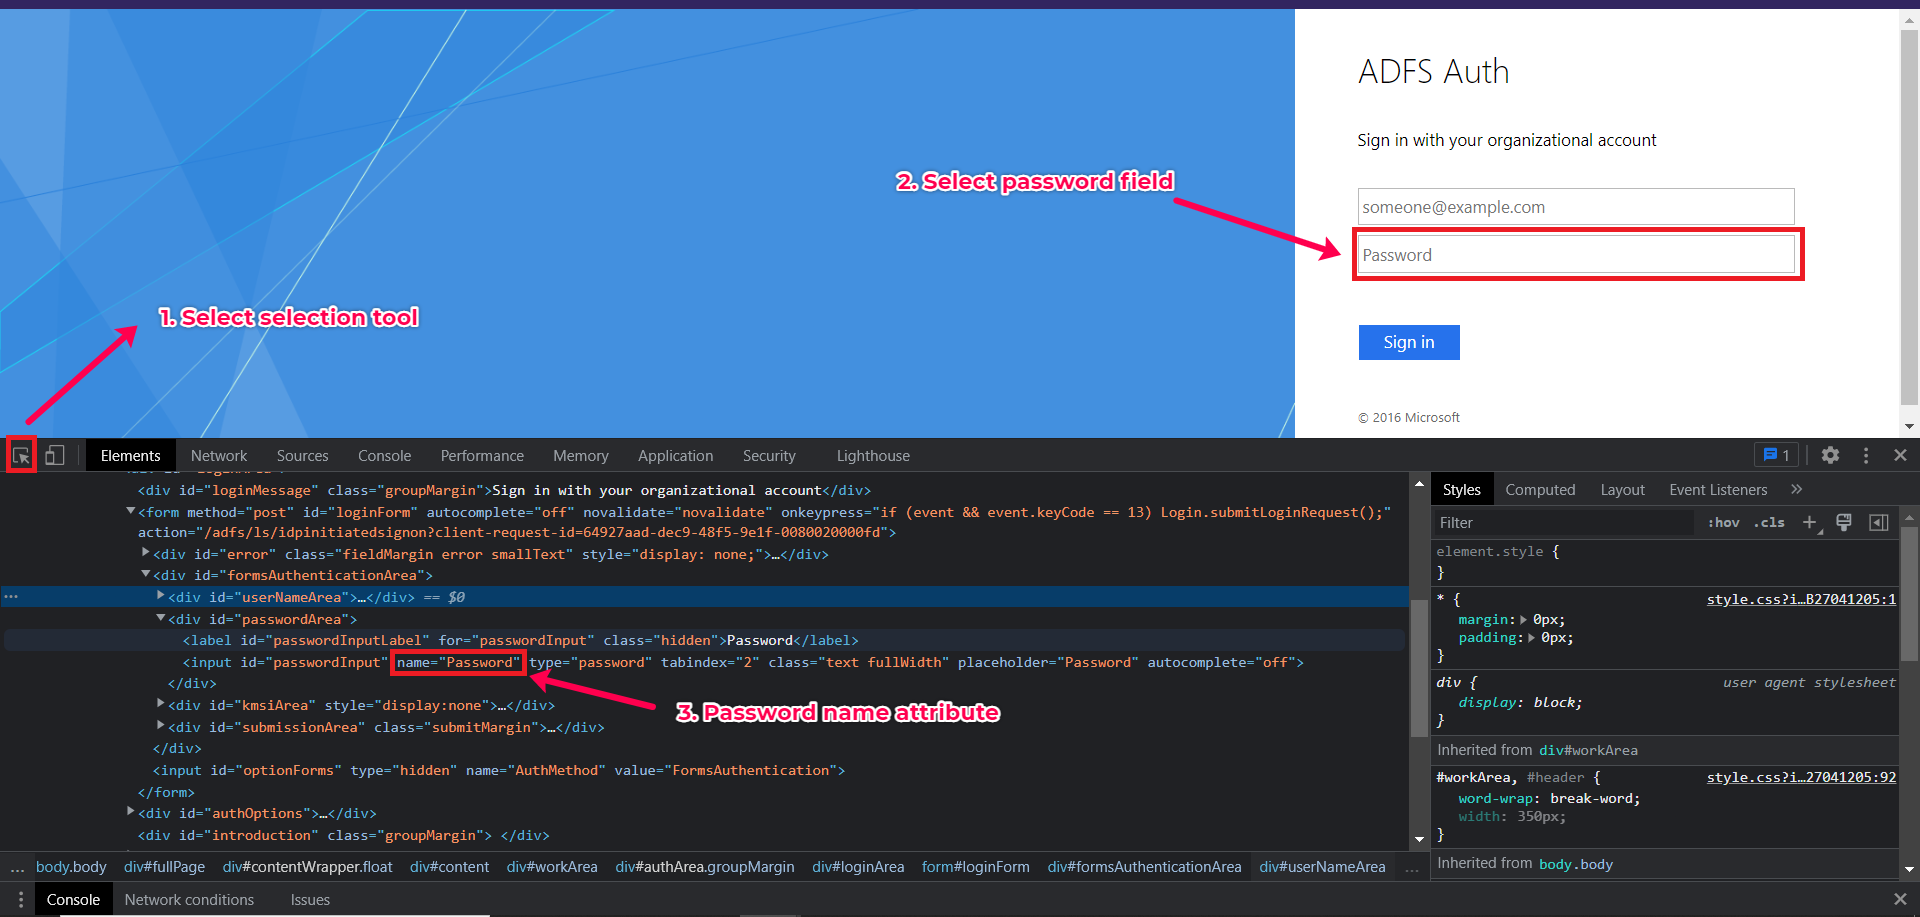
Specify the names of the username and password input fields present in the ADFS login page under Username's Identifier and Password's identifier fields respectively.
- Choose the Request binding type used by your application return the SAMLResponse to Assertion Consumer Service (ACS) URL—Redirect or POST. This URL might be mentioned by your application in SAMLRequest with the attribute name "ProtocolBinding" and can also be found in ADFS-installed machine by navigating to Server Manager → Tools → AD FS Management → Relying Party Trusts, and then right clicking on Your Application → Properties → Endpoints.
- Specify the ACS URL (or Assertion Consumer Service URL) configured by your application for receiving SAMLResponse from the ADFS. This URL might be mentioned by your application in SAMLRequest with an attribute name "AssertionConsumerServiceURL" and can also be found in ADFS-installed machine by navigating to Server Manager → Tools → AD FS Management → Relying Party Trusts, and then right clicking on Your Application → Properties → Endpoints.
- After entering all the required configuration details, click Save.
Upon clicking Save, an SAML Authenticator profile will be created based on the entered configuration details and can be found under Settings → Discovery & Data Collection → Credential Settings → SAML Authenticator for ADFS.
