Creating New Contracts
Contracts are services provided to a product for a definite time period. The assets purchased can be associated to more than one contract with different times for renewal.
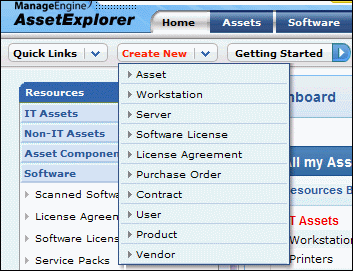
The new contract form can be accessed by two ways in AssetExplorer application.
Create New Tab
Contracts tab
Create New Tab
The Create New Tab is a quick navigator to instantly access the New Contract form the home page.

To create a contracts, go to Step 3 in Contracts Tab.
Contracts Tab
Click Contracts tab in the header pane to open the Contracts list view page.
Click New Contract button.
From the Add Contract form, specify the Contract Name in the given field. This field is mandatory.
Specify any relevant information about the contract in the Description field.
Select the Maintenance Vendor from the drop down.
If the maintenance vendor is unavailable in the list, click Add New Vendor button. Specify the Vendor Details such as Name, Description and Contact Person. Save the changes.Specify the support details of the contract in the Support field. Say, support for maintenance, replacement and so on.
You can attach relevant documents to the contract.
Click Attach file button.
Click Browse button to choose a file.
Select the file and click Attach file button. You can see the file attached with the file size.
|
|
Note: Files up to the file size of 10 MB can be attached. |
You can add any number of assets to this contract. To add the assets,
Click Select Resources for this contract link.
Enter the Resource Name, Product Type or Product in the search field.
Click Search button to get the result. Select the required resources by enabling the check box.
Click Add Items button to add the selected items.
Click View Resources >> button to view the selected resources.
Click Add Resources to Contract button to add resources to the Maintained Assets list. Else, clicking on < Go back and add more items to add assets from Select Resources for this contract page.
|
Note |
1. The assets are listed in Maintained Assets block.
2. To delete an asset, select the asset and click on the delete
icon |
Select the Active Period (From and To date) of the contract using the calender icon. This field is mandatory.
Specify the Maintenance Cost ($) for this contract.
To notify users before a contract expires, select Enable Notification check box. Select the users from the User list. Click >> button to move the user to the Notified User List. Specify the days before which the information has to be notified in the Notified before field.
If there are any Additional Contract details (configured under Admin -> Contracts -> Contract - Additional Fields) then enter the same in the respective fields.
Click Save.
