Adding Invoice details and Notification
Once the PO is approved by the concern personnel, the Invoice and Payment options gets populated in the Actions tab. On receiving the Invoice from the Vendor, you can add the Invoice details and also sent a notification to the concern technicians.
Add Invoice
Click Purchase tab in the header pane to open the purchase list view page.
Click the PO Name link of the Purchase Order to add an Invoice.
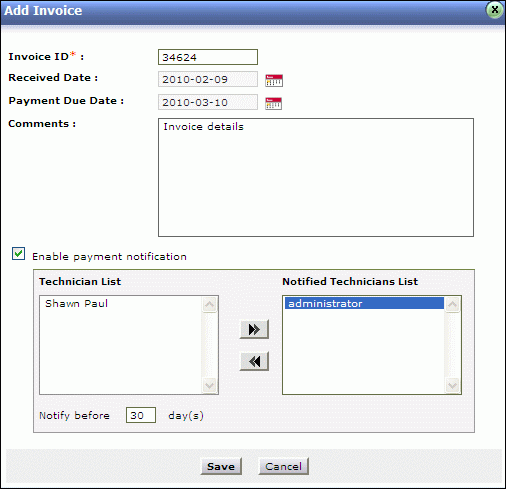
From the PO details page, click Actions drop down -> Add Invoice option. The Add Invoice dialog pops up.

Enter the Invoice ID. This field is mandatory.
Select the Receive Date and the Payment Due Date from the calender icon.

If required, enter the relevant comments from regarding the Invoice in the Comments field.
You can also enable payment notification to the technicians by enabling the check box.
Select the technicians from the list for payment notification. Click >> button.
Enter the Days before which the notification should be sent to the selected technicians.
Click Save.
Receive Invoice
Once the Invoice is received from the Vendor, you can notify the same to the PO approvers.
Click Actions drop down -> Receive Invoice option. The Receive Invoice dialog pops up.
Enable Send Mail Notification check box.
Enter the email address in the To field.
If required, you can modify the Subject content manually and type in the message text for mail notification in the Description field.
Click Send. The status of the PO changes to Invoice Received.
