Network Scan
Discover networks part of your organization and scan them at regular intervals using Network Scan. Apart from scanning various operating systems like Windows, Linux, MAC, Solaris and AIX workstations network scan also allows for scanning of SNMP devices and VMware machines. Note: Agents are mandatory for scanning Windows, Linux, and Mac machines. If Windows machines are scanned using Windows Domain scan, they need not be configured here.
The Network Scan page can be accessed in two different ways:
a. Using Quick Actions Menu
b. Using Admin Tab
Quick Actions Menu
The Quick Actions drop-down menu is a quick navigator to instantly access the Network Scan page. From the Quick Actions, drop-down select the Network Scan option available under Scan block.
Admin Tab
1. Click the Admin >> Network Scan under the Discovery block. The Network list view page opens where you can add, edit, delete, and scan a network.
Adding a Network
- Click Add New Network link.
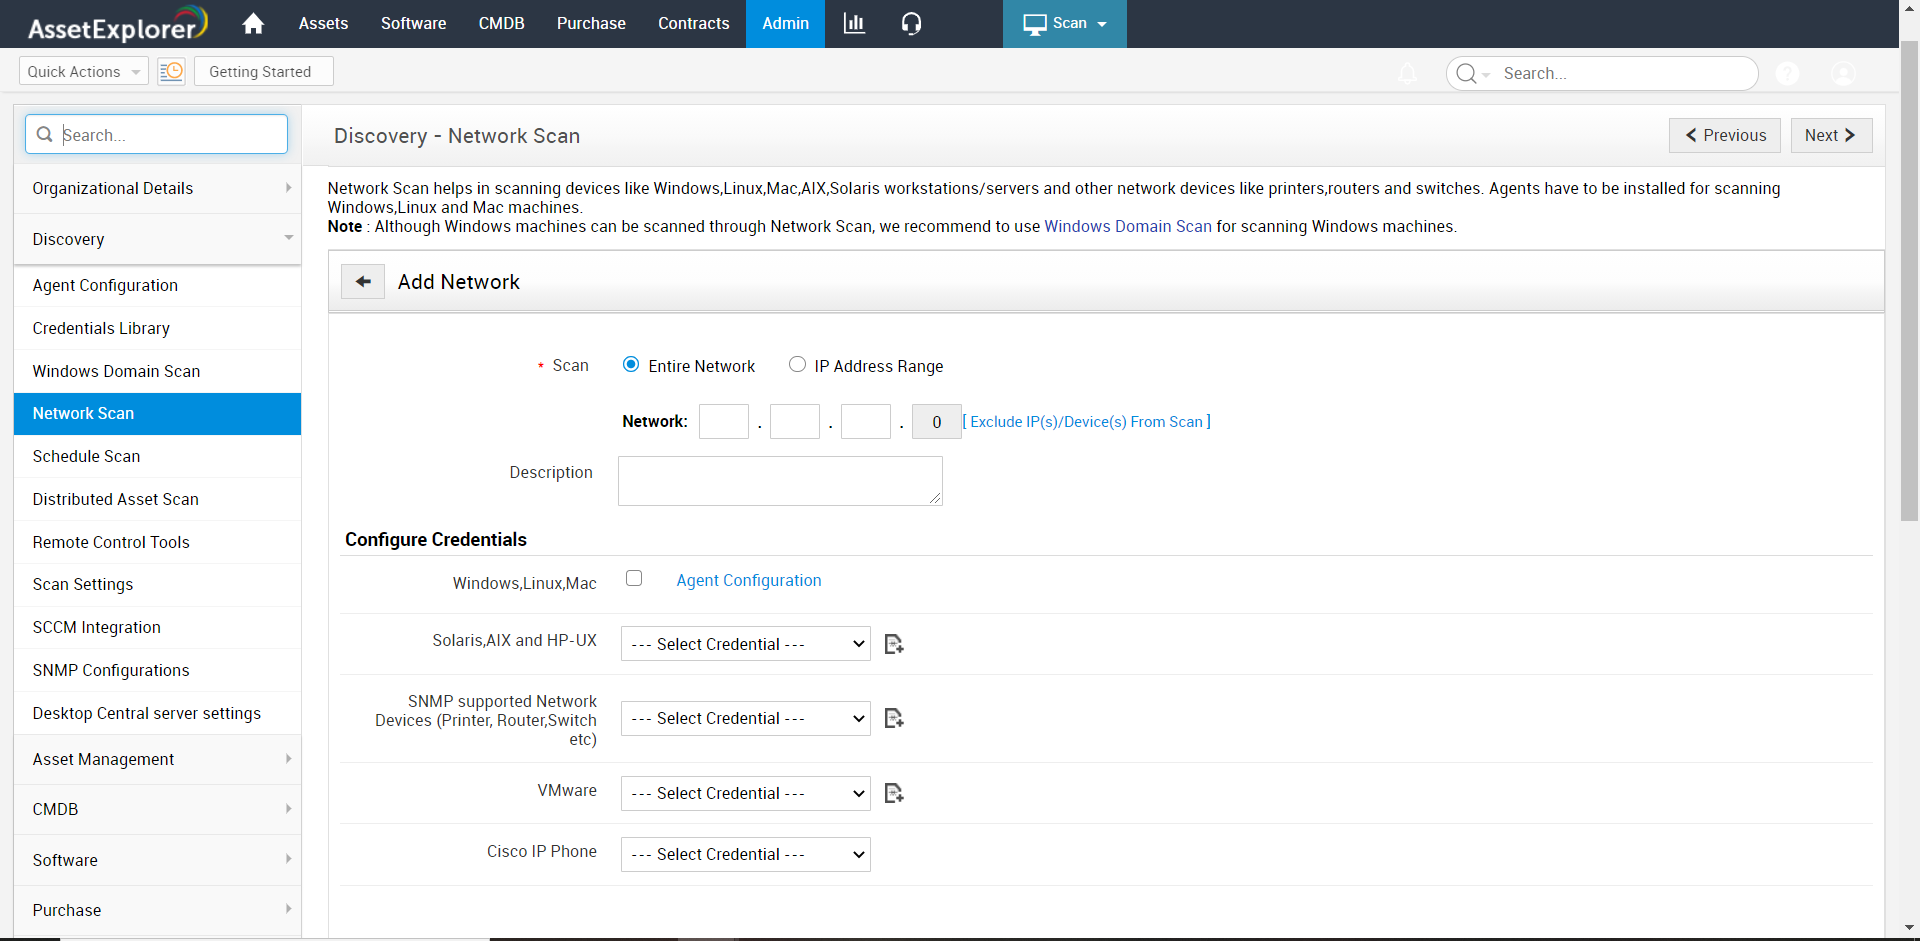
- Decide Scan Range: you can either scan the Entire Network or mention a specific IP Address Range for scanning.
- Enter the Network Address.
* To scan the Entire Network, the IP address should be mentioned as 192.168.27.0
* To scan part of a Network, the IP address range should be mentioned as follows: 192.168.27.0 - 192.168.27.30 - Provide a suitable description.
- For scanning Windows, Linux, and Mac machines, Agent configuration is required. Click Agent Configuration to download the Agent.
- Specify Network Scan Credentials for scanning different subnets of your network
- Click Save (or) Save and Scan now to scan the network immediately.
Network Scan Credentials
These credentials let administrators refine network scans based on SNMP devices being used. The network scan page contains four different credentials for scanning various subnets involved in the network.
Note: Scan Credentials can also be configured from the Credentials Library page and can be later associated with Network Scan.
Configure Scan Credentials for a Network
Using Existing Scan Credentials:
1. Select Network to which Scan Credentials are to be added from Network List View.
2. Select Scan Credentials from Select Credential Drop Downs.
3. The following Scan Credentials can be selected for a given network
- Scan Credentials for Solaris HP-UX, and AIX machines
- Scan Credentials for SNMP Devices
- Scan Credentials for VMWare Devices
- Click Save (or) Save and Scan now (for immediate scanning of the network)
Configure New Scan Credentials:
- Select Network to which Scan Credentials are to be added.
- For adding New Scan Credentials, do the following:
- Select Add New Credential Icon (besides respective Scan Credential to be configured).
- Add New Credential Pop-Up will be displayed.
If you're configuring Solaris and AIX Scan Credentials, click here.
If you're configuring SNMP Device Scan Credentials, click here.
If you're configuring VMWare Device Scan Credentials, click here.
Having Multiple Scan Credentials
Administrators can configure Multiple Scan Credentials at a stretch using Add Another Credential Icon that appears on-hover select credential drop downs.
Adding Multiple Scan Credentials:
1. Click on the Add Another Credential button (appearing on-hover Select Credential dropdown)
2. Select the Credential (you can add all Credentials available under Select Credential dropdown using the Add Another Credential button)
Note: You can also delete Scan Credentials added by mistake by clicking on the Remove button.
Scanning the Network
1. From the Network List View page, click the Scan Network icon.
2. If your organization is distributed across various sites, select the Site to which the workstations/devices are associated.
3. Click Start Scanning. Once scanned, you will get the complete report on the success and failed workstations of the scan.
Edit Network
1. From the Network List View page, click the Edit icon of the network to be edited.
2. Edit the network details and save the changes. Click Save and Scan now, to save and scan the workstations in the specified range
Delete Network
1. From the Network List View page, select Network you want to delete.
Click on the Delete button. A confirmation message on the delete operation appears. Click OK to continue. The network will be deleted from the list.

