How to Configure Registry Settings for Computers
The Registry Settings allows you to change the values in the registry in the workstations. The Registry Settings Configuration enables you to modify the registry values from a central location.
Step 1: Name the Configuration
Provide a name and description for the Registry Settings Configuration.
Step 2: Define Configuration
You can perform the following actions:
Write Value
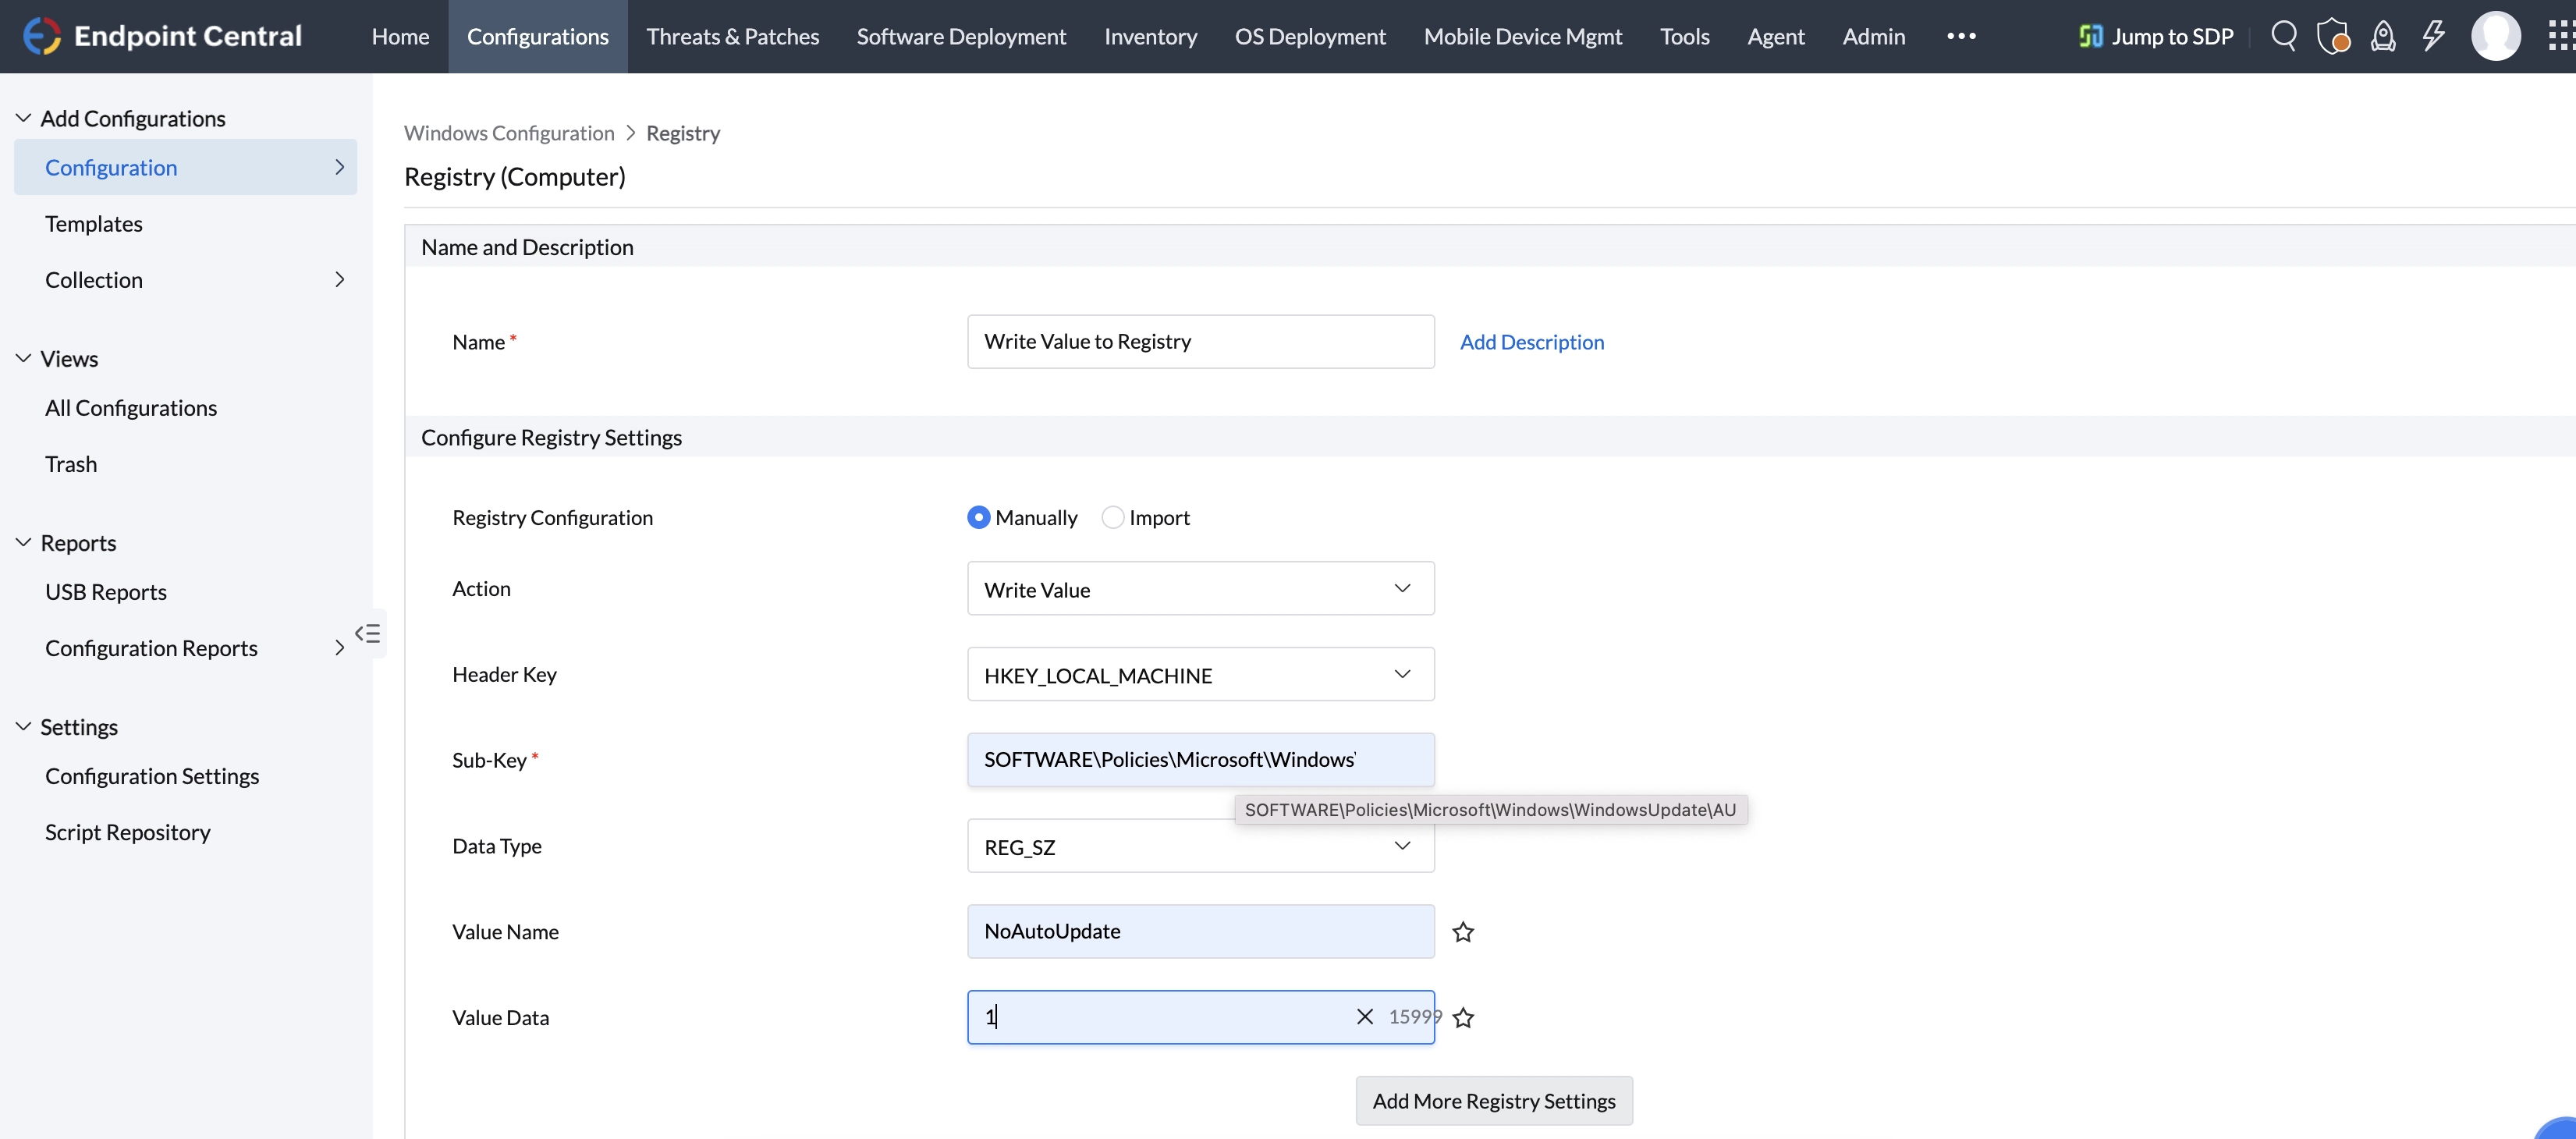
To write a value to the registry, select the Action as Write Value andspecify the following:
Parameter Description Header Key
Select the header key or hive as HKEY_LOCAL_MACHINE.
Key
Keys are sub-components of the hives. Specify the key value.
Type
The type of the value. This varies with respect to the Header Key selected. Select the appropriate type from the combo box.
Value*
Specify the value to be added.
Data / Expression*
Specify the data or expression. If the new value has to be created without data, enter the word clear inside the parentheses as (clear).
* - Click theicon to select and assign a dynamic variable to this parameter.
ExampleTo set the NoAutoUpdate value to 1 under HKEY_LOCAL_MACHINE\SOFTWARE\Policies\Microsoft\Windows\WindowsUpdateNoteNote: When adding a value to the Registry, if the specified subkey path does not exist, it will be automatically created.If WindowsUpdate or AU does not exist, they will be created.
If you wish to write more values, click Add More Registry Settings button and repeat step 2. The values gets added to the Registry Settings table.
Delete Value
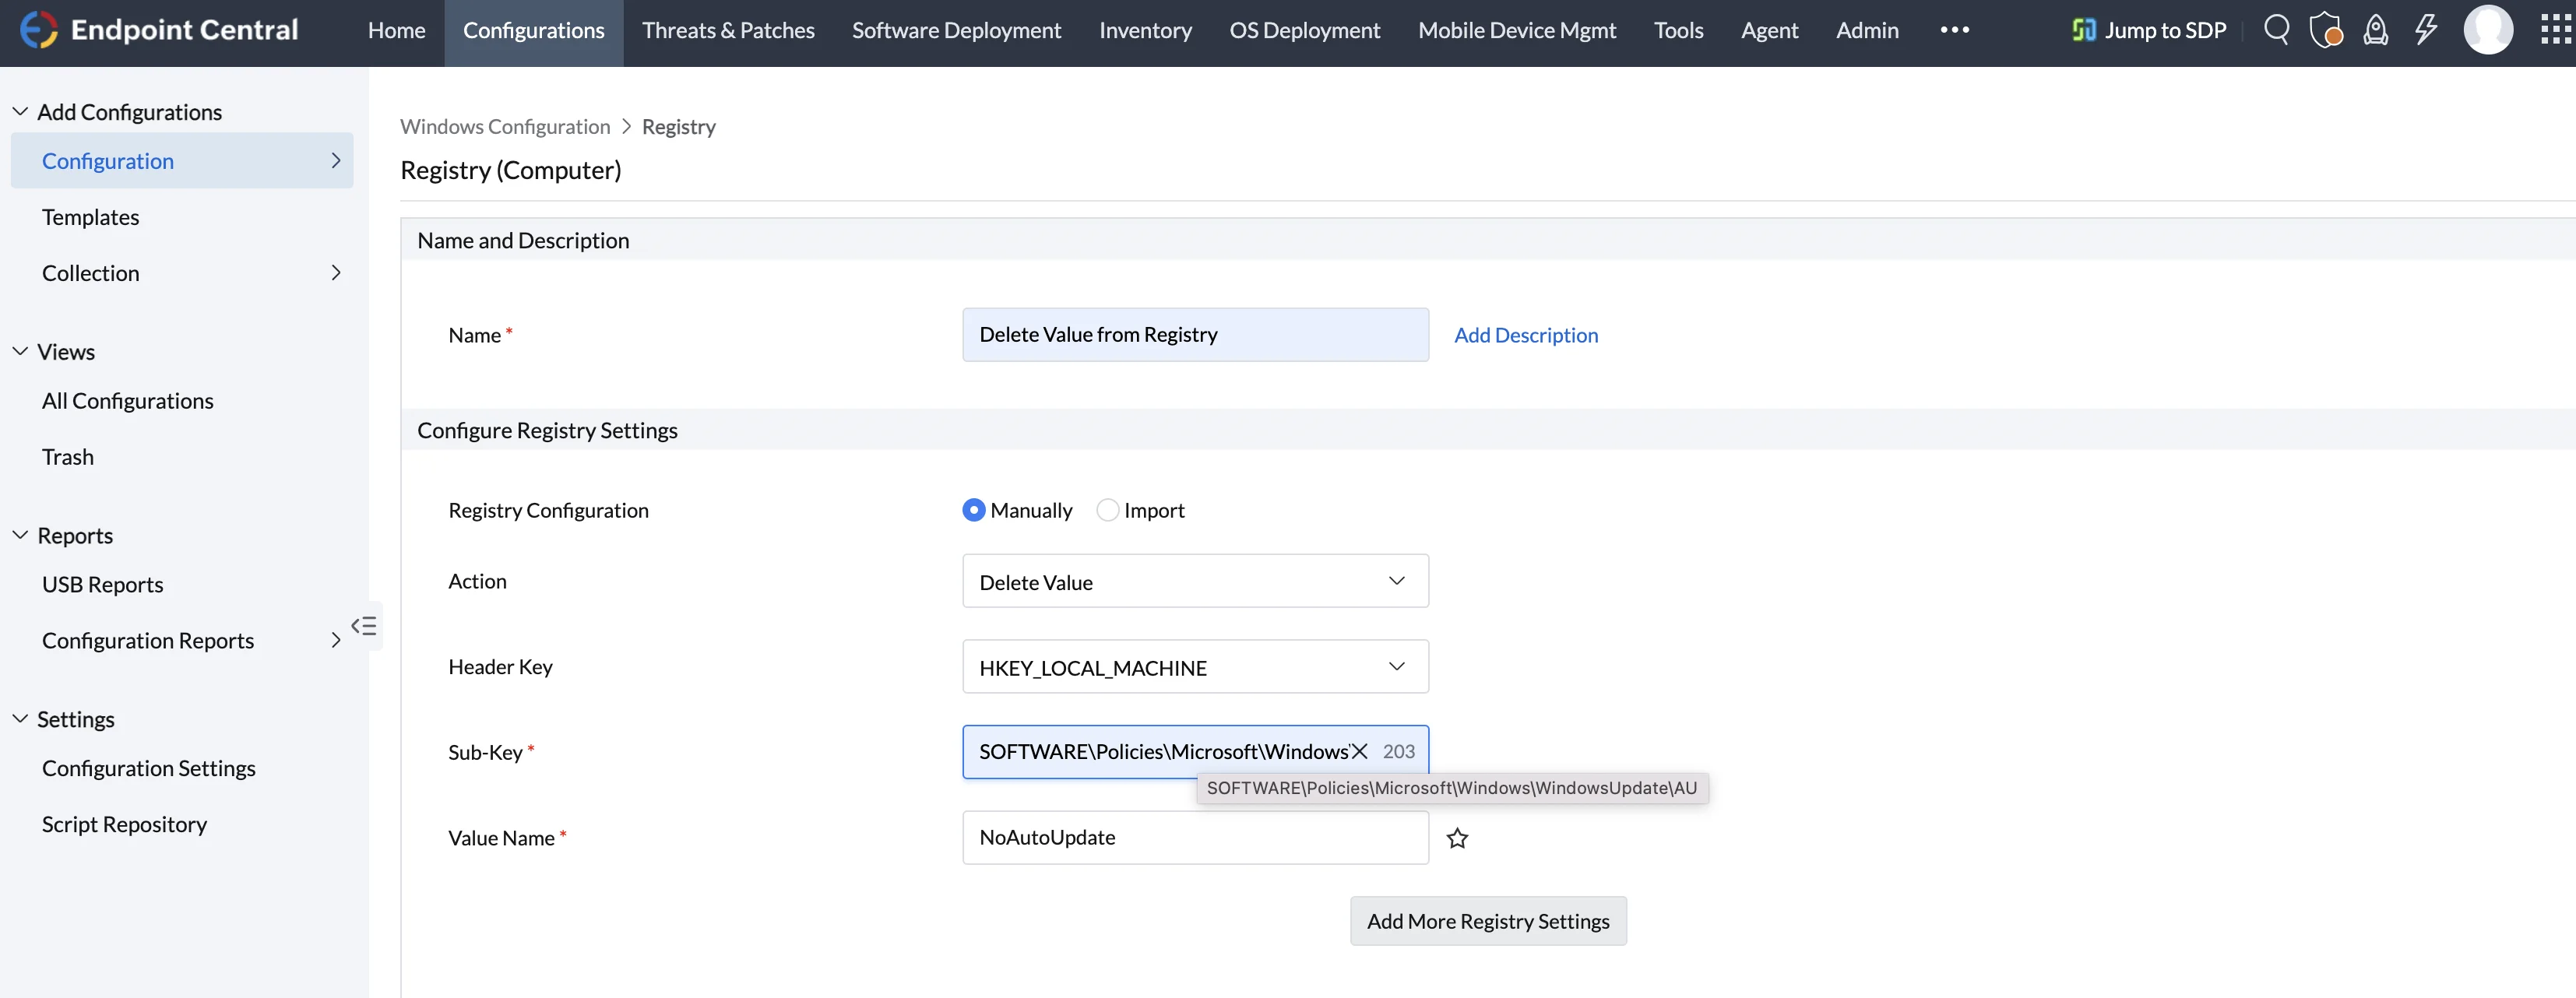
To delete a value from the registry, select the Action as Delete Value andspecify the following values:
Parameter Description Header Key
Select the header key or hive as HKEY_LOCAL_MACHINE.
Key
Keys are sub-components of the hives. Specify the key value.
Value
Specify the value to be deleted.
ExampleTo delete NoAutoUpdate under HKEY_LOCAL_MACHINE\SOFTWARE\Policies\Microsoft\Windows\WindowsUpdateIf you wish to delete more values, click Add Registry Settings button and repeat step 2. The values gets added to the Registry Settings table.
Add Key
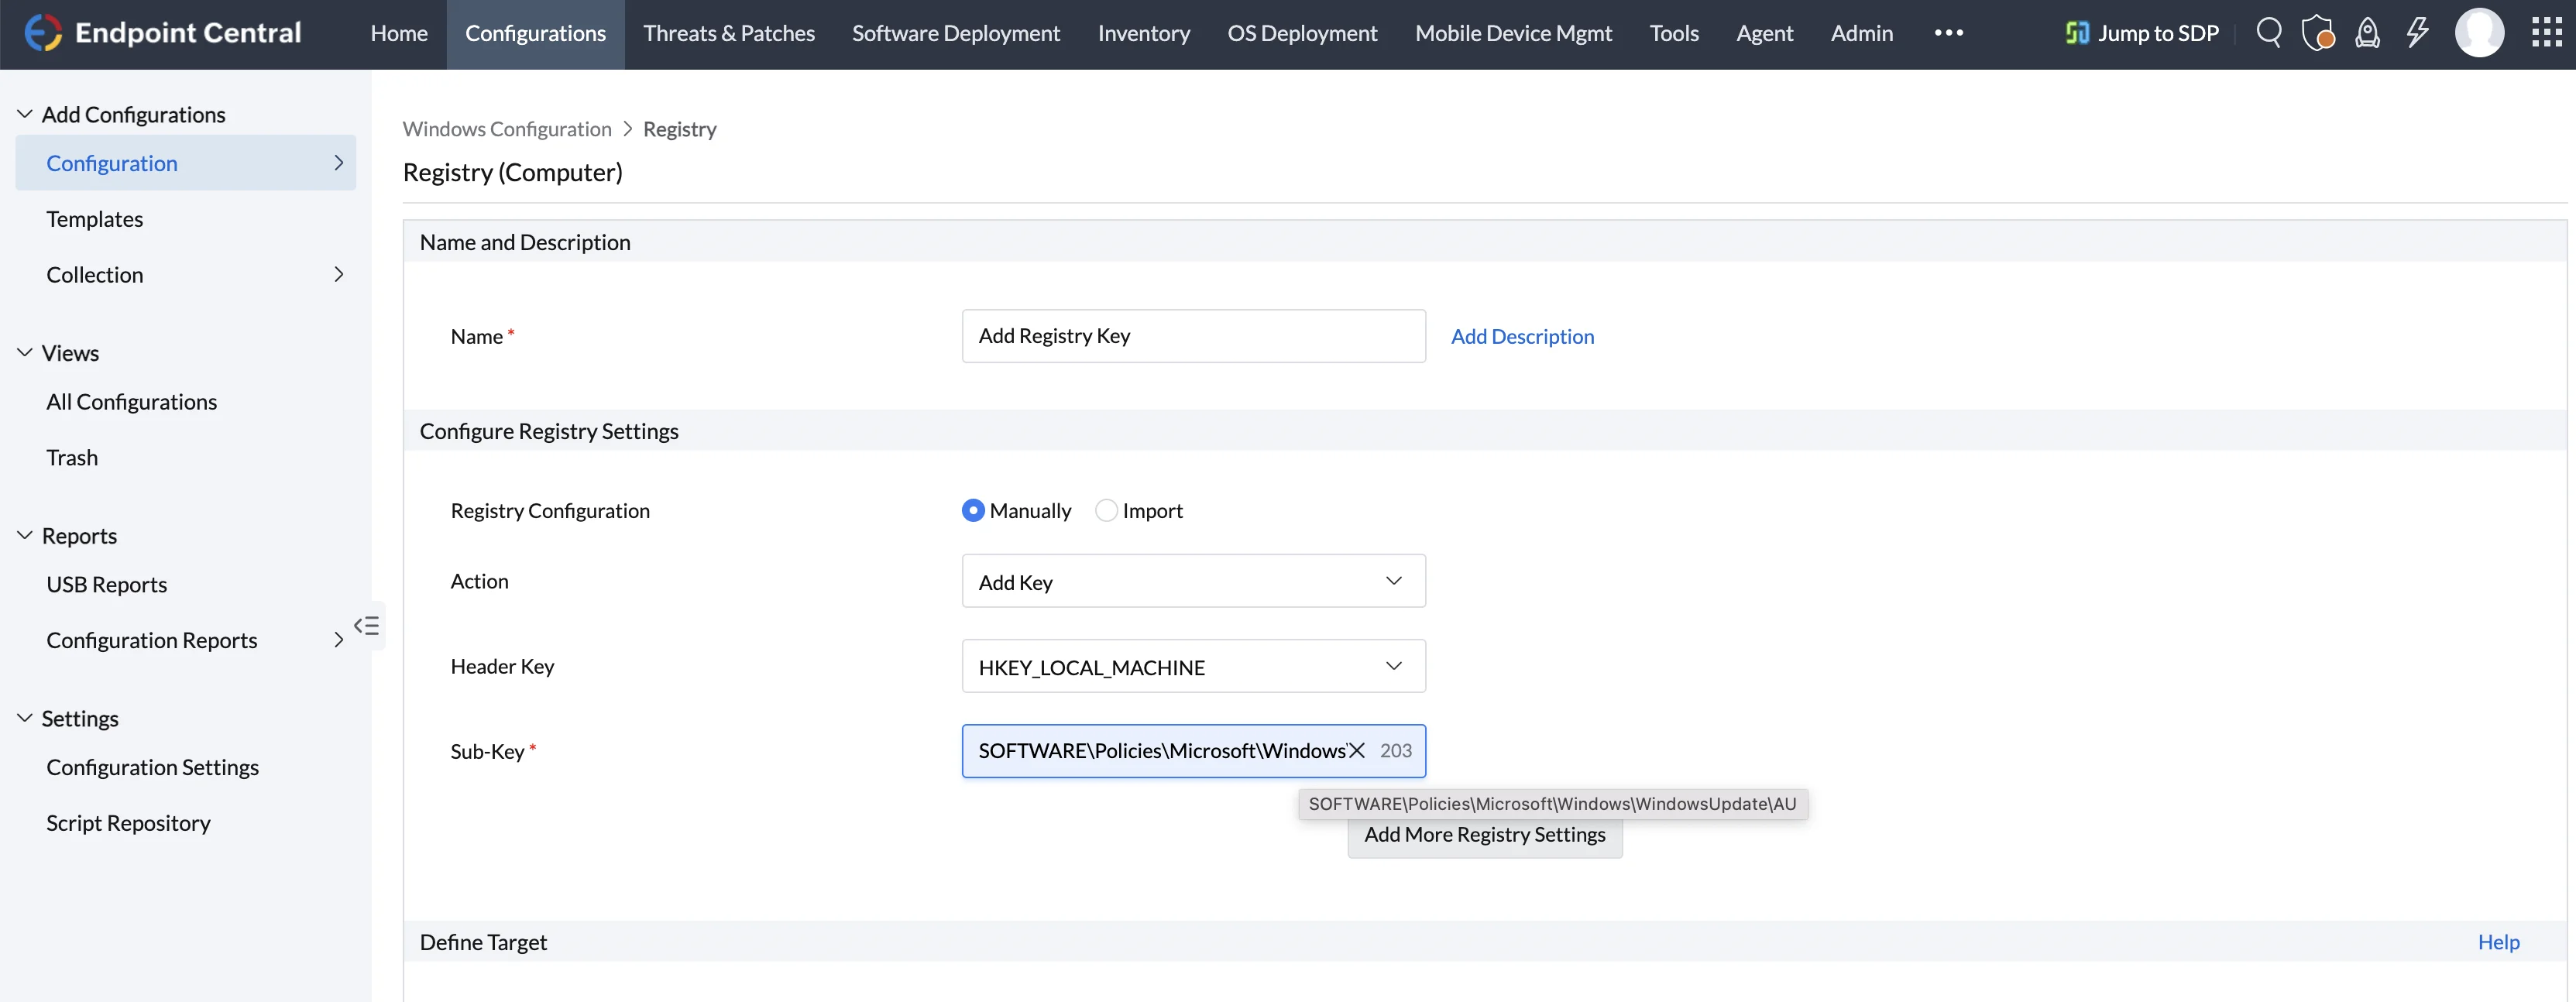
To add a registry key, select the Action as Add Key and specify the following:
Parameter Description Header Key
Select the header key or hive as HKEY_LOCAL_MACHINE.
Key
Keys are sub-components of the hives. Specify the key value to be added.
ExampleTo add key SOFTWARE\Policies\Microsoft\Windows\WindowsUpdate\AU under HKEY_LOCAL_MACHINEIf you wish to add more keys, click Add Registry Settings button and repeat step 2. The values gets added to the Registry Settings table.Delete Key
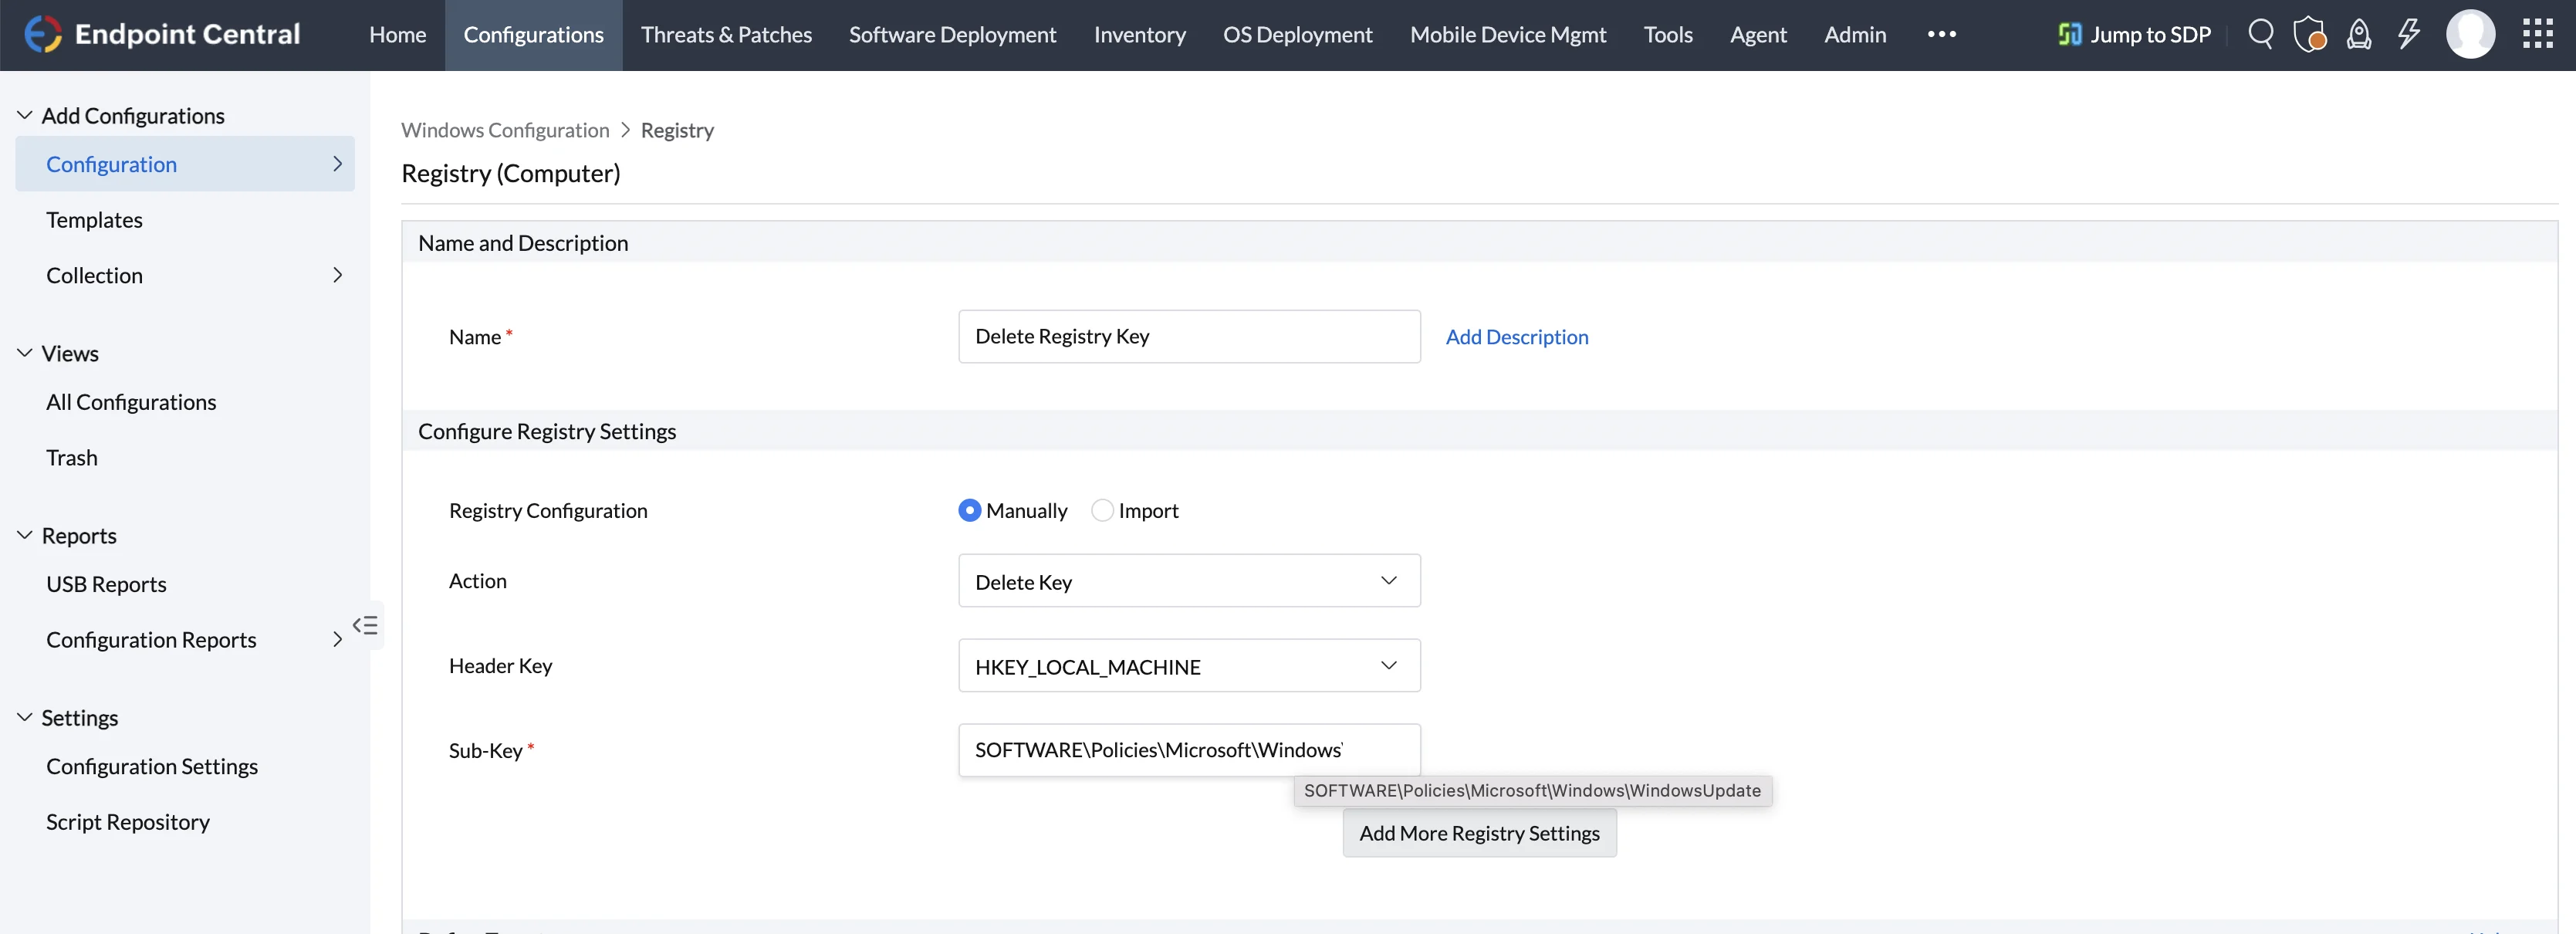
To delete a registry key, select the Action as Delete Key and specify the following values:
Parameter Description Header Key
Select the header key or hive as HKEY_LOCAL_MACHINE.
Key
Keys are sub-components of the hives. Specify the key value that has to be deleted.
ExampleTo delete key SOFTWARE\Policies\Microsoft\Windows\WindowsUpdate\AU under HKEY_LOCAL_MACHINEIf you wish to delete more keys, click Add Registry Settings button and repeat step 2. The values gets added to the Registry Settings table.
 icon and change the required values.
 icon.
icon.Import Value
To import a registry key value,click Import and select the registry file
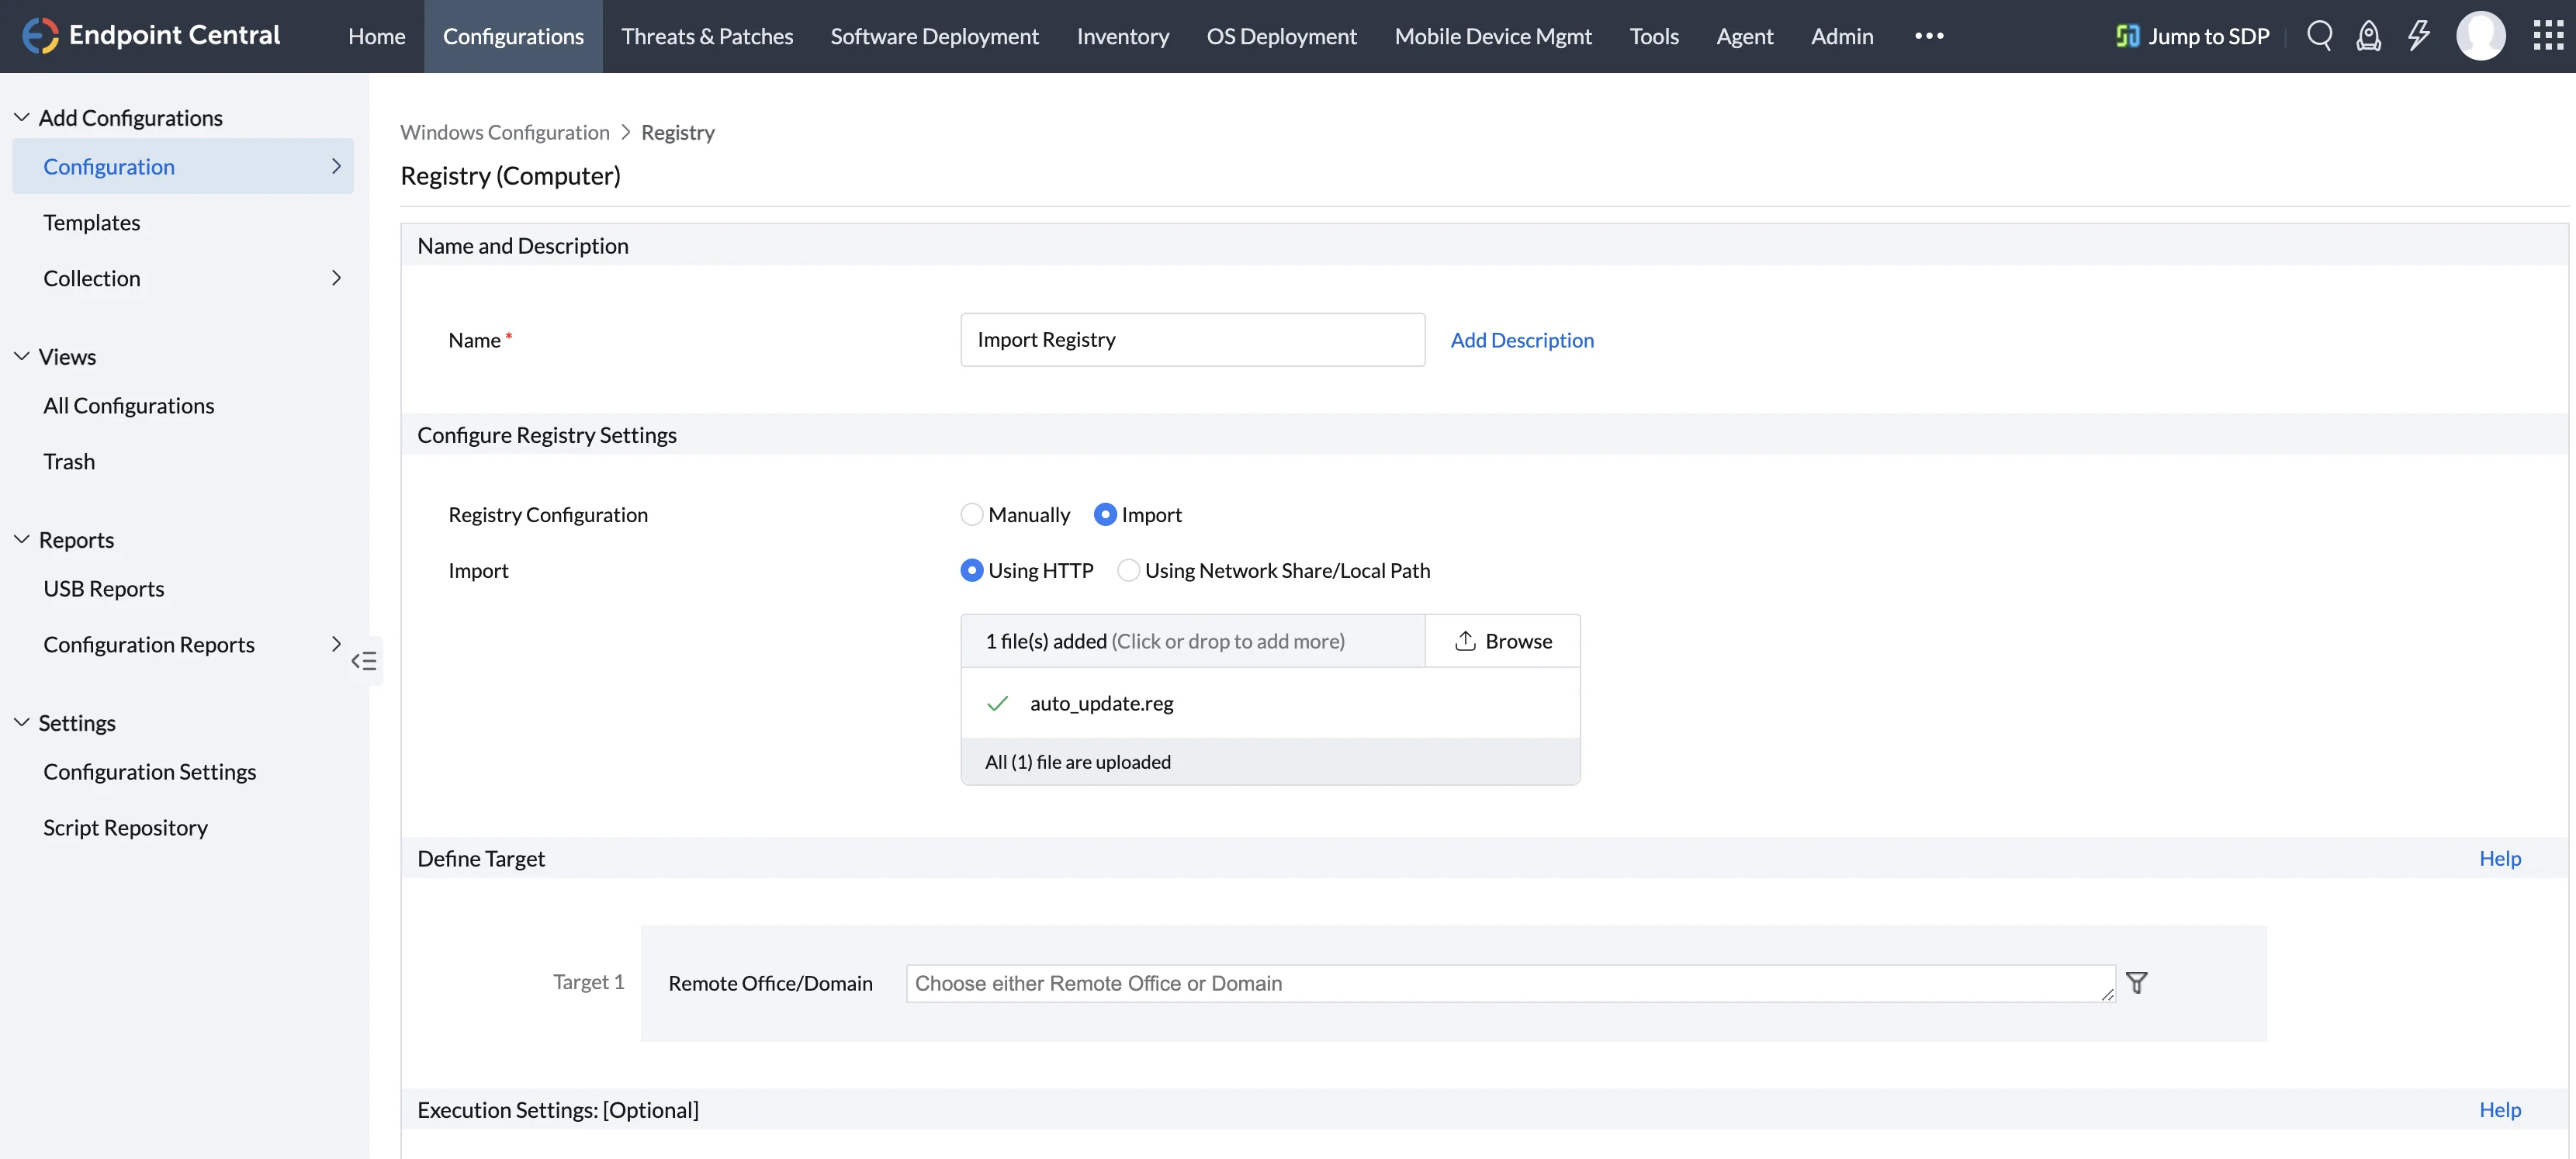
Step 3: Define Target
Using the Defining Targets procedure, define the targets for deploying the Registry Settings Configuration.
Step 4: Deploy Configuration
Click the Deploy button to deploy the defined Registry Settings Configuration in the targets defined. The configuration will take effect during the next system startup.
To save the configuration as draft, click Save as Draft.