Configure Custom Scripts for Windows | Computer Configuration
Custom script configuration in Endpoint Central enables administrators to configure and manage essential settings and tasks for their organization. This includes actions like disabling Windows auto update, setting the date format, checking if a file exists, etc. These configurations can be applied to the Windows operating systems as Computer Configuration. These scripts offer more flexibility compared to standard options, allowing you to run scripts tailored to your specific requirements. They can be scheduled to run during Every Startup, Subsequent Startup, Refresh Cycle, or just Once. It is important to select the configuration type as Computer based on the script's behavior.
Supported Language for Windows Custom Script
Windows supported script types - vb, js, ps1, cmd, msi, jse, exe, bat, vbe, vbs, wsf, wsc, wsh, reg.
In Endpoint Central, scripts must be added to the Script Repository before being deployed to end-machines. You can choose from the predefined script templates or add your own scripts to the repository.
How to Deploy a Custom Script Configuration?
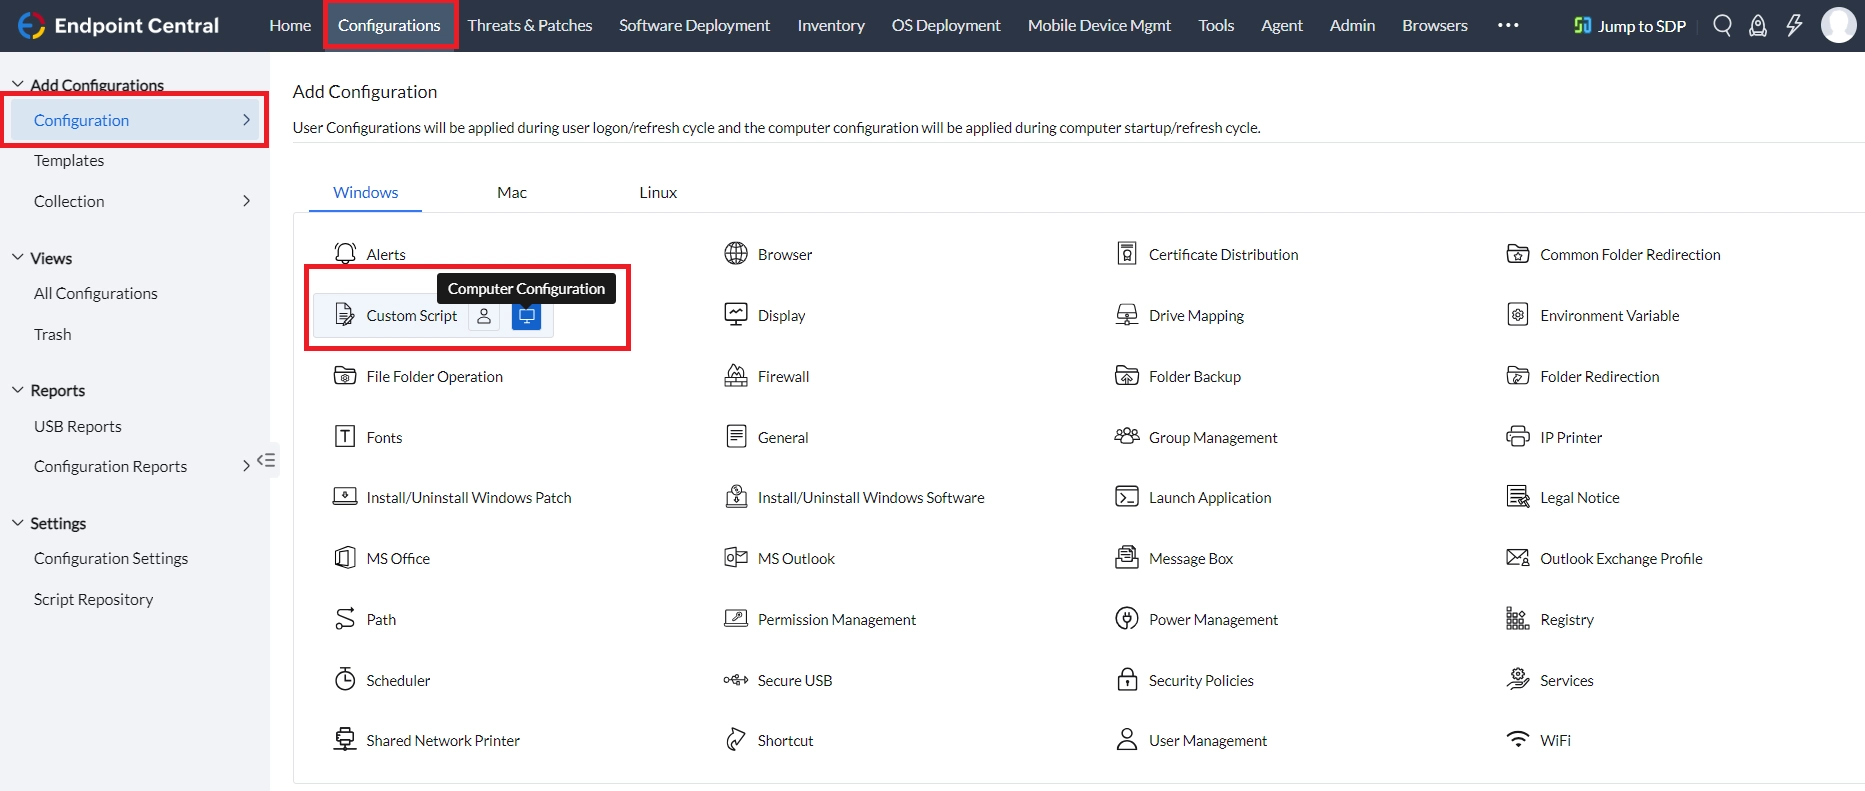
- In the Endpoint Central console, navigate to Configurations > Add Configurations > Windows Configuration > Custom Script > Computer Configuration.
- Specify the Name and Description for the configuration.
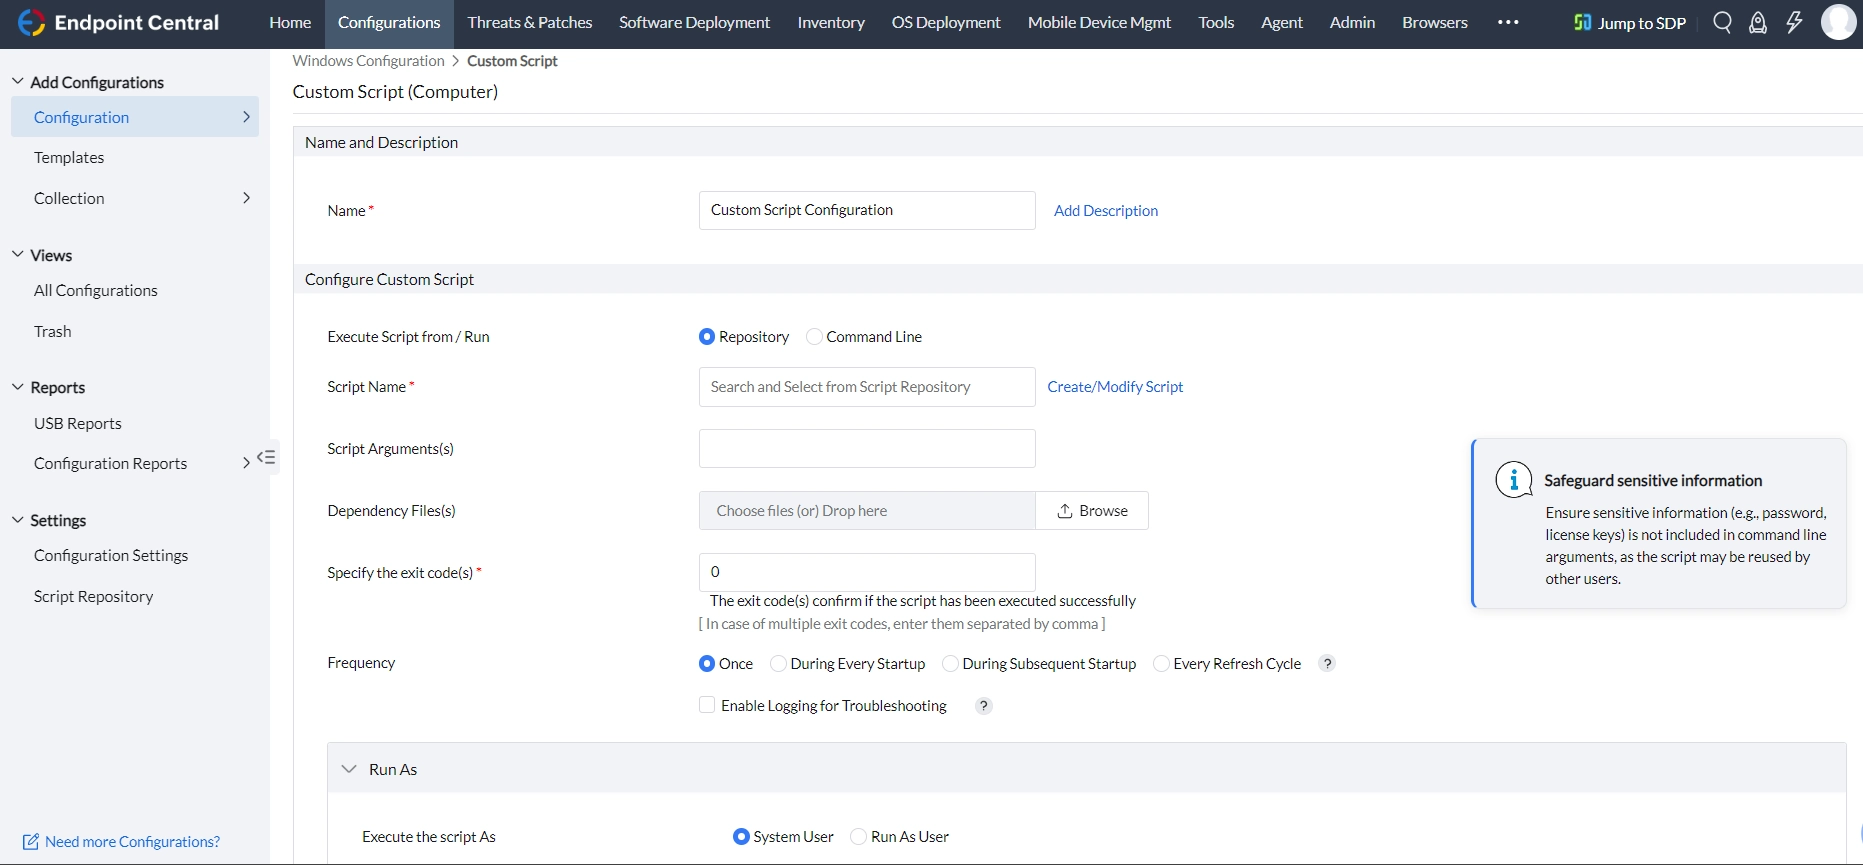
- To execute scripts from the Script Repository, proceed with the Repository option.
- Select the script from the Script Name field.
- Provide Script Arguments, if any.NoteFor example, in case of blockexe.bat the application to be blocked must be provided in script arguments. In case of hard coded scripts, it may not be necessary. If multiple arguments are required, each argument must be enclosed within "...." and arguments must be separated by a single space.
- Upload Dependency Files, if any.
- Exit codes confirm if the script has been executed successfully. By default, it is 0. If you have any exit codes, you can specify them here. If there are multiple exit codes, separate them with commas [,].
- To run commands, proceed with the Command Line option.
- Enter the command in the Command Line field. To execute multiple commands, enter them separated by a semicolon [;]. Dynamic variables can be assigned if needed.
- Upload Dependency Files, if any.
- Exit codes confirm if the script has been executed successfully. By default, it is 0. If you have any exit codes, you can specify them here. If there are multiple exit codes, separate them with commas [,].
- Select the Frequency from the options given below:
- Once: The script will be deployed once.
- During Every Startup: The script will be deployed during every system startup. If Execute Until is selected, the script will be executed during every system startup until the configured date and time.
- During Subsequent Startup: The script will be executed for the next number of startups you select from the dropdown.
- Every Refresh Cycle: The script will be executed every 90 minutes on the target machine.
- If you select Enable logging for troubleshooting, the executed script output will be logged and displayed in the Remarks section under:
- All Configurations > Click on any of your Computer Configurations > Execution Status
- Select a Run As option from the choices given below:
- System user: The script will be applied at the System level, utilizing the System user account.
- Run as User: The script will be deployed to the target machine with the credentials you select. We recommend choosing the Domain Admin credentials to avoid access level issues.
- Define the targets for the deployment.
- Specify retry options, if required.
- You can also enable notifications to receive emails based on the specified frequency.
- Click on the Deploy/Deploy Immediately button to deploy the configuration in the target machines.
- To save the configuration as a draft or template for later use, click Save as.
You have successfully added a Windows Computer-based Custom Script for your endpoints.