CIS Compliance Customization
With Endpoint Central, organizations can create custom compliance rules, build policy templates from scratch, or modify existing CIS rules to align with their specific security and operational requirements.
Overview
The Center for Internet Security (CIS) provides globally recognized benchmarks to securely configure systems, applications, and networks. However, these rules may not be directly applicable to every organization's compliance and operational requirements.
Compliance needs vary across industries. Healthcare organizations must protect sensitive patient data, while financial institutions focus on transaction security, fraud prevention, and auditability. Each sector has distinct regulatory demands, making it essential to adapt security configurations accordingly. For example, retail organizations prioritize securing payment systems and customer data, while government entities emphasize strict access controls and data sovereignty. Similarly, manufacturing environments often need to balance security with operational continuity to avoid disruptions.
With Endpoint Central, organizations can create custom compliance rules, build policy templates from scratch, or modify existing rules to align with these specific requirements. This enables CIS policies to be tailored for different use cases and consistently enforced across endpoints, ensuring effective and streamlined compliance management.
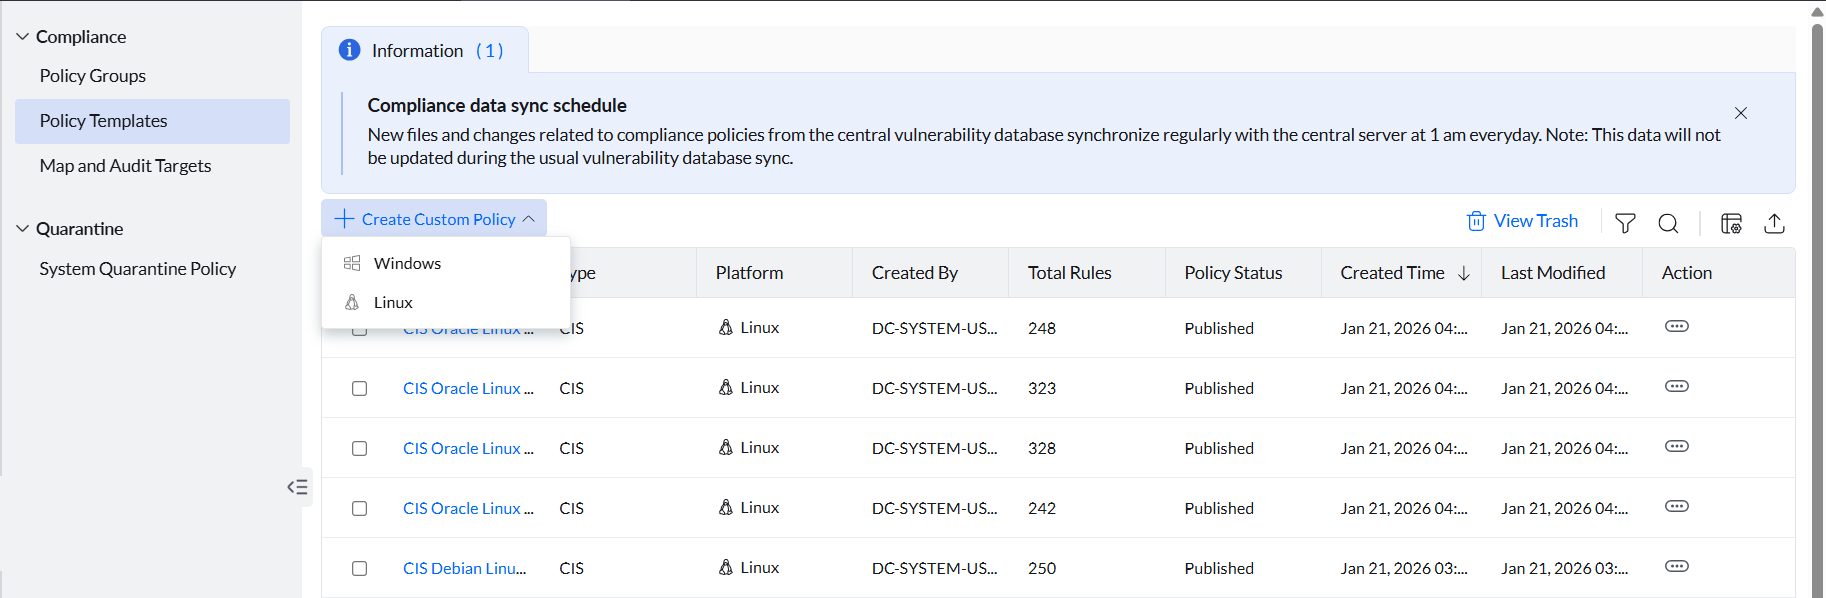
To create custom compliance policies or customize existing CIS policies, navigate to Threats & Patches → Threats → Compliance → Policy Templates, click Create Custom Policy, and then select the operating system for which you want to customize the policy: Windows or Linux.
Create Custom Rules
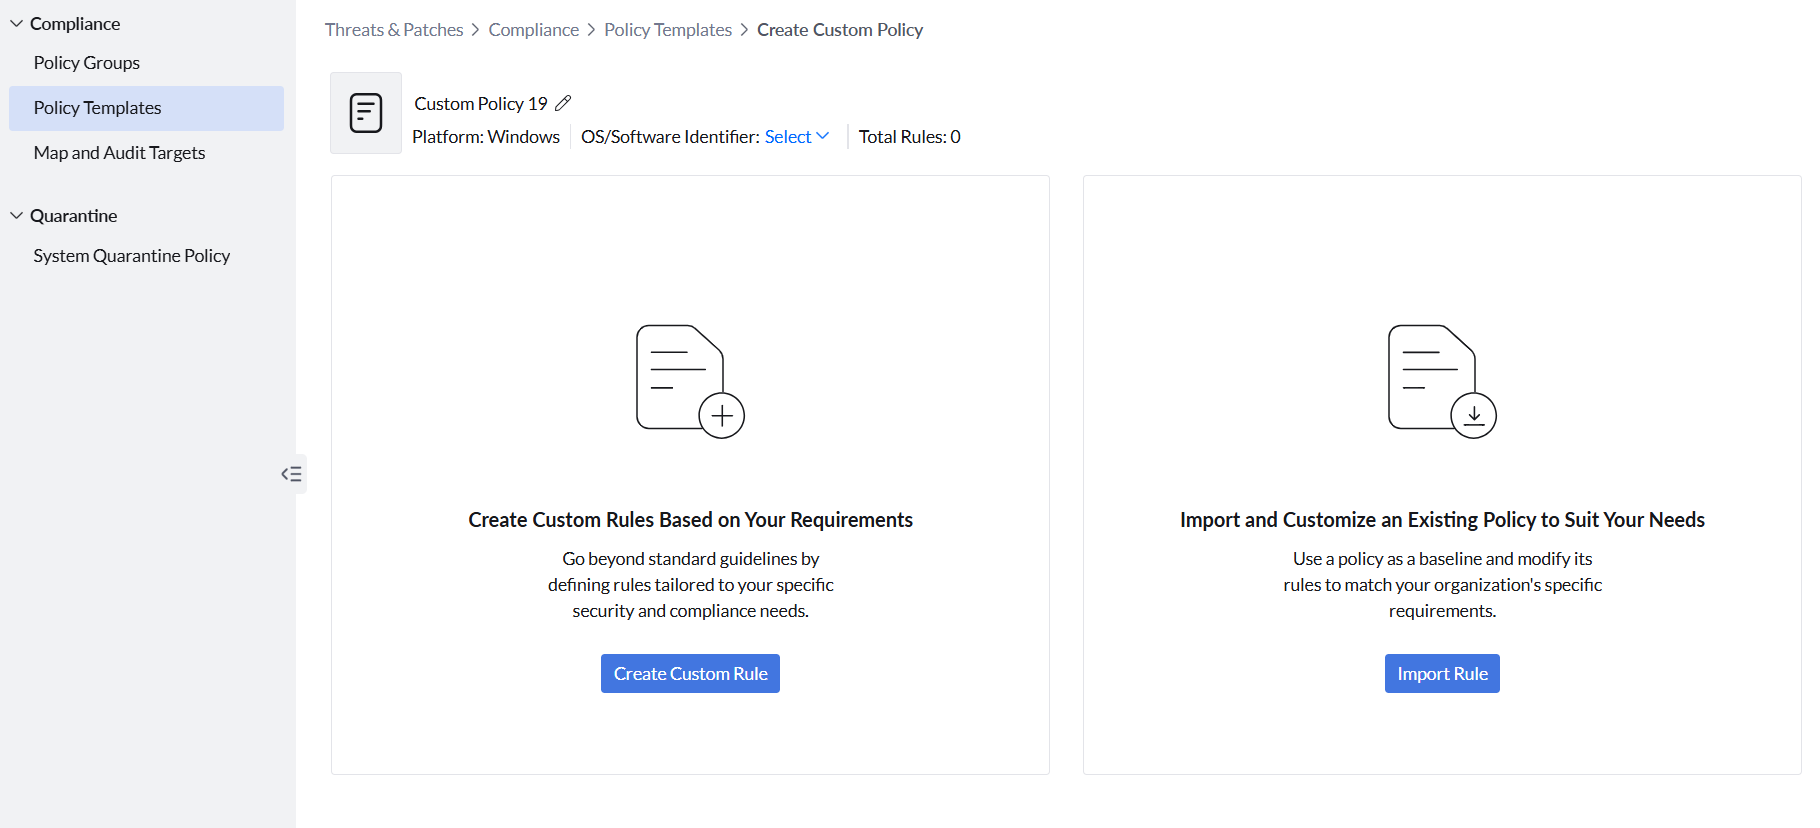
By clicking Create Custom Rules, you can define specific compliance conditions tailored to your organization's security requirements — building rules from scratch and creating new policy or rule groups to organize and manage them effectively.
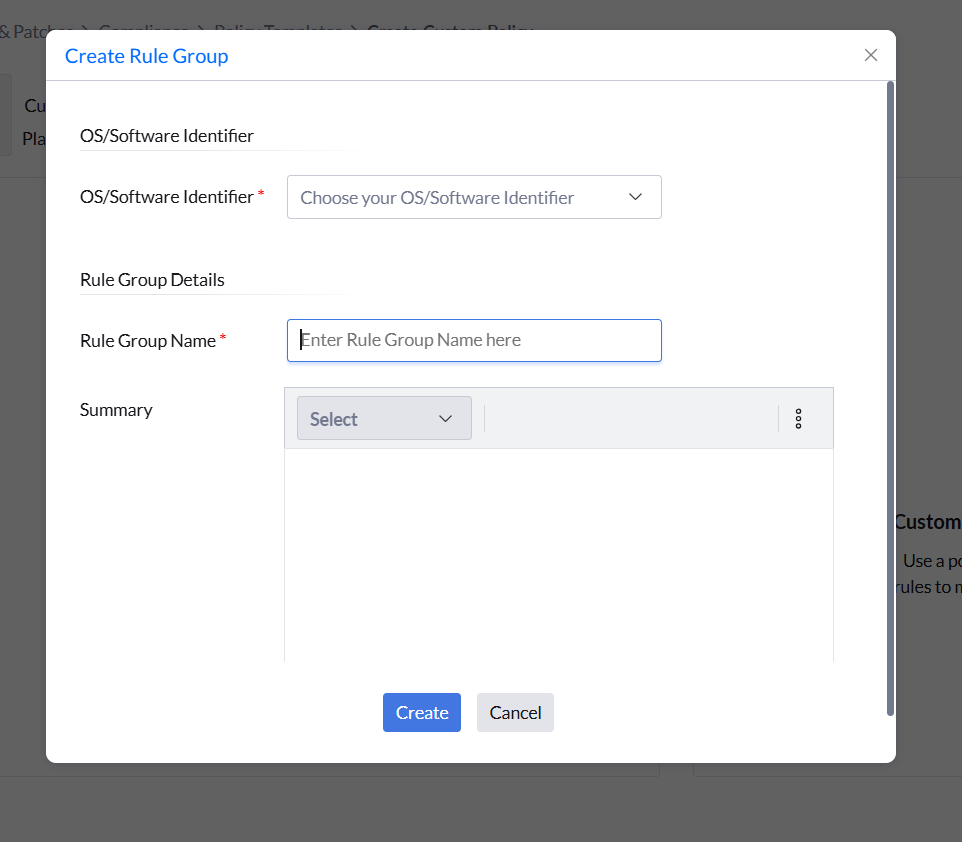
Once you click on this, configure the rule group settings by selecting the OS/Software Identifier and filling in the Rule Group Details, such as naming the Rule Group and providing a Summary. Once configured, click Save. The newly created policy or rule group will then be listed.
Ensure that the rules and policies you select from existing ones while customizing or importing are of the same OS/Software Identifier. If there is a mismatch, the rule will still be audited but marked as Not Applicable.
For example, if a rule like "Ensure Password Policy Minimum Length is set to 14 characters (Windows 10)" is created for Windows 10 but applied to a Windows 11 machine, the compliance check will not match the OS version, and the rule will be returned as Not Applicable.
Always select matching OS and software identifiers for accurate compliance results.
To create rules from scratch within this policy, click the policy name and select Add Rule after clicking the Action button. The Create Rule interface will open, where you need to define and configure compliance rule settings:
- Enter a rule name. Click Show Additional Information to add more context by navigating through the available tabs:
- Use the Summary tab to briefly describe what the rule checks.
- Switch to the Rationale tab to explain why the rule is important.
- Move to the How to Fix tab to provide the necessary remediation steps for resolving non-compliance.
- Select a rule category such as password policy, registry policy, account lockout, or SID validation, depending on the type of system check needed.
- Specify conditions through a criteria pattern that determines how the checks are evaluated for the selected category.
- Manage multiple checks by clicking Add New Check, which together form the rule logic.
Once you have configured all rule settings, click Save Rule.
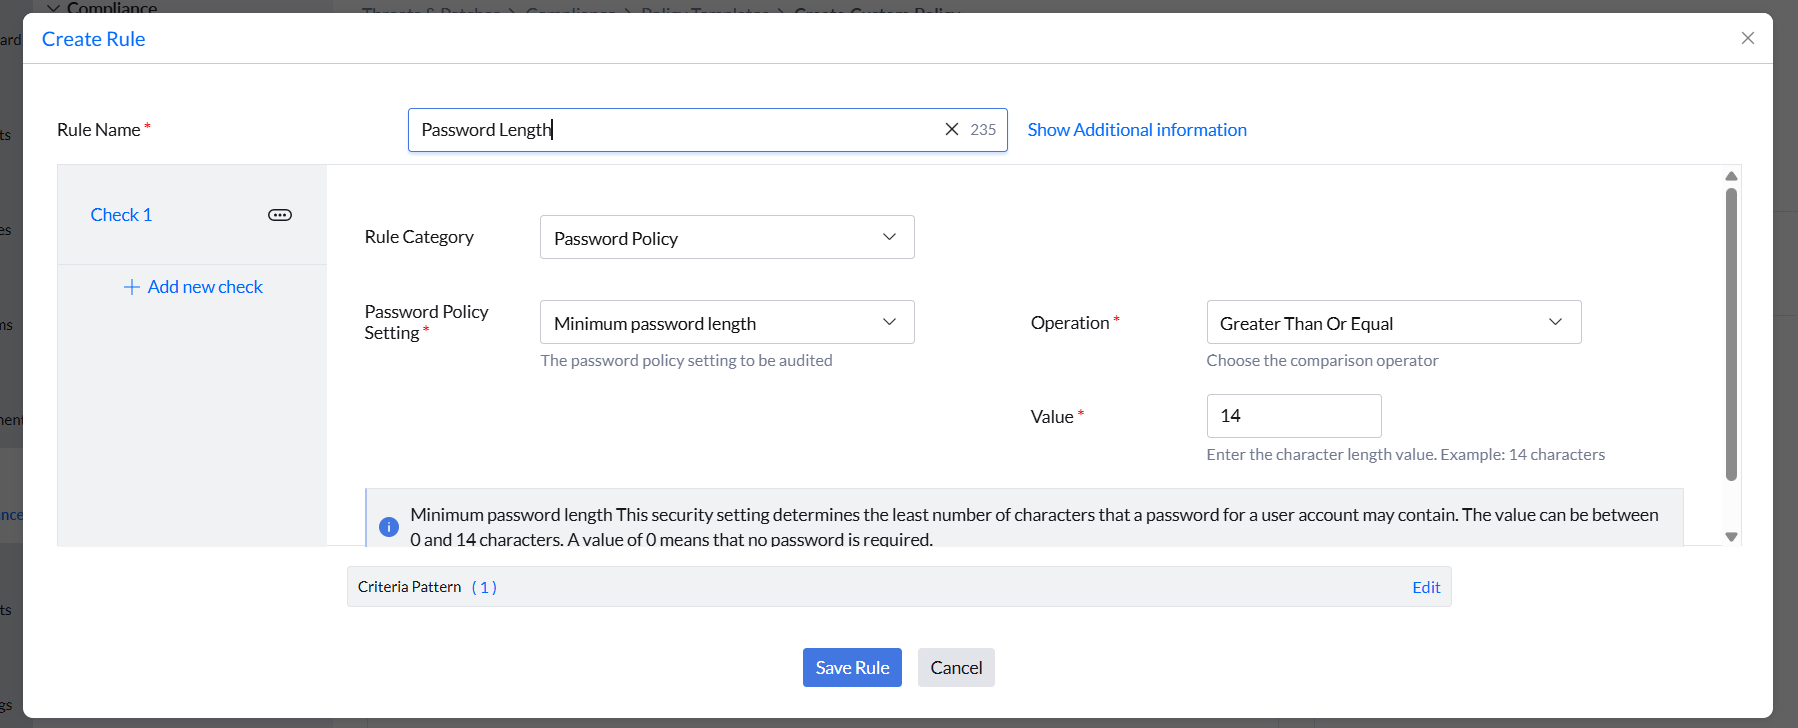
By clicking the Action button against a rule group, you can also:
- Create a sub-group of rules by clicking Create Sub-Group.
- Import rules from other existing policies by clicking Import Rule.
- Move rules across different rule groups by clicking the Move button.
Import and Customize Existing Policies
By clicking Import Rules, you can import multiple rules from any number of existing policies to create a unique rule group with a customized name, OS/Software Identifier, and Summary.
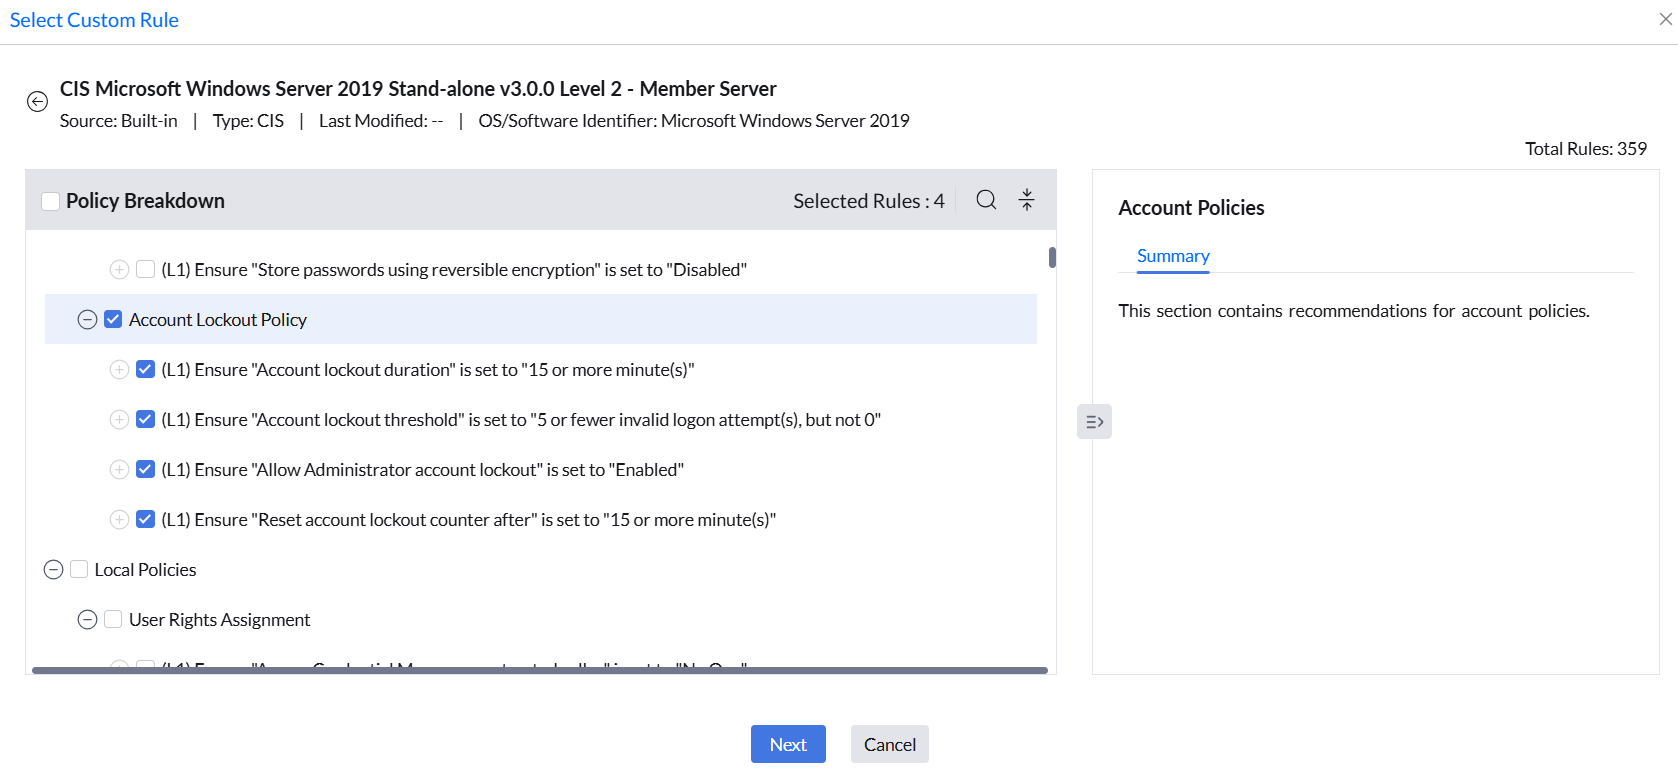
Additionally, by clicking the Edit button on an existing rule, you can modify it by configuring the rule settings as required by your organization, then save the changes and publish the policy. You can also move rules across different rule groups by clicking the Move button.
Use Custom Policies for Compliance Audits
Once you have configured the required customizations for a policy, click Save and Publish.
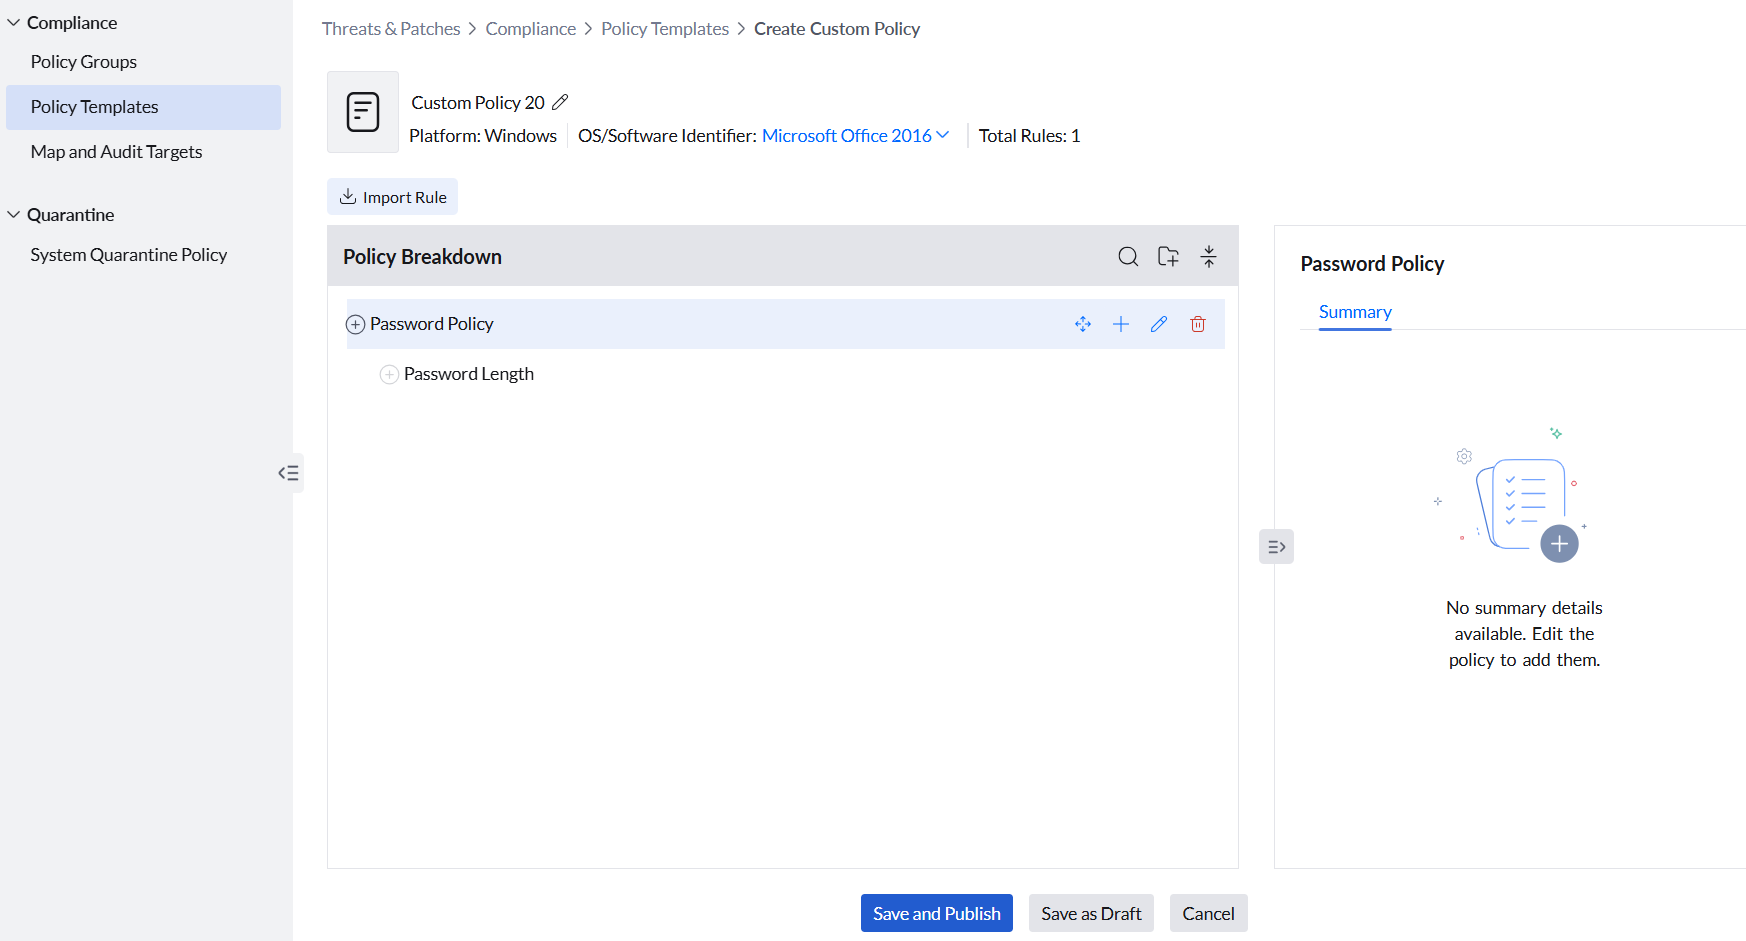
Your customized policies will appear in the Policy Templates section as Published. You can then use them to create policy groups and scan these rules against target computers, which effectively performs a compliance audit to assess their adherence, helping you maintain consistent and effective compliance management across your environment.
Deleting Custom Policies
From the Policy Templates section, you can delete a custom compliance policy that you created. Click the Action button next to the policy name, then select Move to Trash.
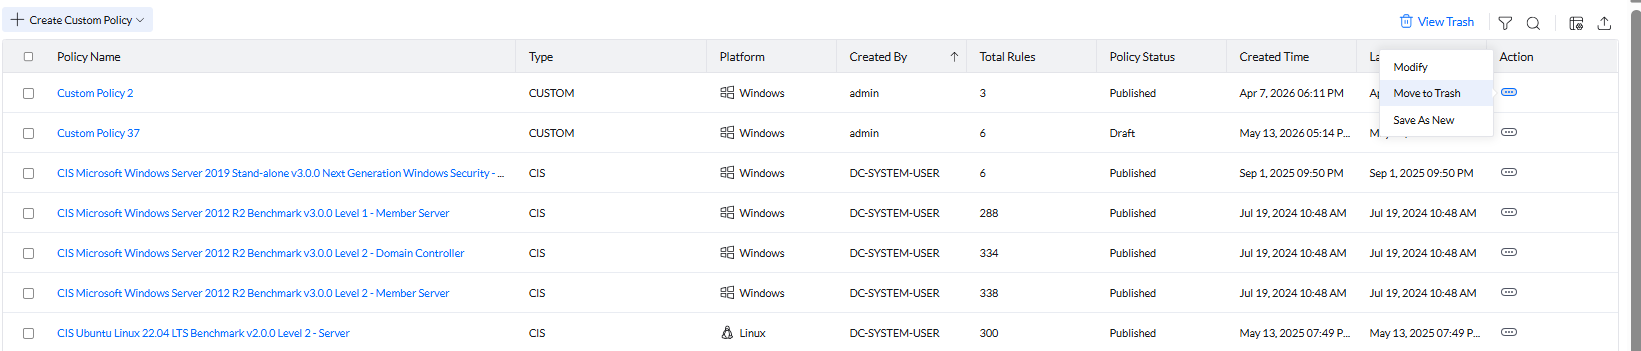
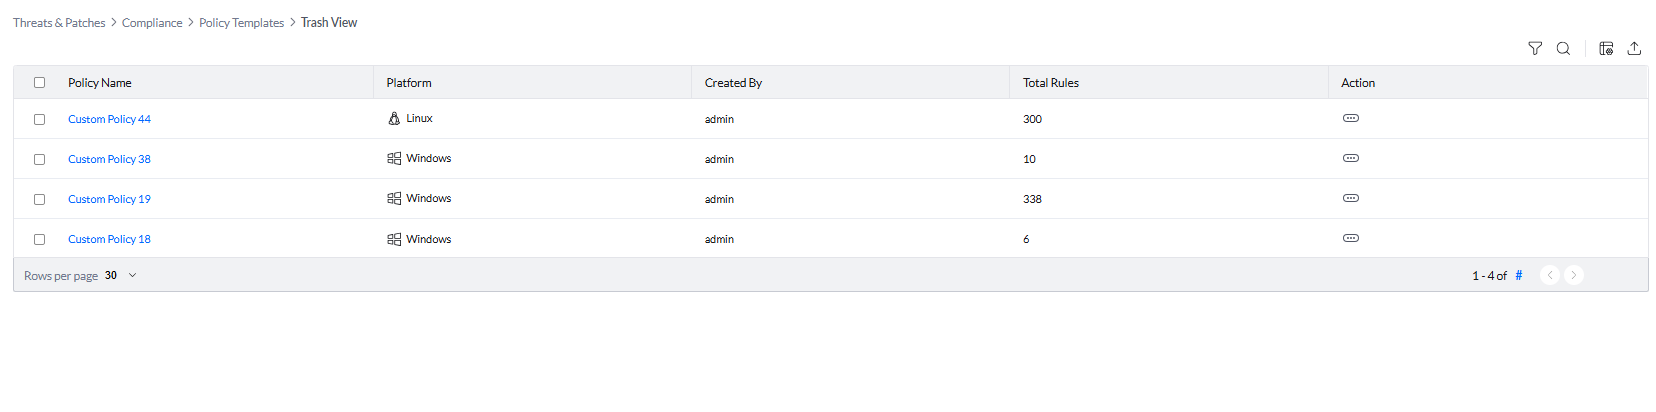
To view deleted policies, click View Trash. Policies in Trash are automatically deleted after 30 days without any notifications.