Generating Incident Timeline Reports in Correlation
With EventLog Analyzer's correlation reports, you can understand complex incidents happening across your network and get a clear picture of the sequence in which they unfold.
You can also perform several reporting actions, empowering you to gain maximum value from your log data. To know more about what correlation is, how correlation rules are structured, and more, see understanding correlation.
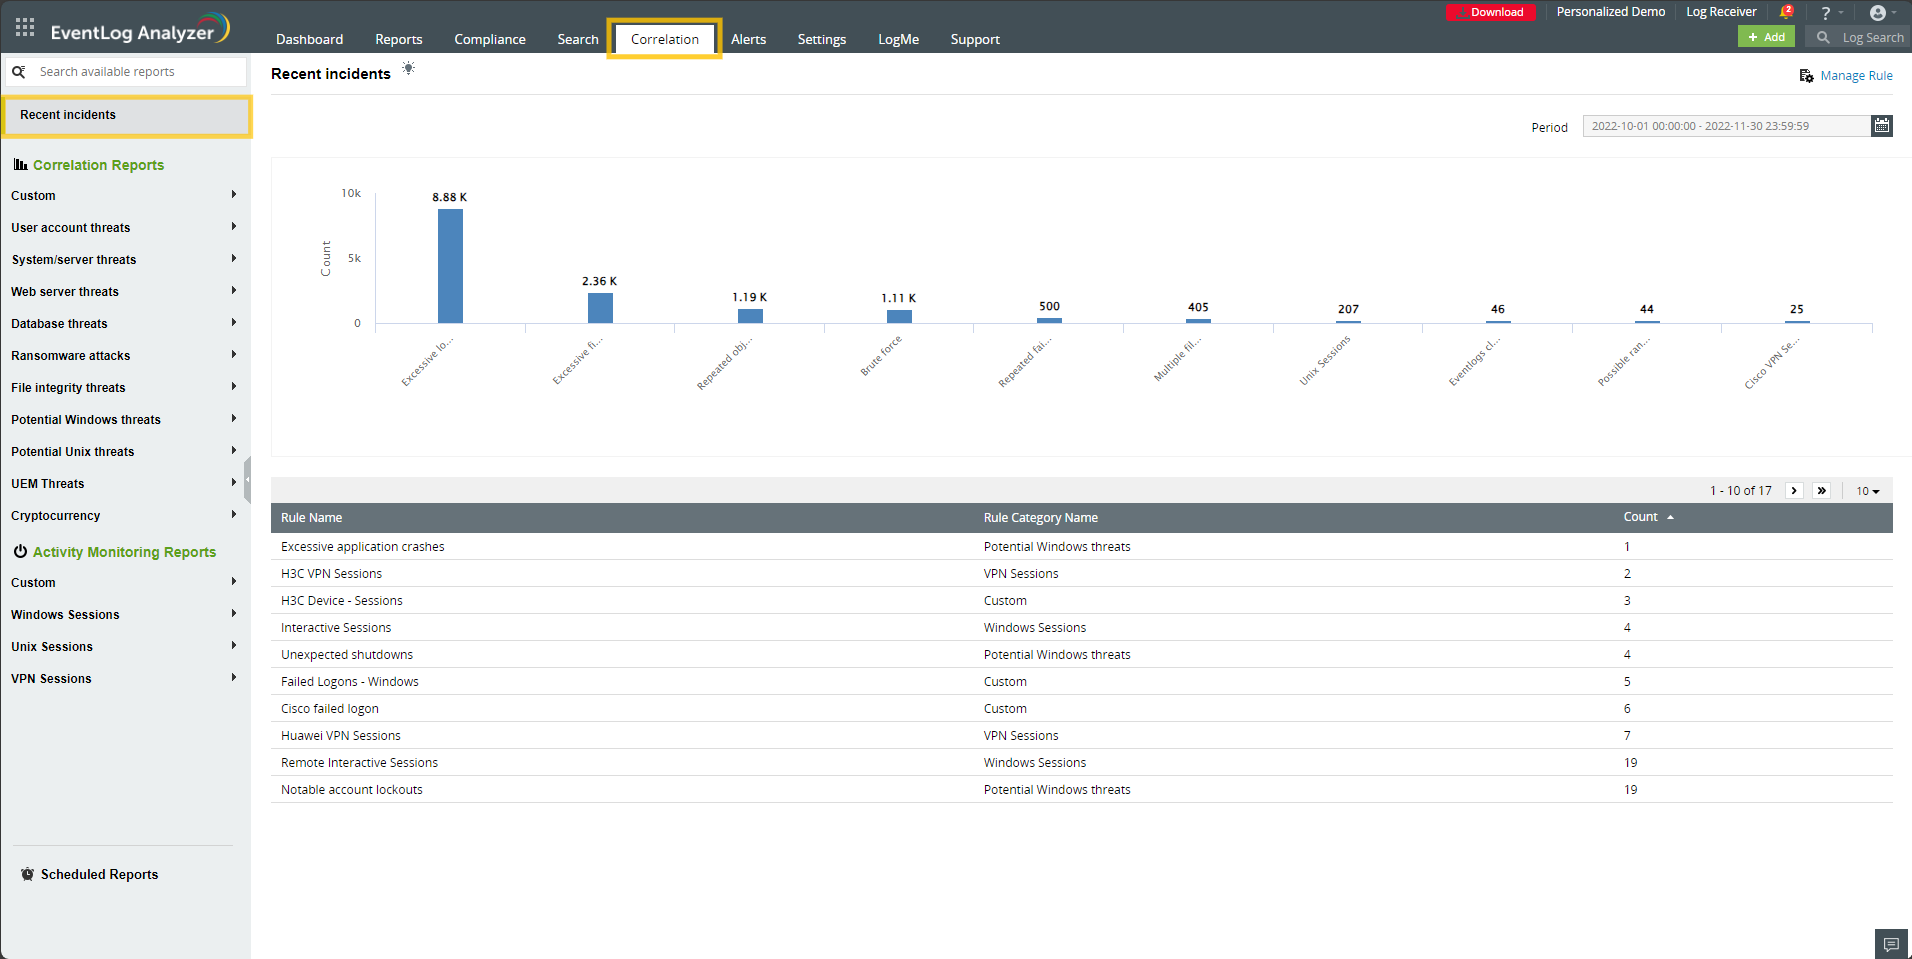
Incidents overview report
The incidents overview report provides a summary of the various incident types encountered. Each incident type corresponds to a correlation rule. For each incident type, you can view the total count of correlated incidents.
To view the incidents overview report,
Click on the Correlation tab.
Select Recent Incidents from the left menu.
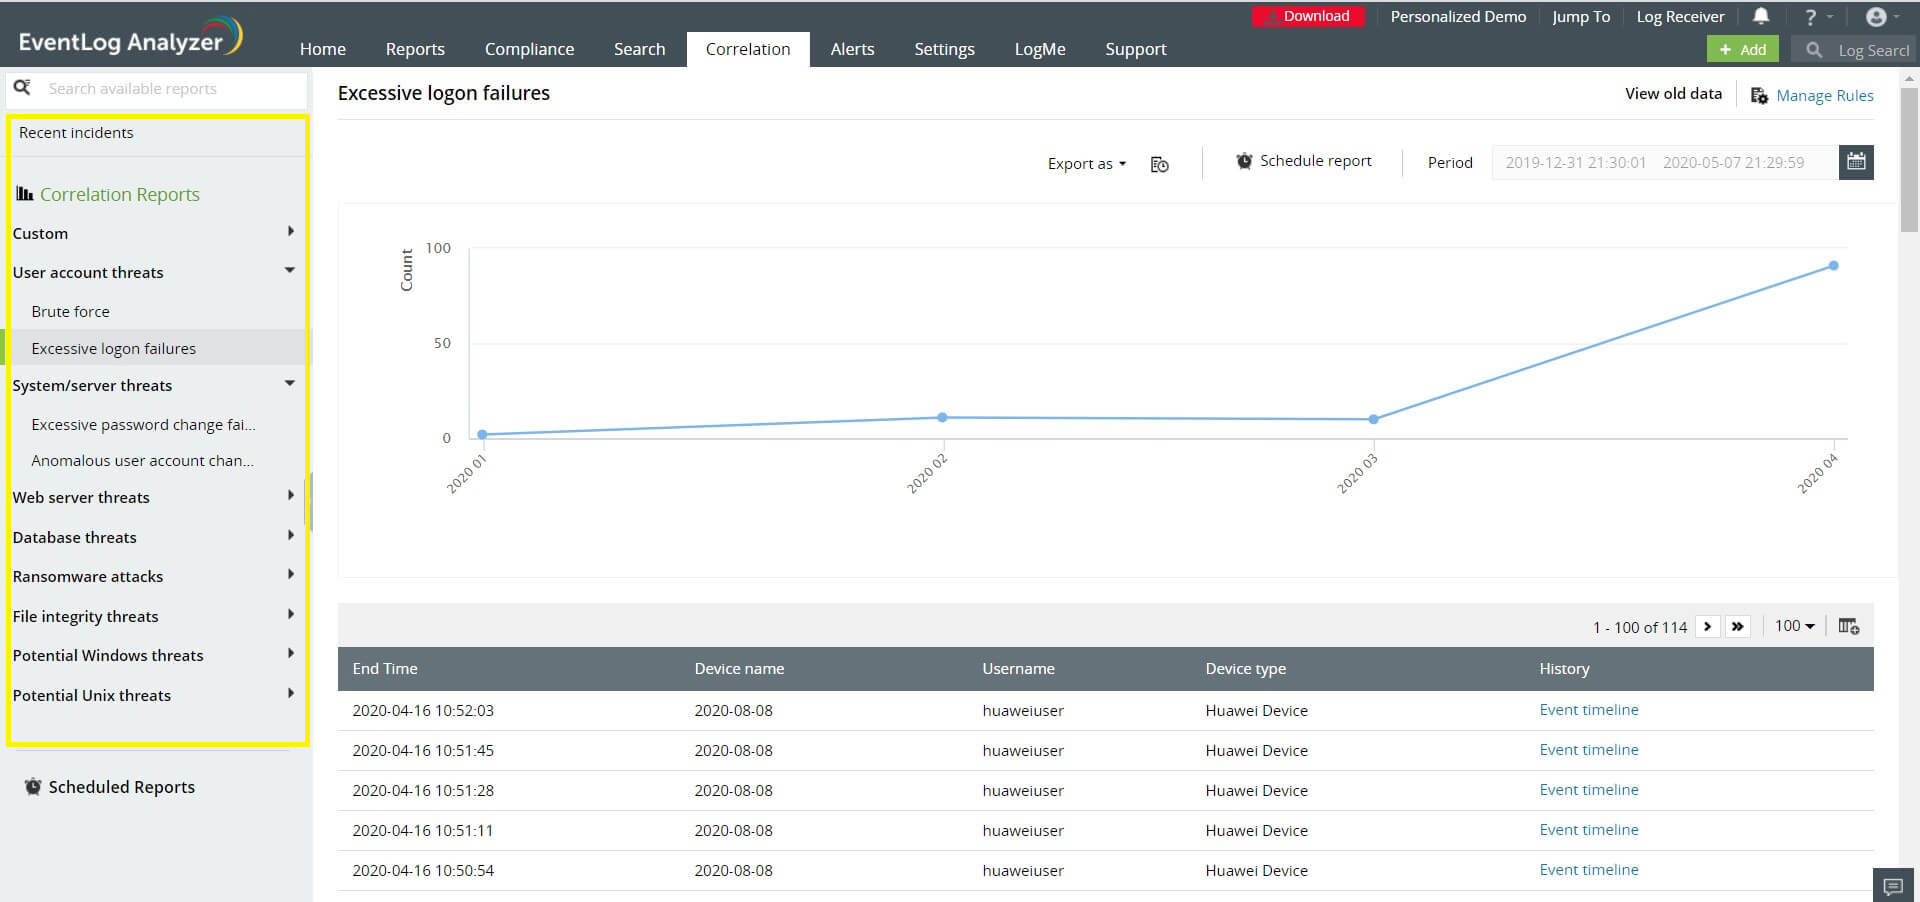
Incident reports
An incident report provides the details of the various occurrences of a specific incident type (or correlation rule). It displays the count of correlated events over time.
To view the report for a specific rule, go to the Correlation tab, navigate to the rule name on the left menu, and click on it. You can also go to the incident report from the incidents overview report by clicking on the corresponding entry in the graphical or tabular parts of the report.
Click on the Correlation tab.
Select the desired rule name from the left pane.
You can also view the incident report for a particular incident by selecting the corresponding entry from the table.
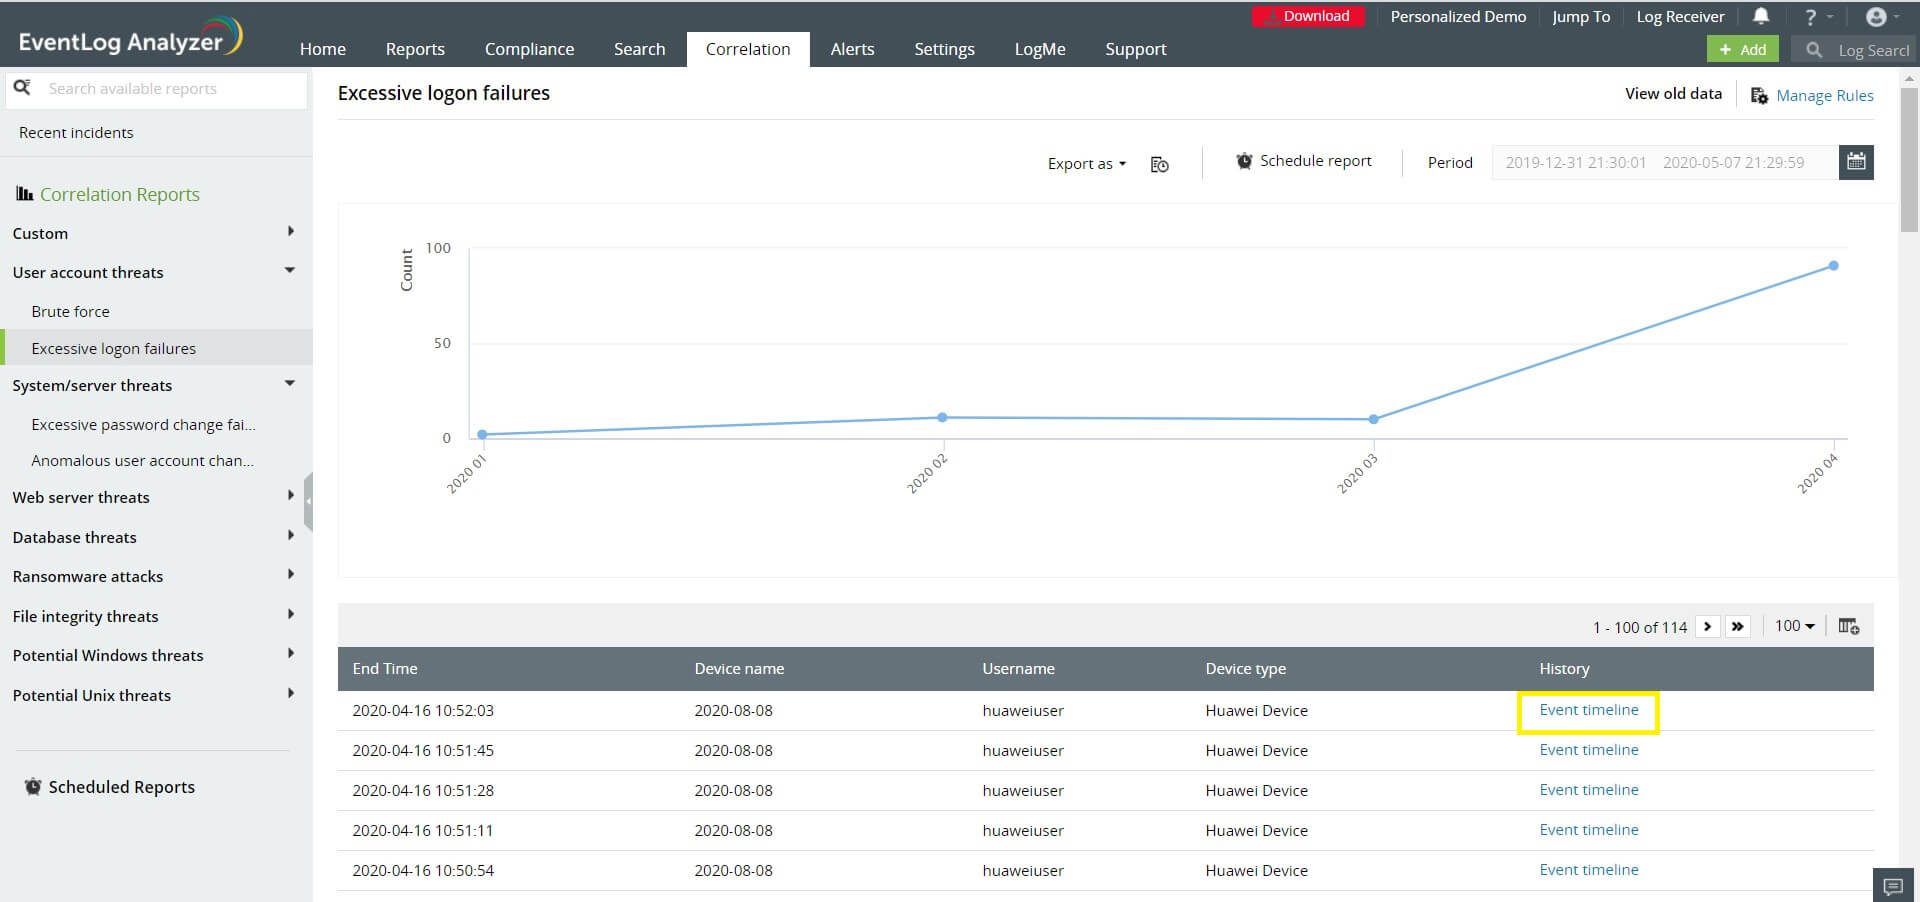
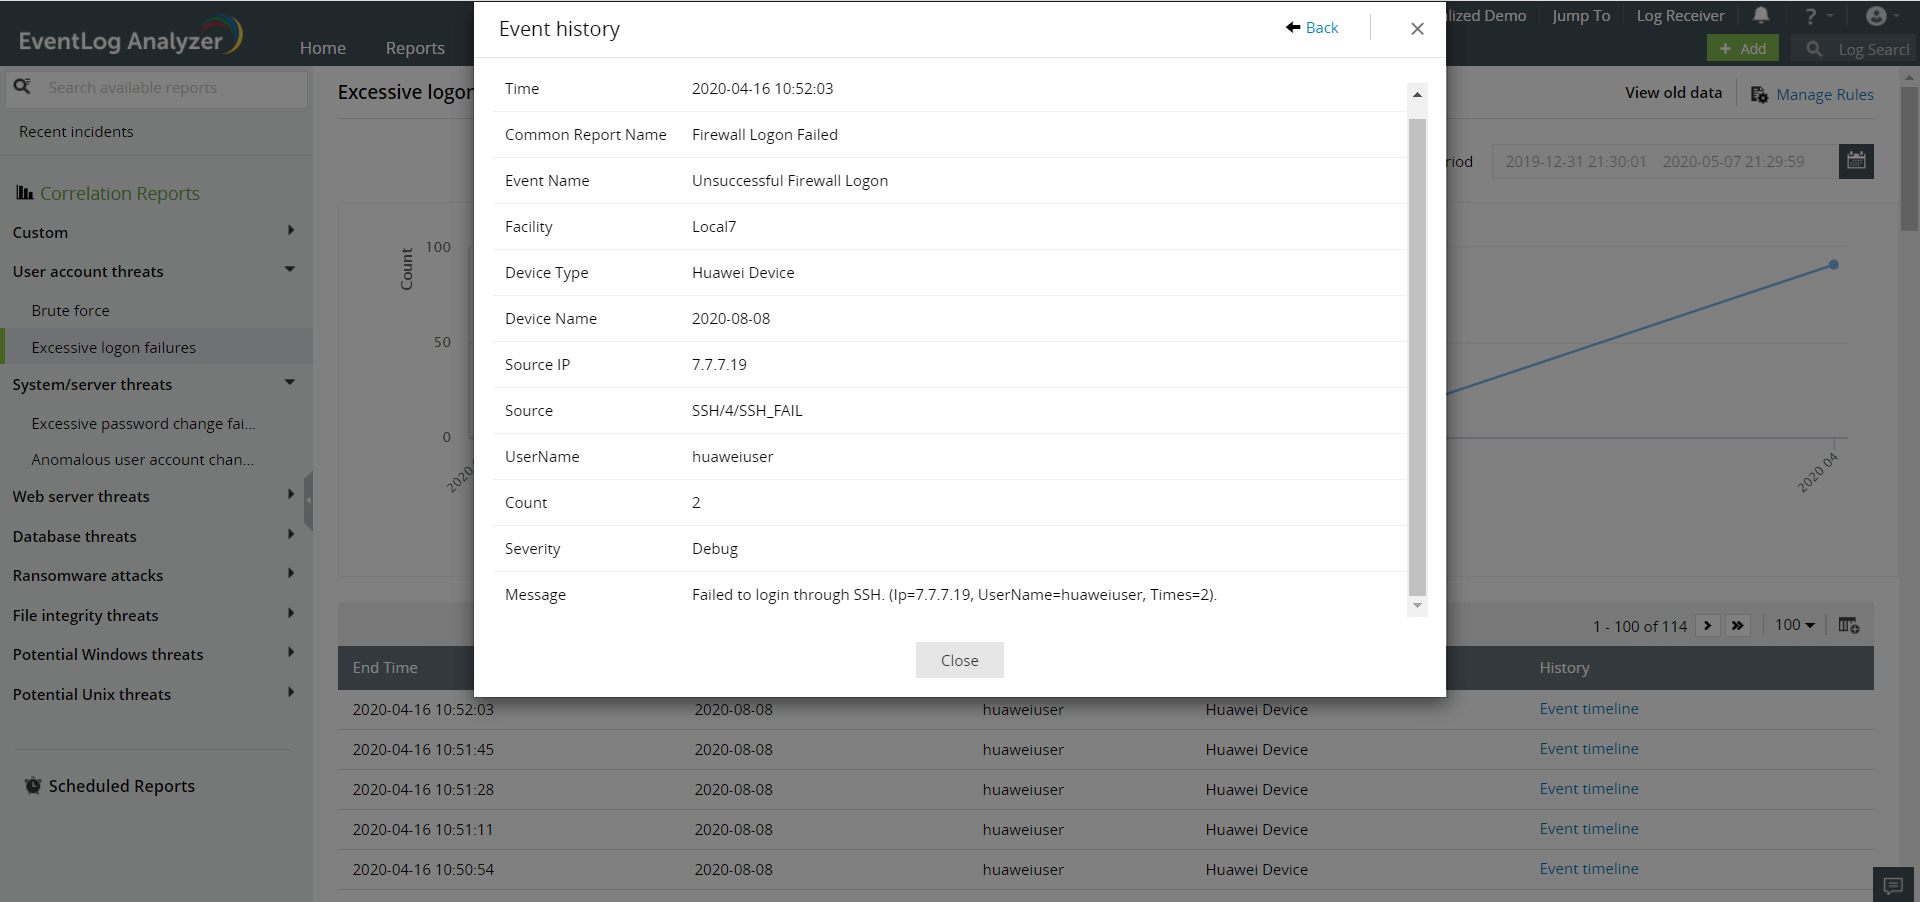
Timeline view
The timeline view provides the history of correlated actions for each occurrence of an incident. It is a sequential list of logs that led to the triggering of a particular rule.
To get an Event timeline for each incident on the table, click on Event Timeline corresponding to the specific incident.
To view the details of each log, click on the Details next to each event.
Incident report actions
The following actions can be performed on the incident reports:
Export reports
You can export incident reports in either PDF or CSV format.
To export a report, navigate to the required report, and click on the Export as option.
Select the format in which you would like to export the report from the drop down list.
The status of all previous and ongoing exports can be viewed by clicking on the Report export history icon next to the Export as option.
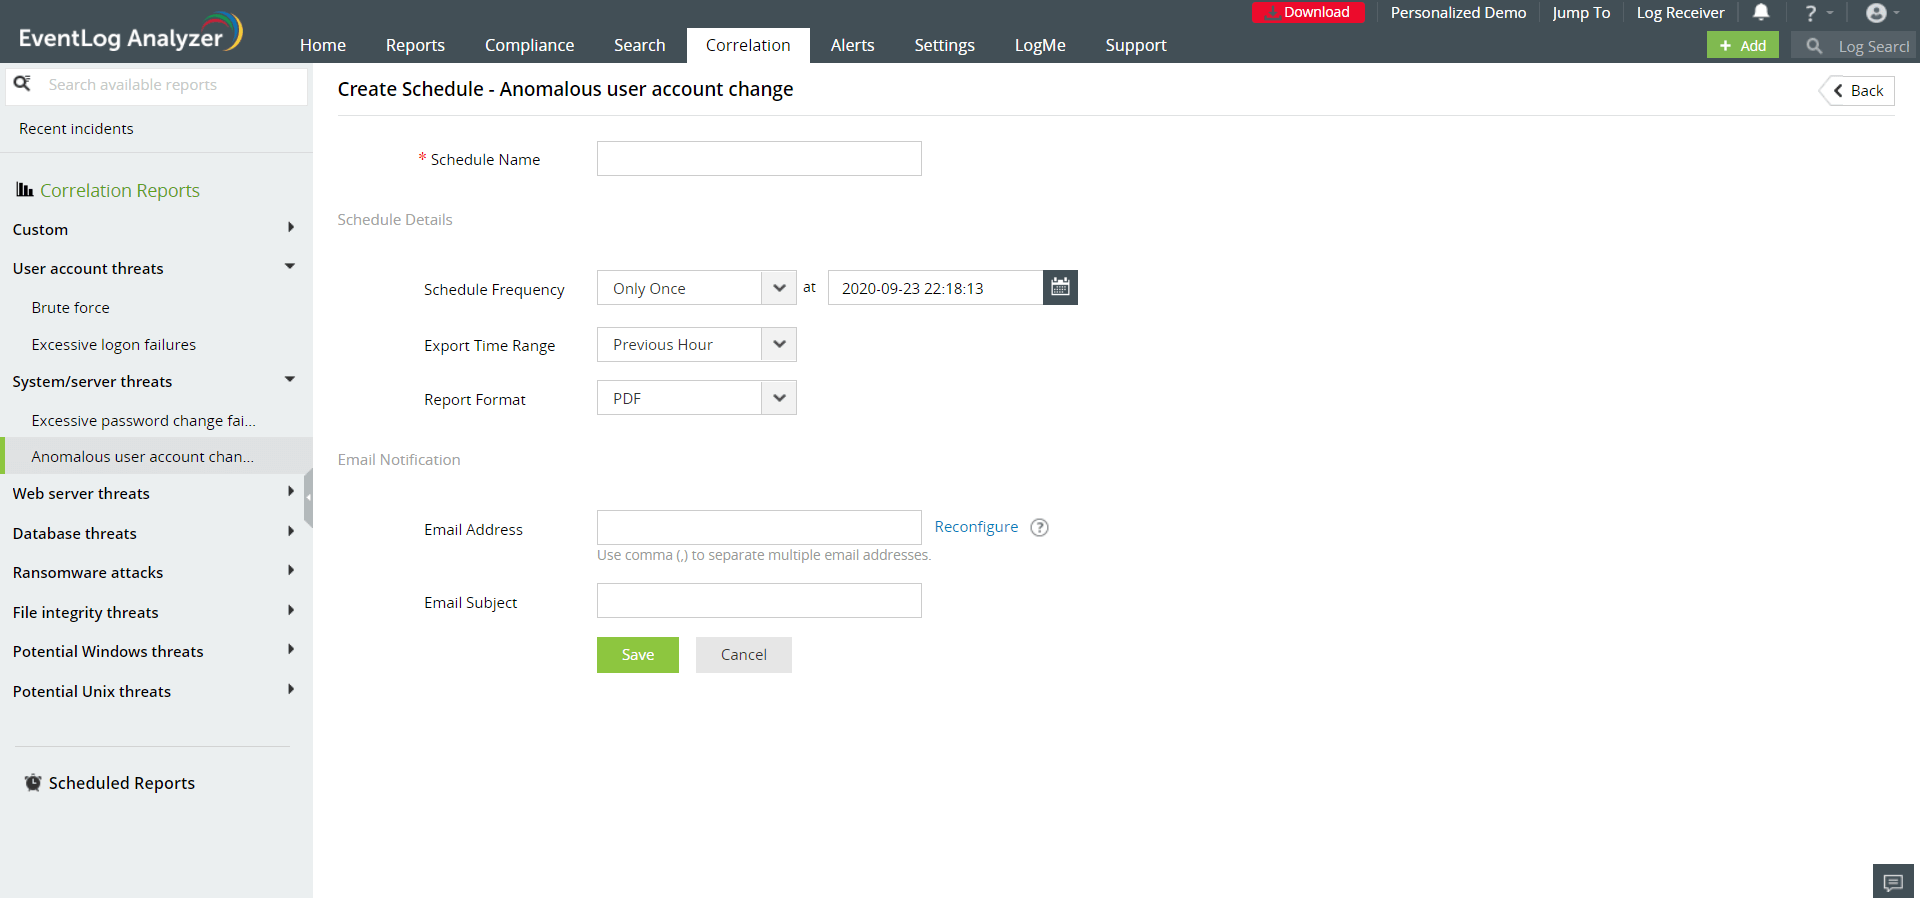
Schedule reports
An incident report schedule allows you to generate incident reports at regular periods, and optionally receive them via email.
To view the list of existing schedules for a specific report, navigate to the required incident report and click on Schedule Report.
You can enable/disable or edit the schedules by clicking on the respective icons. To create a new schedule, click on Add Schedule.
Specify the following details for the schedule:
Schedule name: A name for the new schedule.
Schedule frequency: The frequency to generate the report (only once/hourly/daily/weekly/monthly)
Run schedule at: The day/time within the chosen period at which the report must be generated.
Export time range: The time range for which the report data must be exported..
Report format: Reports can be generated in either PDF or CSV formats.
Email address: The email address to which the report needs to be sent to.
Email subject line: The subject of the email to be sent.
Click on Save.
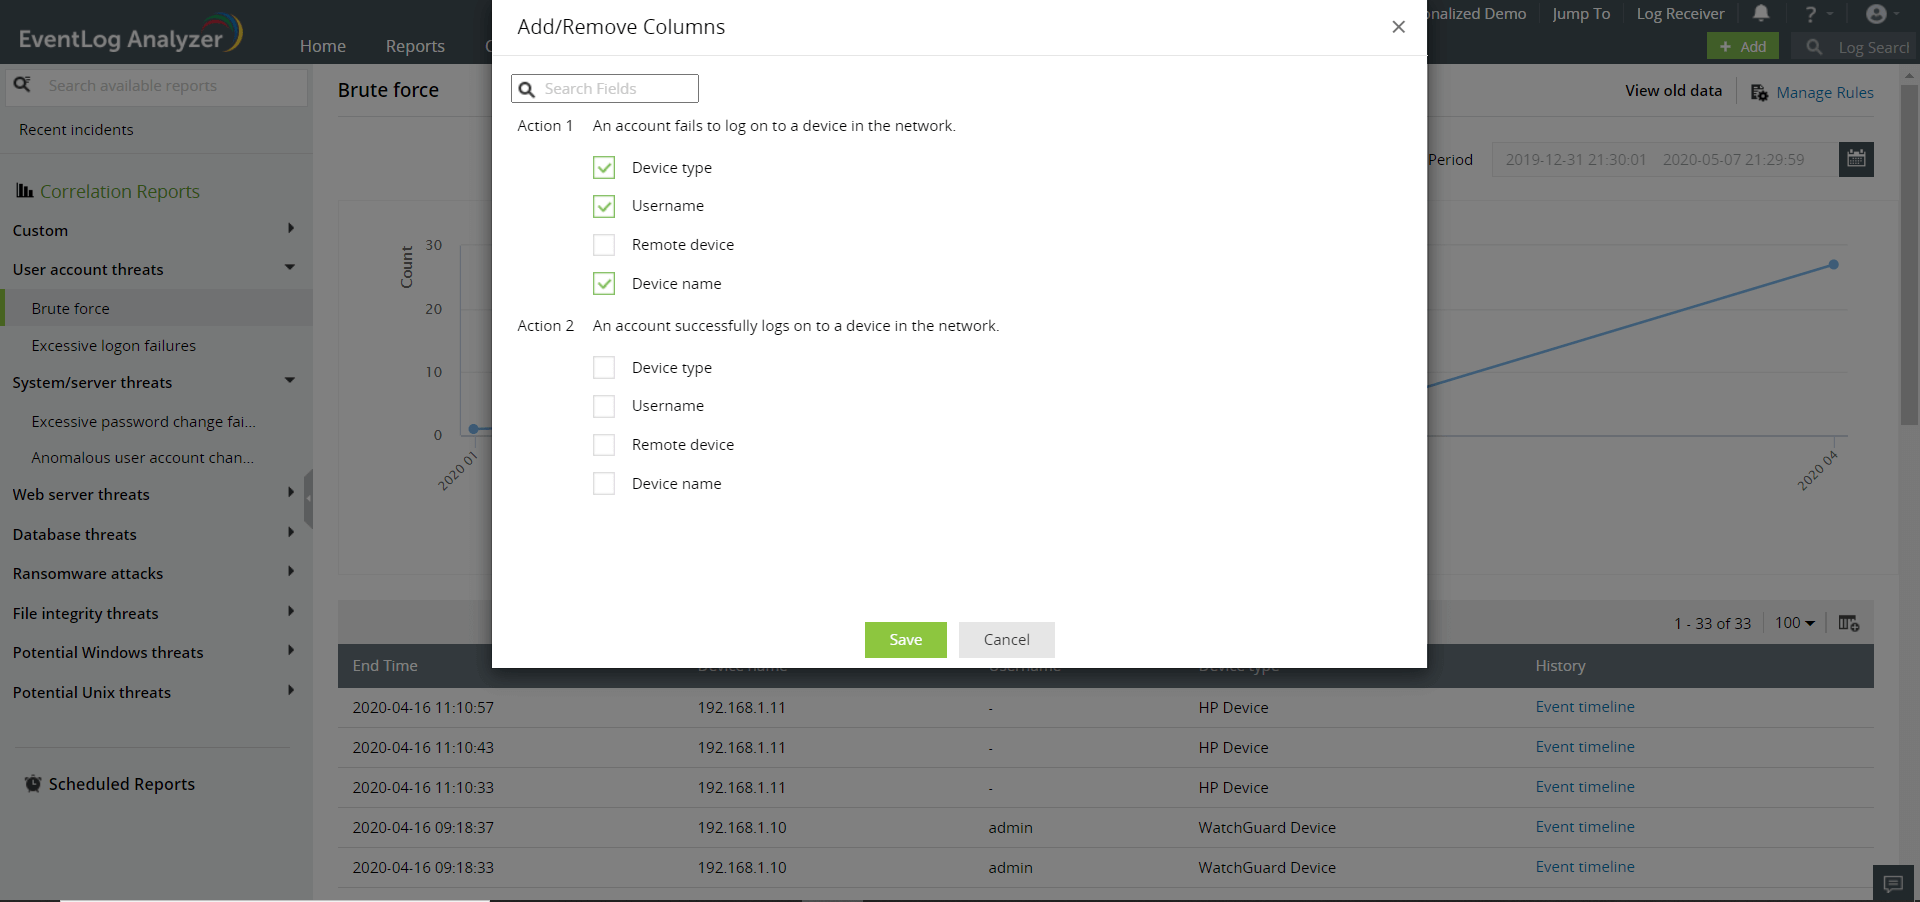
You can choose what information must be displayed in your incident report by adding or removing the required fields as columns in the report.
To select the fields, click on the column selector icon on the top right cornerof the required report.
Select the fields to be displayed in the report by choosing the respective checkboxes under each action.
You can also specify the below options for each field by clicking on the edit icon next to the required field.
Display name: This is the name of the field as displayed in the report. This is useful if you would like to display the same field (e.g. username) from more than one action. You can distinguish between similar fields by changing their display names. For instance, 'Failed logon username' and 'Successful logon username'.
Show value of: When you have specified a threshold value for the action and it occurs more than once, you can choose to display the field value from either the first, last or all occurrences of the action. Once you have specified the required information to be displayed, click Save.
 Click here to expand