Alerts
The Alerts feature in Exchange Reporter Plus allows you to identify actions in the monitoring data that pose a potential threat to your Exchange environment. It classifies threats based on their severity level, like critical, trouble, and attention. When one such threat is recognized, an alert is generated to notify the user. This page talks about:
- Viewing the alerts
- Creating new alert profiles
- Customizing alert profiles
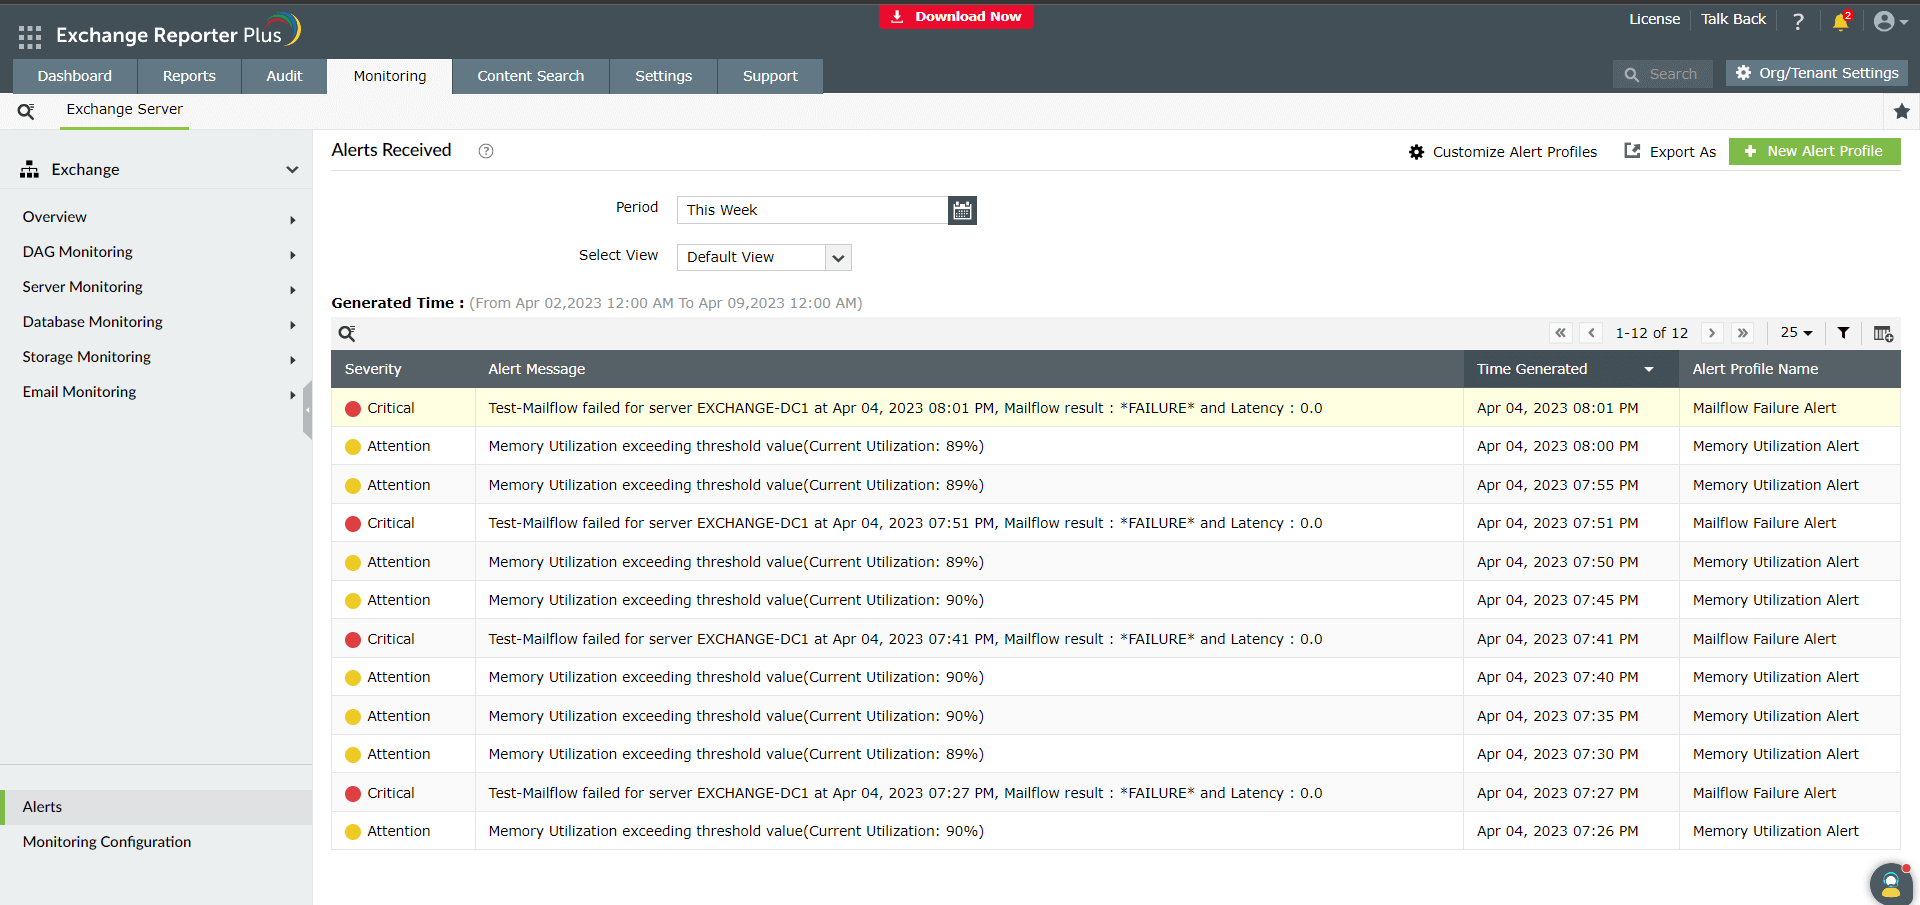
Viewing the alerts
To view the monitoring section alerts:
- Click Alerts in the left pane.
- Choose the Organization from the drop-down in the left pane.
- Select the time period for which you would like to view the alerts.
- Choose a suitable type of view.
Note: You can export the generated report in CSV, PDF, HTML, XLS or XLSX formats.
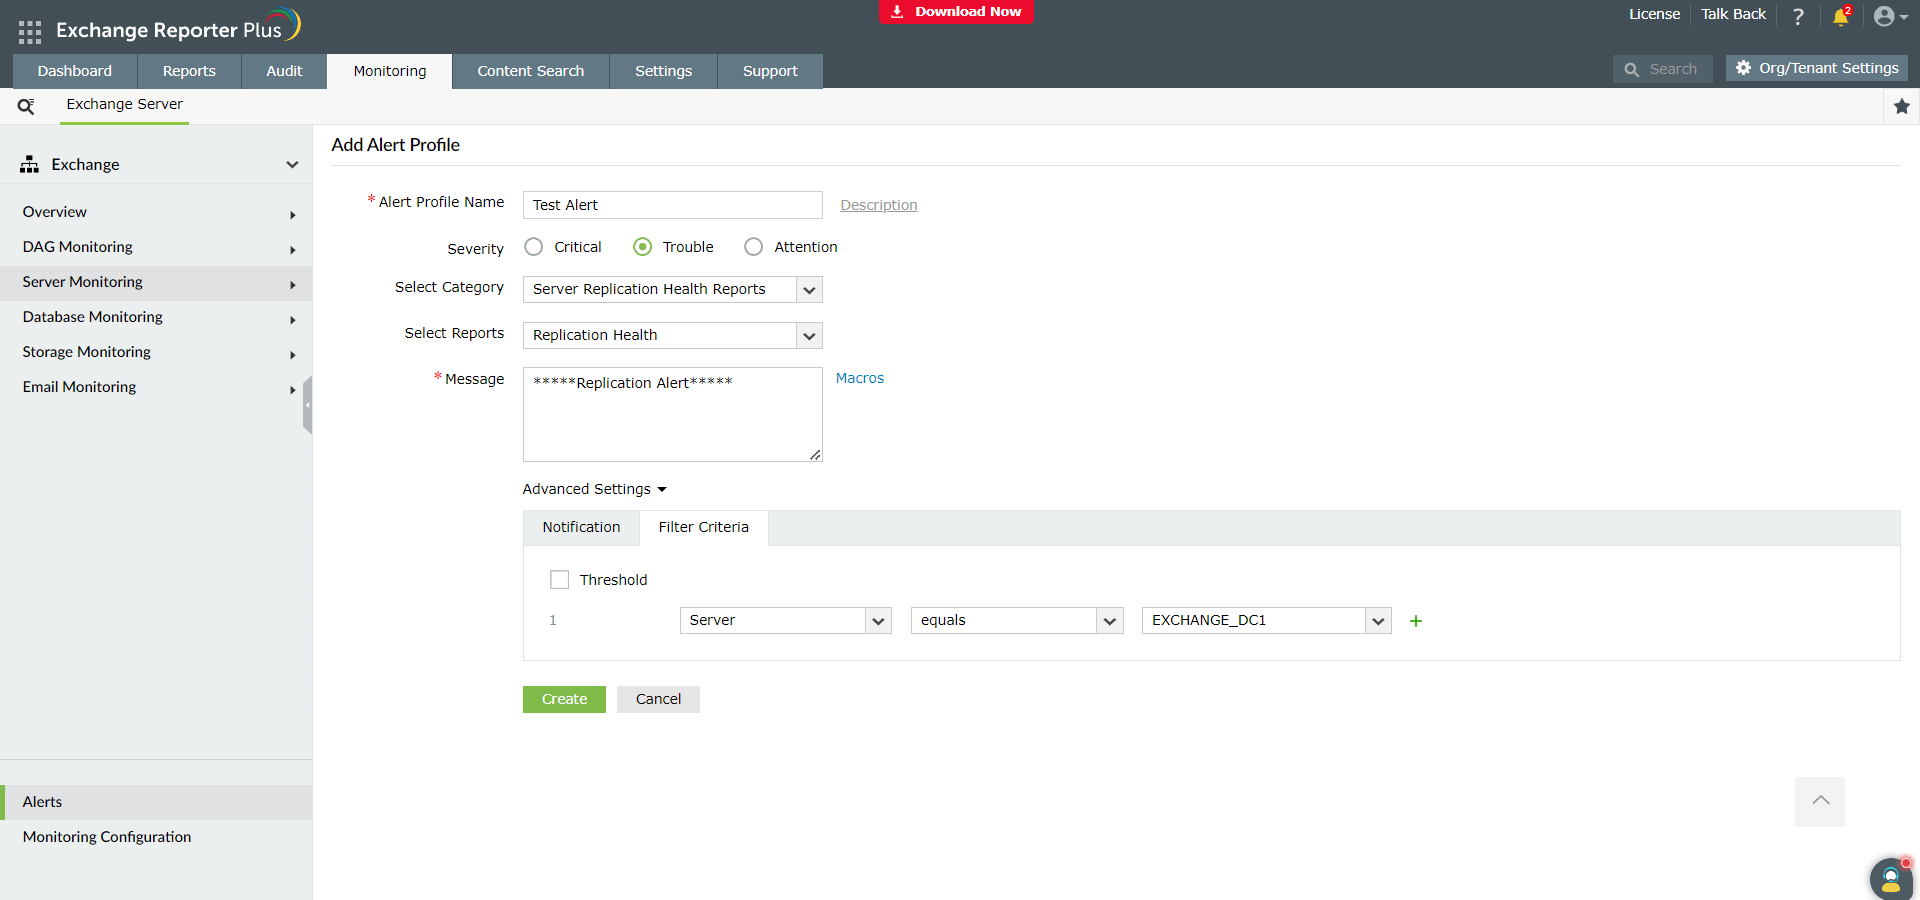
Creating new alert profiles
To create new alert profiles:
- Click Alerts in the left pane.
- Choose New Alert Profile in the top-right corner.
- Enter a suitable Name and Severity for the alert profile.
- Select a Category of reports and a particular report from the category for which you would like to set the alert.
- Enter an alert Message. (You can also use the available macros to customize the message further).
- Under Advanced Settings, enable and configure the E-mail or SMS notification if you would like to get immediate messages on the alerts triggered.
- You can also set the Threshold levels and Filter Rules to trigger the alerts under the Filter Criteria tab.
Note: Alerts are not applied on all the data gathered by the product, because not all data has critical implications on an Exchange environment. Therefore, there is an option to use filter rules to leave out certain data and make the data more concentrated and meaningful.
- Click Create.
Customizing alert profiles
To customize alert profiles:
- Click Customize Alert Profiles.
- You’ll see a list of already created alert profiles, which you can further disable, edit, or delete by clicking on the
 ,
,  ,
,  and icons next to each profile.
Note: After editing an alert profile, don’t forget to click Update for the changes to take effect.
- You can also configure new notification settings using the Configure option next to each profile if you had not done it previously.
- You also have options to change the number of days for which the alerts must be retained in the dashboard using the Alert Settings option in the top-right.


 ADManager Plus
 ADAudit Plus
 ADSelfService Plus
 M365 Manager Plus