Managing AWS Route 53 DNS Servers
ManageEngine OpUtils DNS management capabilities are enhanced by supporting AWS Route 53 to manage and monitor AWS Route 53 DNS servers in OpUtils console. Users can now create Route 53 DNS zones, records and modify the record operations. With this, using specific AWS credentials, users can easily discover AWS Route 53 DNS servers to monitor and manage them.
To authenticate OpUtils with AWS Route 53, users will need an access key and secret access key retrieved from AWS account.
In this document, you can find the steps to generate the credentials required to begin managing AWS Route 53 DNS servers in your OpUtils console.
- Generate Access Key and Secret Access Key in AWS Route 53
- Configuration Steps to integrate in OpUtils
Generate Access Key and Secret Access Key in AWS Route 53
- First, login to your AWS account and navigate to User icon then select Security Credentials.
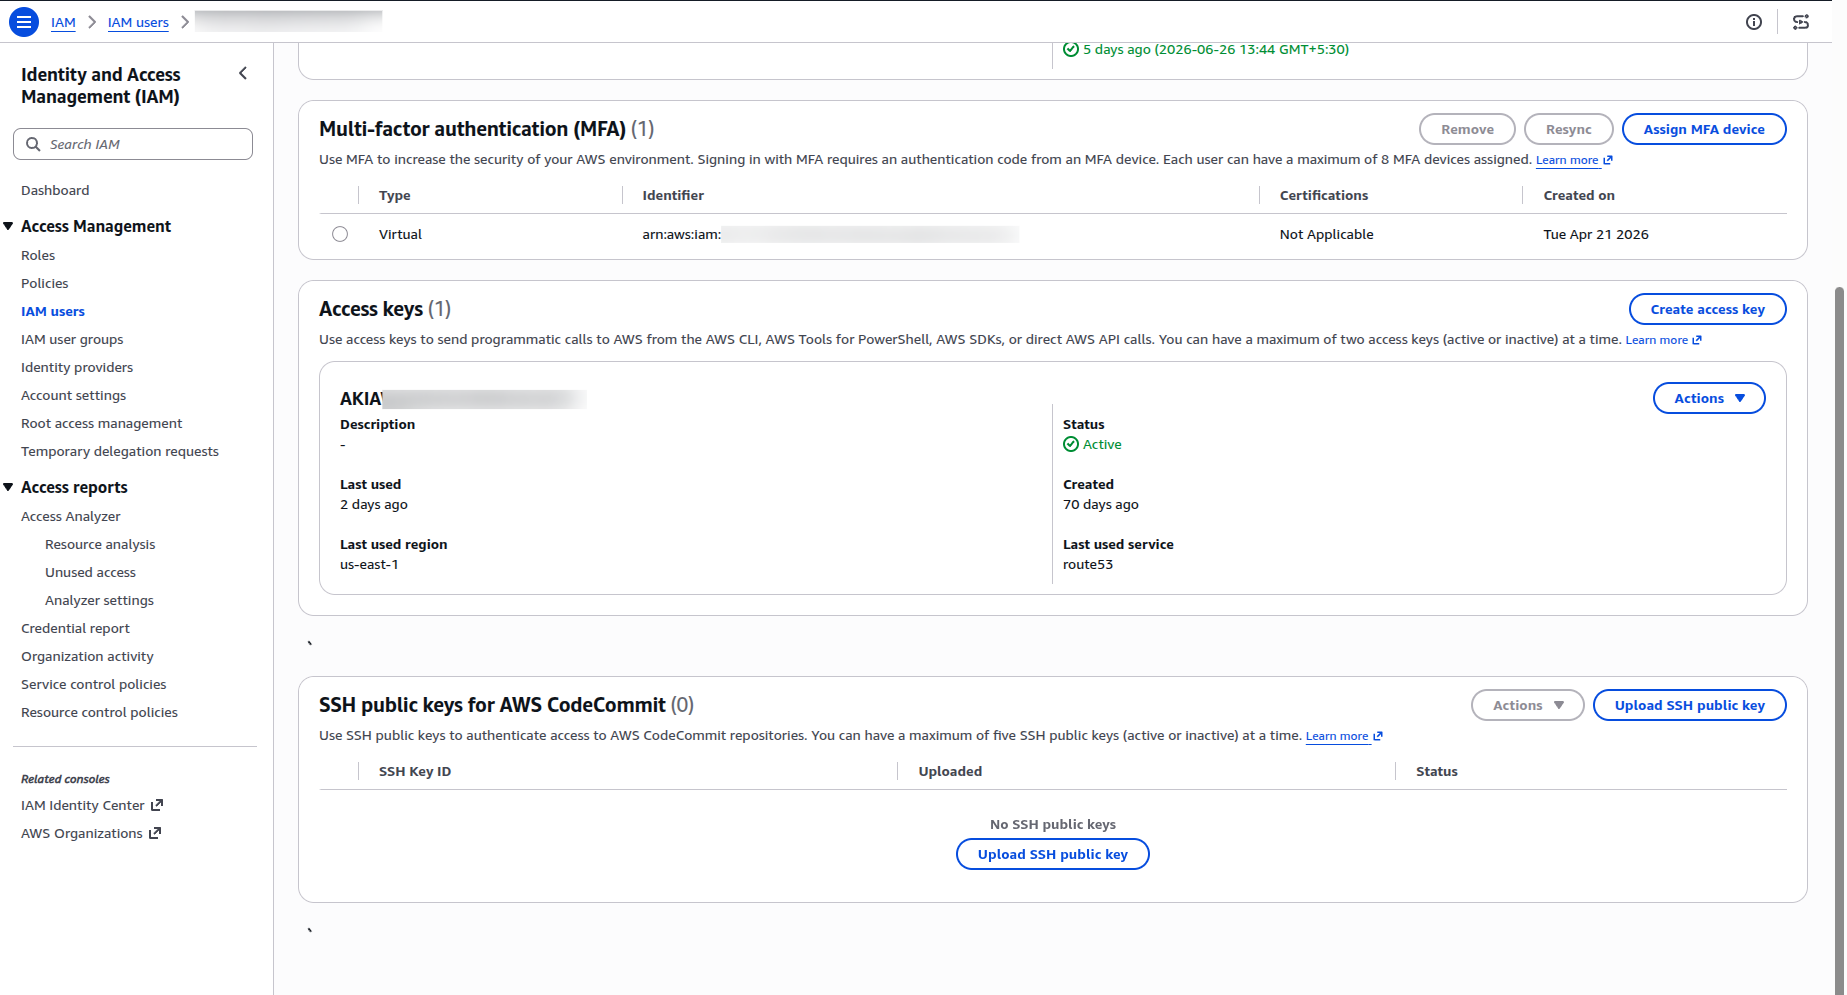
- On the Identity and Access Management(IAM) page, click on Create Access Key to generate Access key and Key ID.
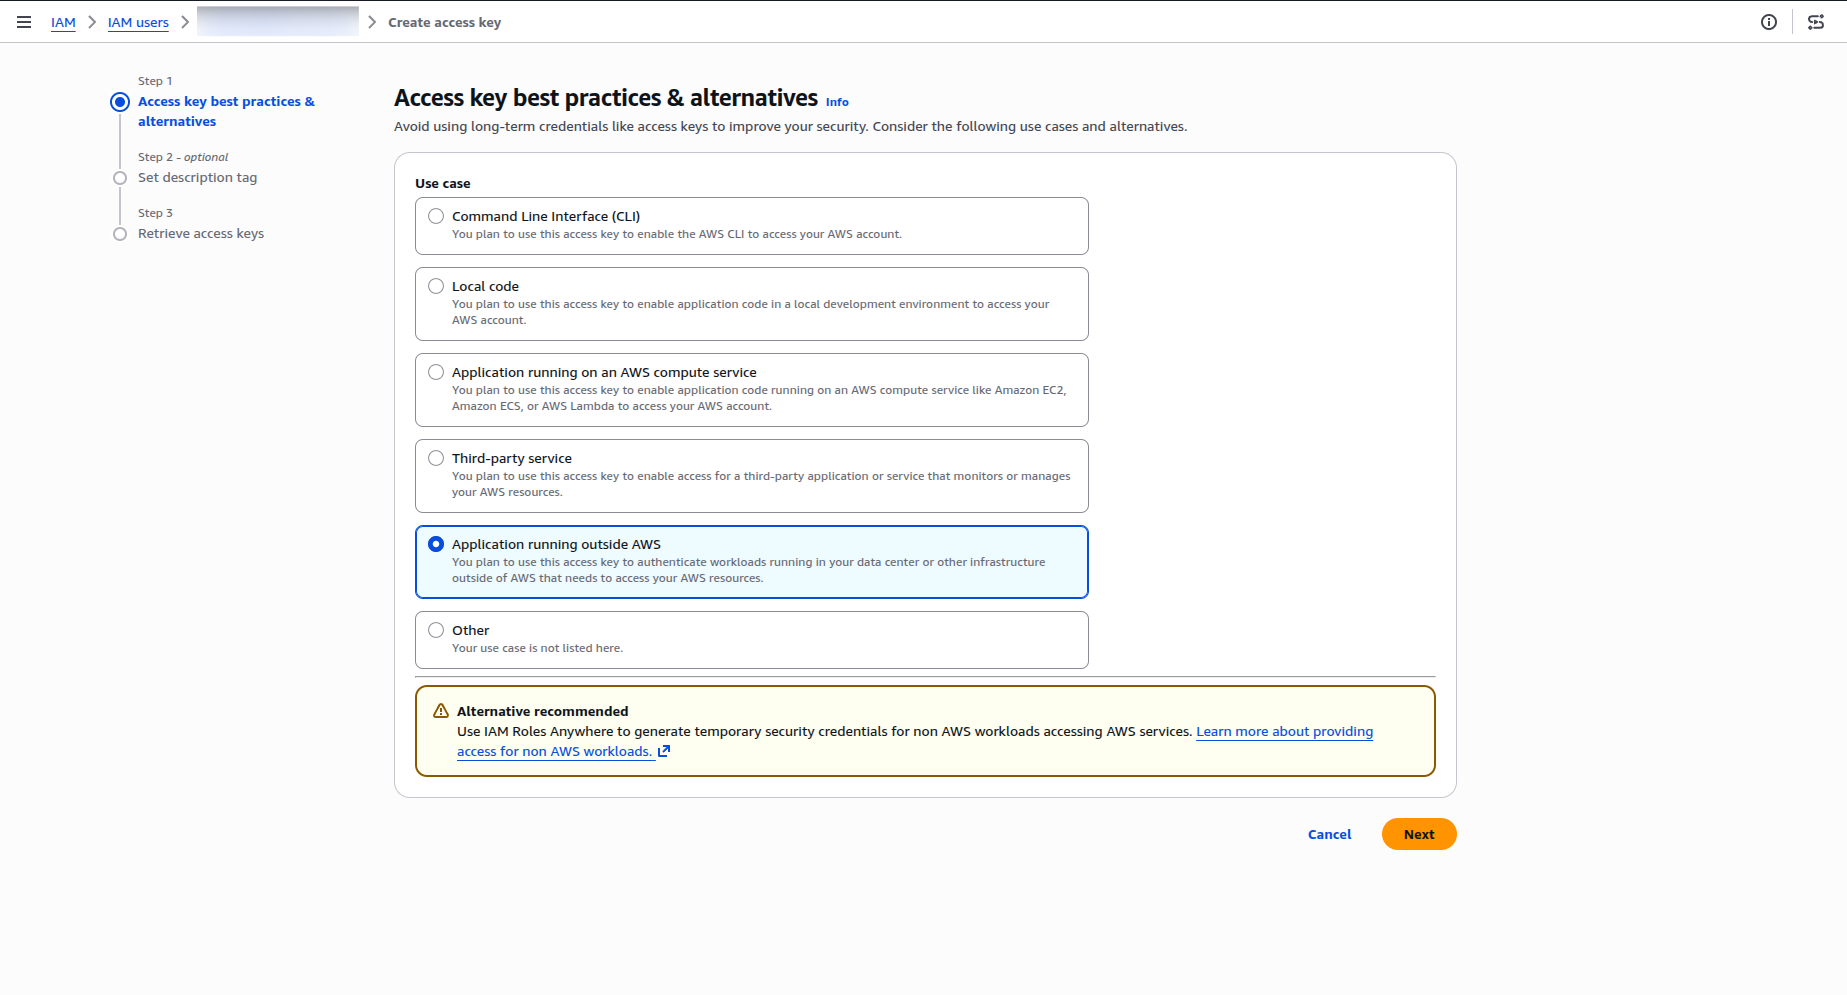
- In the page that appears, select Use Case as Application running outside of AWS, and click Next.
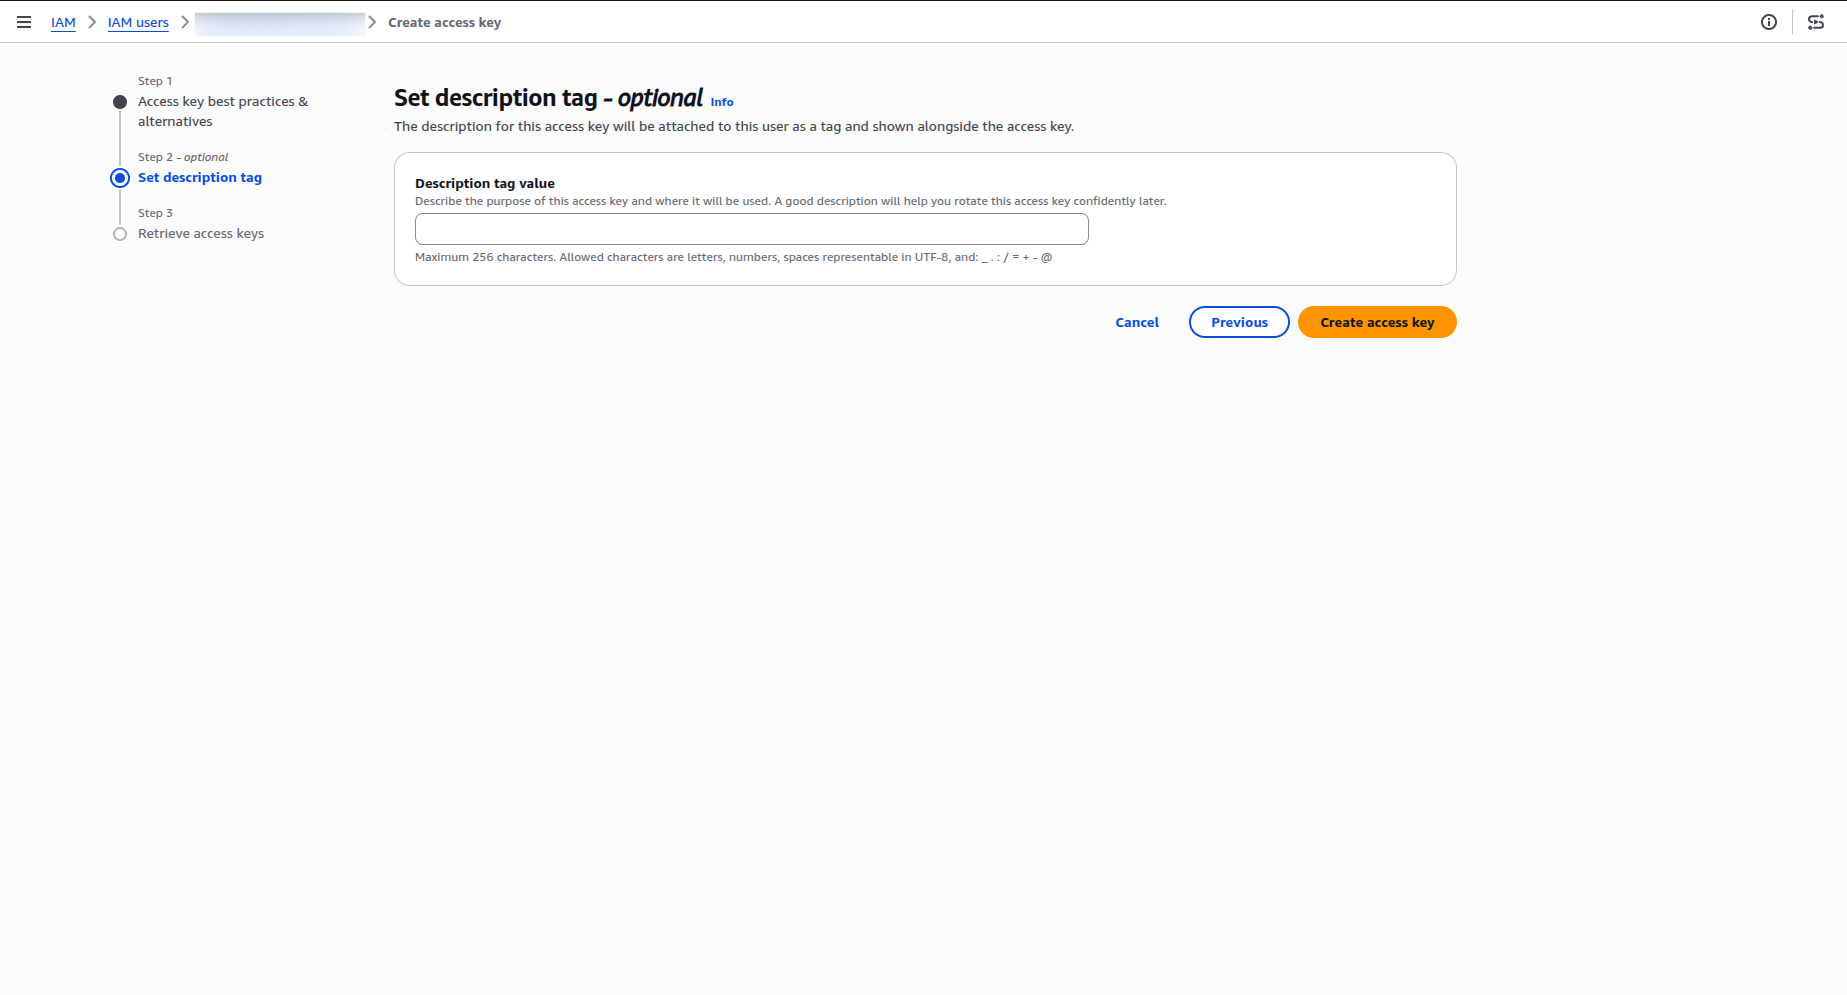
- Enter a Description tag to identify the purpose and usage of the access key pair. This description will be associated with the user as a tag along with the access key.
- Click Create Access Key.
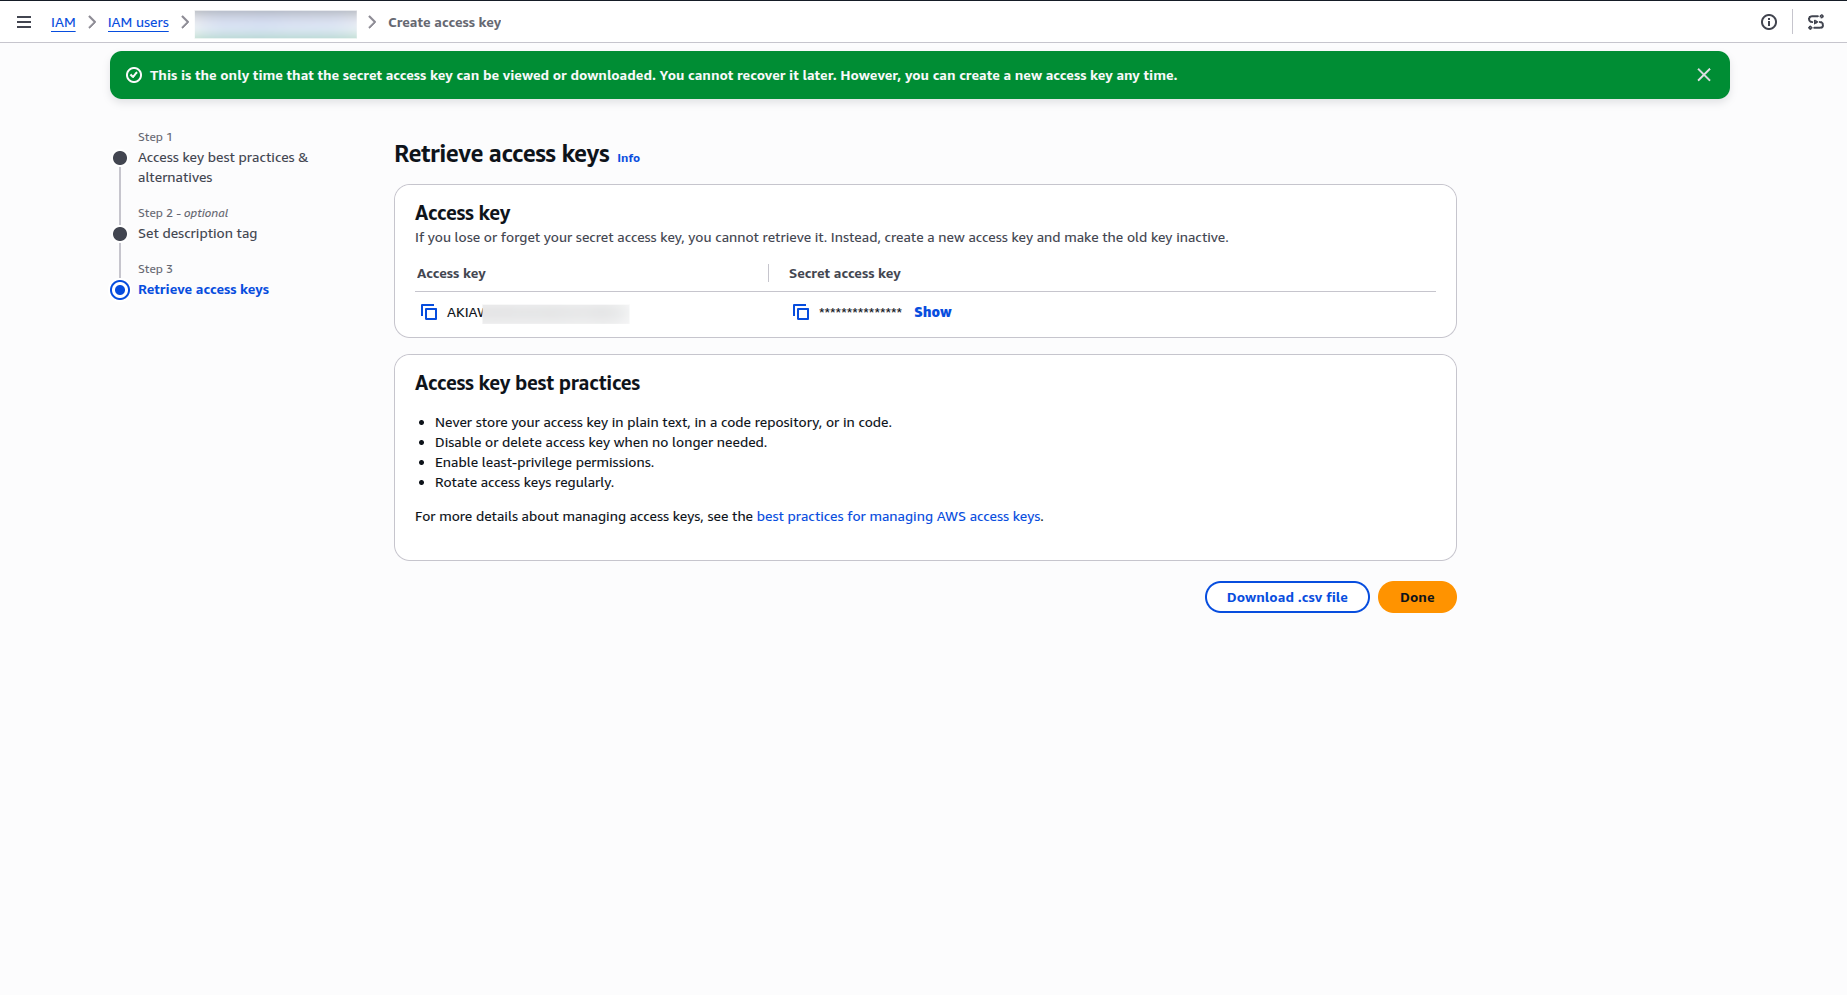
- The Access Key pair (Access Key and Secret Access Key) has been generated successfully. Copy the credentials, as they are required to configure in OpUtils.
Configuration Steps to integrate in OpUtils
After generating the Access Key pair, use the credentials to add an AWS Route 53 DNS server in OpUtils.
- In OpUtils, go to IP Address Manager,and select DNS Server from the tree view.
- On the DNS inventory page, click Add -> DNS Management -> Add DNS Server.
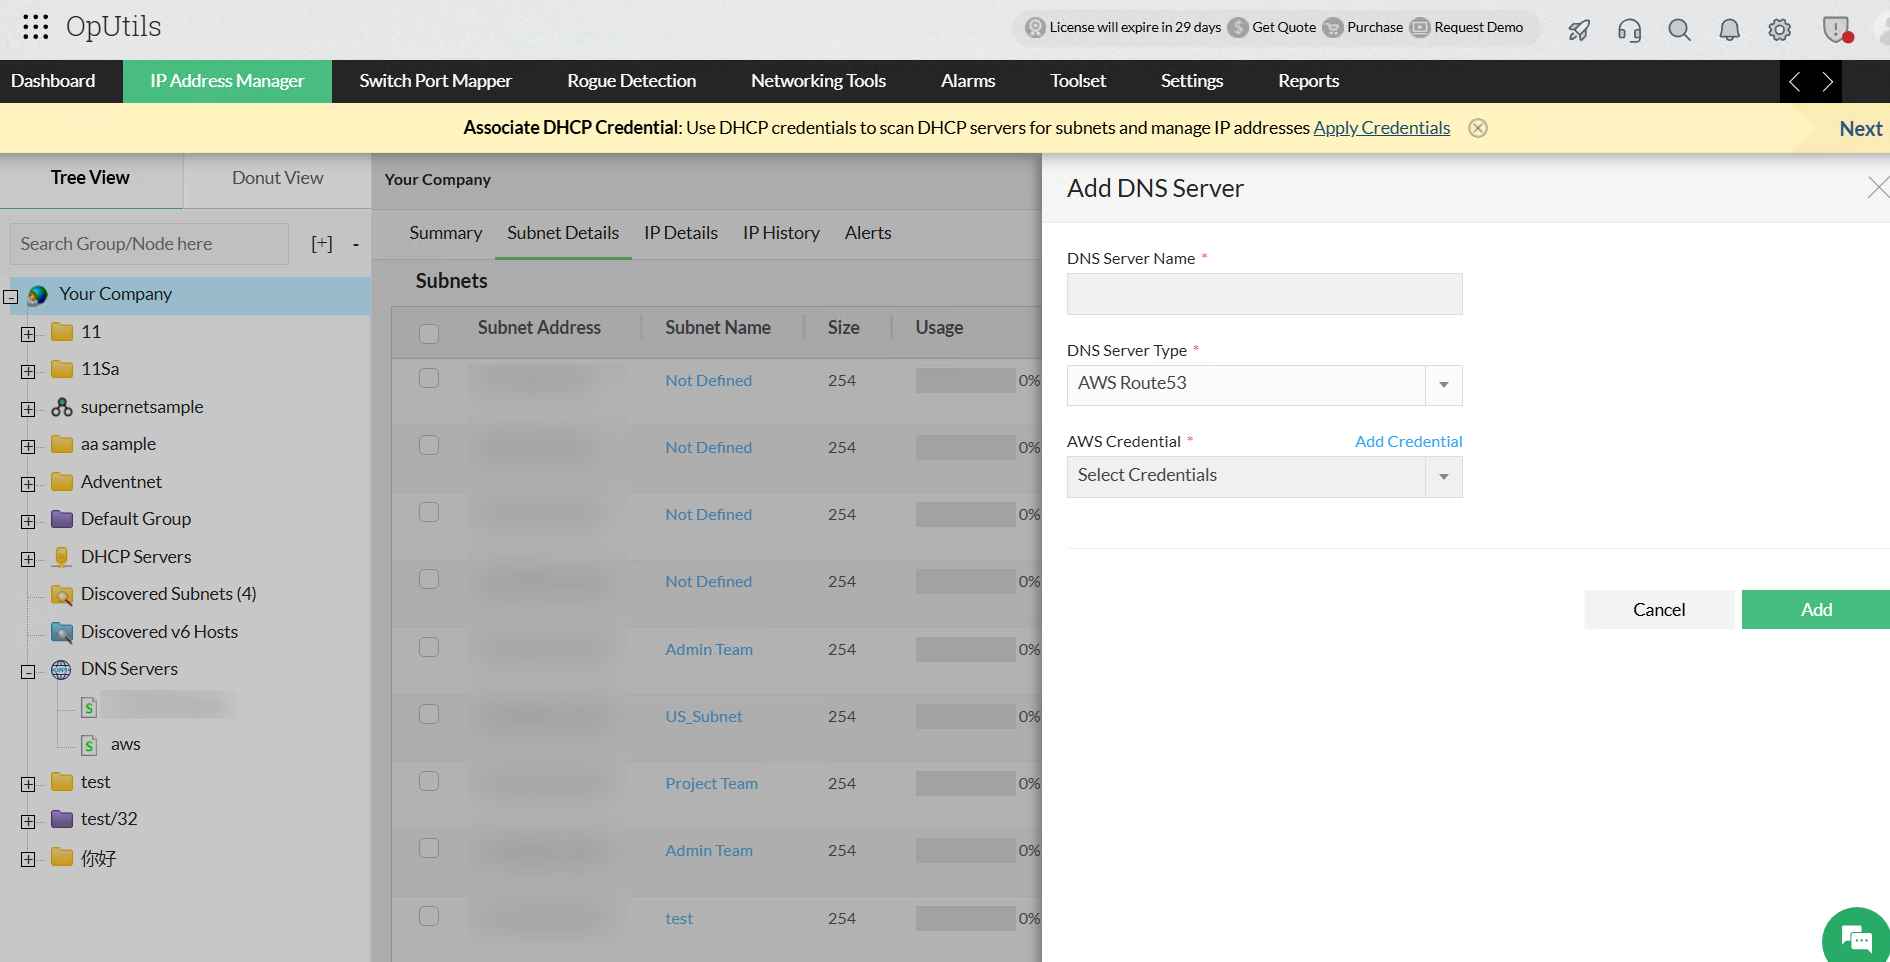
- Choose DNS Server Type as AWS Route 53 and enter the DNS Server Name.
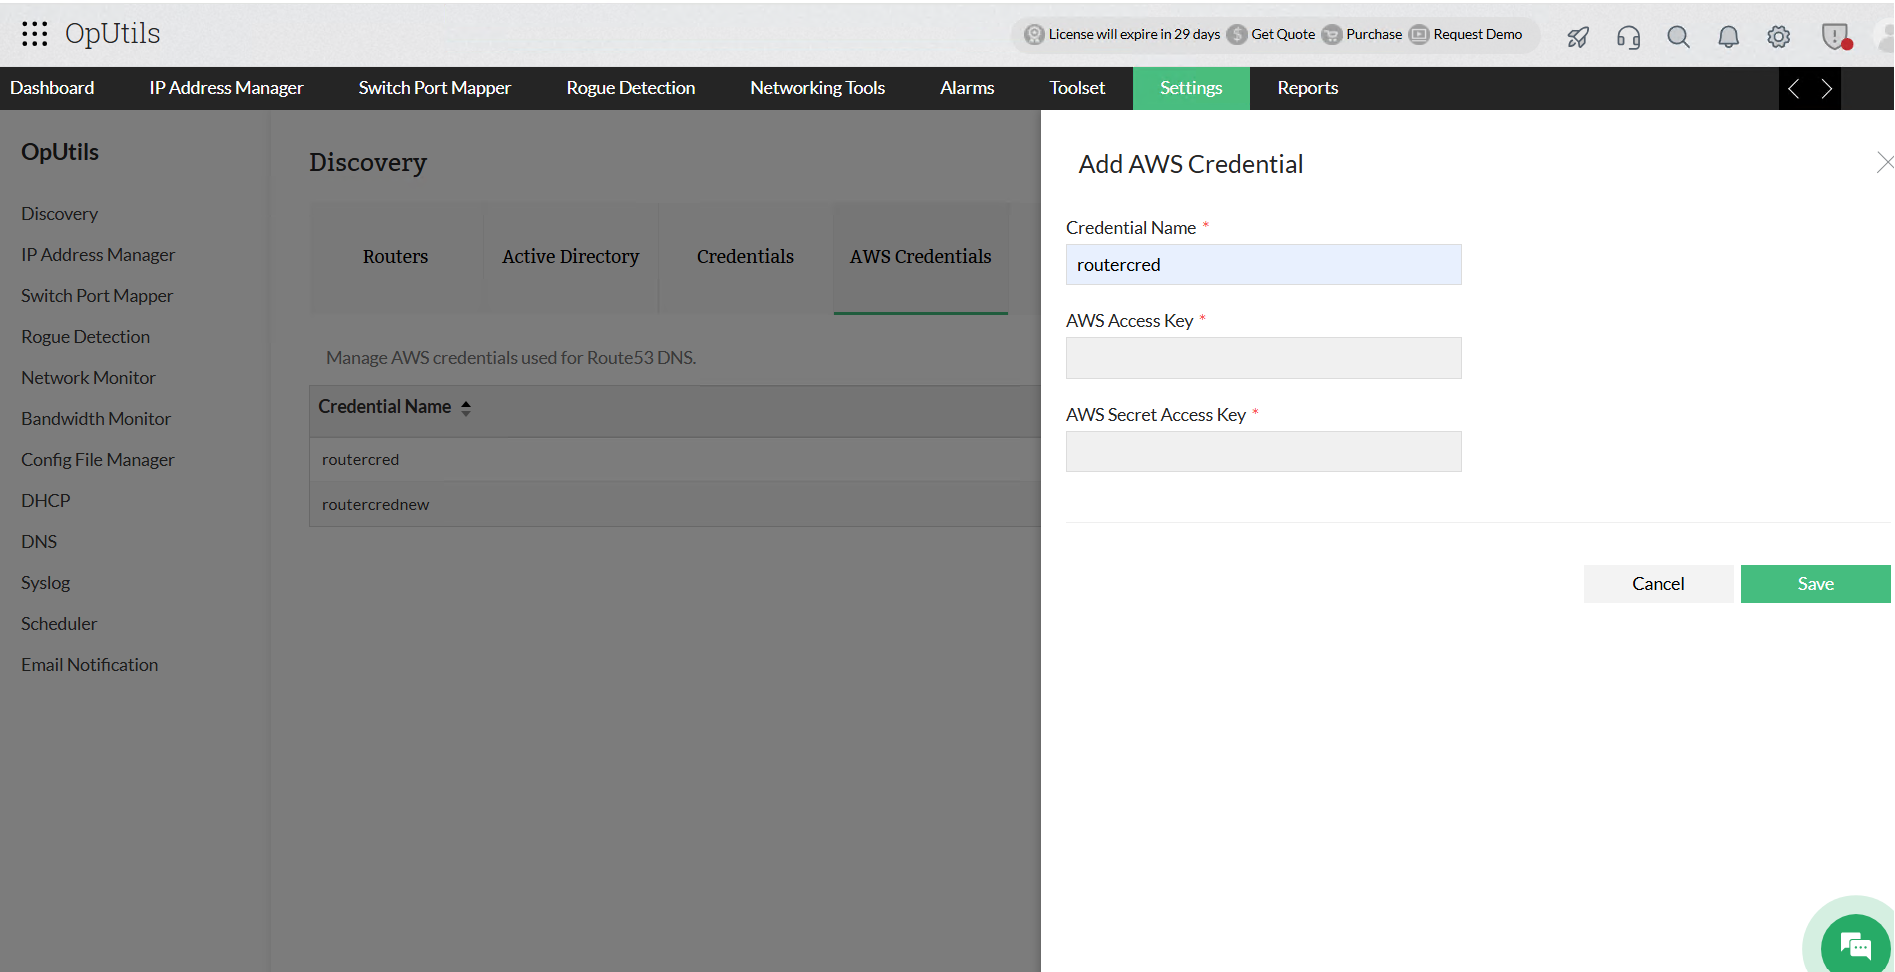
- To add AWS Credential, click on Add AWS Credential.
- In the dialog box that appears, enter the Access Key and Secret Access Key that you copied earlier.
- Click Save.
- Once the credentials are saved, click Add in the Add DNS Server dialog box.
The AWS Route 53 DNS server will be added to the DNS Server Summary page successfully.