IP Address Manager Settings
General Settings
Here you can specify the IP Availability Policy and the period to maintain the history of the IP Addresses.
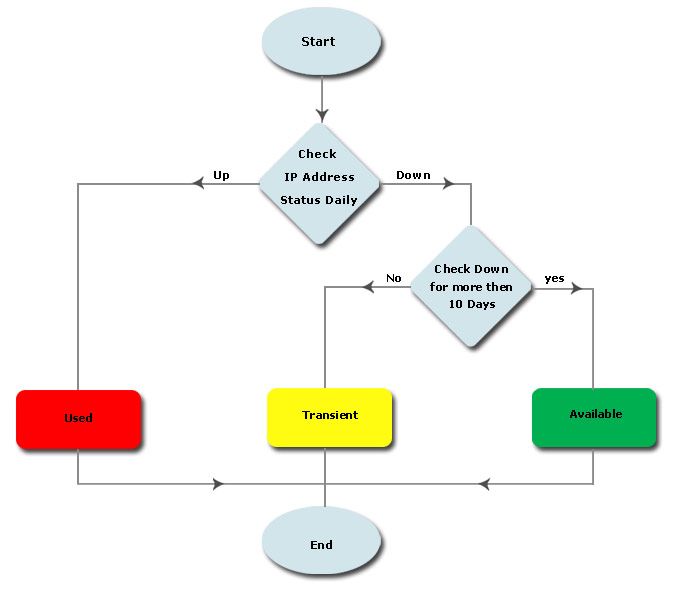
IP Availability Policy: This specifies the number of days an IP can be continuously down beyond which it is declared as "Available". Till then the IP Address will be in "Transient" state. The default period is 10 days.
IP History: Select the period to maintain the history of the IP Addresses. This will show the details of the devices that has been assigned with that IP Address in the given period. The default period is 3 months.
Configure Email Alerts to Notify Change in State
Alerts are generated for the following events:
When the state of an IP Address changes from "Available to Used" or from "Transient to Available".
When the DNS Reverse Lookup Fails
When the DNS Forward Lookup Fails
When the DNS Forward Lookup returns a different IP

The IP Address Manager tool can be configured to notify specific events by email:
Click the Settings -> IP Address Manager -> Configure Alerts.
IP Availability Policy: This determines the state of the IP Address based on the response. Specify the period after which an IP Address has to be declared as Available.
Select the Enable Email Alert check box and select the required events.
Specify the recipients email addresses as comma separated.
Alert Cleanup Policy: Specify the maximum number of Alerts to be stored in the database, the default being 2000. When you delete the older alerts, you have an option to save them as a csv file for future reference.
Click Save.
Configuring IP conflict alerts
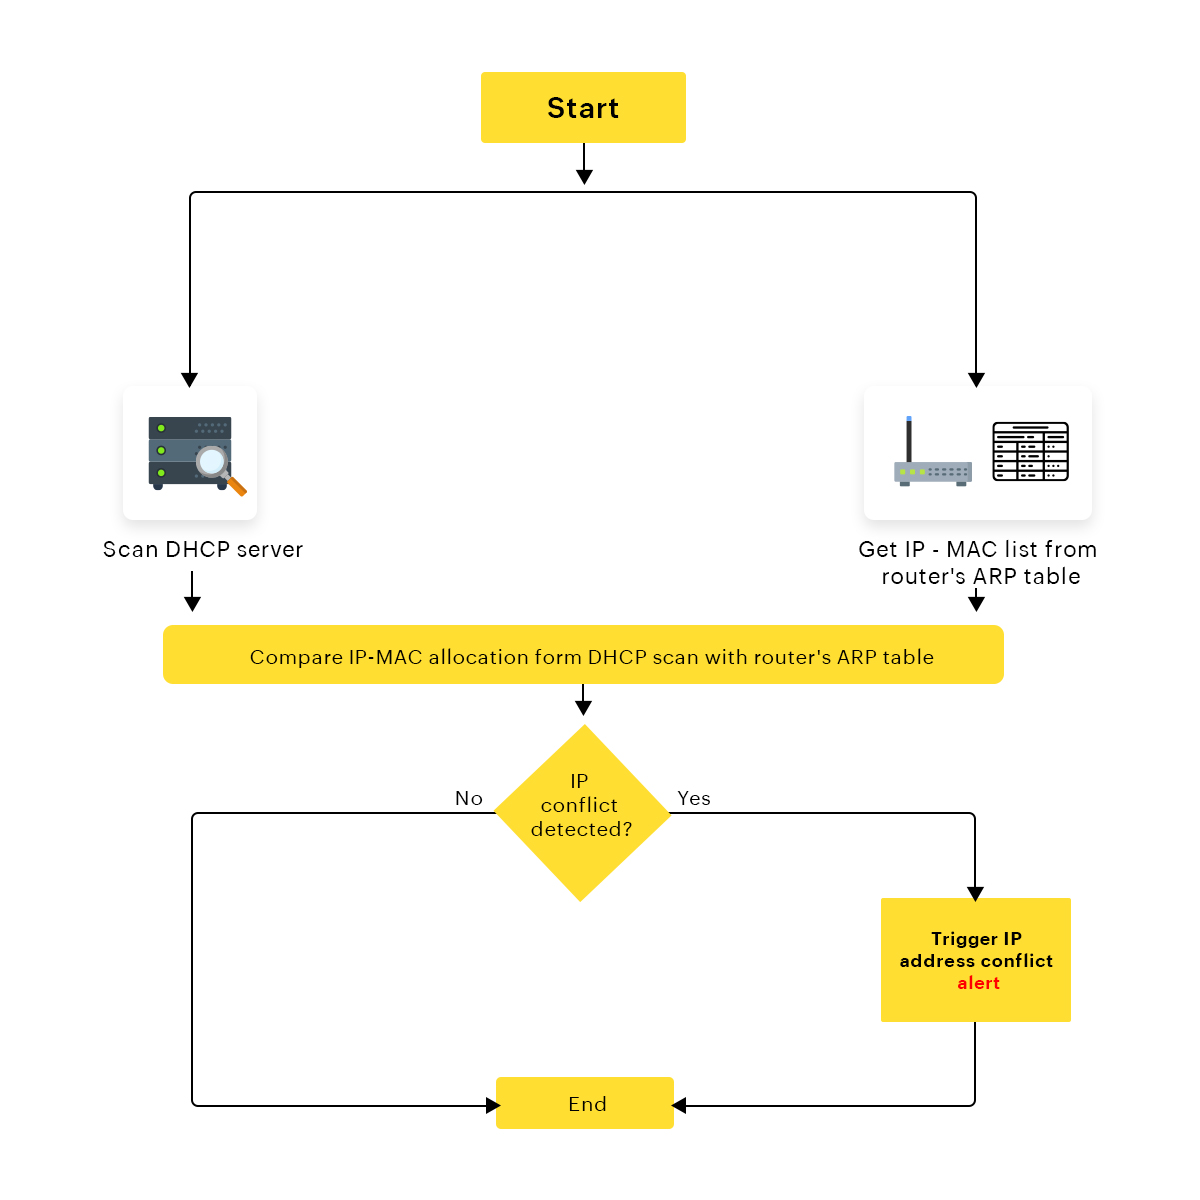
OpUtils' IP address manager can trigger alerts on detecting IP address conflicts in your network. These alerts can be configured to be sent to the specified mail ID, or can be notified via syslog.
Detecting IP address conflicts with OpUtils
 To configure OpUtils to generate alerts on detecting IP conflicts,
- Click on the Settings tab.
- Go to IP Address Manager -> Configure Alerts.
- Enable the required email or syslog notification for 'IP address conflict is detected' option under the 'Notify when' column.
- On enabling email alerts, specify all the user email IDs to which the alerts are to be sent, separated by a comma.
- Click save.
Note:You can also specify the maximum number of Alerts to be stored in your database with the Alert Clean-up Policy option. Older alerts can be exported to a CSV file for future reference.
Add Active Directory Domains
When you have a Windows Active Directory based Domain Setup, OpUtils will let your perform the following:
Fetch the computer objects from the domains - This information is used to relate an IP address with the domain.
Scans the Active Directory to fetch the computer details like System Description, CD Key, Serial Number, etc.
Authenticate Oputils users via Active Directory to login to OpUtils Web Console.
Note: You should have installed Oputils on a computer running Windows OS to add Active Directory Domains.
To add the domains, follow the steps below:
Click the Settings -> Discovery -> Active Directory -> Add Domain.
Specify the Admin User Name, Password, and the Domain/Workgroup name and click Save.
Auto-Publishing the Scanning Results
The IP Address Manager provides an option to automatically publish the scanning results of the subnets to a CSV File. This helps to view the history of the IP States at a later period. Click the Publish tab under IP Address Manager settings to publish the results of the scan to a csv file automatically.
Enable Auto-Publish - Select this option to enable publishing the results to a CSV file automatically. This option is not selected by default.
Publish Directory - Specify a location to store the published results. The default location is /webapps/IPAMPublish
Thank you for your feedback!