Configuring Just-in-Time (JIT) provisioning for Tableau
This guide details the steps to configure JIT provisioning between ManageEngine ADSelfService Plus and Tableau.
Prerequisite
SAML-based SSO must be configured to enable JIT provisioning. To learn how to configure SSO for Tableau, click here.
Tableau (Service Provider) configuration steps
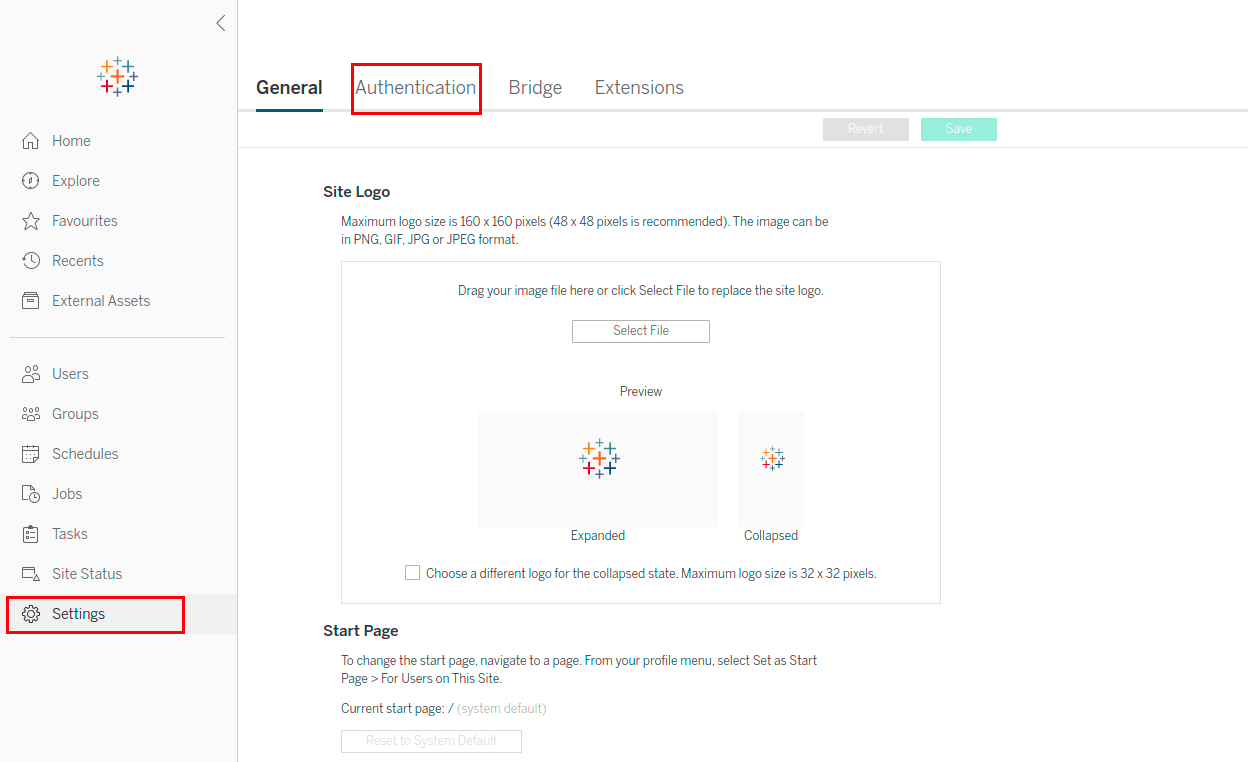
- Log in to Tableau as an admin user with site administrator access.
- Navigate to Settings → Authentication.
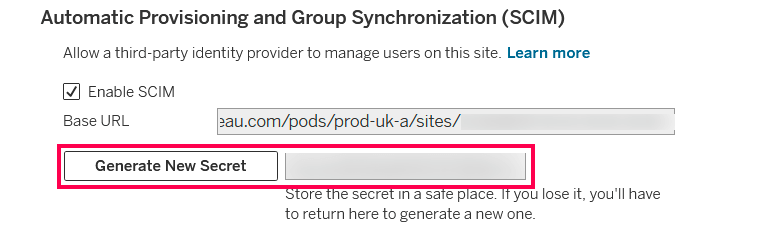
- On the Authentication page in Tableau, under Automatic Provisioning and Group Synchronization (SCIM), select the Enable SCIM check box.
- From the Enable SCIM Base URL field, copy the Region value and Account ID value from the URL, as shown in the image below.
- Click Generate New Secret and copy the value displayed in the Secret field.

ADSelfService Plus (Identity Provider) configuration steps
- Login to ADSelfService Plus with administrator credentials.
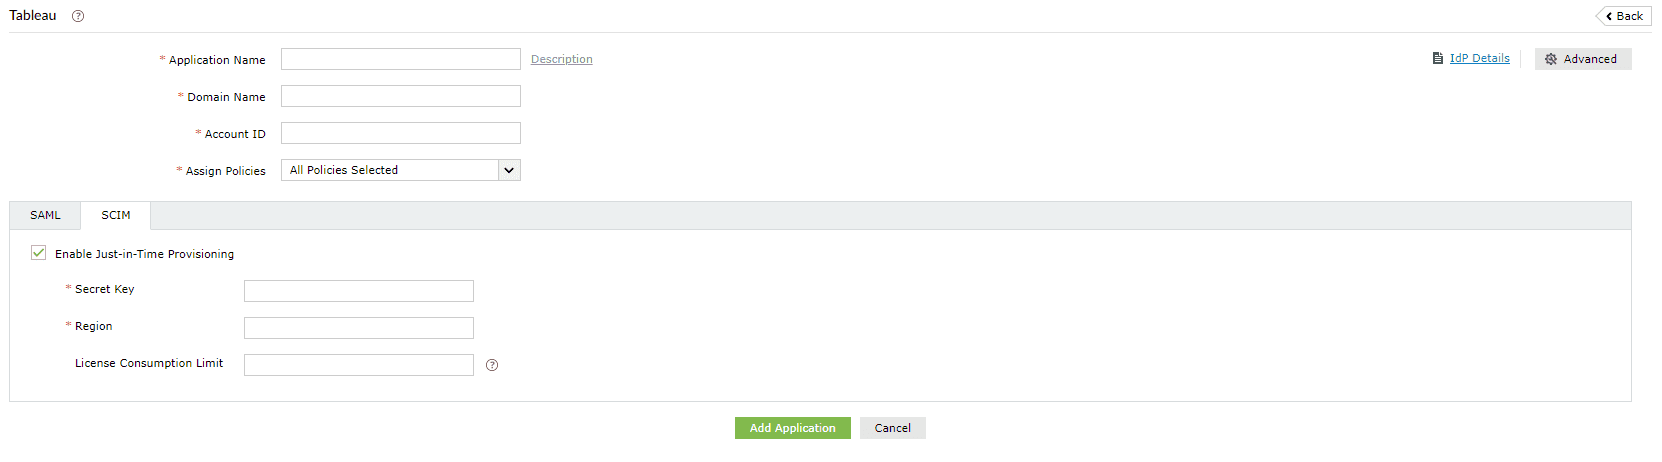
- Navigate to Configuration > Self-Service > Password Sync/Single Sign On > Add Application, and select Tableau from the applications displayed.
- Enter the Application Name and Description.
- Enter the Domain Name of your Tableau account. For example, if you use johndoe@thinktodaytech.com to log in to Tableau, then thinktodaytech.com is the domain name.
- In the Account ID field, paste the value copied in Step 4.
- In the Assign Policies field, choose the policies for which you want the application to be assigned.
- Click SCIM and select Enable Just-in-Time Provisioning.
- In the Secret Key field, paste the value you copied in Step 5.
- In the Region field, paste the region value you copied in Step 4.
- In the License Consumption Limit field, enter the maximum number of licenses you want to be consumed in this application. This will ensure that only the specified license count is used when creating user accounts in the application. The number of licenses consumed will be displayed next to this field. If license consumption exceeds the specified limit, then the user account creation process is stopped.
- The license usage details will be visible when editing the application configuration.
- If a user already has an account in the application, their access attempt through ADSelfService Plus will also be counted towards the license count.
- Click Add Application.
Note: You can also find Tableau from the search bar located in the left pane or the alphabet wise navigation option in the right pane.
Note: ADSelfService Plus allows you to create OU and group-based policies for your AD domains. To create a policy, go to Configuration > Self-Service > Policy Configuration > Add New Policy.
Note:
You have now successfully configured JIT provisioning for Tableau. User accounts that do not exist in Tableau will be created automatically during SSO login.