Configuring single sign-on for SAML-enabled custom enterprise applications
Note: SSO for applications is available only with the Endpoint MFA.
ADSelfService Plus supports single sign-on (SSO) for over 100 cloud applications, right out of the box. The solution also extends its SSO support capability to any SAML-enabled custom enterprise application.
Prerequisites:
- Log in to the enterprise application (service provider).
- Get the metadata file or the Entity ID/SAML Redirect URL (the Login Redirect URL) and Assertion Consumer Service (ACS) URL from the enterprise application.
Create a custom application
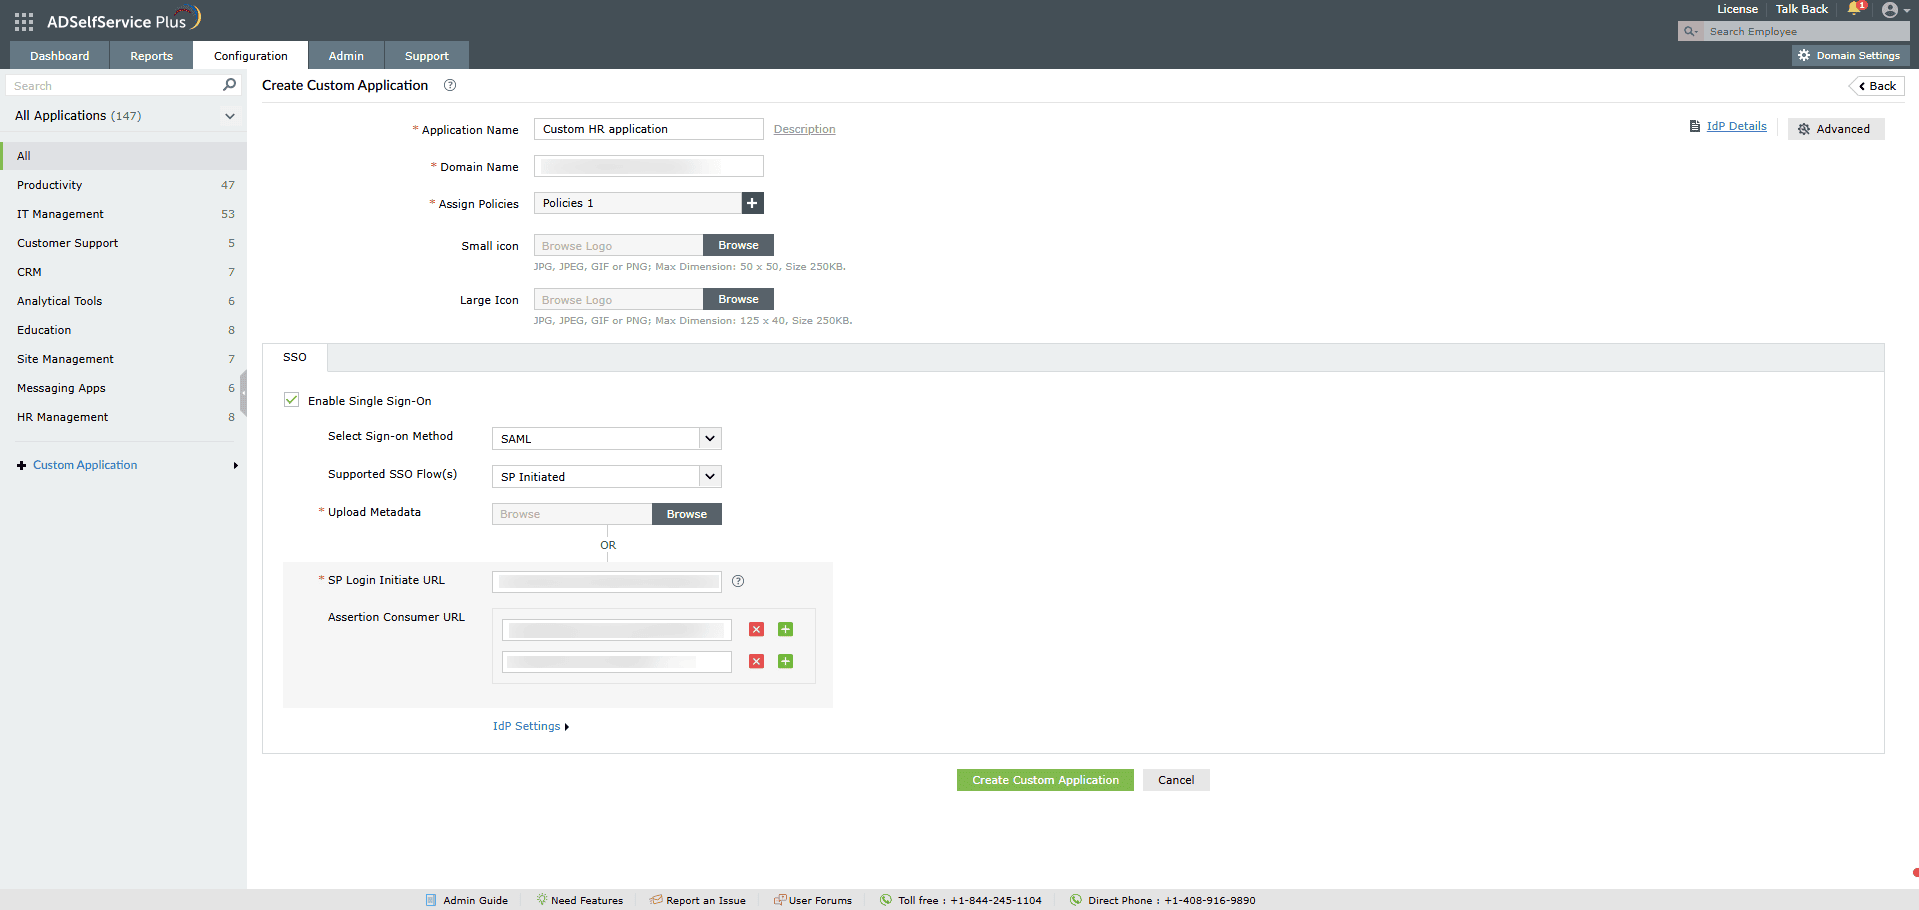
The steps given below will guide you through setting up SSO for your custom SAML applications using ADSelfService Plus.
- Log in to ADSelfService Plus as an administrator.
- Navigate to Password Sync/Single Sign On > Add Application > Custom Application.
- Enter your Application Name and Description.
- Enter the domain name of your email address in the Domain Name field. For example, if you use johndoe@mydomain.com to log in, then mydomain.com is the domain name.
- Upload an image for the app icon in both sizes.
- From the Select Method drop-down, select SAML.
- Select the SSO flow that the app supports from the Supported SSO Flow drop-down.
- Automatic Configuration: If you have downloaded the metadata file during Step 2 of the Prerequisites section, upload it in the Upload Metadata field or follow step 8 below.
- Manual configuration: Based on the SSO flow selected earlier, enter the required details.
- If you have selected the SP-Initiated flow:
- Enter the SAML redirect URL supplied by your application service provider supplies in the Login Redirect URL field.
- Enter the Assertion Consumer URL supplied by your application service provider in the Assertion Consumer Service URL field. If required, click the + button next to the text field to add multiple Assertion Consumer Service URLs. These values can also be found in the service provider application's SSO configuration page.
- If you have selected the IdP-Initated flow:
- Enter the ACS URL supplied by your application service provider in the ACS URL field. If required, click the + button next to the text field to add multiple ACS URLs. These values can also be found in the application's SSO configuration page.
- Enter the Entity ID supplied by your application service provider in the Issuer URL/Entity ID field. This value can also be found in the application’s SSO configuration page.
- Under IdP settings:
- Choose the RSA-SHA1 or RSA-SHA256 algorithm depending on the encryption your application supports.
- Pick a SAML response (signed/unsigned).
- Choose the XML canonicalization method to be used. The canonicalization method is the process of converting the XML content to a standardized format by the identity provider (IdP) and service provider (SP). The algorithm you choose is used for signing the SAML response and assertion.
- Choose the Name ID format that has to be sent in the SAML response. The Name ID format will specify the type of value sent in the SAML response for user identity verification.
- Click Create Custom Application.
Note: We advise contacting your service provider and verifying the supported SSO flows before selecting
an option from the drop-down.
Note: Check with your service provider to identify the supported SSO flow and
the SAML response. By default, the SAML assertion will be signed.