Configuring SAML SSO for ServiceNow

These steps will guide you through setting up the single sign-on functionality between ADSelfService Plus and ServiceNow.

Prerequisite

  1. Log in to ADSelfService Plus as an administrator.
  2. Navigate to  Configuration → Self-Service → Password Sync/Single Sign On → Add Application, and select ServiceNow from the applications displayed.
    Note: You can also find ServiceNow application that you need from the search bar located in the left pane or the alphabet wise navigation option in the right pane.
  3. Click IdP details in the top-right corner of the screen.
  4. In the pop-up that appears, click Download metadata file and save the XML file. Open the file in a text editor and copy its content.
  5. IDP Details

ServiceNow (Service Provider) configuration steps

  1. Now, Login to ServiceNow portal with an administrator’s credentials.
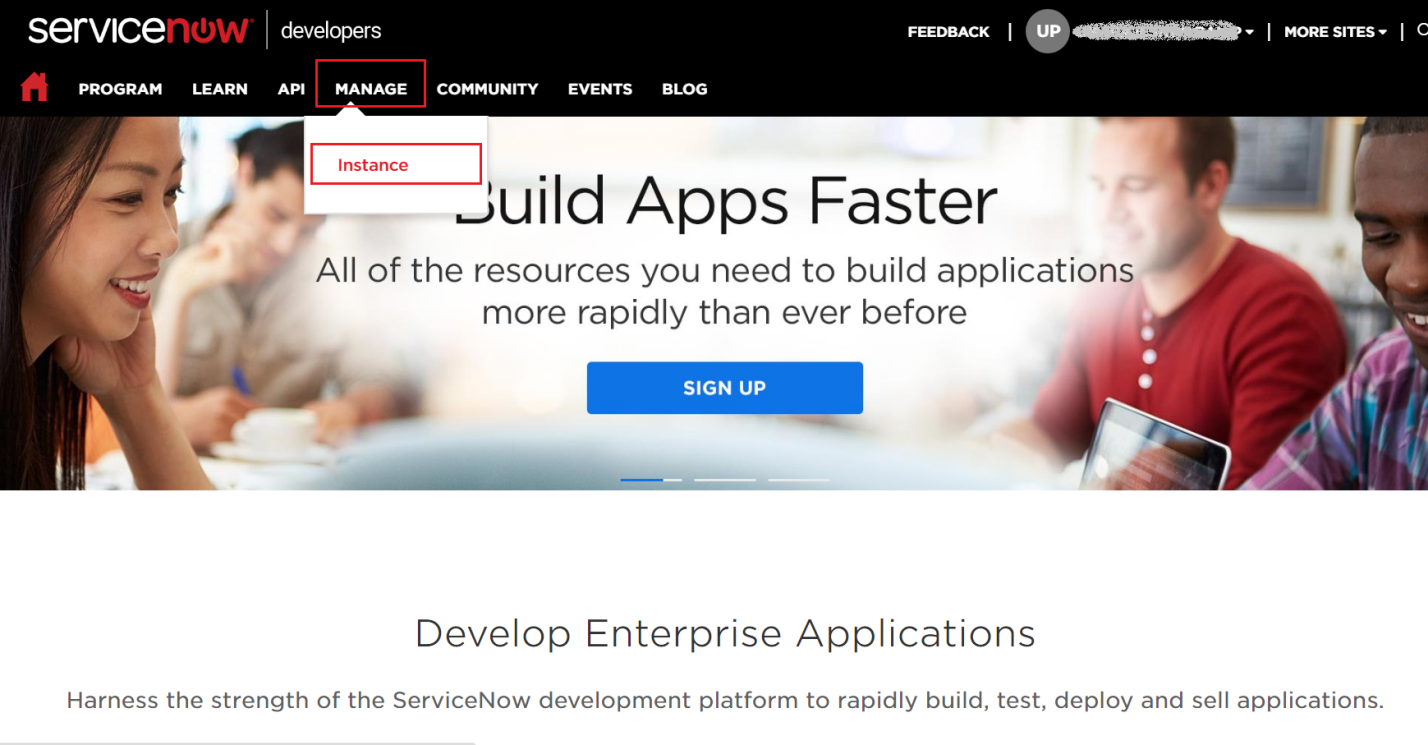
  2. Navigate to Manage → Instance.

    Screenshot
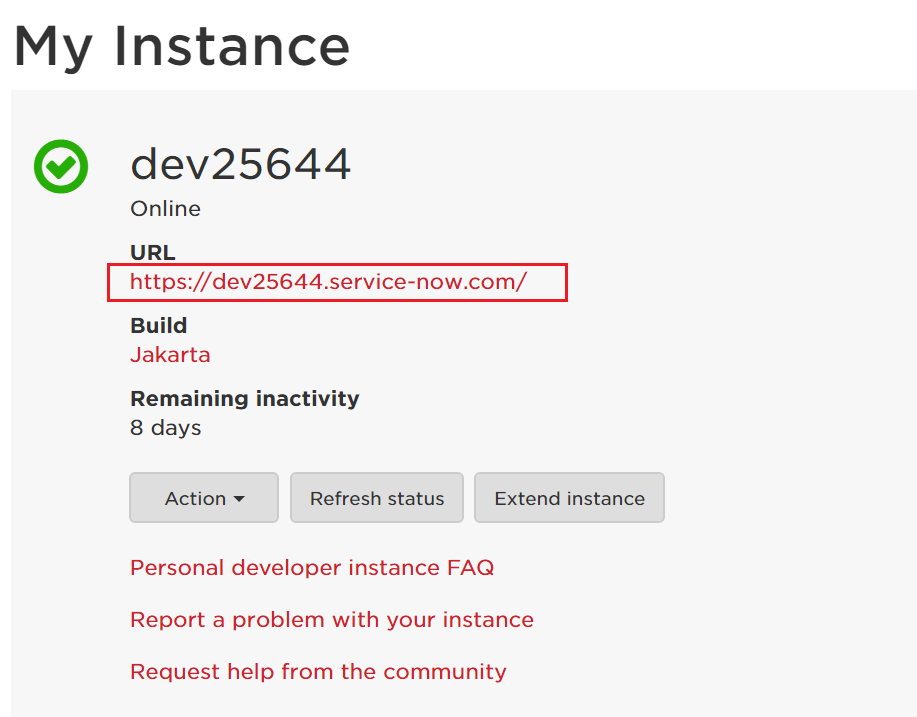
  3. In the My Instance page, click on the instance URL. Also, note down this value. We will need it while configuring ServiceNow with ADSelfService Plus.

    Screenshot
  4. In the left pane, navigate to Multi-Provider SSO → Identity Providers and then click New.
    Note: If Multi-Provider SSO plugin is activated in your instance, Please follow this
    steps
    Screenshot
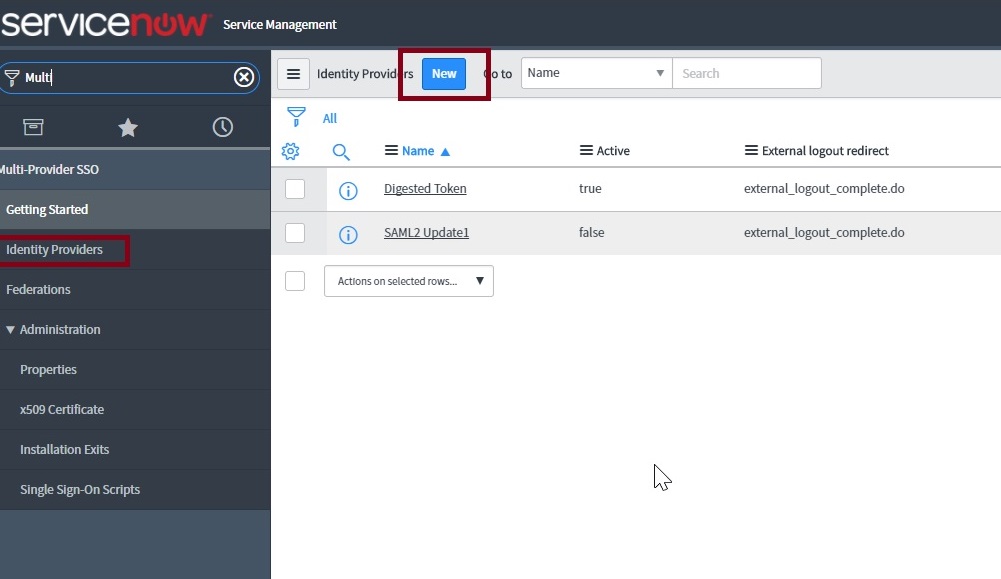
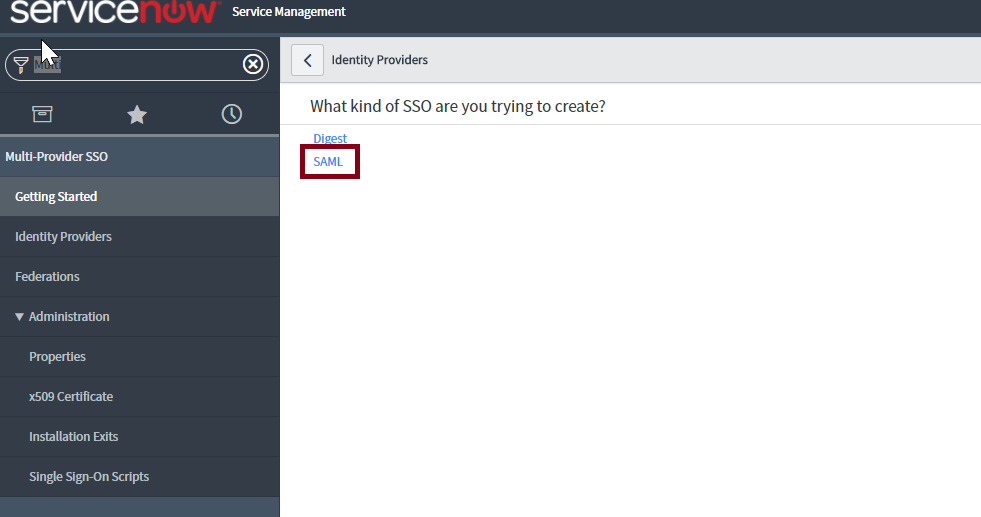
  5. In the What kind of SSO are you trying to create? section, select SAML

    Screenshot
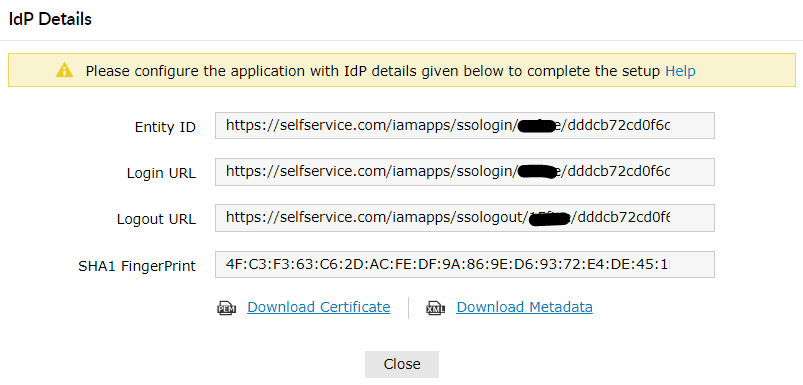
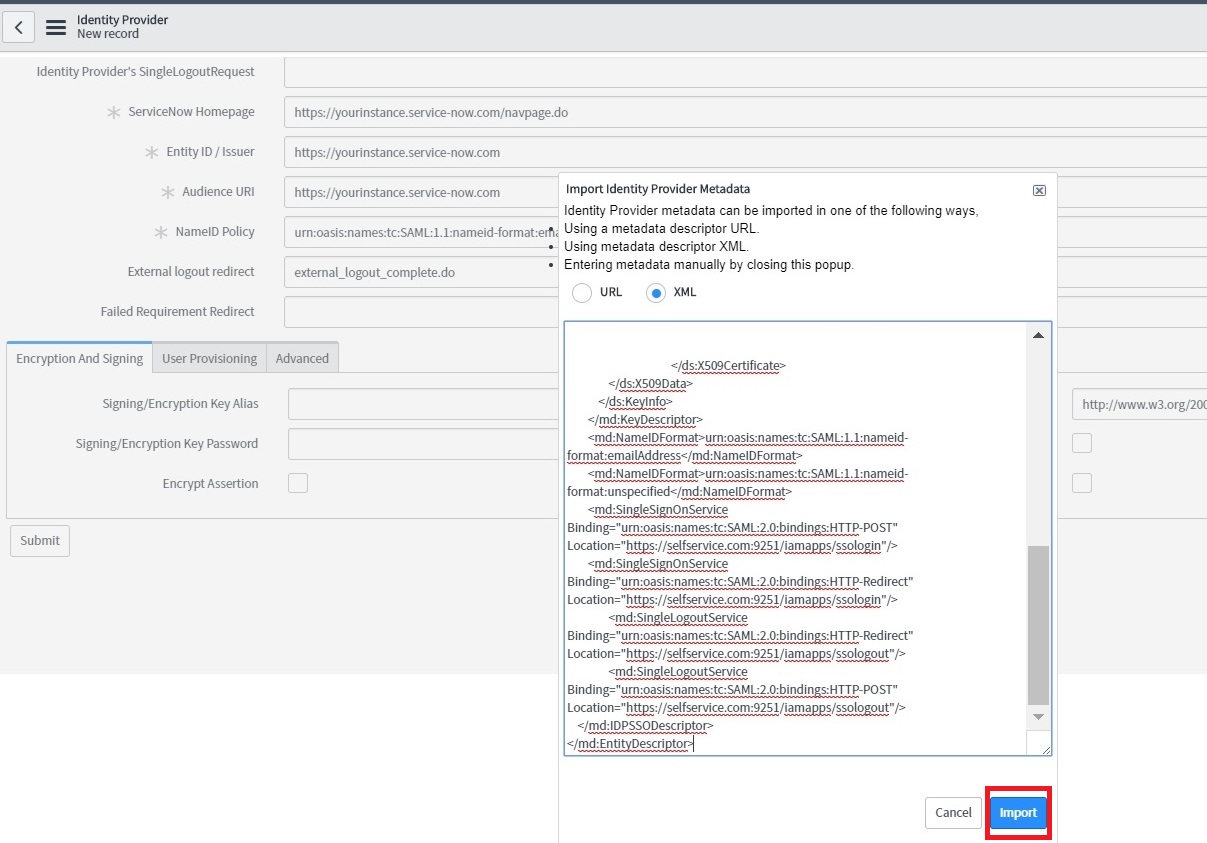
  6. In the Import Identity Provider Metadata pop up that appears, select XML and paste the XML file content you had copied in Step 4 of Prerequisite.
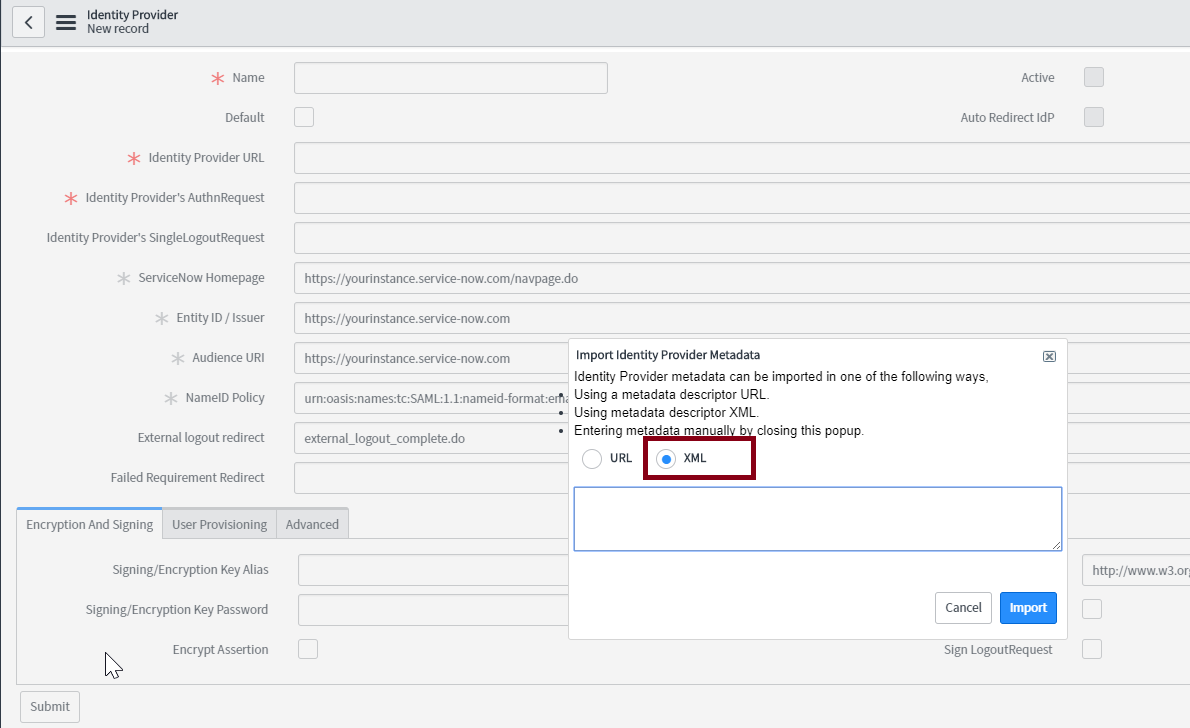
    Screenshot
  7. Click Import.

    Screenshot
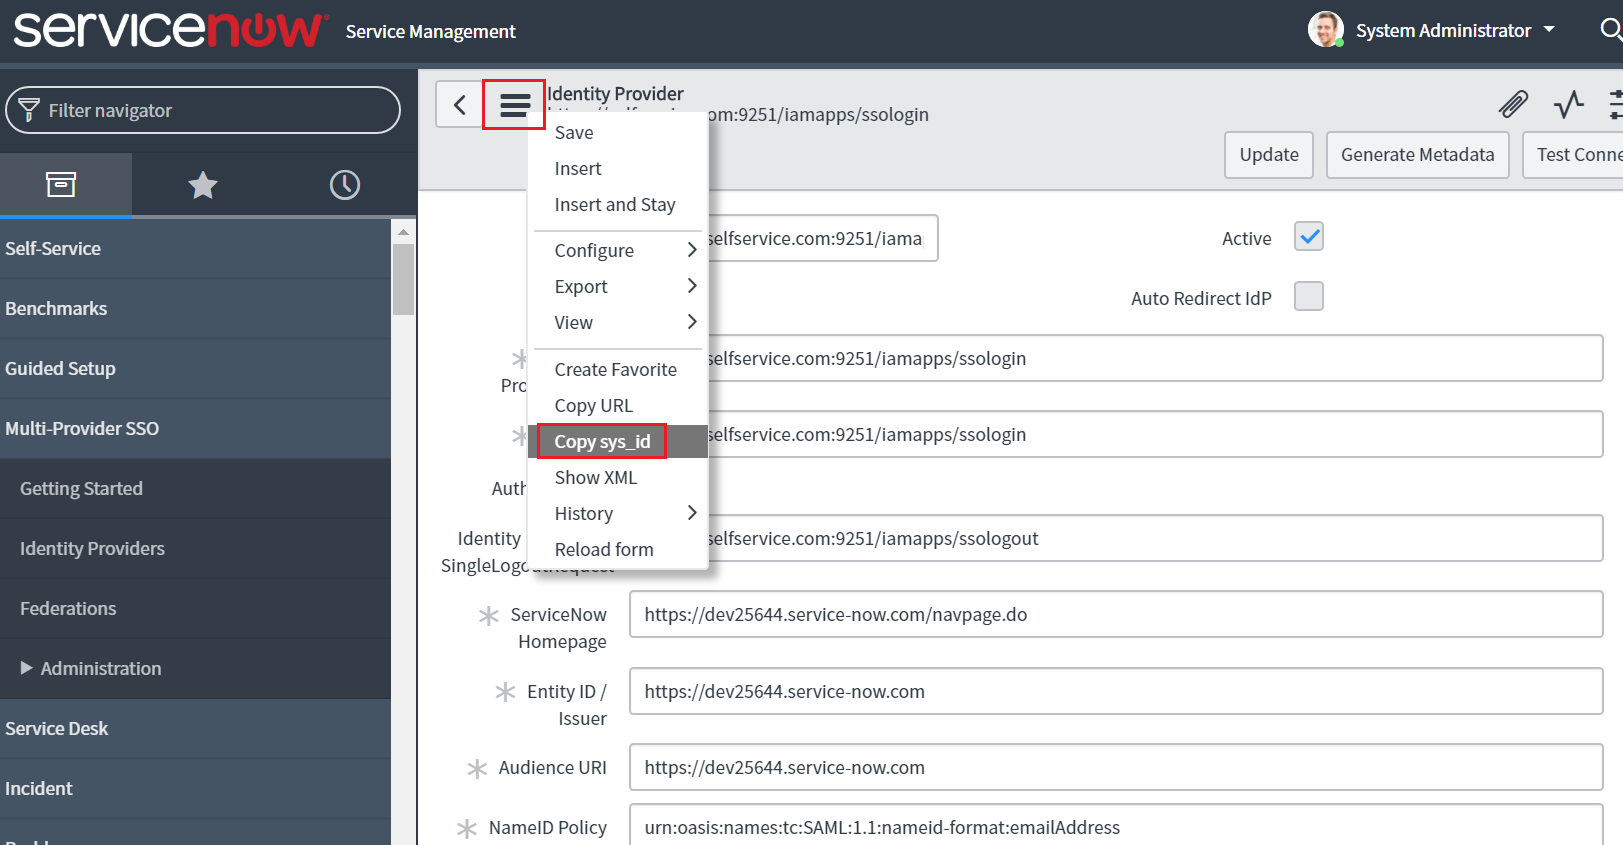
  8. All the required fields will be auto-filled. Scroll down and click Advanced tab. Make sure in the User Field, the value “email” is entered.

    Screenshot
  9. Click Test Connection. You will be asked to log in to ADSelfService Plus.
  10. Once the connection is successful, click Activate.
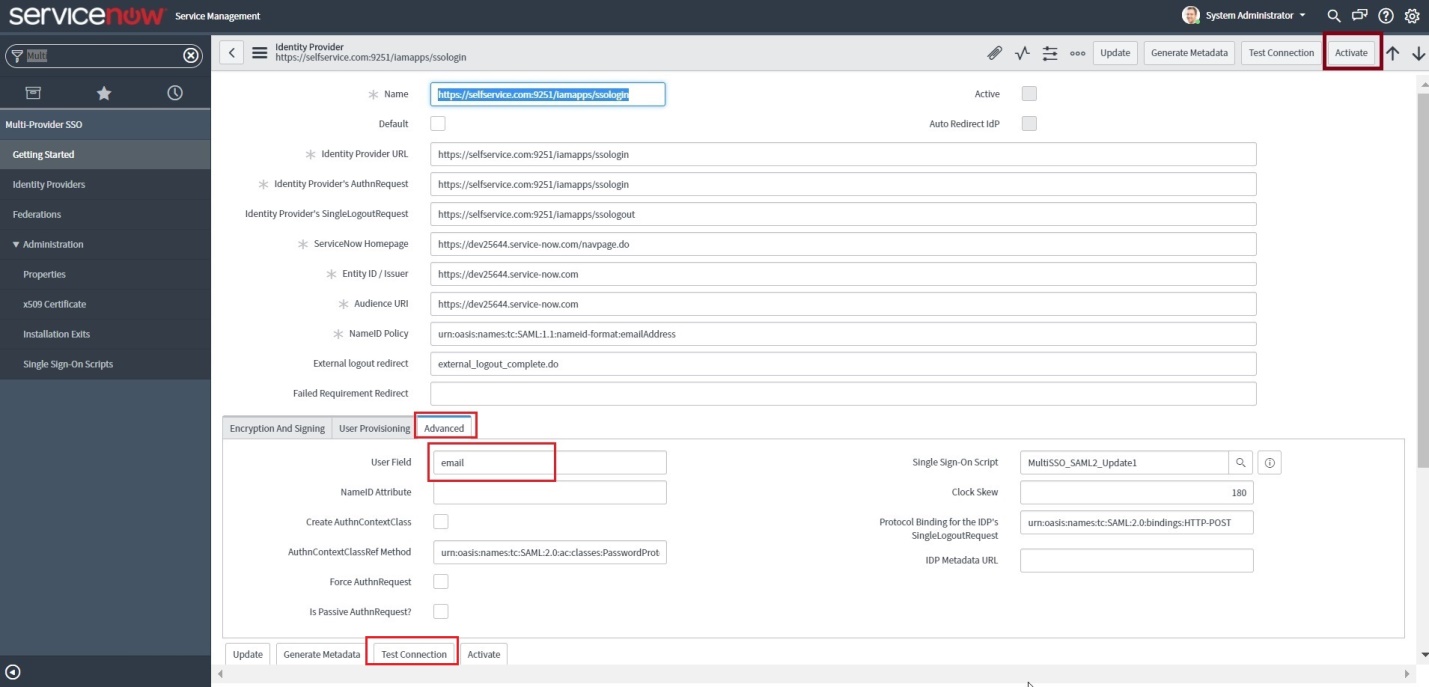
  11. Now click on the Additional Actions icon at the topnear the identity provider and select Copy sys_id. Paste the value in a note and keep it safe.

    Screenshot
  12. In the left pane, navigate to Multi-Provider SSO → Administration → Properties.
  13. Make sure that Enable multiple provider SSO in enabled.
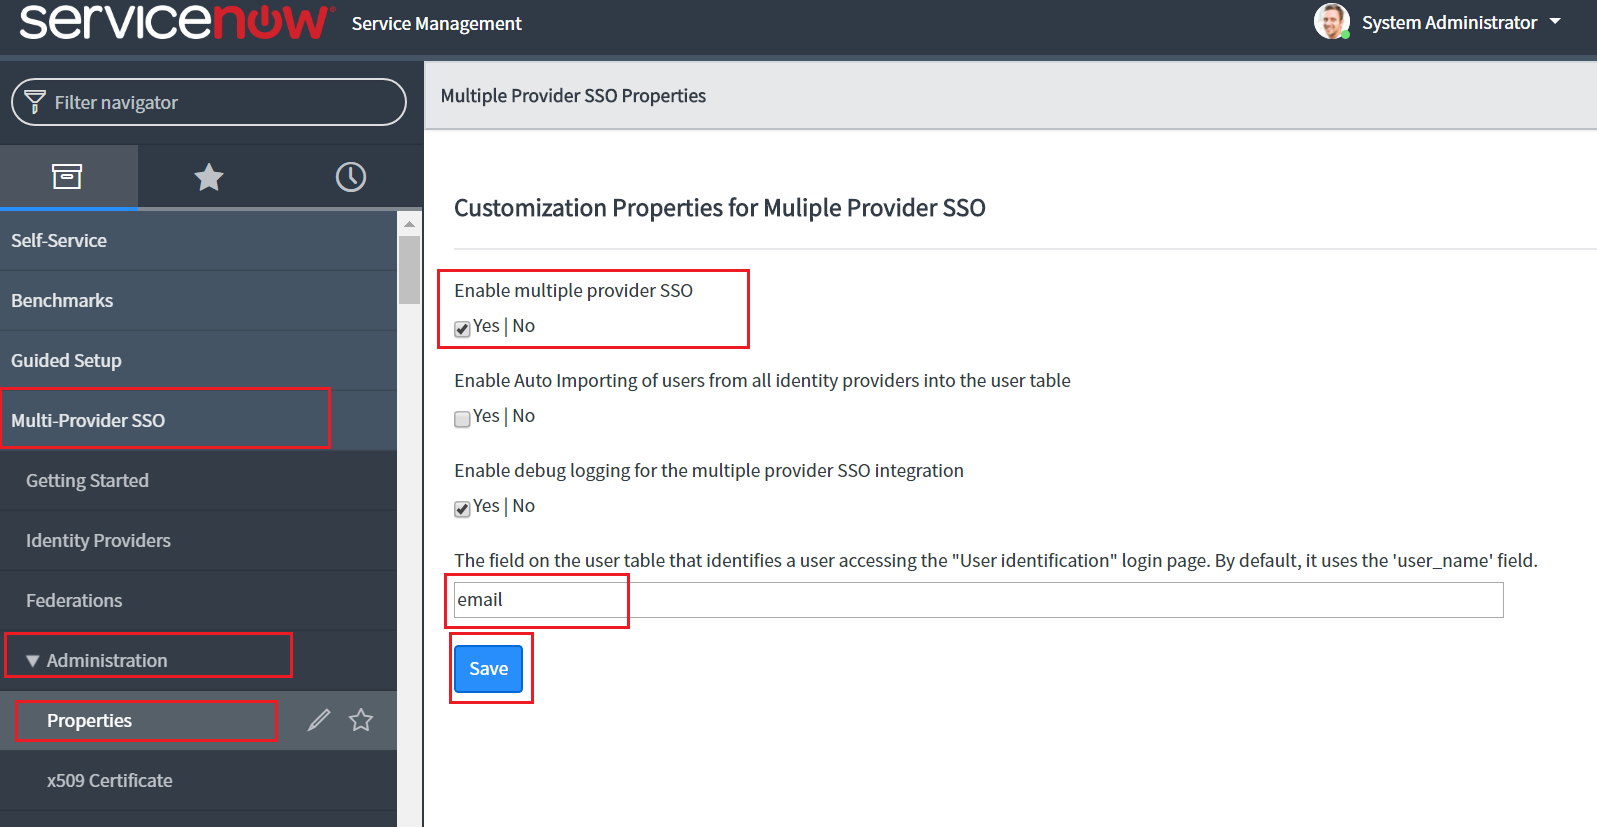
  14. In the field for user identification, change ‘user_name’ to email as the value.

    Screenshot
  15. Click Save.
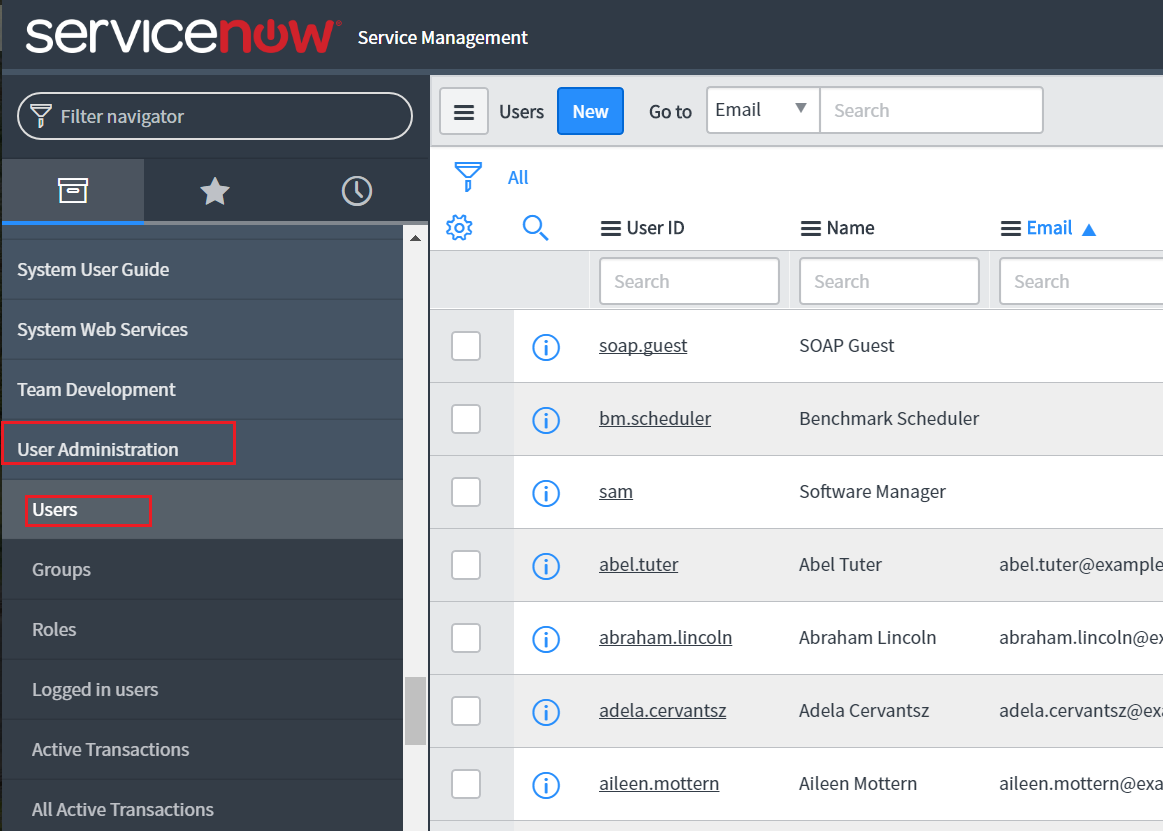
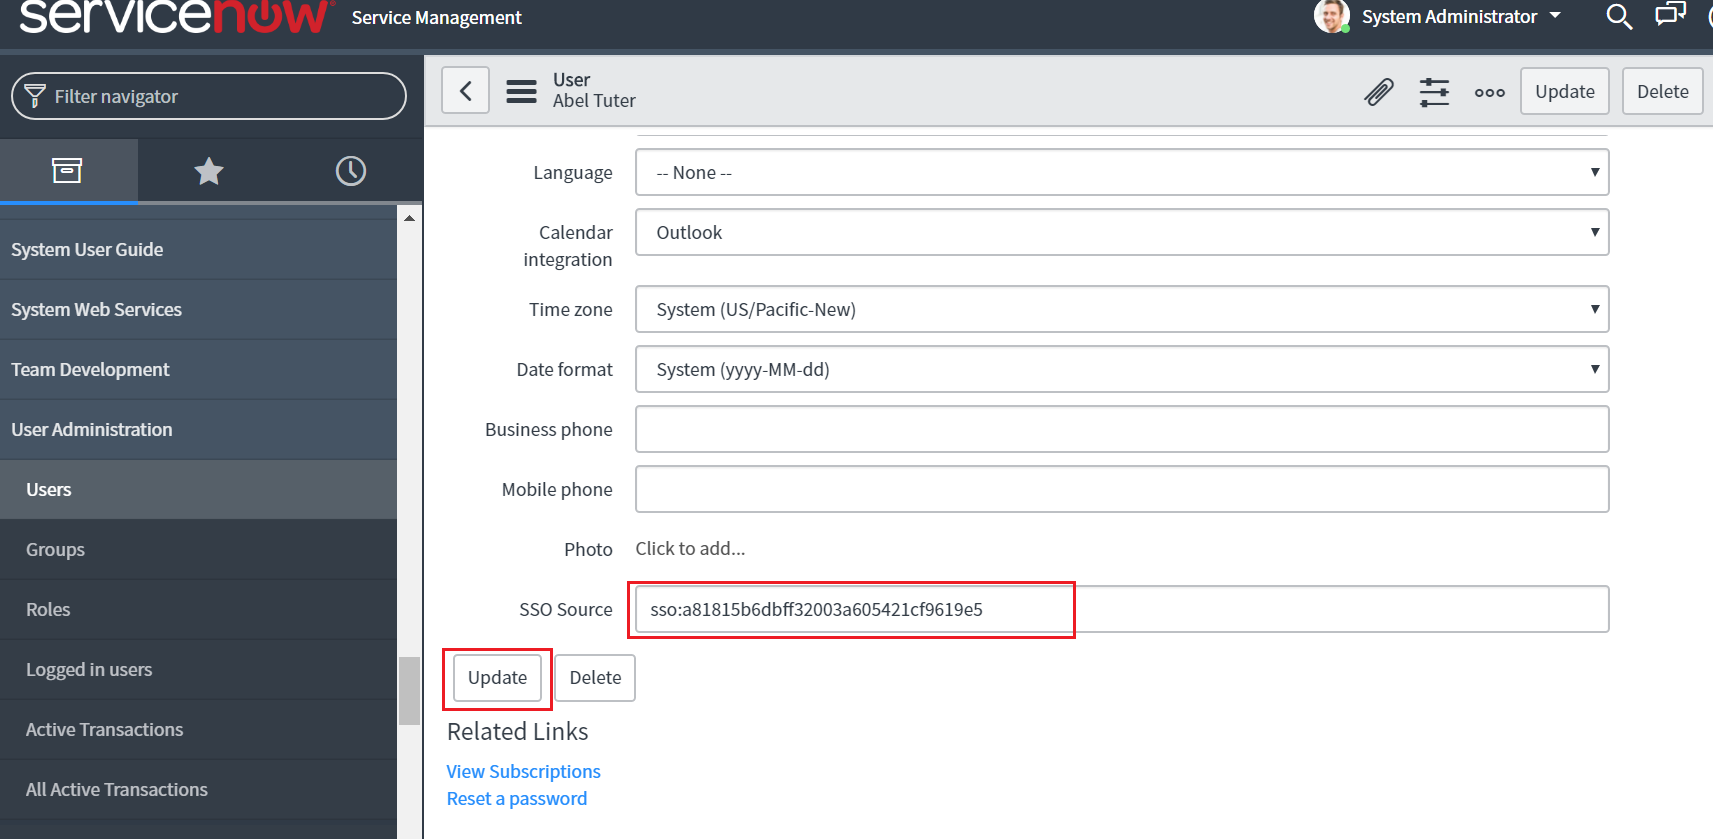
  16. In the left pane, navigate to User Administration → Users.

    Screenshot
  17. Select a user for whom you want to enable SSO and click his/her username.
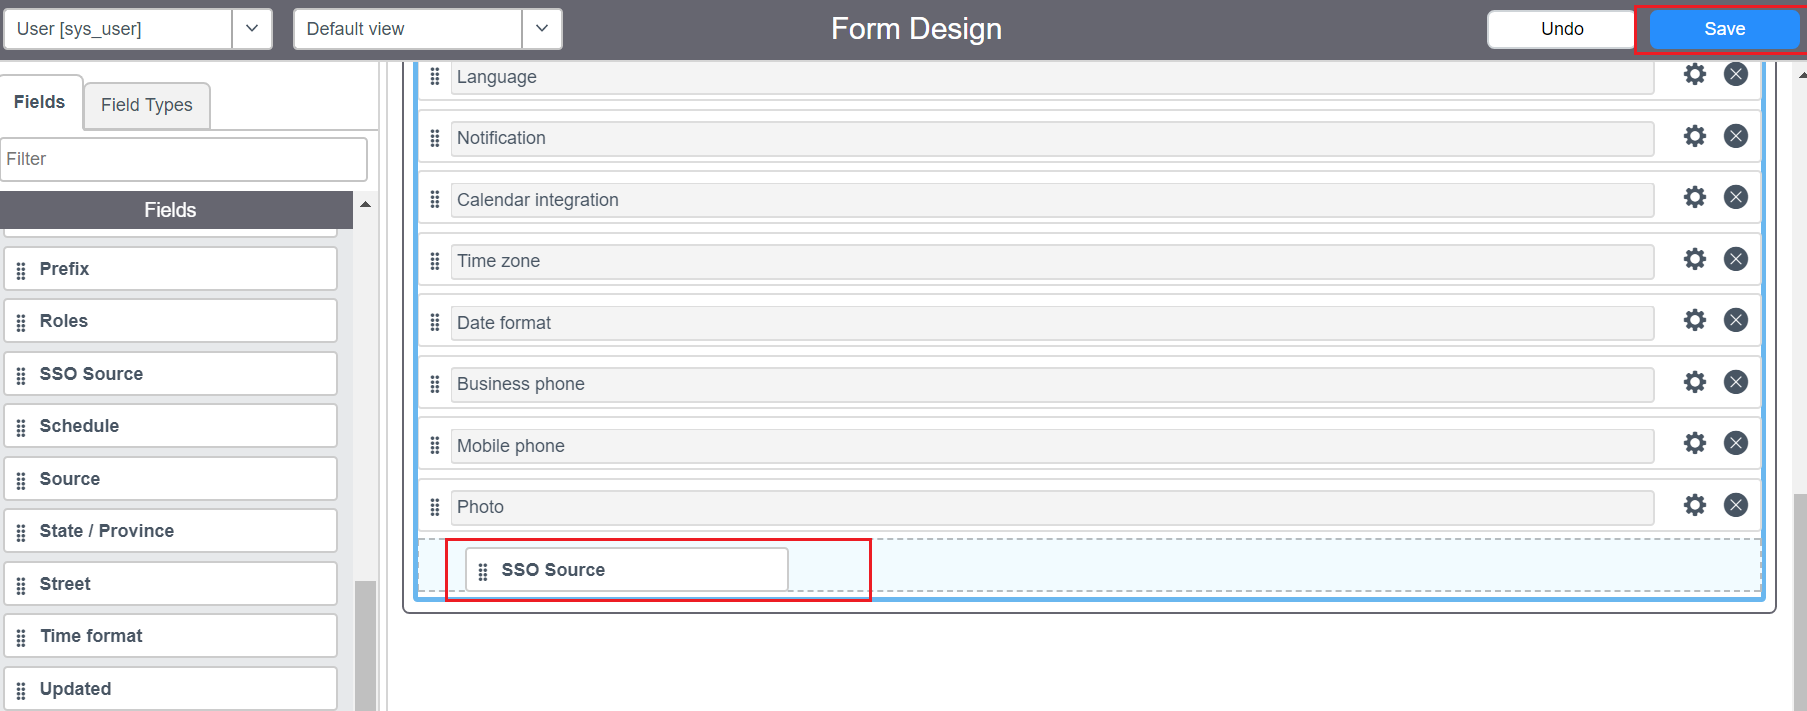
  18. Now click the Additional Actions icon and select Configure → Form Design.

    Screenshot
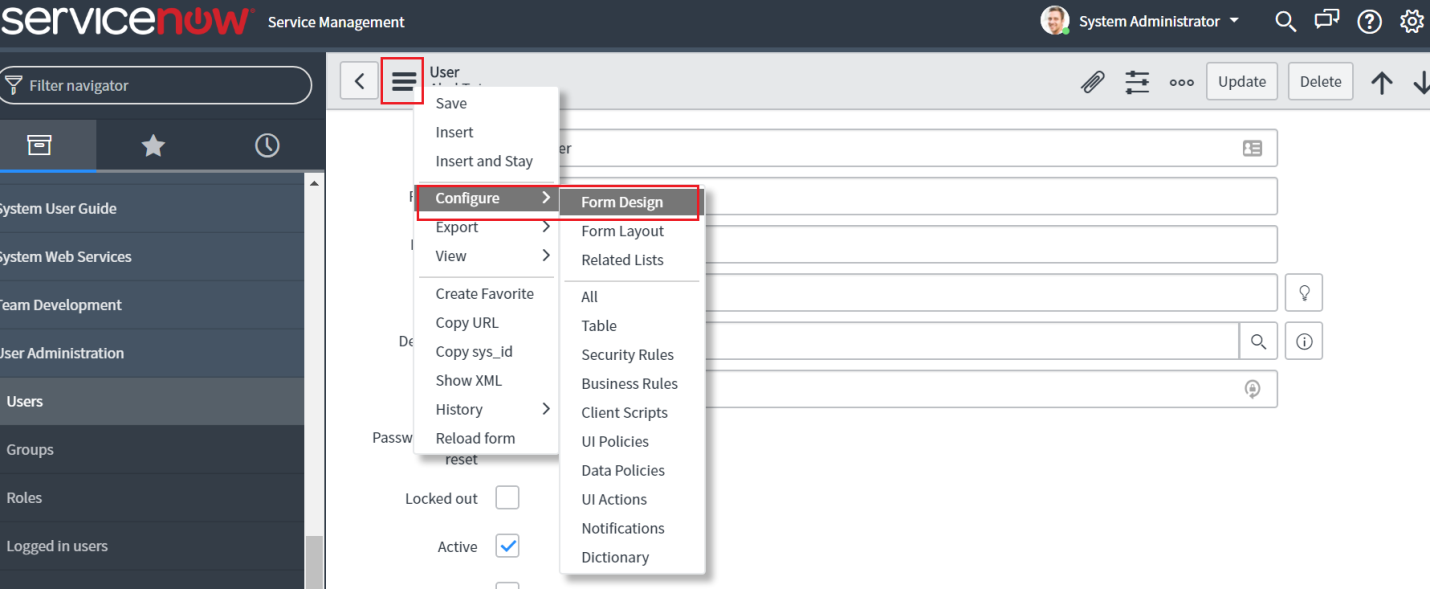
  19. Drag and drop the SSO source field from the left pane into the user’s form and click Save.

    Screenshot
  20. Close the form design tab and go back to the user configuration page. You can notice the SSO source field added to the user’s form
  21. In the SSO source field, paste the sys_id you had copied in Step 11. Append “sso:” before the sys_id value.

    Screenshot
  22. Click Update.
  23. Repeat steps 17-22 for other users to whom you want to enable SSO.

ADSelfService Plus (Identity Provider) configuration steps

  1. Now, switch to ADSelfService Plus’ ServiceNow configuration page.
  2. Enter the Application Name and Description.
  3. In the Assign Policies field, select the policies for which SSO need to be enabled.
    Note:ADSelfService Plus allows you to create OU and group-based policies for your AD domains. To create a policy, go to Configuration → Self-Service → Policy Configuration → Add New Policy.
  4. Select Enable Single Sign-On.
  5. In the Domain Name field, enter the domain name of your email address. For example, if you use johndoe@thinktodaytech.com to log in to ServiceNow, then thinktodaytech.com is the domain name.
  6. In the SAML Redirect URL field, enter the value you copied in Step 3 of ServiceNow configuration.
  7. Enter the Assertion Consumer Service URL provided by your application service provider in the Assertion Consumer Service URL field. If required, click the + button next to the text field to add multiple Assertion Consumer URLs. These values can be found in the application's SSO configuration page or metadata. Please reach out to your application's support team if you are having trouble locating the Assertion Consumer Service URL in your application's user interface or metadata.
  8. In the Name ID Format field, choose the format for the user login attribute value specific to the application.
  9. Note: Use Unspecified as the default option if you are unsure about the format of the login attribute value used by the application

  10. Click Add Application
  11. Your users should now be able to sign in to ServiceNow through ADSelfService Plus.

    Note: For ServiceNow, both SP and IDP initiated flows are supported.
Go to Top

Thanks!

Your request has been submitted to the ADSelfService Plus technical support team. Our technical support people will assist you at the earliest.


Need technical assistance?

  • Enter your email ID
  • Talk to experts
  •  
     
  •  
  • By clicking 'Talk to experts' you agree to processing of personal data according to the Privacy Policy.

Don't see what you're looking for?

  •  

    Visit our community

    Post your questions in the forum.

     
  •  

    Request additional resources

    Send us your requirements.

     
  •  

    Need implementation assistance?

    Try OnboardPro


Copyright © 2025, ZOHO Corp. All Rights Reserved.