
Configuring WorkLog - Additional Fields
Sometimes you may want to capture some additional details about an organization, for which, you need additional fields apart from the default fields in the New WorkLog form. You can add your own fields using the Additional Fields configuration.
-
Log in to the ServiceDesk Plus - MSP application using the user name and password of an admin user.
-
Click the Admin tab in the header pane.
-
In the Helpdesk block, click the HelpDesk Customizer icon
 . The next page displays the list of request form attributes that can be customized on the left menu and the category list page.
 -
Click WorkLog - Additional Fields from the left menu. The next page is a form that allows you to add the field labels and description of the field. You can add three types of fields in the form: text, numeric, and date/time. These three fields are available in three tabs as shown below:
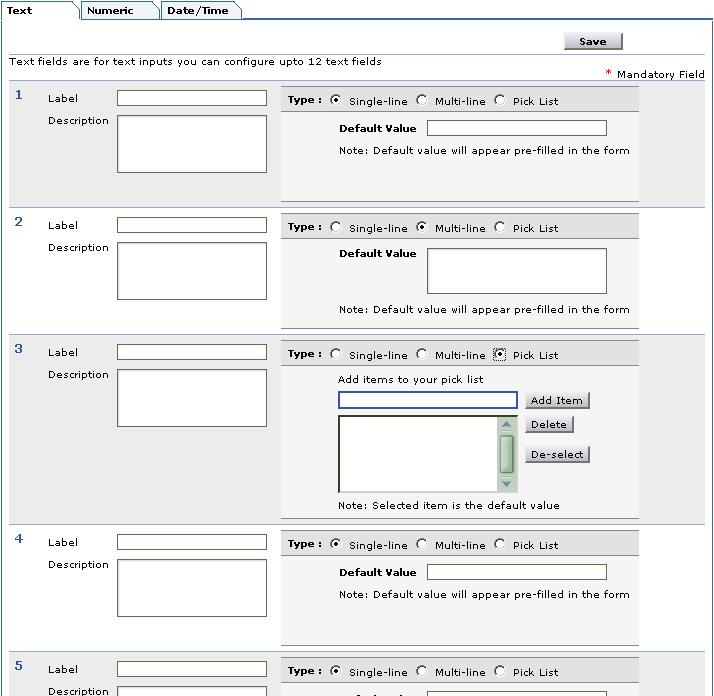
The default tab selected is Text. -
To add the text fields, enter the label name in the form fields below the Label heading. If required, enter the description for the field.
-
You can choose the type of text field that you wish to add by selecting the radio buttons. A Single-line text field allows you to add just a text field. The Multi-line text field allows you to add a text box where a lengthy description can be added. A Pick List allows you to add a list menu from which you can select. In all the three cases, you can add default values for the text field in the space provided for the same.
-
To add items for the pick list, enter the value in the text filed and click Add Item. The value will get added to the list below. To select the default selected value of the list, click on the value in the list.
-
To add numeric fields, click the Numeric tab and then enter the label name in the form fields provided.
-
To add Date/Time fields, click the Date/Time tab and enter the required details.
-
Click Save. A message is displayed saying that the additional field is successfully created.
The new custom fields that you have added will appear in the New WorkLog form under the Additional Request Details block.
To delete the user-defined fields, follow the above steps till the 4th step. Then, delete the label names you wish to remove and the default entries made for them, and click Save. The respective fields that you deleted will be removed from the New WorkLog form.