
Configuring MSP Requesters
You can add, edit, or remove requesters from ServiceDesk Plus - MSP application and also provide them with login permissions to access the self-service portal.
To open the requester configuration page:
-
Log in to the ServiceDesk Plus - MSP application with the user name and password of a ServiceDesk Plus - MSP administrator.
-
Click the Admin tab in the header pane.
-
On the MSP Details block, click Organization Details
 icon.
icon. -
Click on 'MSP Requesters' from the menu on the left side to open the MSP Requesters page
Add Requester
To add a requester and provide login access to him/her,
-
Click Add New Requester link available at the top right corner of the Requester List page. This opens the Add Requester form
-
In the Personal Details block, enter the Full Name and Employee ID of the technician. The name is a mandatory field. Specify any relevant information about the requester in the Description text field.
-
In the contact information block, enter a valid e-mail ID. If the requester has a phone and a mobile number, you can enter the same in the space provided for entering these values.
-
Specify the department details such as, Site and the corresponding Department Name to which the requester belongs from the combo box. The requester has an option to view, only his requests, all his department requests, all the requests in the site to which he is associated or all requests from the account to which he is associated, select the corresponding option from the Requester allowed to view combo box.Specify the Job Title of the requester in the field provided.
-
If you have added any organization-specific fields for the new requester form, those will be available under the Additional Requester Details block. Enter the relevant information.
-
In the Self-Service Access Details block, enter the Login Name and Password, if you wish to provide self-service access to the requester. Enter the password again in the Re-type Password field.
-
If the requester is associated to a domain then select the Domain from the drop down list.
-
Certain requesters can also approve purchase order in an organization. Upon enabling the check box adjacent to Purchase Order Approvers, a link is sent to the requester to accept or reject the PO.
-
Click Save. If you want to add more than one requester then, click Save and add new button.
At any point if, you decide not to add the new requester, then click Cancel to get back to the requester list. Clicking the View List link on the top right corner of the add requester form will also take you to the requester list view.
Import Requesters from Active Directory
You can also import requesters from an active directory. To import requesters from active directory
-
Click Import from Active Directory link in the Requester List page. The Import From Active Directory window pops up.
-
From the list of domains that are listed in the Domain Name combo box, select the domain name in which the active directory from which you wish to import is installed. If the other details such as domain controller name, user name, and password have already been entered in the Domain scan page, then that will be populated automatically. Else enter the name of the domain controller in the Domain Controller Name field, login name and password in the corresponding fields.
-
Select the Fields for Import from the active directory by enabling the check box.
-
Click Import Now !. The import wizard displays the various Organizational Units (OUs) available in that domain. Choose the specific OU from which you wish to import users by selecting the check box beside it.
-
Click Start Importing. Once the import is complete, the data on how many records were added, how many overwritten, and how many failed to import will be displayed.
Import Requester from CSV (Comma Separated Value) Files
You can also add requesters by importing from CSV files. To import requesters from CSV file
Step 1: Locate the CSV file
-
Click Import from CSV link in the Requester List page. The Import Wizard opens in a pop-up window.
-
Click the Browse button in the wizard.
-
Select the CSV file in the file chooser window and click Open.
-
Click Next.
Step 2: Customize Mapping
-
The CSV column names are populated in the select boxes beside each label. Map the ServiceDesk Plus - MSP requester fields with the field names from the CSV file.
-
Click Next.
Step 3: Import
-
Click Import Now button. The values from the CSV file will be imported to the requester details. Once the import is complete, the data on how many records were added, how many overwritten, and how many failed to import.
If at any point you wish to stop importing from the CSV file, click the Exit button.
|
|
Note 1: Login name column will be the identifier for requesters. No two requesters can have the same login name. Hence the existence of a requester will be checked based on the login name value. So, if by mistake there was any mismatch of fields during mapping, and a new import of CSV is performed, the records will be updated based on the login name value. If there were any records that did not have any login name at all or there was mismatch in the login name itself, then duplicate entries will be created. In these cases, delete such entries from the requester list and import again or manually edit the information available.
Note 2: While Importing users using CSV, the existing user information is overwritten based on two criteria - Username and Domain, and the Email id. If the Domain is not specified for a user and on performing a new import of CSV, the user information will be overwritten but the Domain will remain null even if the field is specified. |
Edit Requester
To edit the requester details,
-
In the Requester List page, click the edit icon
 beside the requester's full name that you wish to edit. The Edit Requester form is displayed with the existing details of the requester.
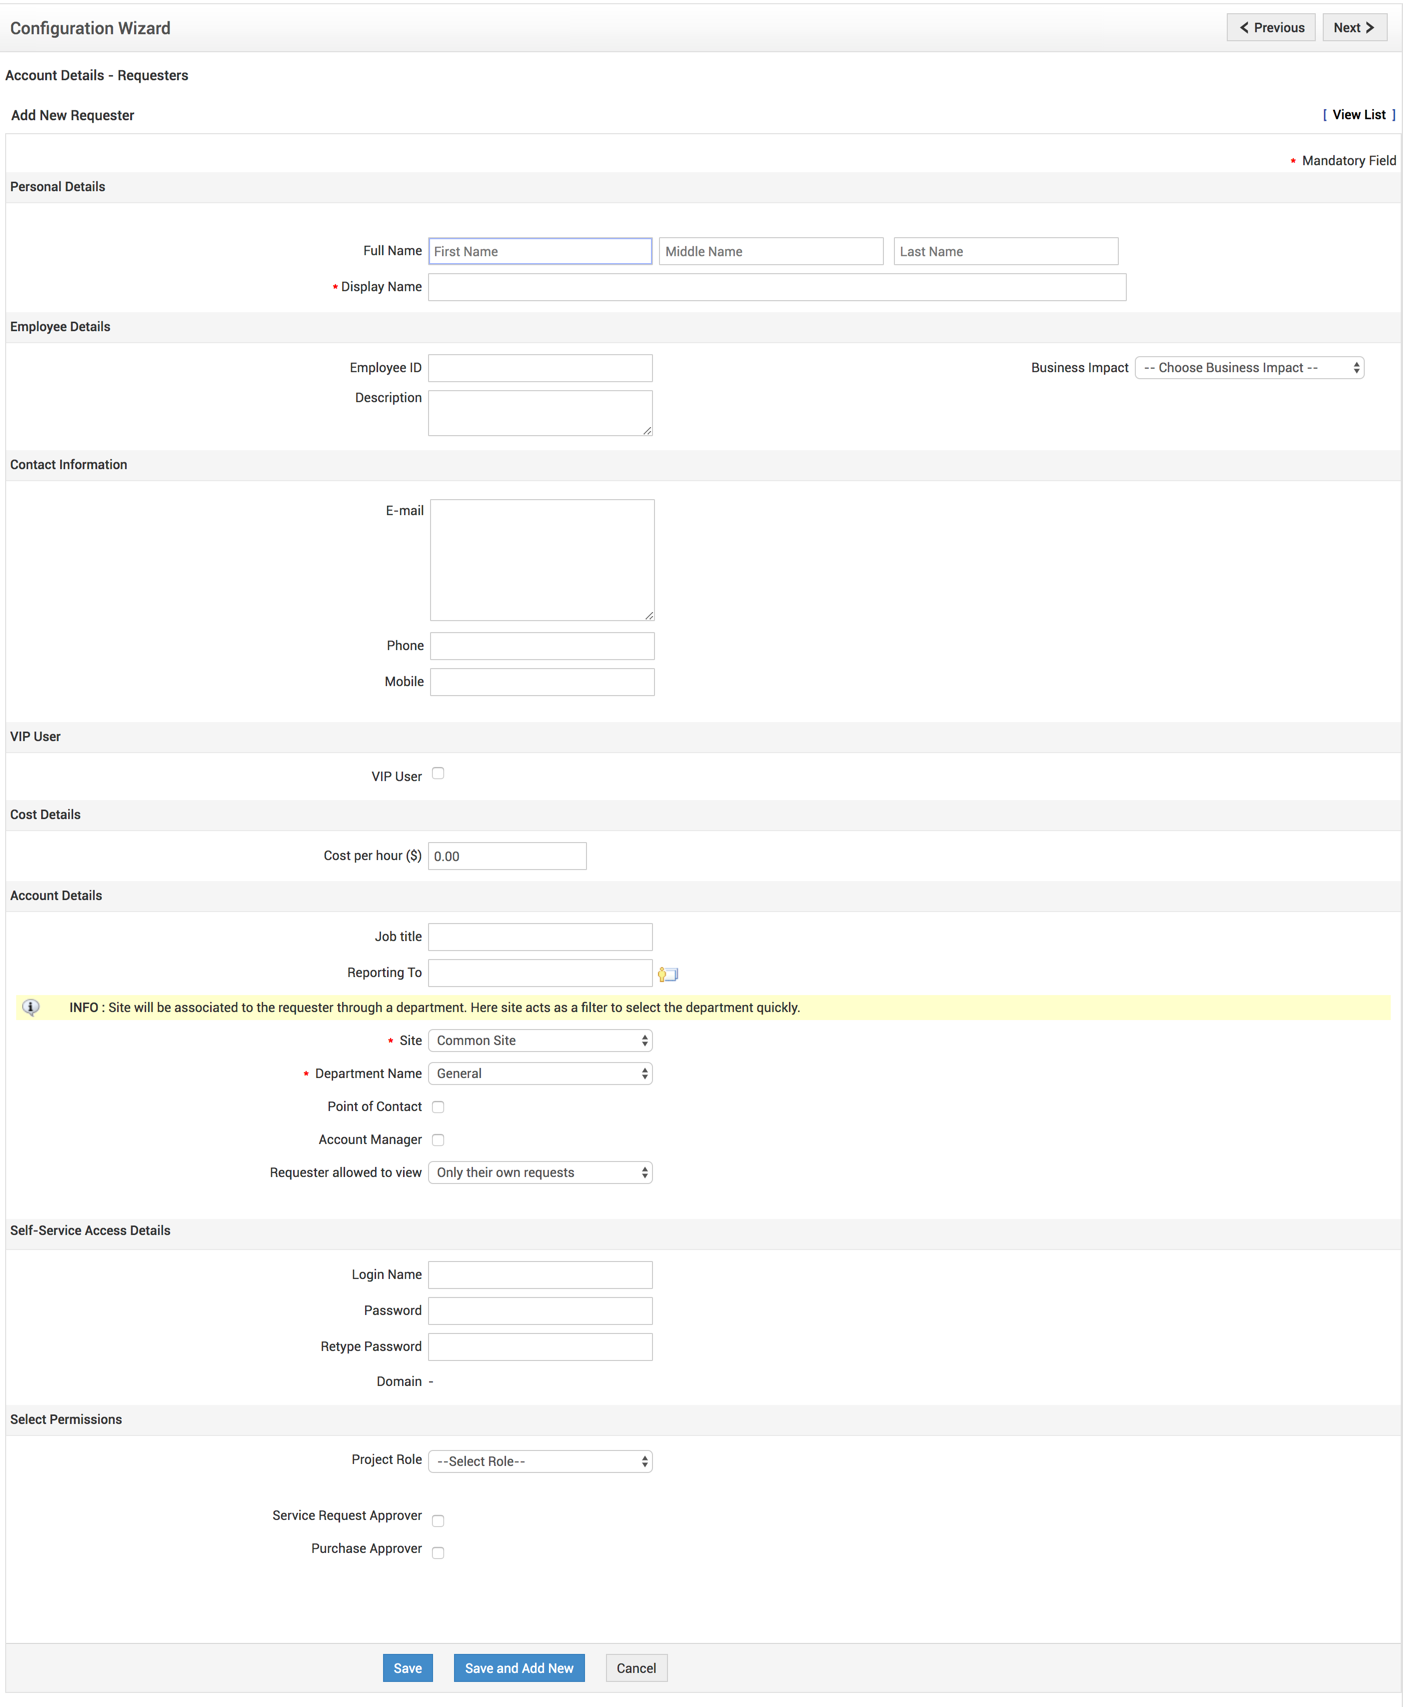
-
In this form, you can modify all the fields displayed. You can also change the login name of the requester.
-
Click Save. If you do not wish to modify any of the details, click Cancel.
You can change the requester's password while editing the requester details.
-
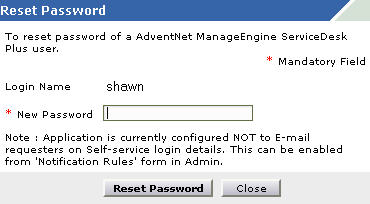
To change the password of the requester, click the Reset Password link. The reset password window is opened.
-
Below the Login Name display, enter the New Password in the text field.
-
Click Reset Password. If you do not wish to change the password, click Close instead of Reset Password.
Change Requester to Technician
You can change a requester to technician without having to delete the requester information and recreate the same as a technician. To change requester to technician,
-
Click the Change as Technician option available at the top left corner of the edit requester form. The page refreshes to display the edit technician form.
-
Change the roles assigned to the requester from SDGuest to any other role that you wish to provide the technician.
-
Enter any other details that you wish to enter including the Cost per hour and so on.
-
Click Save. If you do not wish to change the requester to technician, click Cancel instead of Save.
If you want to continue adding technician after converting a requester to technician, then instead of clicking Save, click Save and add new button. This saves the technician details and reopens the add technician form after displaying a success message for changing the requester to technician.
Associate Workstation to Requester
You can also associate a workstation with the requester. To associate a workstation with the requester
-
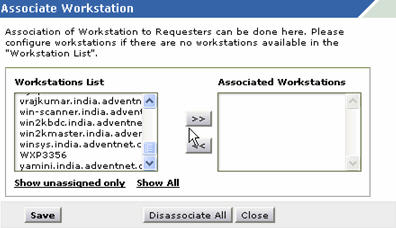
Click the Associate Workstation link available at the top right corner of the edit requester form. The associate workstation window is opened.
-
In the Associate Workstation pop-up, select the workstations that you wish to associate with the requester from the Workstation List and move them to the Associated Workstations list by clicking the >> button. To dissociate workstations, select the respective workstations in the Associated Workstations list and click the << button. If you wish to dissociate all the workstations, then click Dissociate All.
-
After associating the required workstations, click Save Changes.
-
A message is displayed. Click the Close button.
-
In the Requester List page, click the delete icon
 beside the requester's full name that you wish to delete. A confirmation dialog is opened.
 -
Click OK to proceed with the deletion. If you do not want to delete the requester, then click Cancel.
To search requesters
-
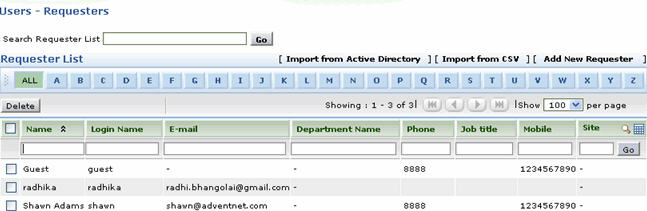
In requestr list view, click on the alphabet with which the name of the requester starts. This lists the requesters whose name starts with that alphabet.
-
If you are unsure of the starting letter, then you can type the name (first name or the last name, which ever you know) or email ID or any other parameter that will identify the requester in the field beside the Search Requester List. This lists the requesters whose details matches the search string that you entered.
You can also search requesters from the Search available on the left menu in the other pages of the application. From the Search in combo box, select Requesters and type your search string in the Enter Keyword text field. Click Go or press Enter. The requester names that match the search string are listed in a separate pop-up window.
Another option to search requesters will be using the column-wise search option. To perform a column-wise search
-
Click the search icon
 at the end of the requester list view headers. This opens the search field just below every column that is visible in the list view.
 -
Enter the search key in field under the column of your choice.
-
Click Go. The search results matching the search string(s) are displayed.
Requester List View Customization
To customize the requester list view
-
Click the column edit icon
 available at the corner of the requester list headers. This opens the available columns that can be displayed in the list view. All those that are visible currently, will have the check box beside them selected.
 -
To remove a column, disable the check box beside the column name.
-
To add a column to the list view, enable the check box beside the column name.
-
To change the column order, click the up and down arrow after selecting the column that you wish to move.
-
Click Save.
This will add only those columns which you have chosen in the list view. You can also sort the list view based on columns. To sort requester list by column, click the column header. Clicking it once will sort it in ascending order. Clicking twice will sort the column in descending order.