Incident Template
Incident Templates make it easy to log new incidents by pre-populating fields automatically.
Incident Requests in ServiceDesk Plus contain various fields, such as Category, Priority, Support/User group, user location, and software version. By configuring incident templates for specific issues, you can make the resolution process quicker and more efficient. The requester can log the incident easily, and the technician will have all the required information to resolve the request.
The SDAdmin can configure templates for incident and service requests.
Configuring Incident Templates
Go to Admin > Templates & Forms > Incident Template (Old UI: Admin > Incident Management > Incident Template).
Click New Template and on the displayed page, fill out the required details.
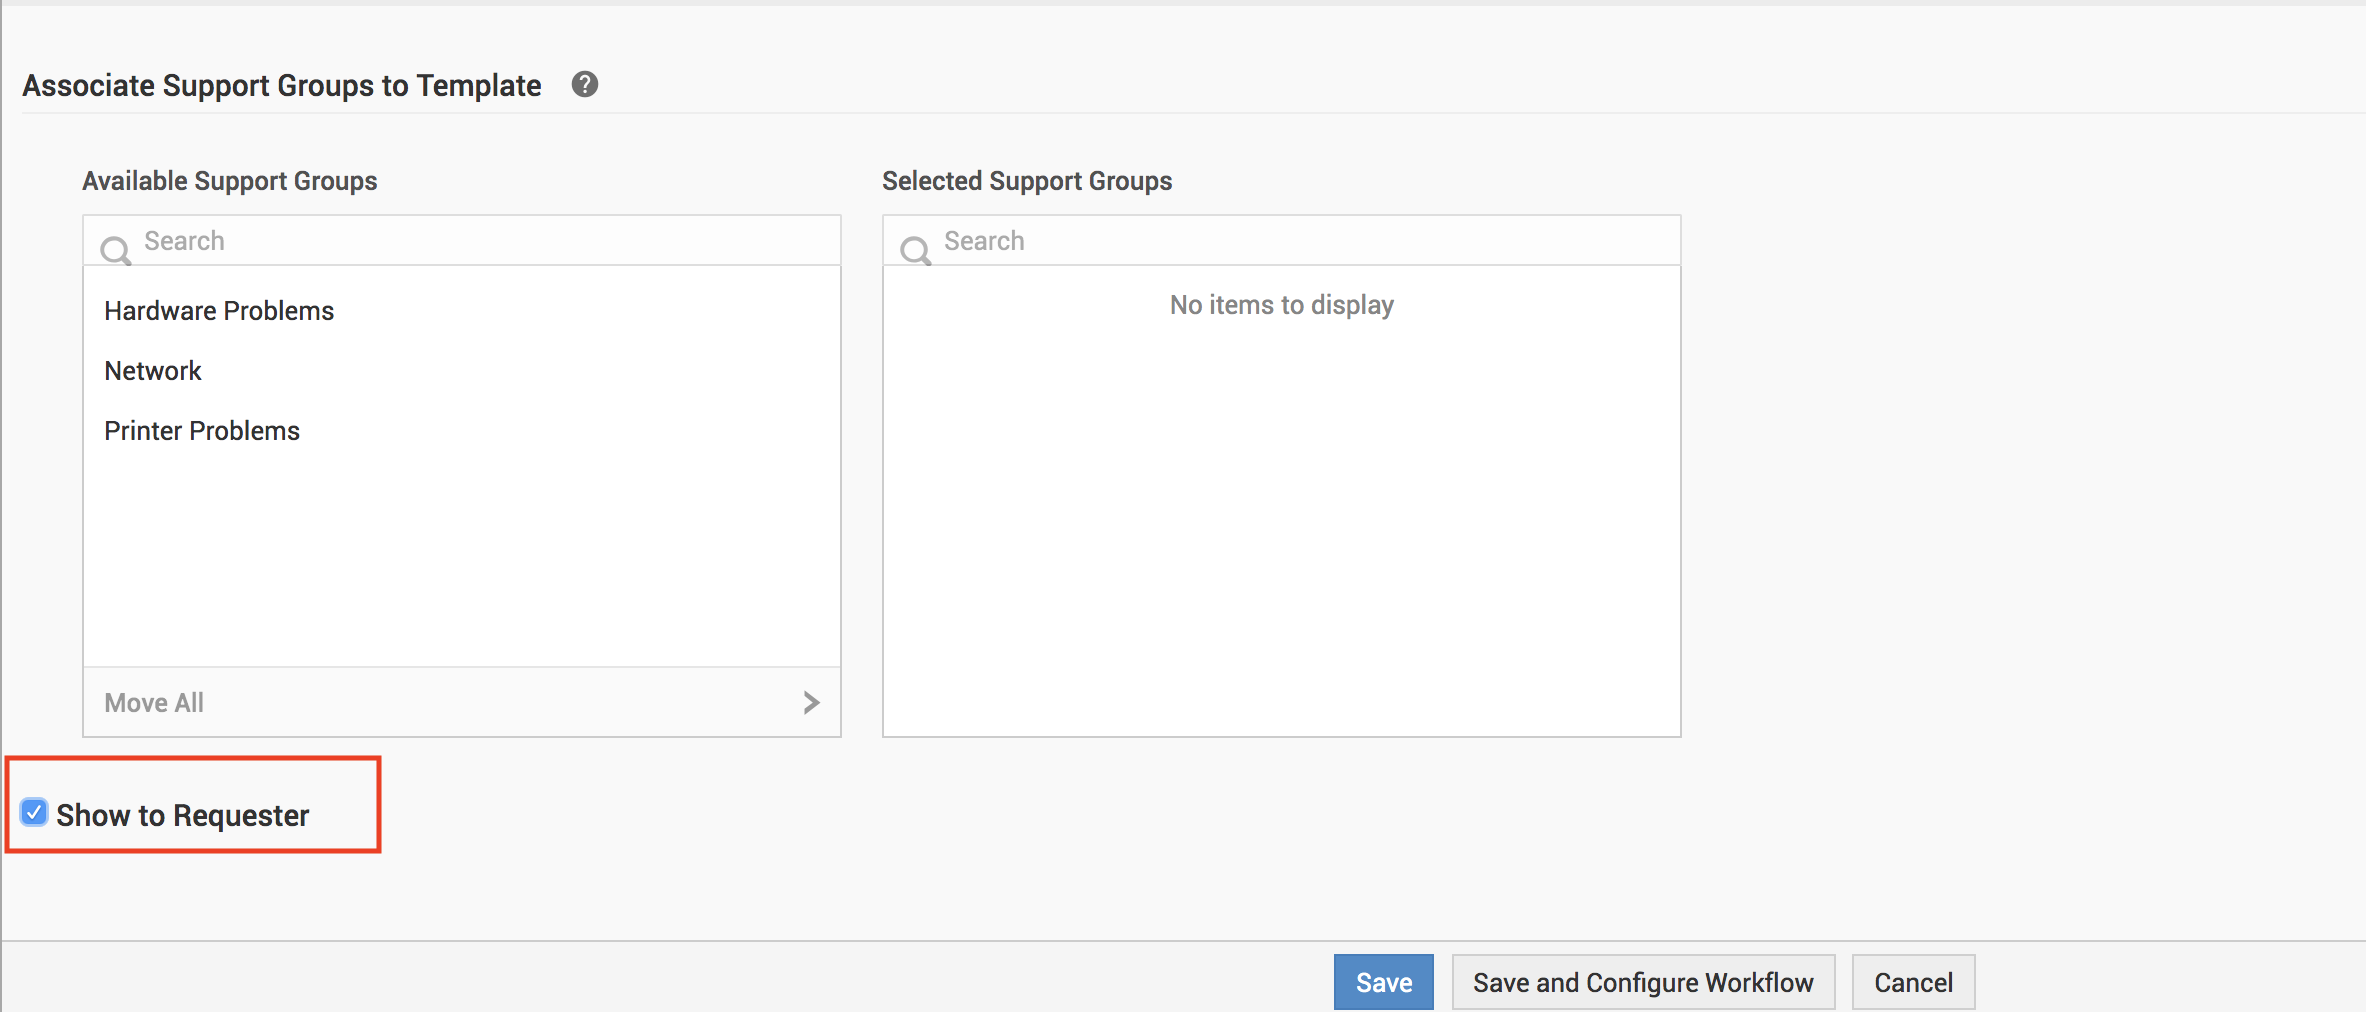
To configure settings for both Technicians and Requesters, scroll down and select the Show to Requester option.
Then, drag to the template canvas the required fields and/or single/double-columned sections from the right panel as shown below:
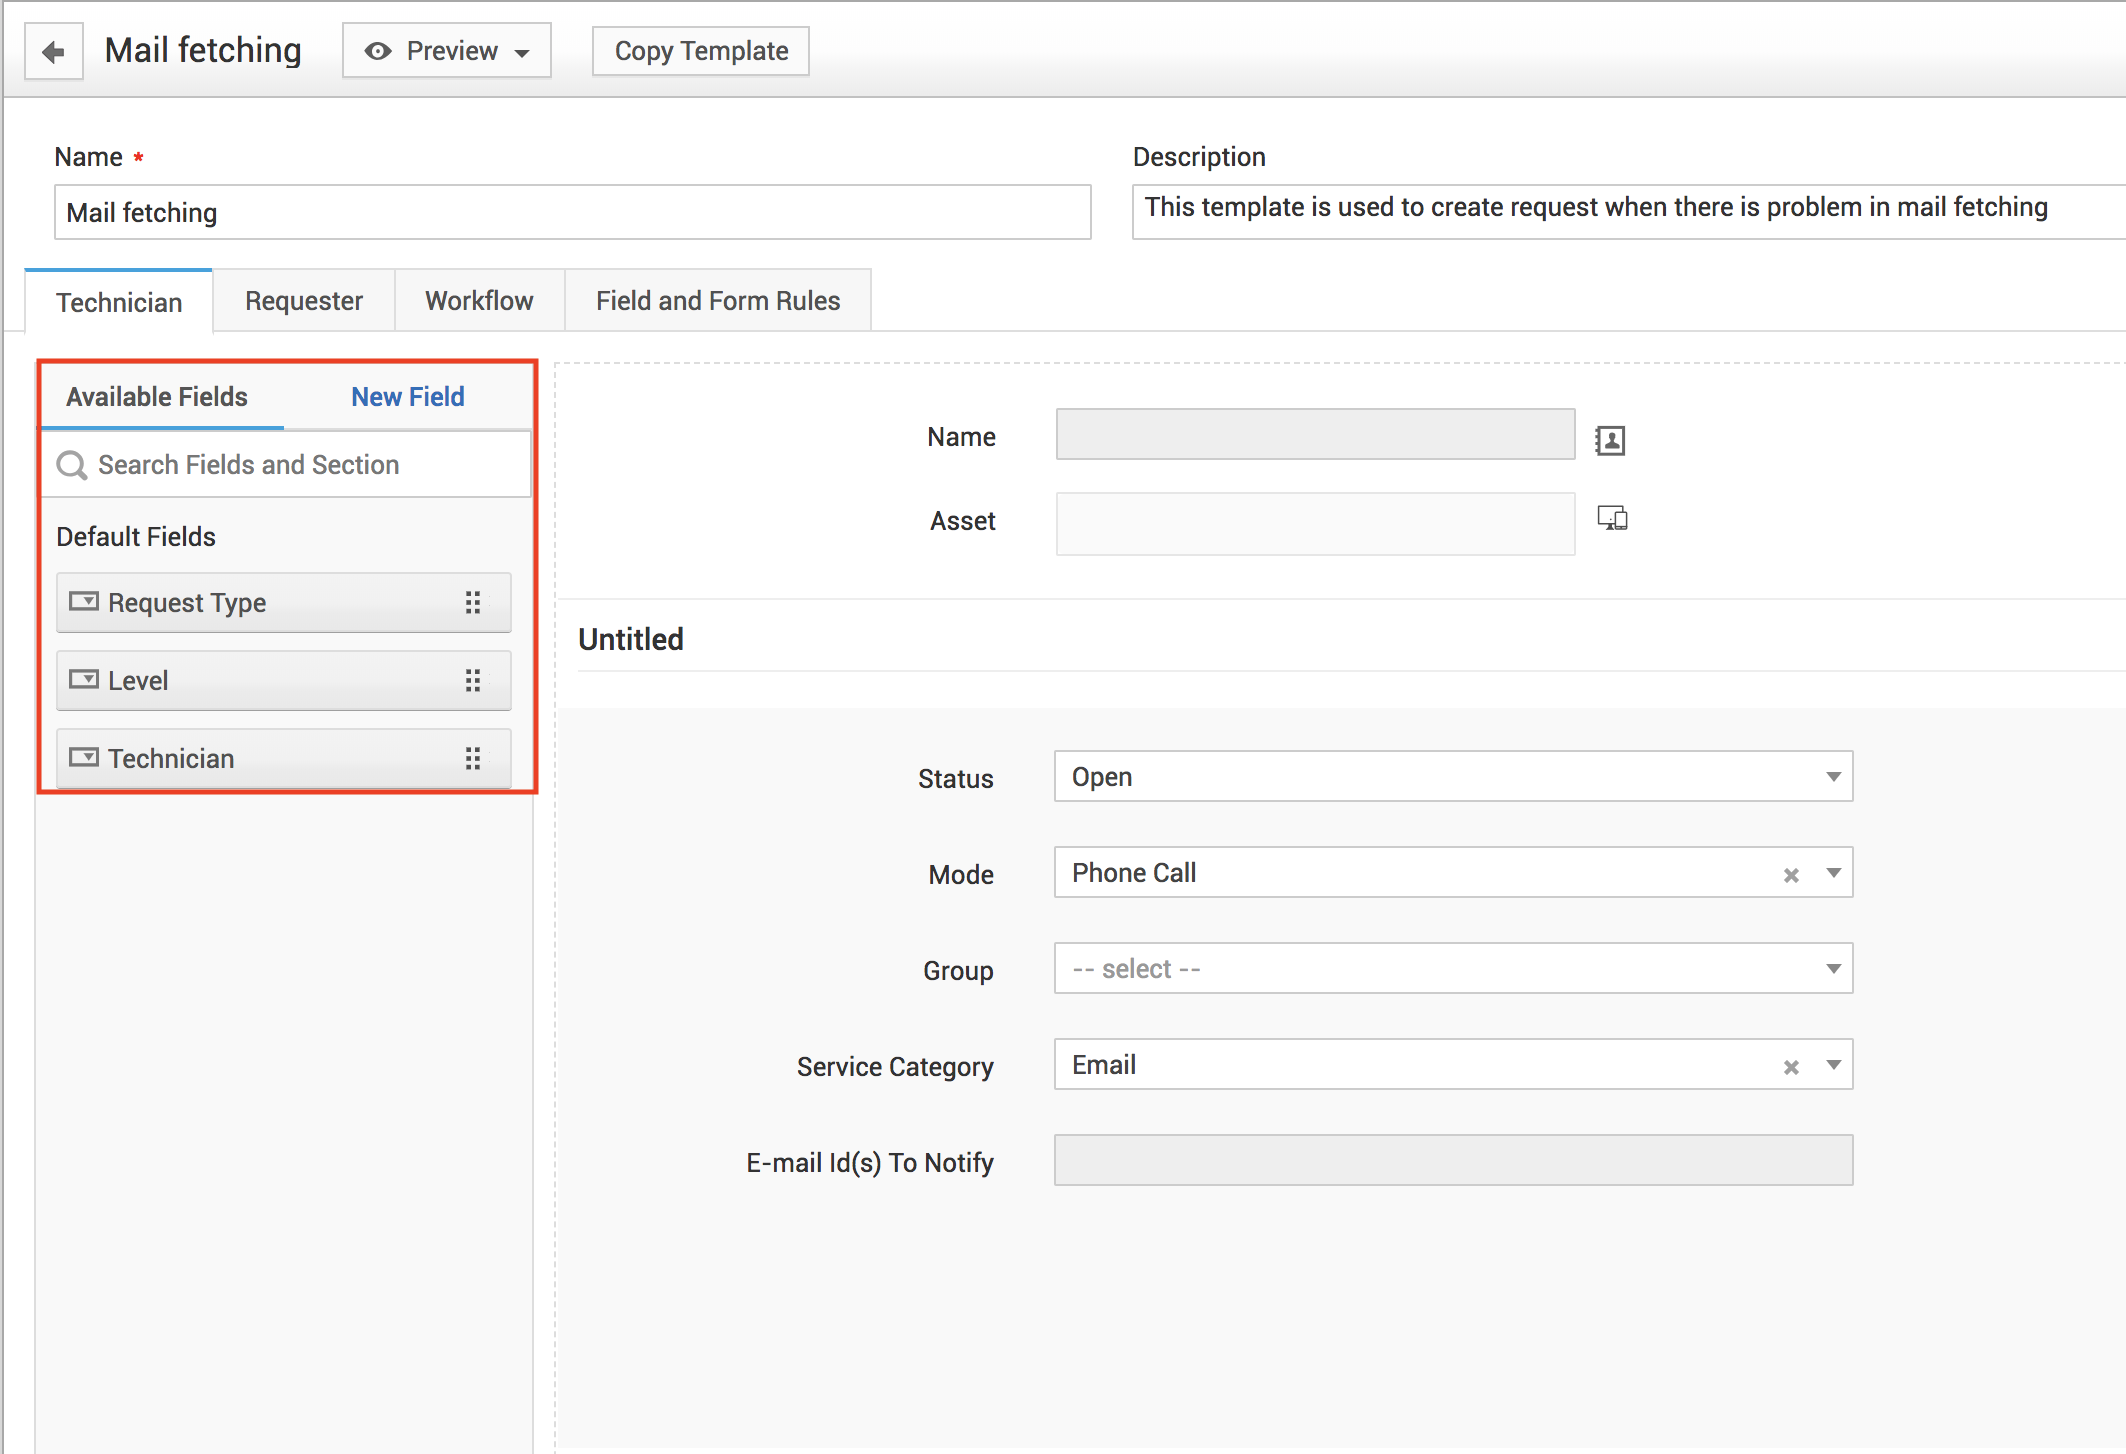
All the Available Fields will be listed under the incident canvas, by default. Except the Status, Subject, and Description fields, you can edit or remove all the other fields. Removed fields will get listed back in the right panel.
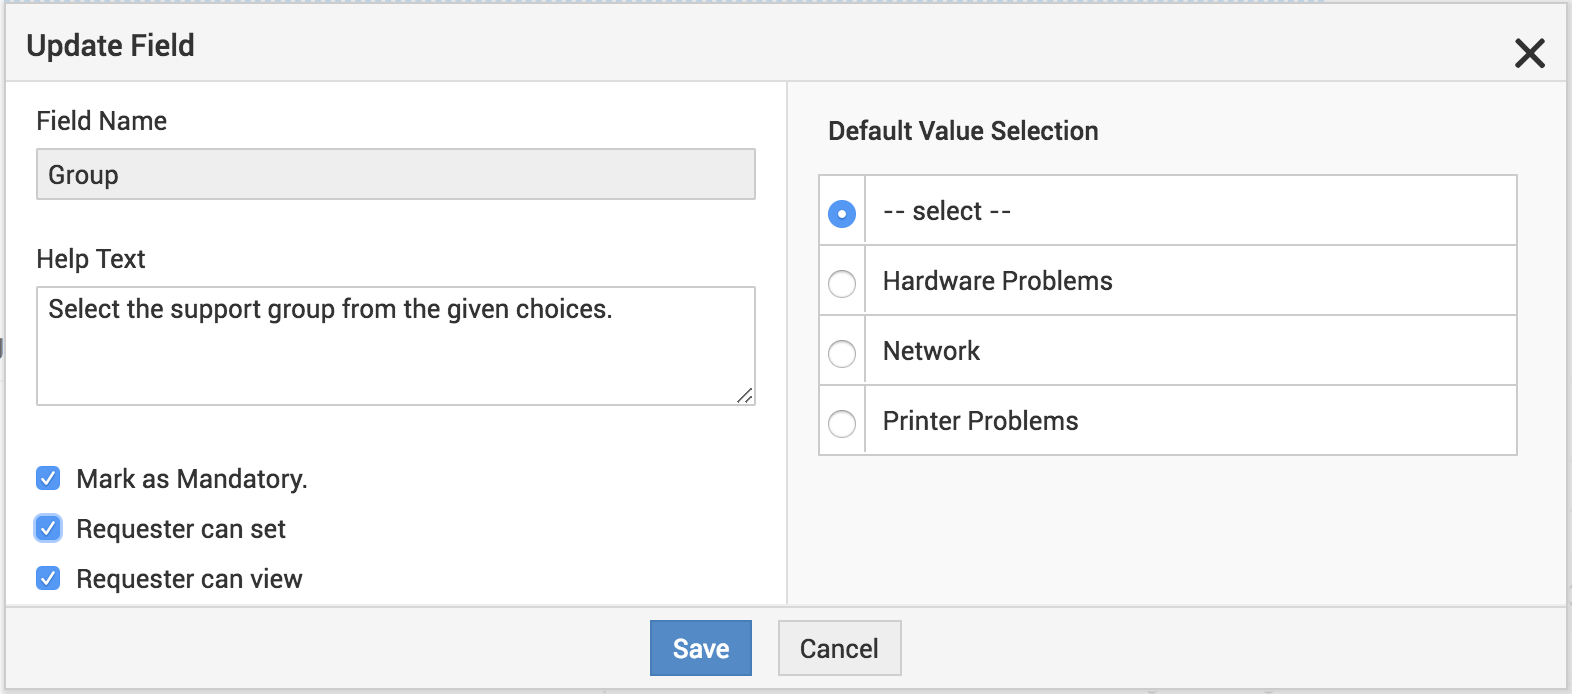
Edit each field to update the following properties:
- Field Name: Provide an appropriate field name, such as Request Type or Category
- Help Text: Provide a simple, brief description on what the field stands for; this will appear on hover over the field.
- Options: Mandate the field, if necessary, and also choose if the field must be visible to the requester. Note that if you mandate the Item field, Category and SubCategory will be automatically mandated. Similarly, mandating Impact Details will mandate Impact.
- Default Value Selectio: Depending on the field, select from the values displayed. For example, under Service, all available services or assets will be displayed, and you can choose a default, if necessary.
To add any new field, go to the New Field tab in the right panel and select from the following Additional Fields:
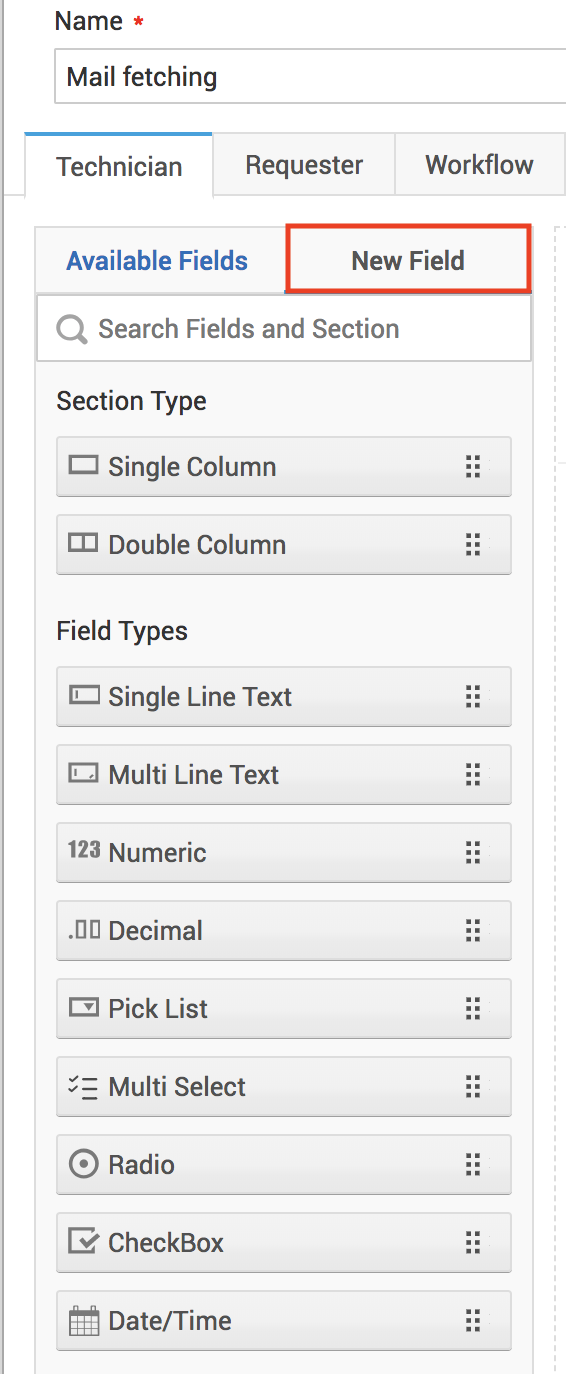
There are 9 field types that you can use, depending on your requirement.
| Field Type | Description | Example |
| Single Line Text | For short phrases | Name/Seating Location |
| Multi Line Text | For long descriptions. To enlarge the space for description, click the right corner of the description box and pull it down. | Communication Address or Comments |
| Numeric | For numbers | Employee ID/Insurance Number |
| Decimal | For costs or ratio. | Price of any asset or error margins. |
| Pick list | For lists. | List of available asset types |
| Multi select | For selectable values within a list. | List of software applications installed. |
| Radio | For selecting just one item from a list. | Available mobile phone or laptop models. |
| CheckBox | For selectable values or decisions. | Preferred mode of communication or Yes/No responses. |
| Date/Time | For date or time in specific formats. | Birthdays/Resolution Time. May 27, 2020/00:12/09:00 AM |
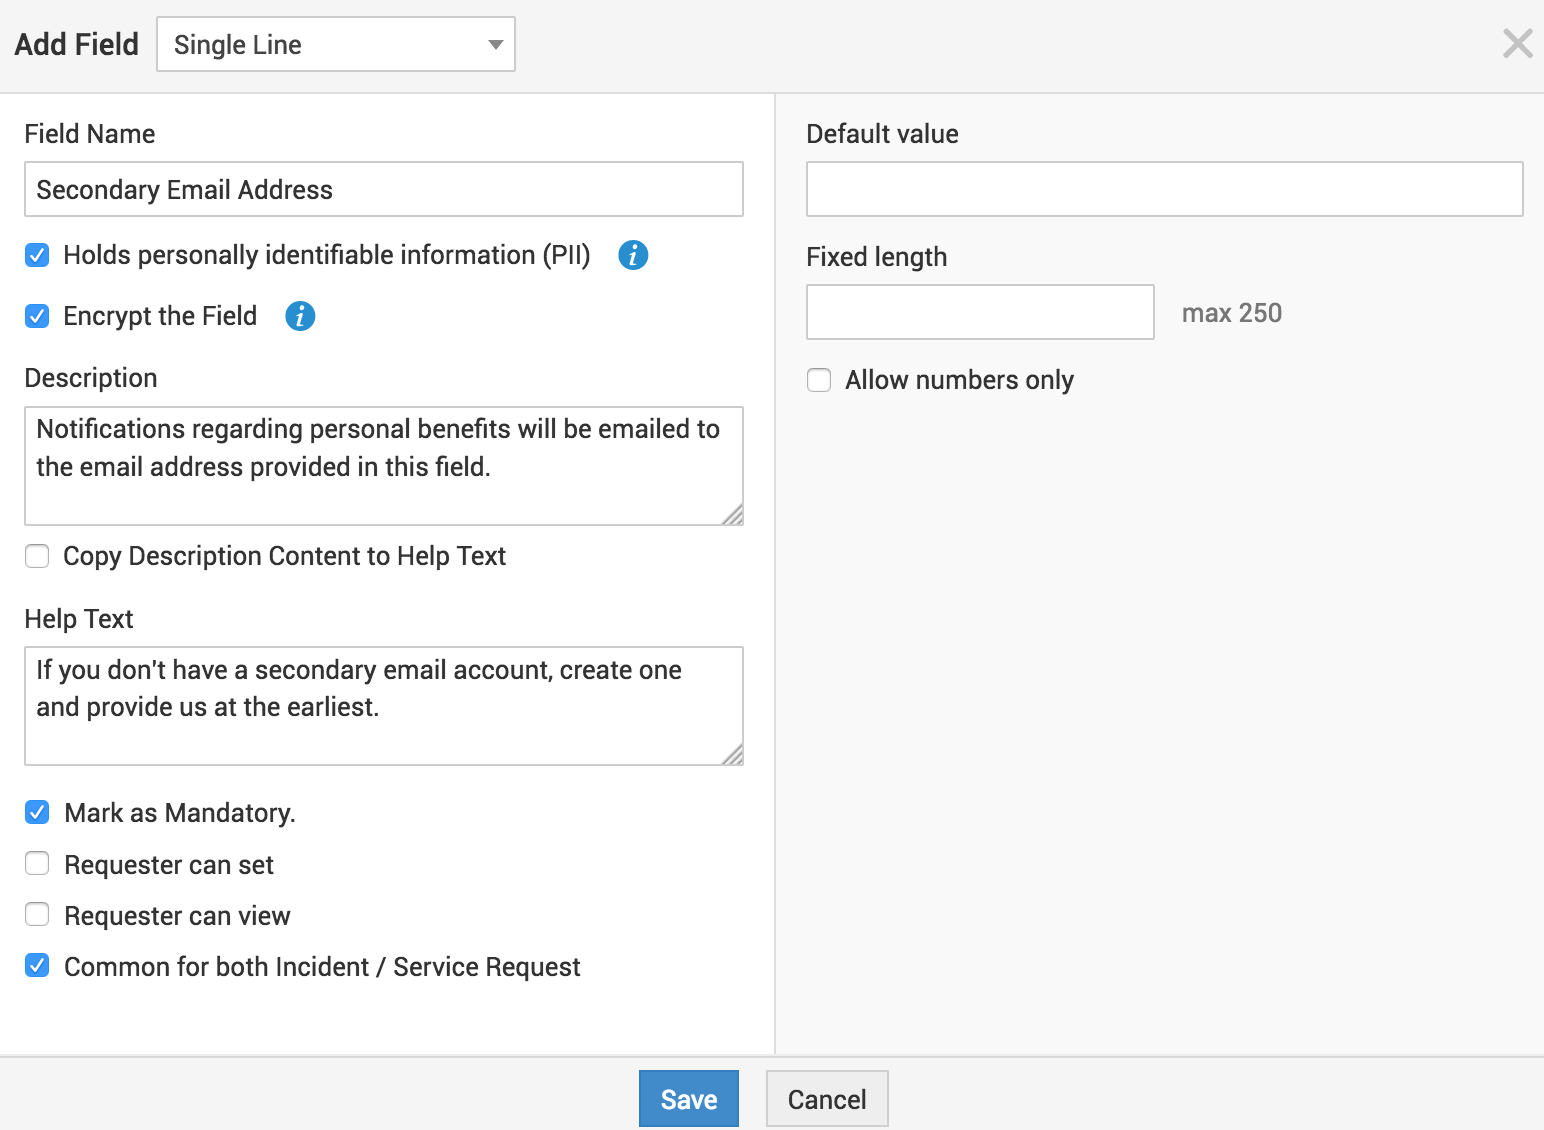
Some of these fields could contain personal information such as the person's name, email address, or any other personal information that could be misused. Moreover, privacy regulations and guidelines, such as the General Data Protection Regulation (GDPR), require businesses to protect their user's personal data from misuse. Therefore, in ServiceDesk Plus, you have the option to mark all personal information of a user as PII or personally identifiable information. You can also choose to encrypt the data provided for better security. PII marking is essential for anonymizing or completeing erasing any personal information soon after the user leaves the organization. Here's a sample Additional Field with all PII fields marked:
The Incident Template canvas for the Technician is divided into 3 sections. You can add a name and a brief description to the first two sections. The third section, Resolution, is fiexd and cannot be edited/moved.
To enlarge the Description field under Subject, click the lower-right corner and pull it down.
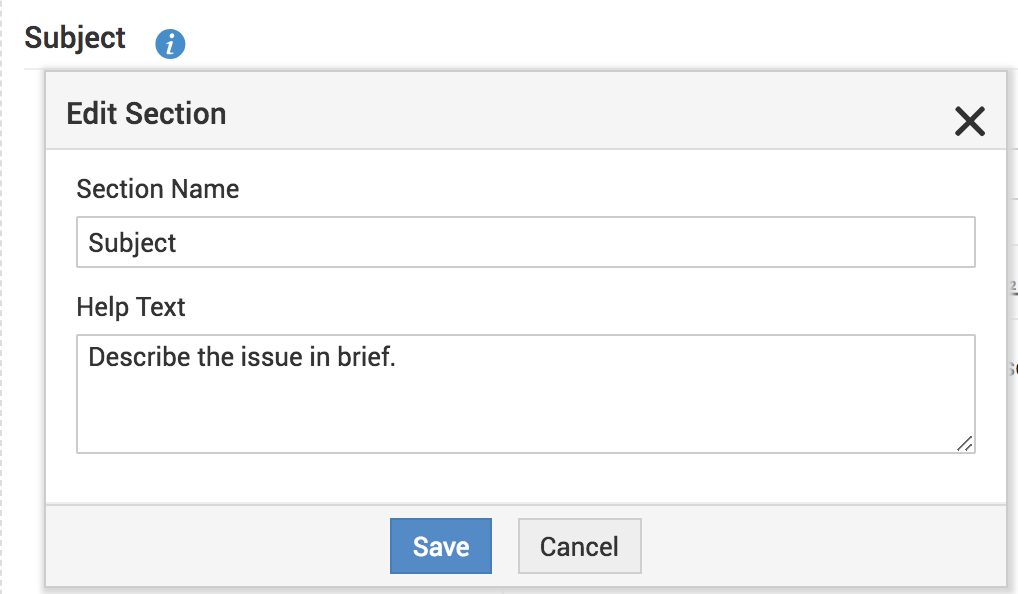
If you want to add information to the Requester/Technician on how to fill the form or if you wish to provide more info about the form, enable the radio button as shown in the image below and provide the content in the text area. This text will be shown when the Requester/Technician fills out the form.

Then, associate the required groups to the template and also if the template must be visible to the requester, save, and go on to configure the workflow for the template.
When you associate support groups to a template, note that only the technicians in the specific support groups will have access to the template. When no groups are associated, all technicians will have access to the template. Similarly, when you associate user groups, the template will be visible only to the users in the associated groups. If the template is not associated to any user group, it will be visible to all requesters.
Form Customization
Incident templates can be customized using different fonts, font sizes, font colors, background colors, and label orientation.
Templates can be customized at three levels:
Customizing Technician Form
Template Customization
Click Customization on the top right corner of the template.
In the customization edit form, you can customize Sections, Labels, and Template background color.
-
Sections - Change font, font size, and color, and background color. You can also bold the titles.
-
Labels - Change label placements to appear on the left, right, or top of the field box. You can also change the font, font size, color, and background color. Also bold the label if needed.
-
Background Color - You can choose a background color for the template by clicking the
 icon.
icon.
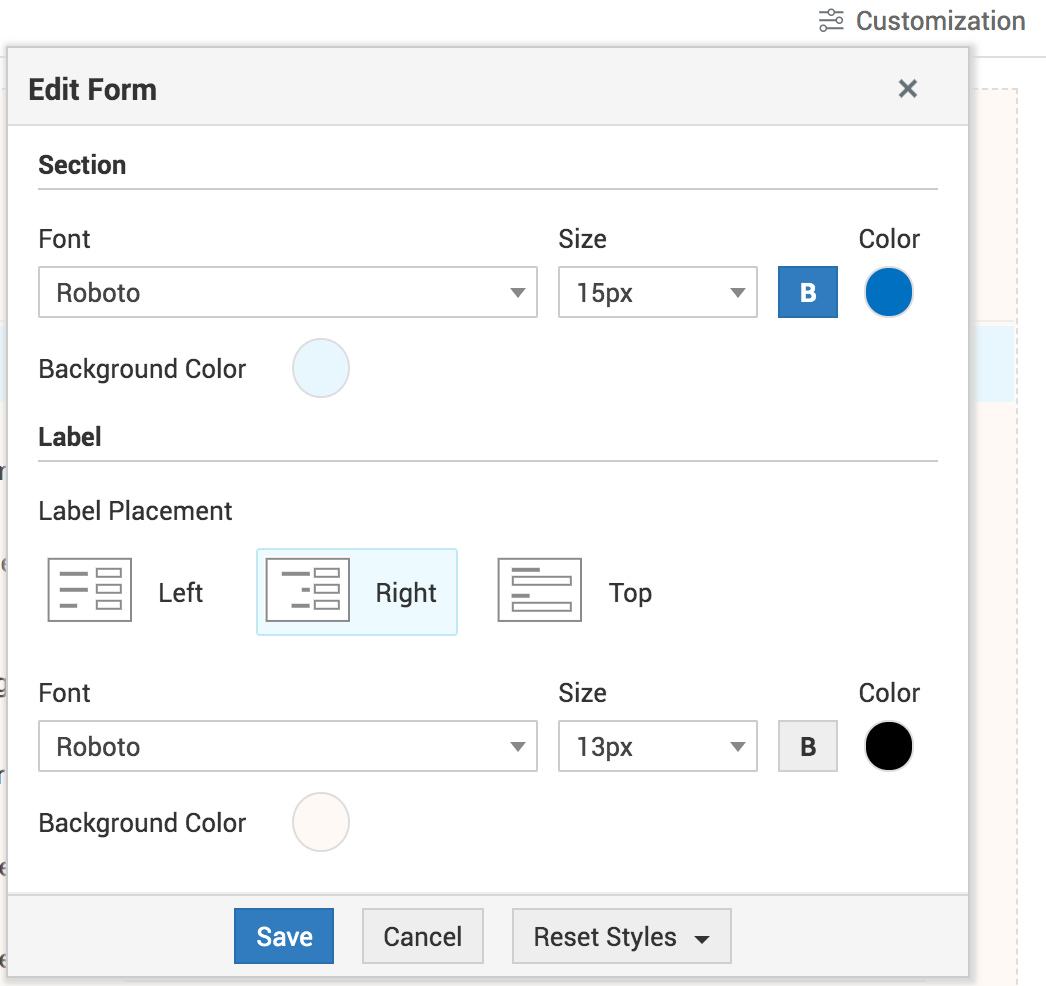
Click Save.
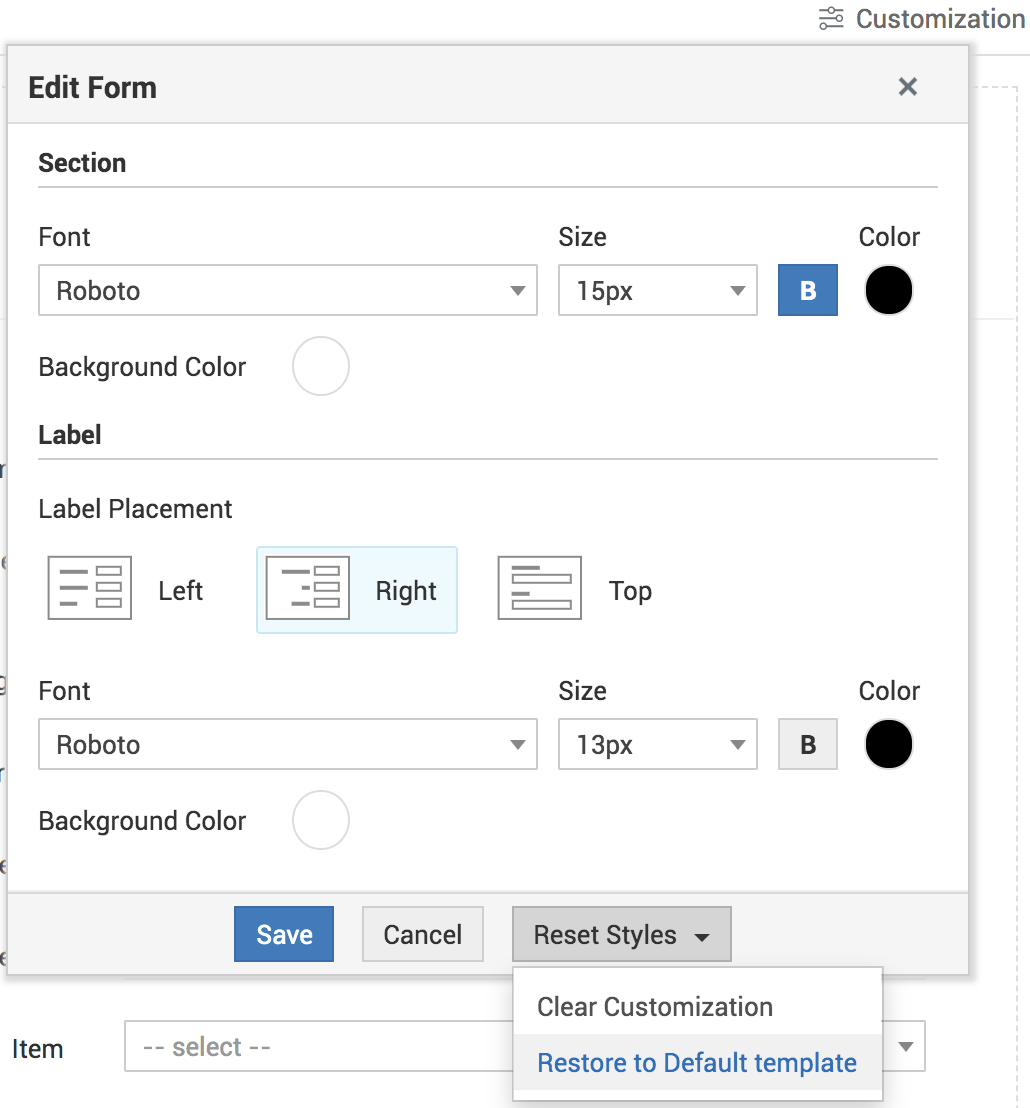
To clear the customization to default settings, click Clear Customization. This will clear the styles of the selected template, section, or label.
You can also select Restore to Default template. Upon restoration, the default template style will be applied to the template you are editing.
Section Customization
Click the customization icon![]() beside the section name and go to the Customization tab to edit the sections individually.
beside the section name and go to the Customization tab to edit the sections individually.
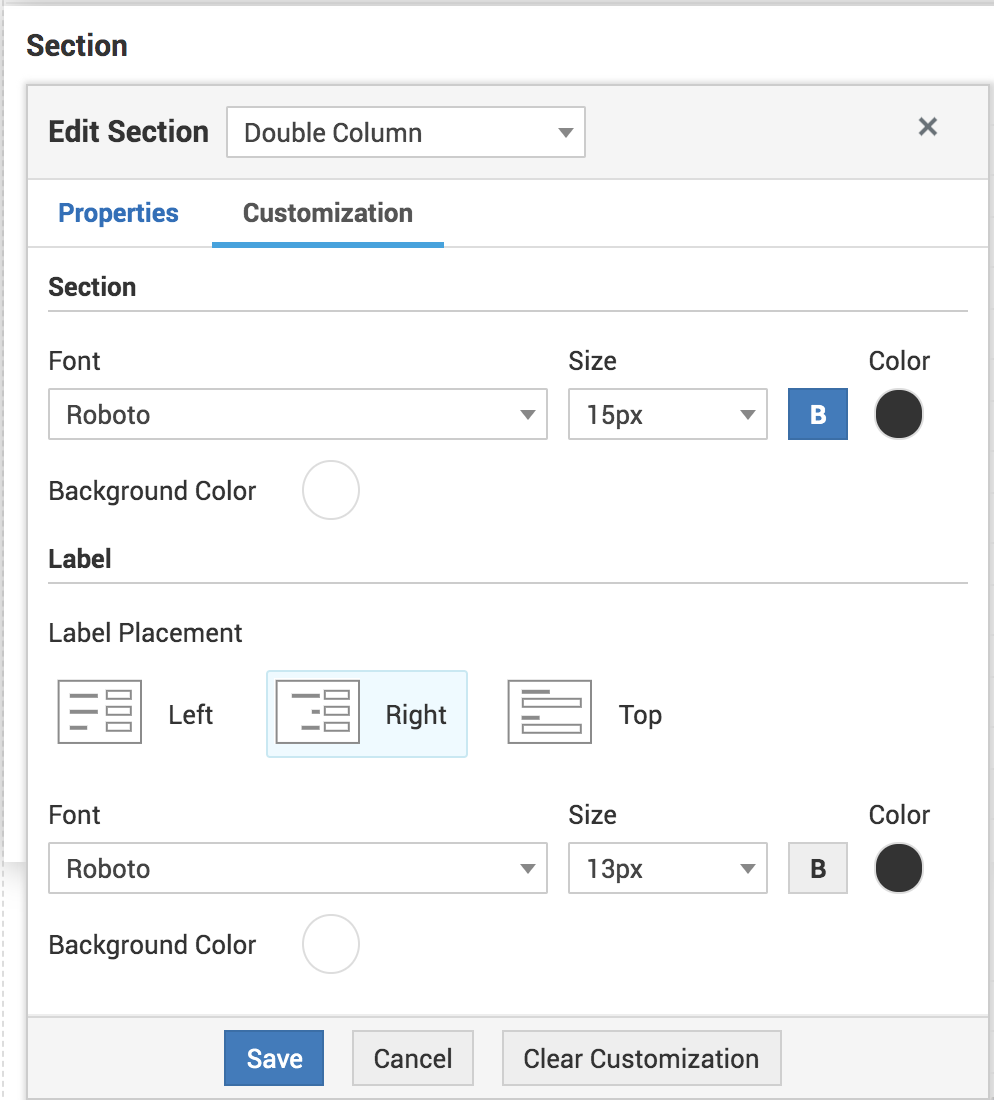
Flexible column layout:
ServiceDesk Plus MSP enables you to configure flexible layout for incident/service templates. With the flexible column layout, you can configure the following options in a template section:
- Drag and drop fields: Drag and drop a field to any position in the section, even without a placeholder. The existing fields re-align automatically to fit the flexible section's width.
- Make smaller/bigger: Hover over the required field and click
 or
or  to increase/decrease the field width towards the corresponding direction.
 - Justify field width: Hover over a field and click
 to justify the width of all fields in the corresponding row.
 - Add relative fields: Hover over a field and click
 .
. - Select the direction in which the field should be added. A field placeholder appears where you can drag and drop the required field.
- Remove fields: Hover over a field and click
 to remove them from the canvas. The remaining fields re-align automatically to fit the flexible section's width.
Add up to 12 fields in a row: You can drag and drop 12 fields in a single row.
Field Customization
Click the Customization icon![]() beside the label and choose the Customization tab to edit each field. You can modify the font, font size and color, and background color. You can also bold the label.
beside the label and choose the Customization tab to edit each field. You can modify the font, font size and color, and background color. You can also bold the label.
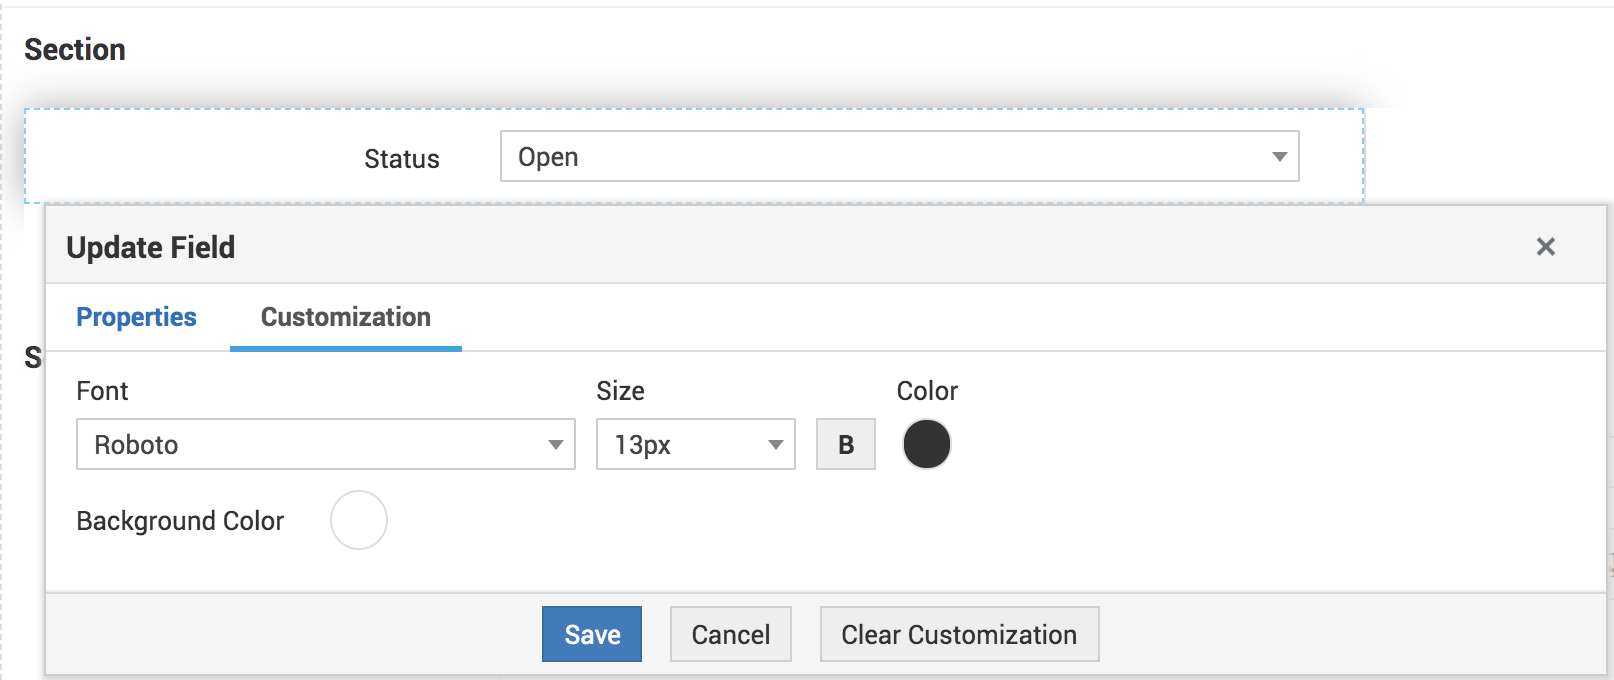
Requester Form
The customization for the requester form is similar to Technician form. However, you cannot customize individual fields in the Requester form.
Click Copy from Technician to copy the customization from the Technician tab.
Preview and Copy Template
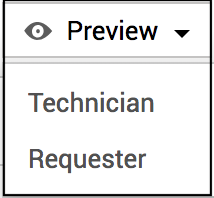
After you configure the template, use the Preview button to check how the template would appear to the Requester or the Technician.
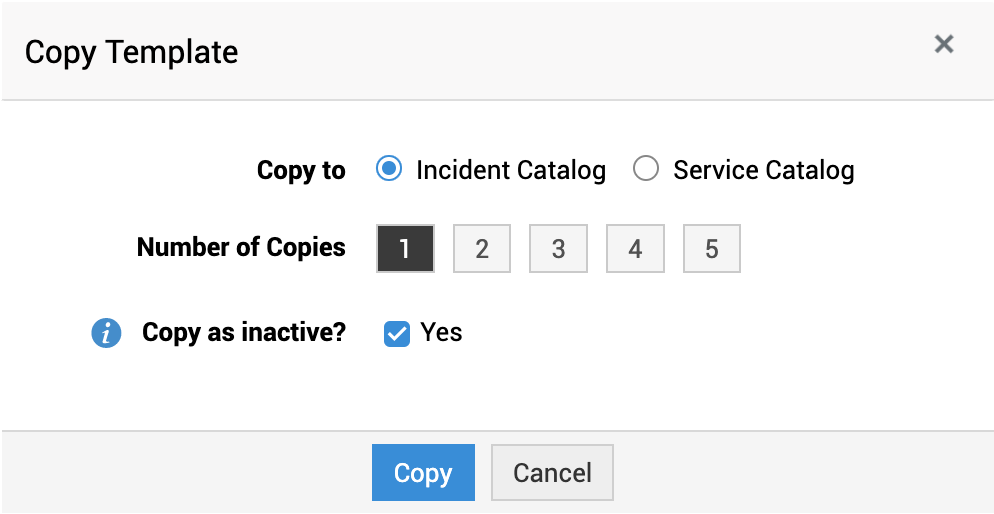
You can make a maximum of 5 copies of the template. You can also choose to copy the templates as inactive. You can enable them after making the required changes.
Configuring Incident Template Workflow
When an incident is logged using the template, the template workflow defines the sequence of activities that must occur automatically.
Under the Workflow tab, you need to configure Approval and Task Details.
Approval Details
Choose whether all approvers must approve or if anyone person's approval is sufficient for the incident to progress to the next level.
All approvers must approve: The request will be approved, and approval status changed to Approved, only when all the approvers approve it. Even if one person rejects it, the request is rejected, and the status is changed to Denied. Until all approvers approve the request, the Approval Status shows Pending Approval.
Anyone of the approvers can approve: until all approvers reject it, after which the status is changed to Denied.
The template workflow allows you to define the sequence of activities that must occur automatically for the requests created using the template. You can configure Approval Details, SLAs, Checklists, and Tasks.
-
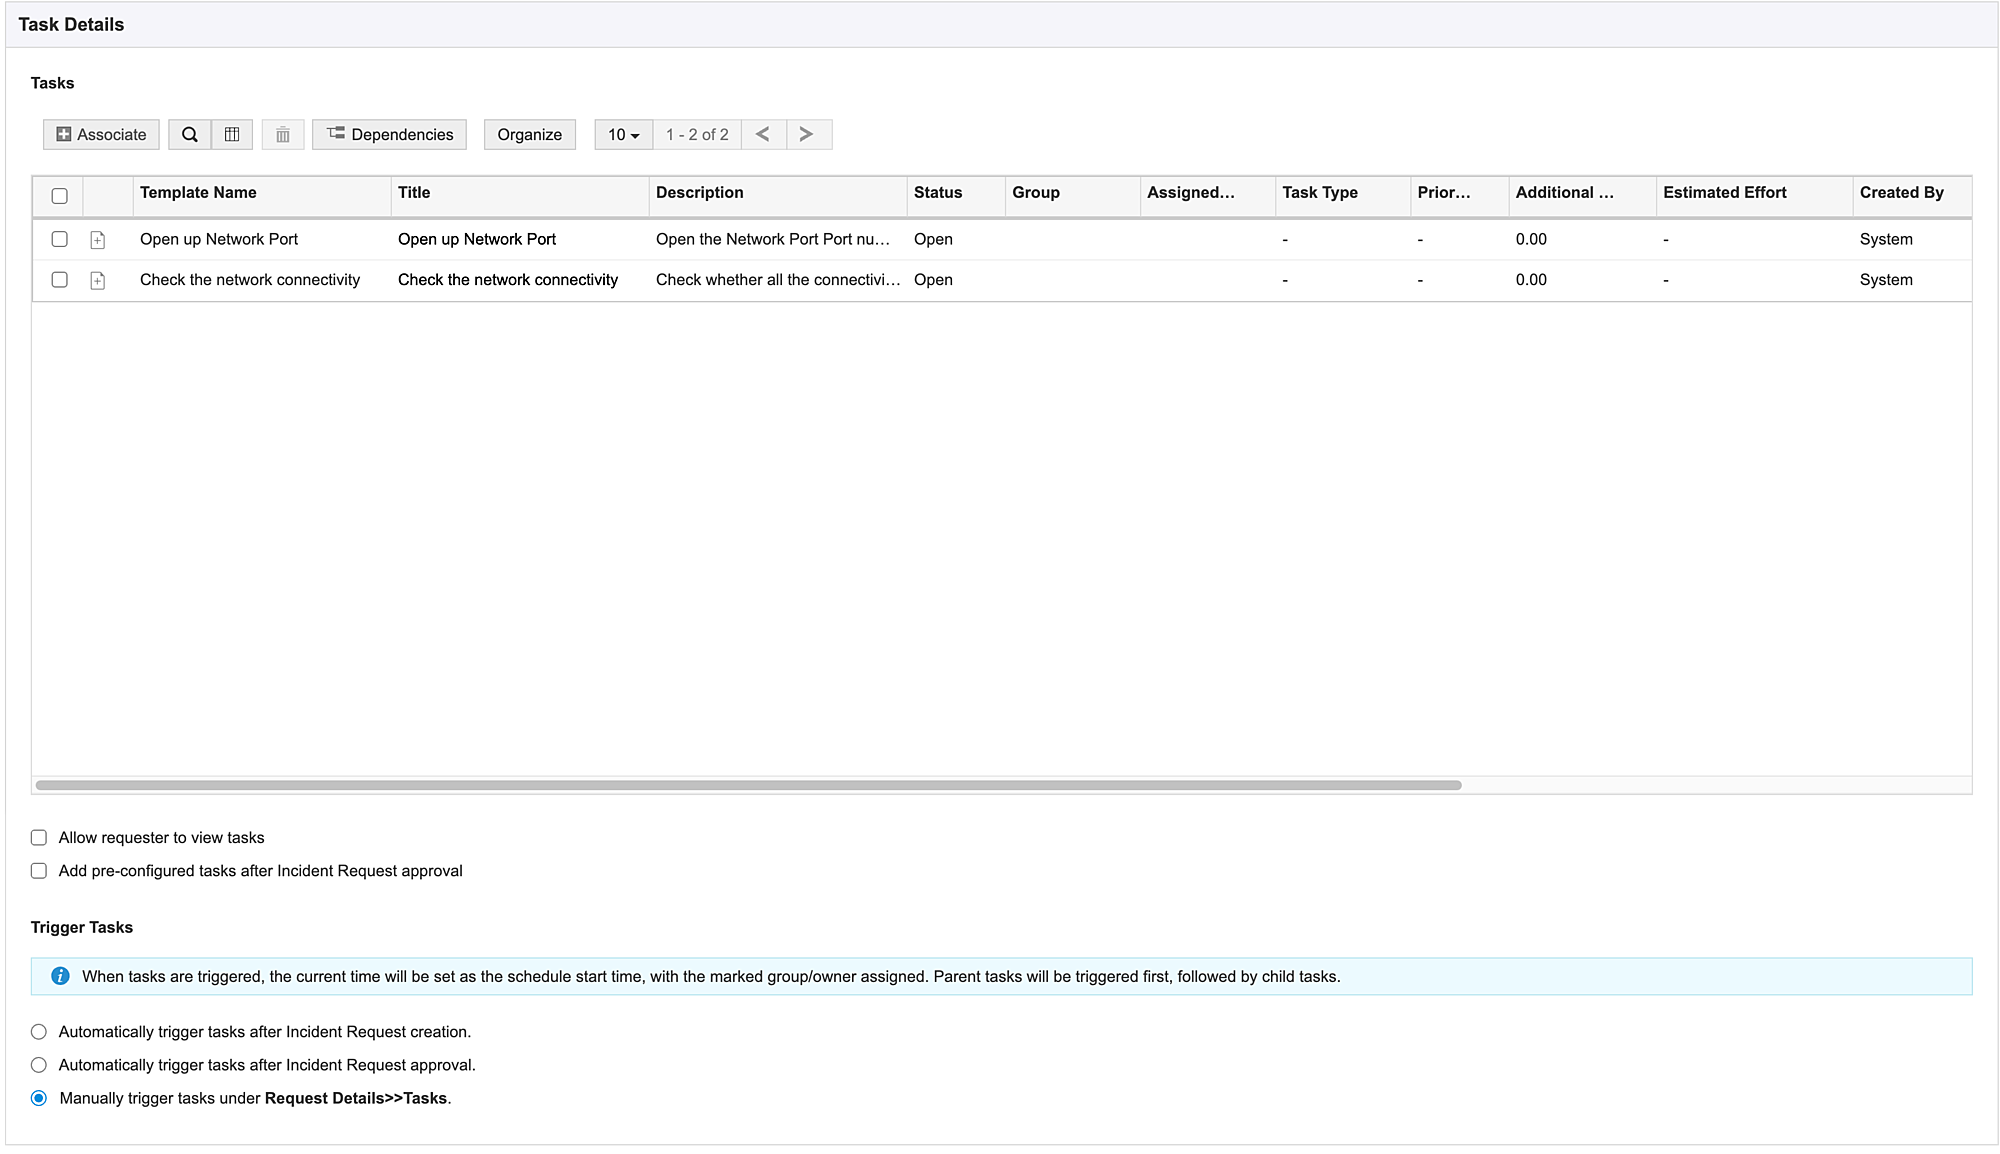
To add tasks using task templates by clicking Associate button. To organize tasks, click Organize button and select and move tasks using the arrow buttons and then click Save.
-
To configure dependency, click Dependencies button. To know more about task dependency, click here.
-
To allow requesters to view tasks, select Allow requester to view tasks checkbox.
-
Select Add pre-configured tasks after Service Request approval checkbox to mandate request approval for adding the tasks. When this option is enabled, pre-configured tasks will be added to the request only after the request approval.
-
Choose whether you want to manually trigger tasks or automatically trigger them on Request Creation or Approval.
Configuring Field and Form Rules
After defining the workflow, you'll need to configure the field and form rules, which enable you to dynamically hide or display information based on user actions. Users could be technicians or end users. You can also configure rules that are exclusive to requesters or technicians.
You can configure Field and Form rules for three conditions:
- On Form Load: Each time the form is accessed or opened. The rule must contain at least one executable action. You can optionally define a criteria for this action/s.
- On Field Change: While an already existing request is being edited. The rule defined will be applied if there's an change in the form fields. The rule must contain at least one executable action. You can optionally define acriteria for this action/s.
- On Form Submit: While the request is submitted. The action here will contain only Execute Script. Ensure that the rule contains a valid script. You can optionally define criteria for this action/s.
Actions Supported
The various actions that you can configure to be executed by configuring Field and Form rules are as follows:
- Show/Hide Fields
- Enable/Disable Fields
- Mandate Fields
- Optionalize Fields
- Execute Script
You can configure Field and Form rules for various scenarios. Click here for detailed information on how to configure the rules for specific scenarios.
After you create the rules, click Save and proceed.
Incident Template List View
This page displays all the configured incident templates. The templates are listed by their name, description, created by, and whether they must be displayed to the Requester.
On this page, you can create templates and also bulk delete them. Note that if you delete any template that's already being used in any other module, the template will appear as inactive (greyed out) in the list view.

You can activate it by editing the template and deselecting the Template not for further usage option in upper-right corner of the Incident Template Details page.

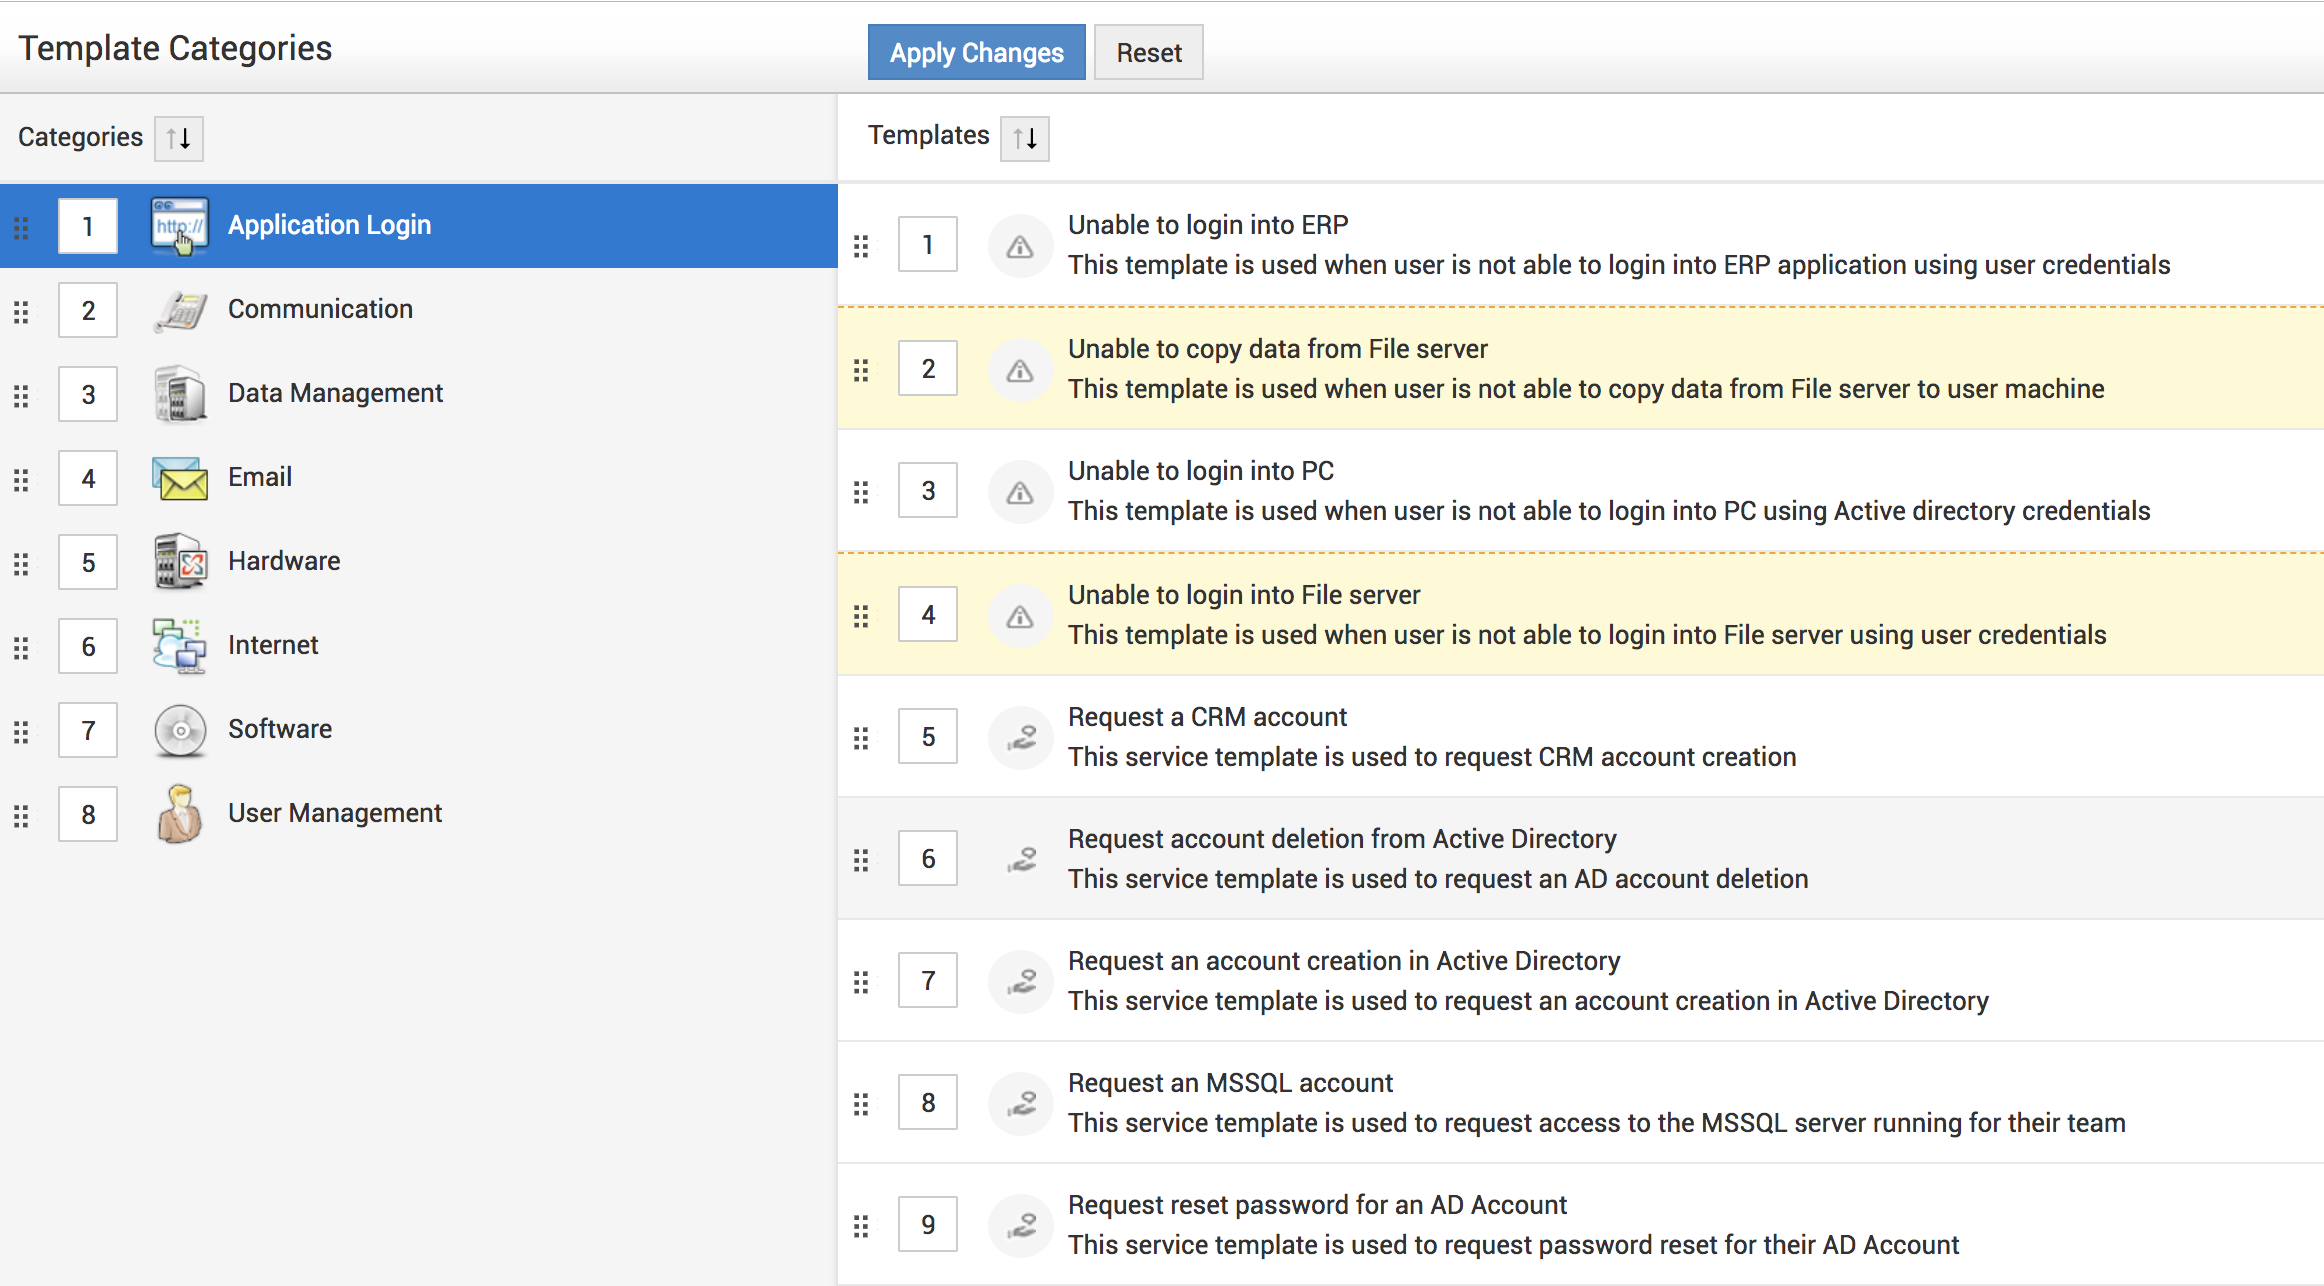
You can reorder the templates by clicking the Reorder button. On the Template Categories page, you can move the categories to the required positions. Until you click Apply Changes, the resequenced categories are displayed in yellow, as shown in the following screen shot:
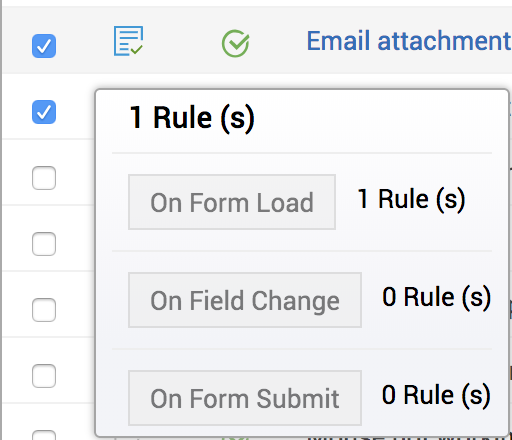
Under individual templates, on hover over, Field and Form rules information is available.
You also enable/disable individual templates, as shown in the following screen shots:

Disable the enabled templates as shown below:


