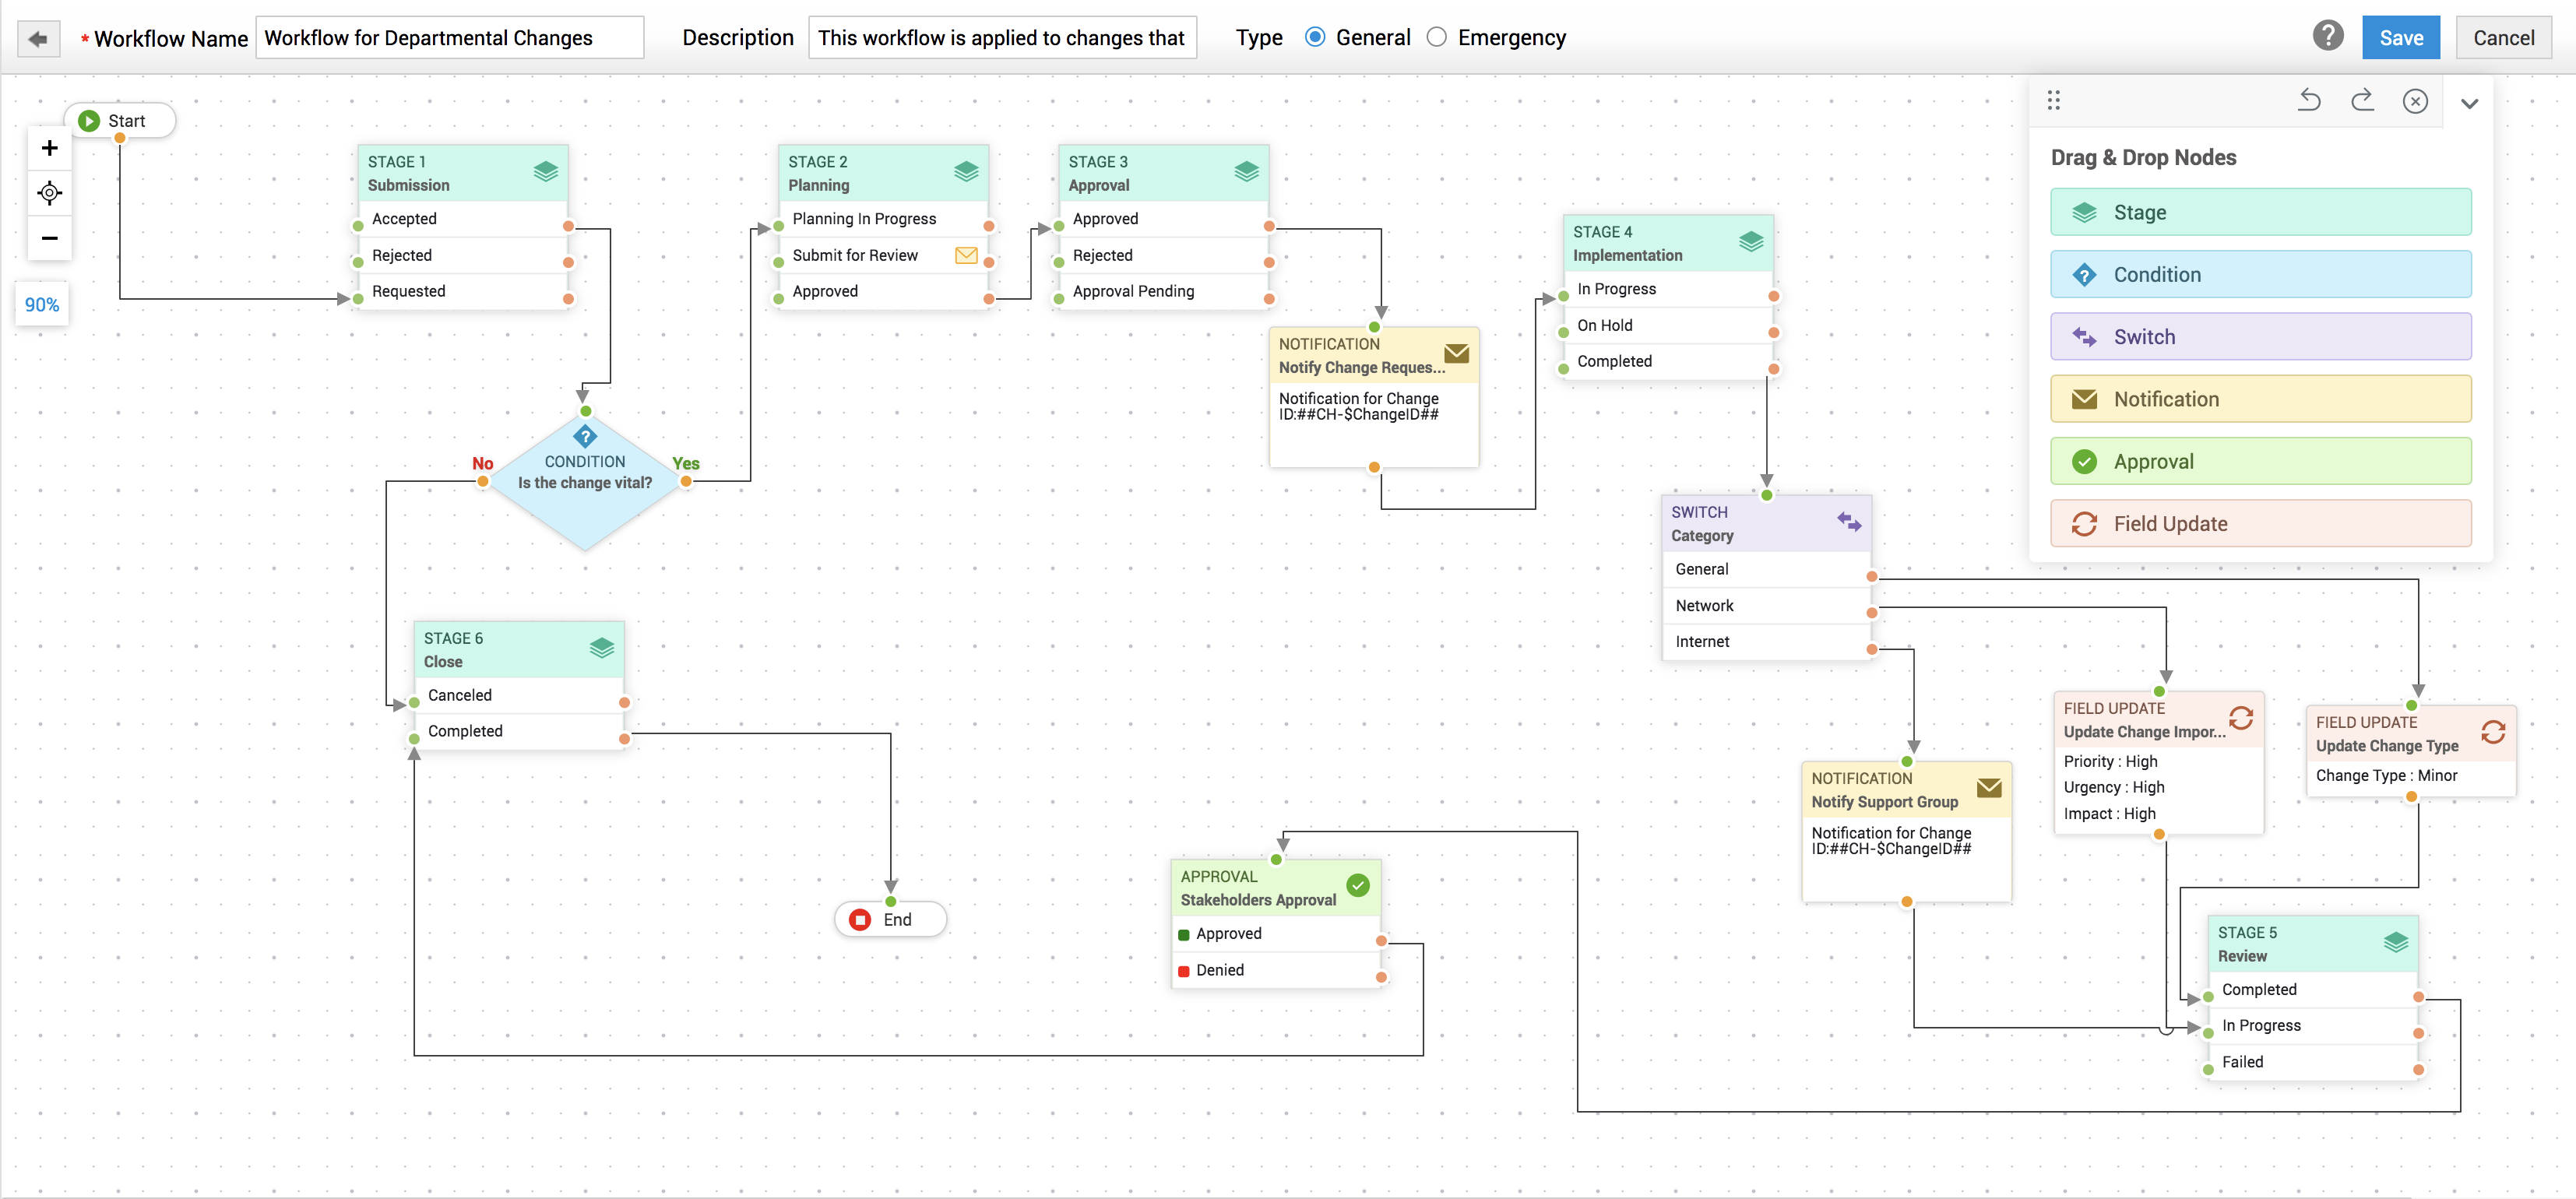
Workflow Editor
You can configure the basic details and the directional path of a workflow in the workflow editor using the built-in graphical tool.
To create a workflow, enter the following basic details:
-
Workflow Name: Enter a relevant name for your workflow. This is a mandatory field.
-
Description: Mention what types of changes can be associated with the workflow. You can also add other vital info as description, if needed.
-
Type: You can select the workflow type as General/Emergency.
-
-
General workflow - Changes that essentially require the processing of all 6 stages can be associated with general workflows.
-
-
-
Emergency workflow - Changes that are highly pressed for time and require immediate action can be associated with an emergency workflow. Emergency workflows can be configured with fewer stages and minimal approvals to ensure immediate implementation of the change.
-
After entering the basic details, you can start designing the workflow process in the Workflow Editor.
Configure the workflow
The Workflow Editor is provided with an expandable, scrollable canvas for creating workflow diagrams and a stencil panel. By default, the Submission and Close stages are present in the workflow and they are connected to the Start and End nodes. You can add more nodes to the workflow from the stencil panel.
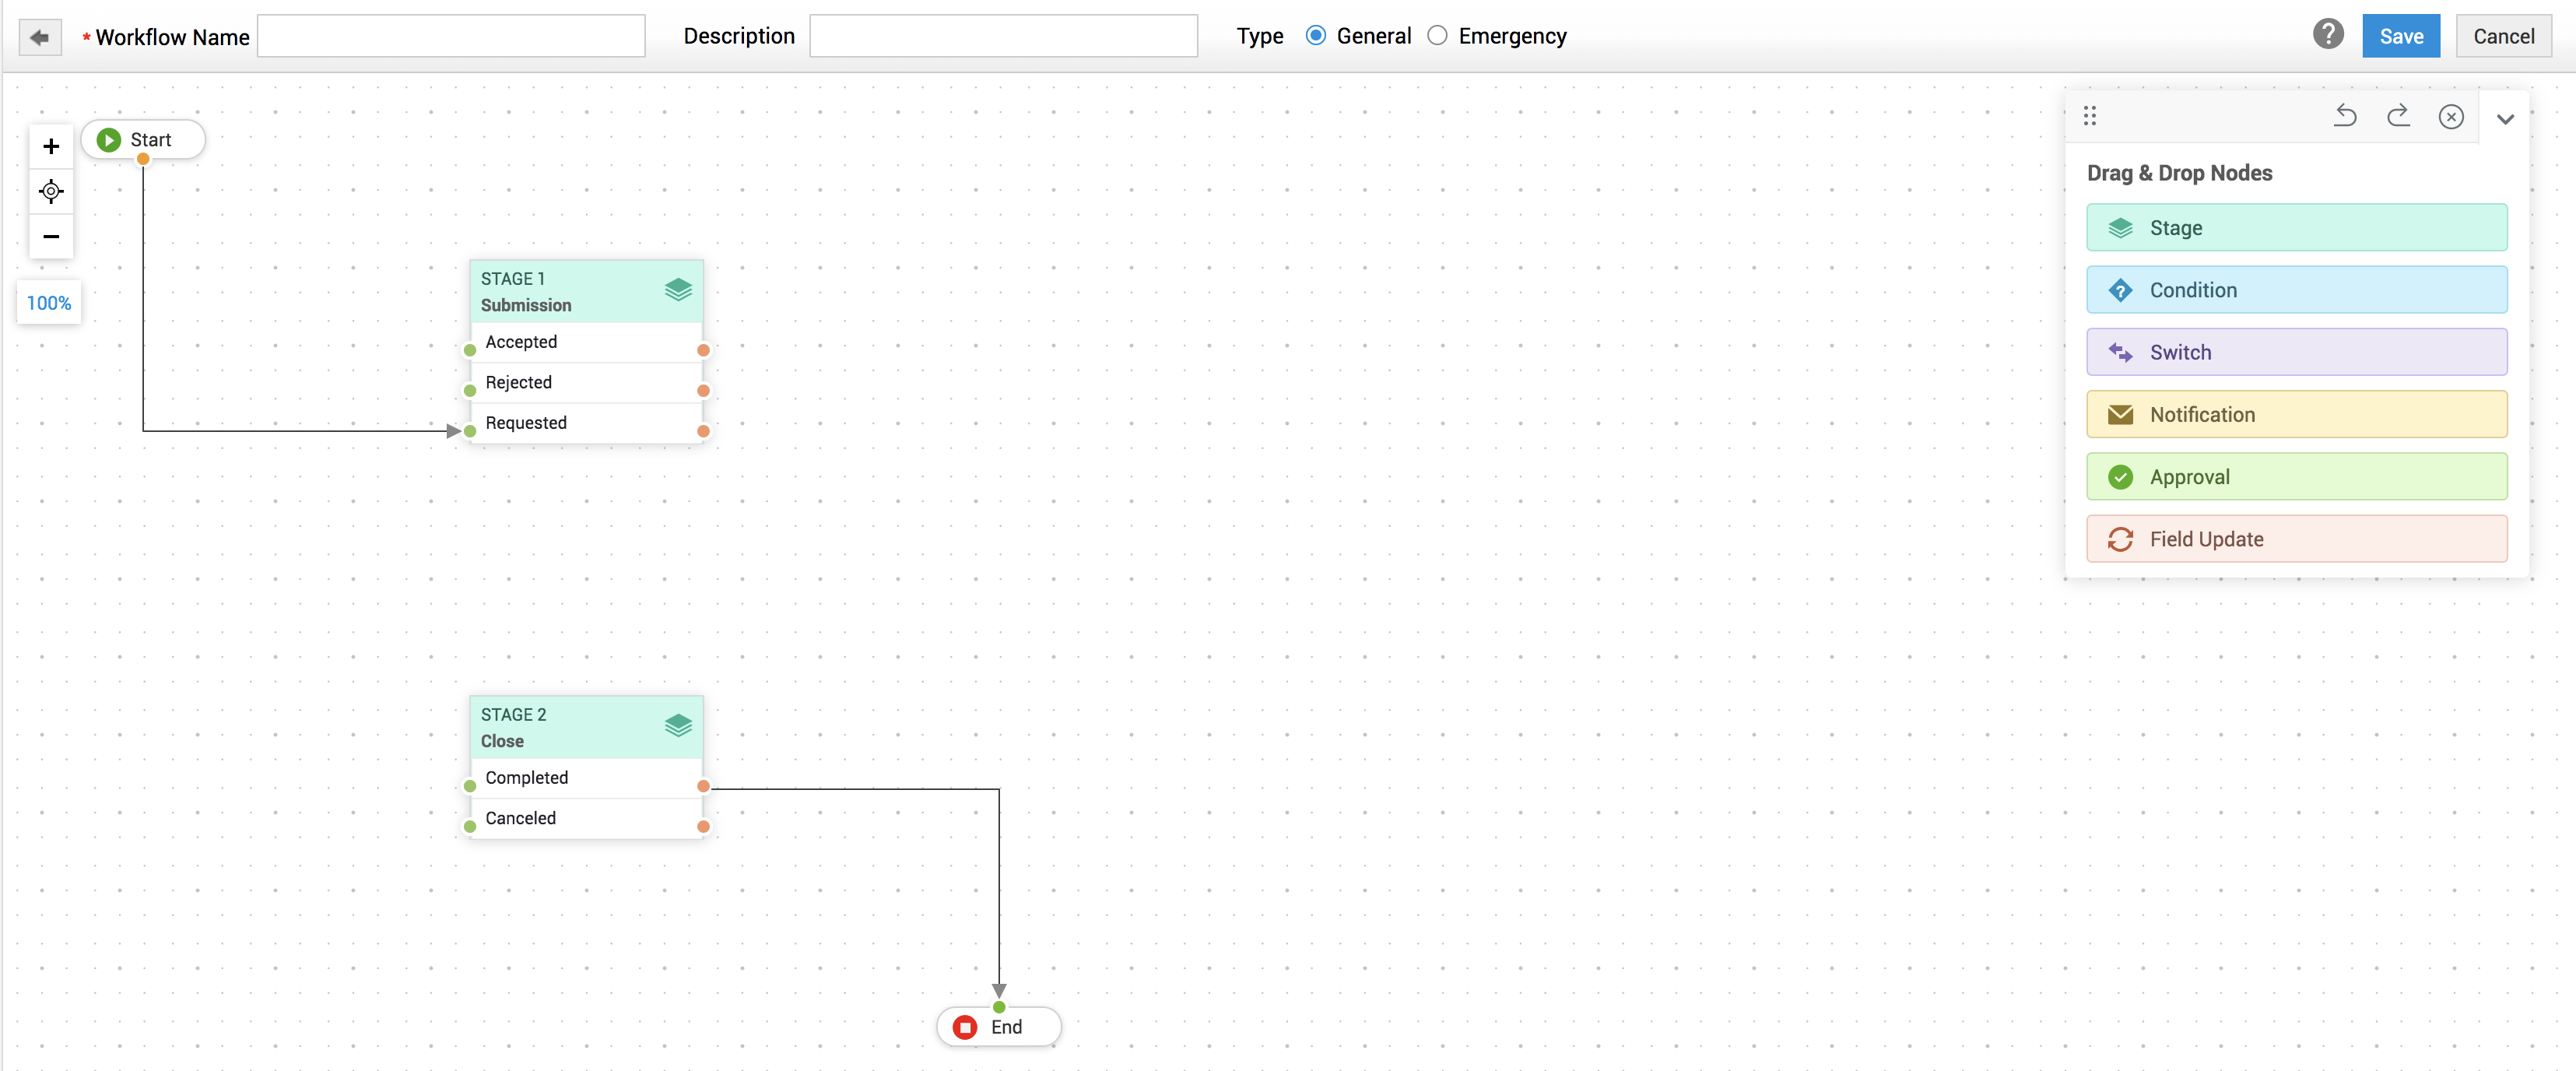
The default view of a new Workflow Editor
Stencil Panel Actions
You can perform the following actions from the stencil panel:
-
Move the Stencil Panel - Use the
 icon on the top-left of the stencil to move the panel anywhere within the canvas.
-
Undo/Redo Workflow - Use the
 or
or  icon on the stencil header to undo/redo any actions or transitions on the workflow data.
-
Reset Workflow - Use the
 icon on the stencil to reset a new workflow to its default state. If the workflow was previously saved, it will be restored to its last updated state.
-
Collapse the Stencil - The stencil panel can be toggled on/off using the
 icon at the far right
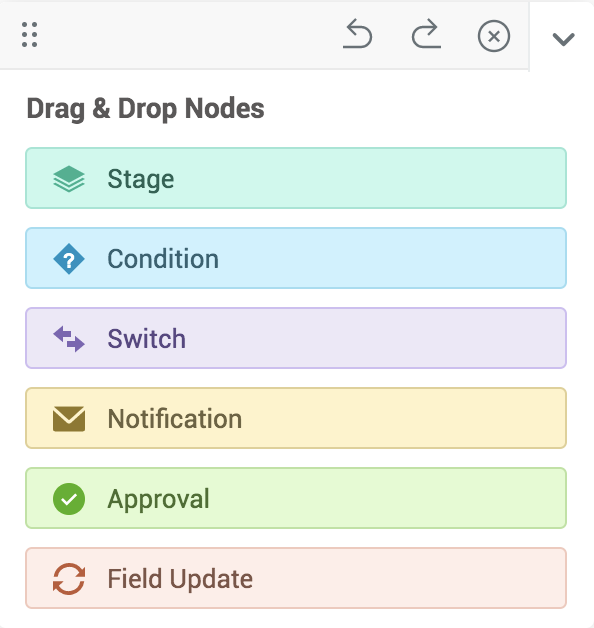
The Stencil Panel
Configure Nodes
Nodes are workflow elements that define how a change workflow should be automatically processed. The stencil panel contains various nodes such as Stage, Condition, Switch, Notification, Approval, and Field Update. You can add a node to the canvas using a simple drag and drop motion. When you add a node to the canvas, a pop-up window opens, where you must specify the properties of the node.
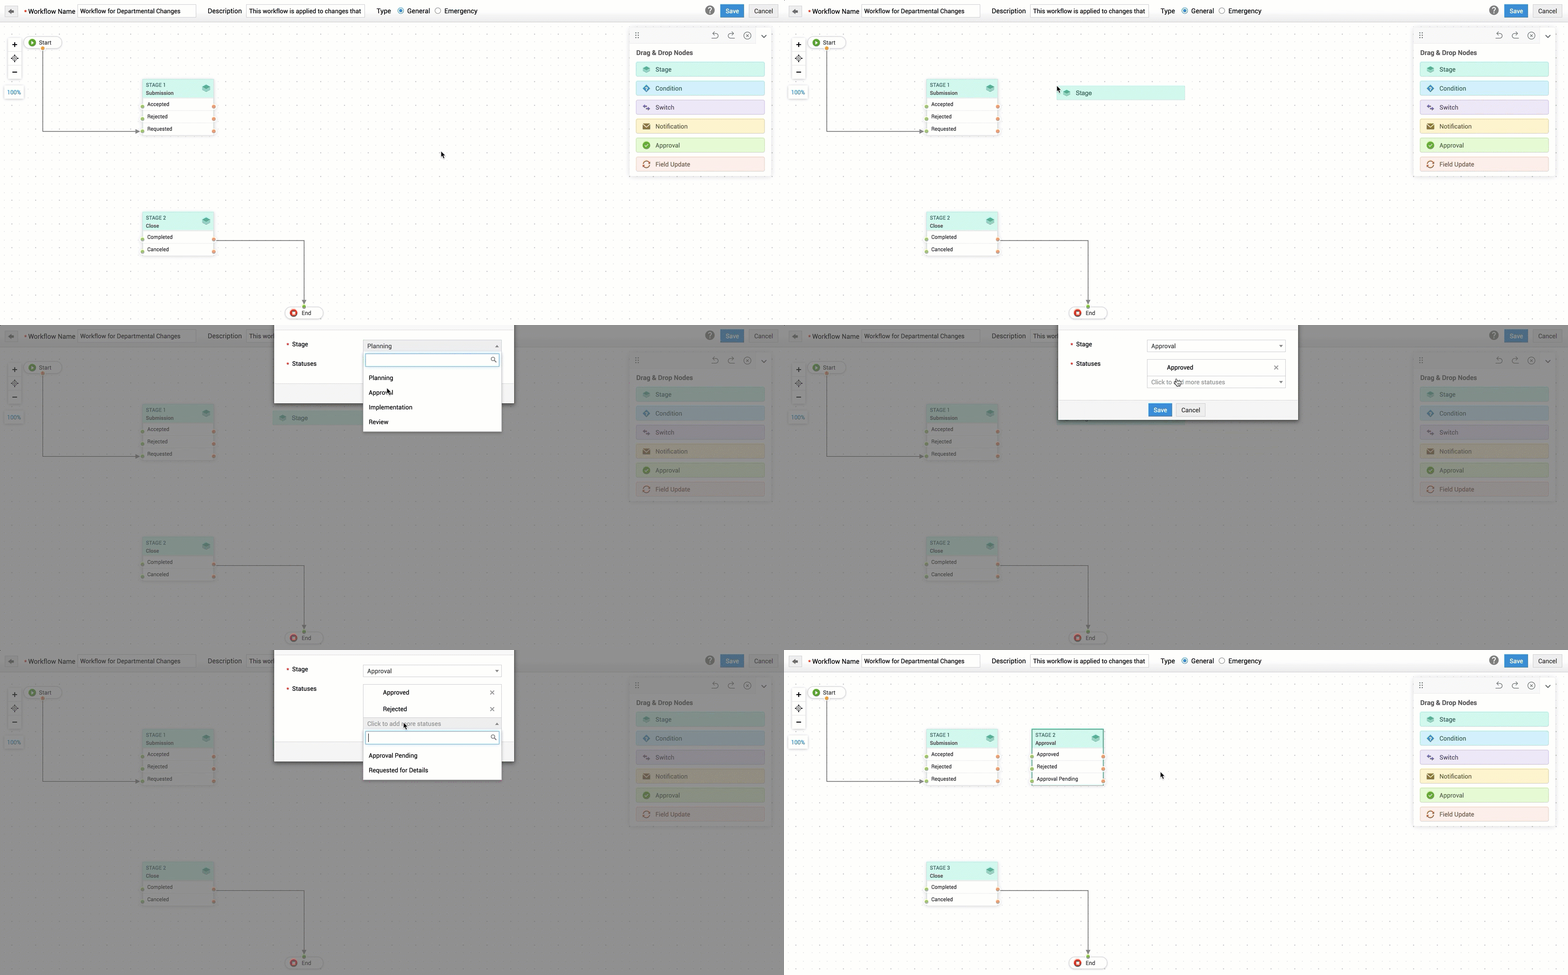
An illustration on adding nodes to Workflow
Refer to the following pointers to understand the use of each node and how to learn how to configure it:
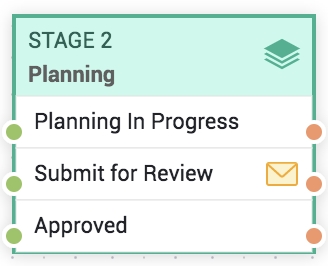
Stage - Add a change stage to your workflow
-
Select the stage and status from their relevant drop-down.
-
You can have multiple statuses in a stage.
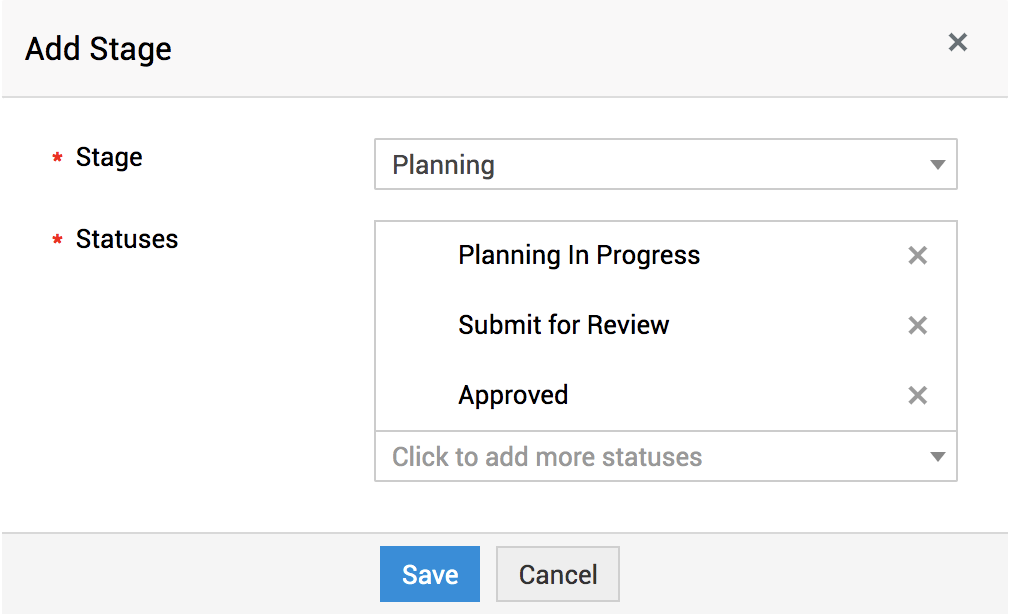
You can configure notifications for each status added to a stage in the workflow. By default, the globally configured status notifications are not impacted by change workflows and continue to operate as configured under Admin. To override the notifications based on the workflow, hover over a status and click the ![]() icon. Configure and save the notifications as required.
icon. Configure and save the notifications as required.
Note:
Statuses with notification override enabled are indicated with a ![]() icon.
icon.
The number of input and output ports on the node depends on the number of statuses chosen.
Condition - Specify a condition to be met before the change proceeds to the next stage
-
Enter a name for your node.
-
Specify the criteria by selecting column, criteria, and the value(s).
-
Click the
 icon to add multiple criteria using AND/OR operators. You can drag a criteria over the indentation space below another criteria to add it as sub-criteria. Criteria containing sub-criteria are denoted with a drop-down icon.

Adding sub-criteria while configuring conditions
The condition node is rendered with a single input port and two output ports (Yes/No).

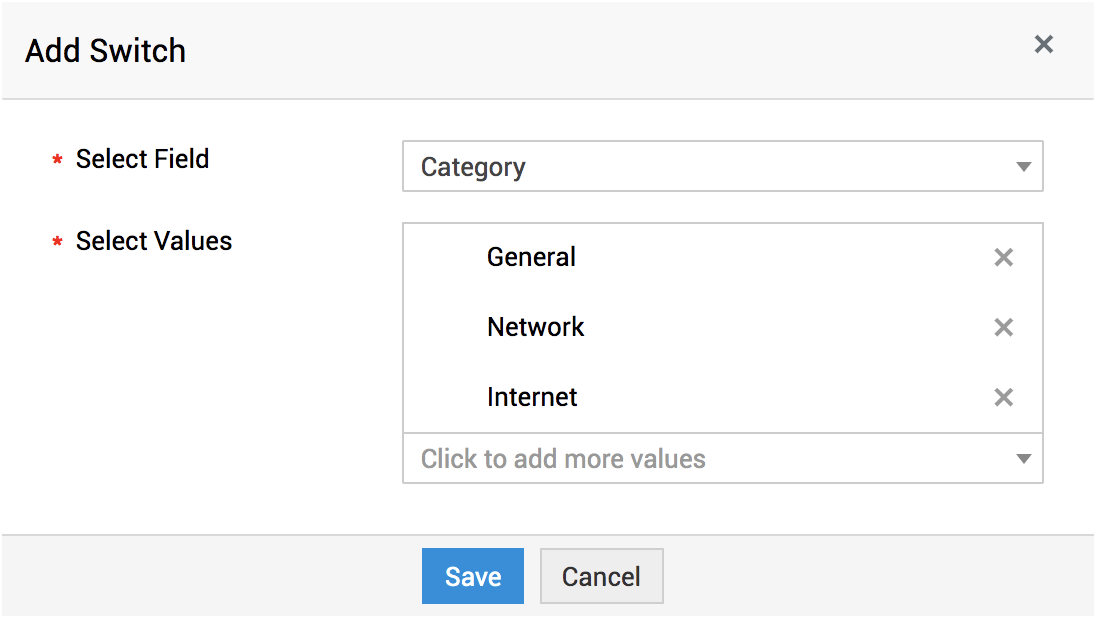
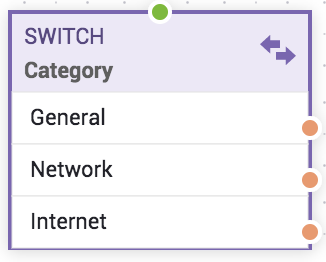
Switch - Switch is a multi-way branch node that refers to the value in a field and applies the workflow path based on the selected value.
-
Select the field to apply the switch condition.
-
Add the field values which must be referred to. You can design a different workflow path for each field value.
Switch node is rendered with a single input port and N number of output ports based on the values selected.
Notification - Configure a custom notification for your change workflow.
-
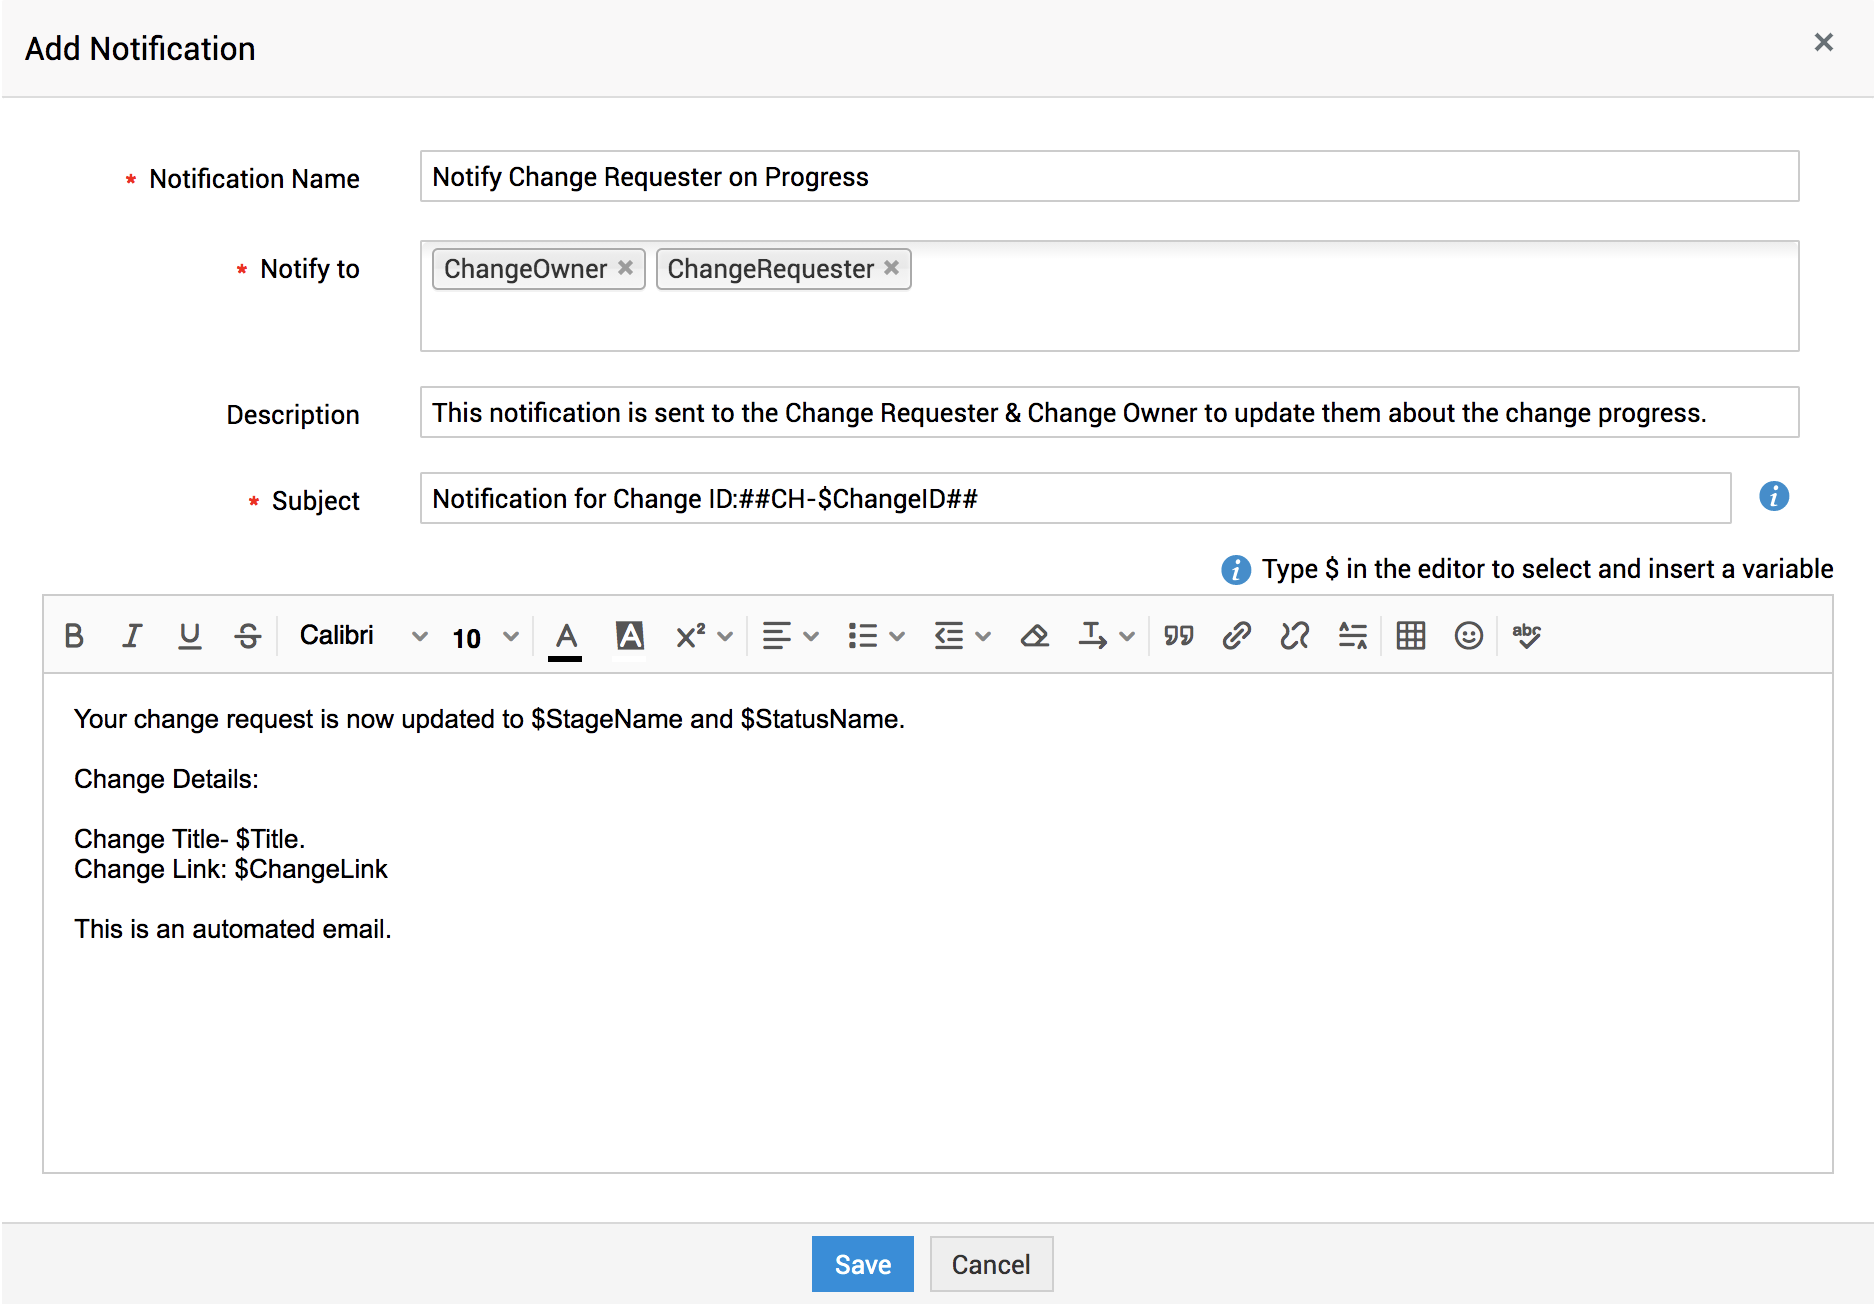
Select an existing custom notification or add a new notification in the Notification Name drop-down. You can also edit the selected notifications using the icon.
-
To add/edit a notification, enter the notification name and add a description.
-
Select the Change Roles/Organization Roles to whom the notification must be sent. To select users, type the user name and select the user from the drop-down.
-
Enter the subject and message to be sent in the notification email.
-
Click Save.
-
After you save/select a notification, the notify to, description, and subject are auto-populated with the notification details. Click Choose.
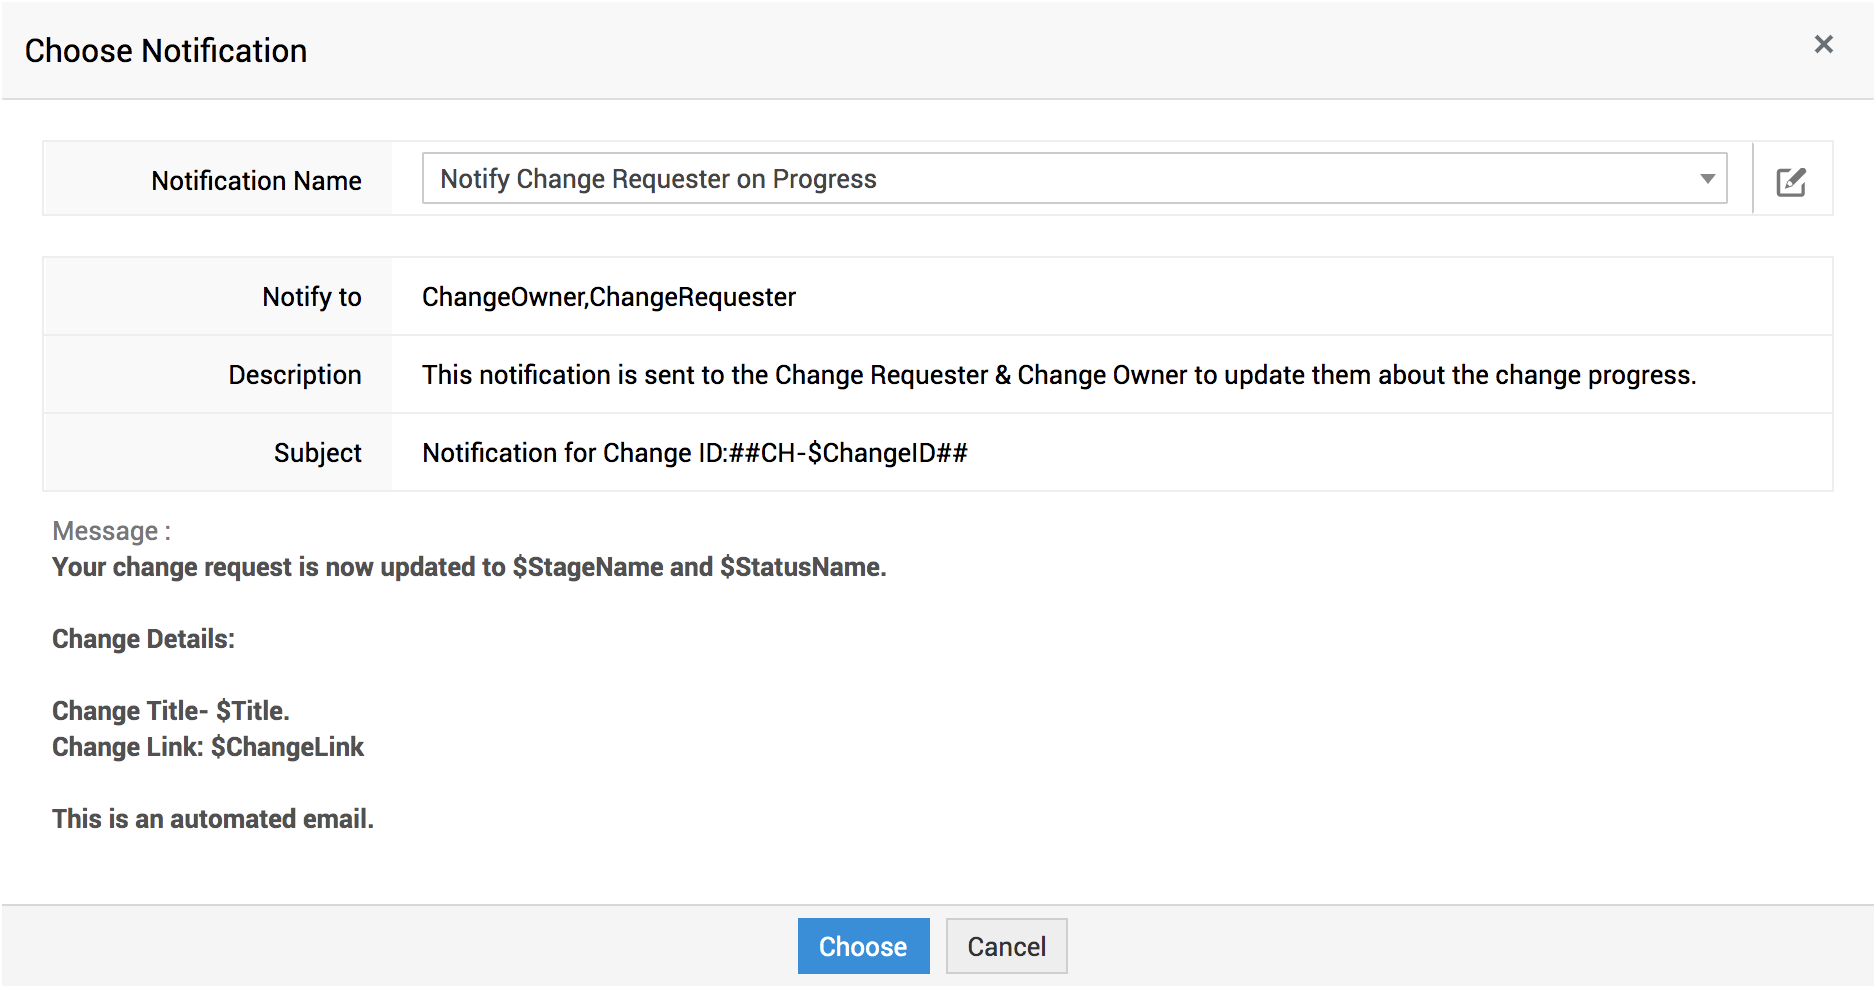
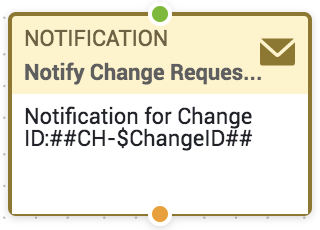
The notification node is rendered with a single input port and output port.
Approval - Add an approval level between stages and configure approval email notifications.
-
Enter the approval name.
-
Choose the approval condition from the Wait For drop-down. The available approval conditions are:
-
Anyone to approve - Approval is granted if any one of the approvers has approved; gets rejected only when all approvers have rejected.
-
Everyone to approve - Approval is granted only when all approvers have approved; gets rejected otherwise.
-
First Response Action - Approval is granted only when the first-ever approver has approved it; gets rejected otherwise.
-
You can also configure the first response from any of the approvers as the approval action.
-
Select the Change Roles/Organization Roles as the approvers. To select users, type the user name and select the user from the drop-down.
-
Enter your approval notification subject and message. You can add variables if needed.
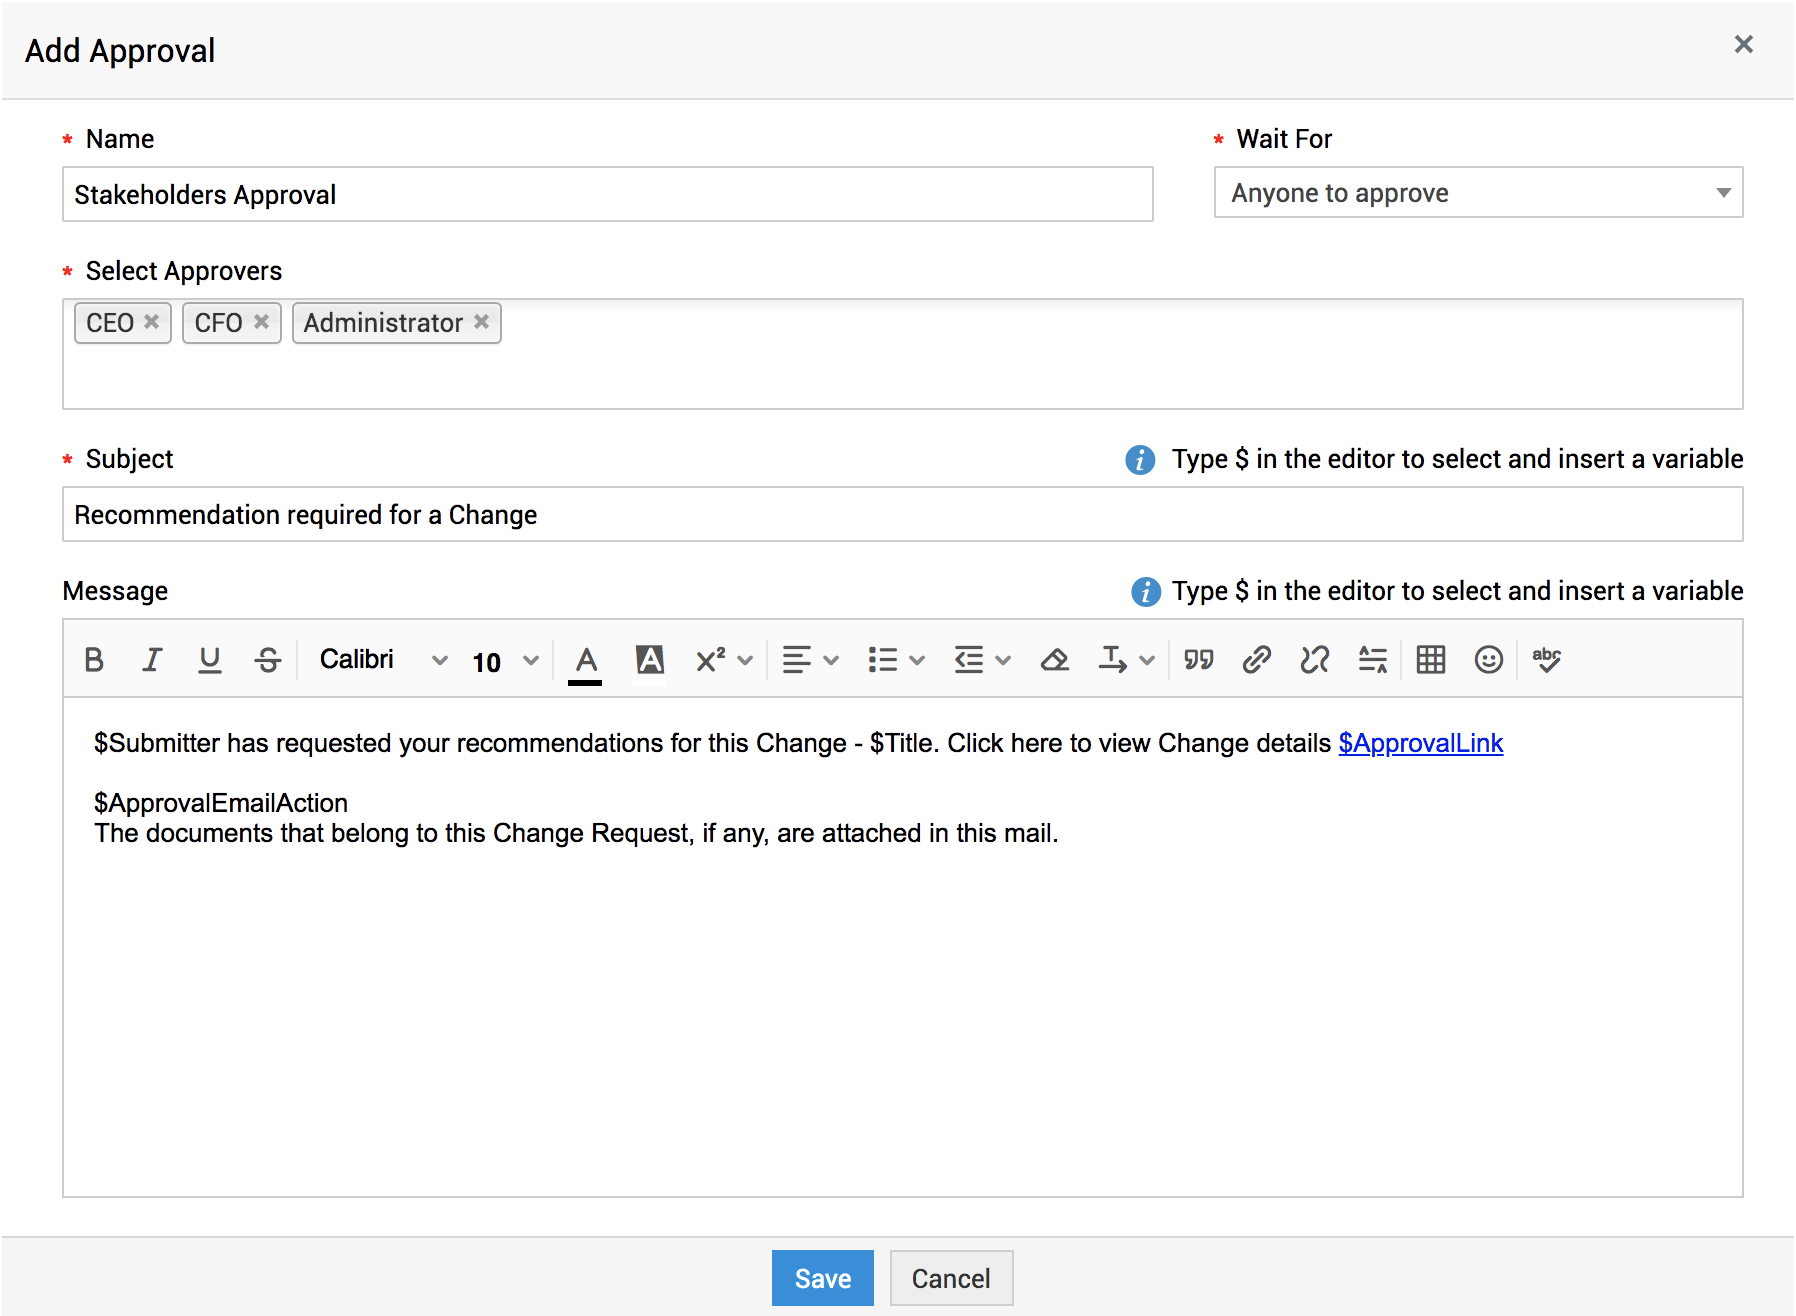
The Approval node is rendered with a single input port and two output ports (Approved/Denied).
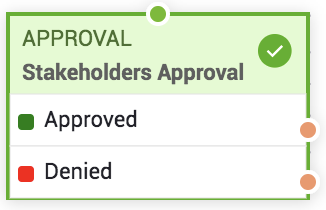
You cannot add approvals/approval levels to the change details page if a change workflow is associated with the change request.
Field Update - Update a field value before it proceeds to the next stage in the workflow.
-
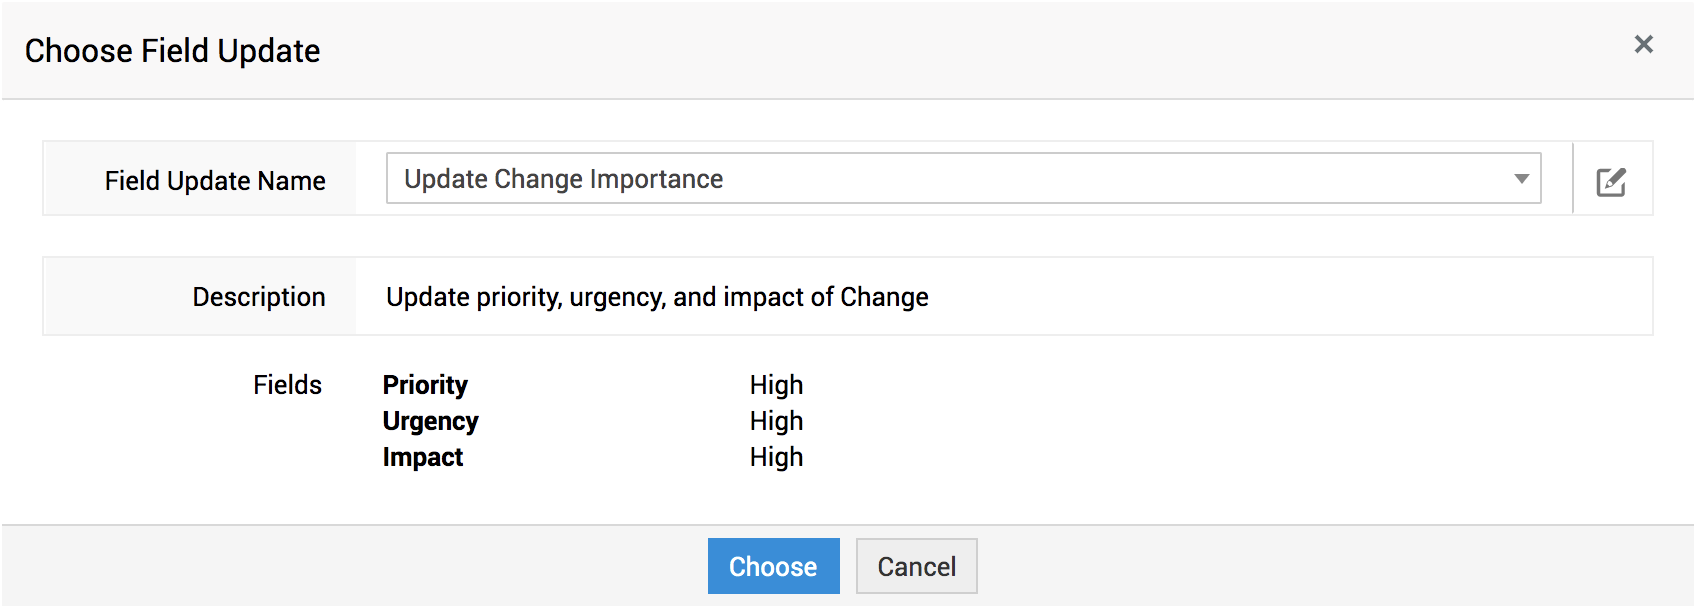
Select an existing field update configuration or add a new configuration from the Field Update Name drop-down. You can also edit the selected configuration using the
 icon.
icon.
-
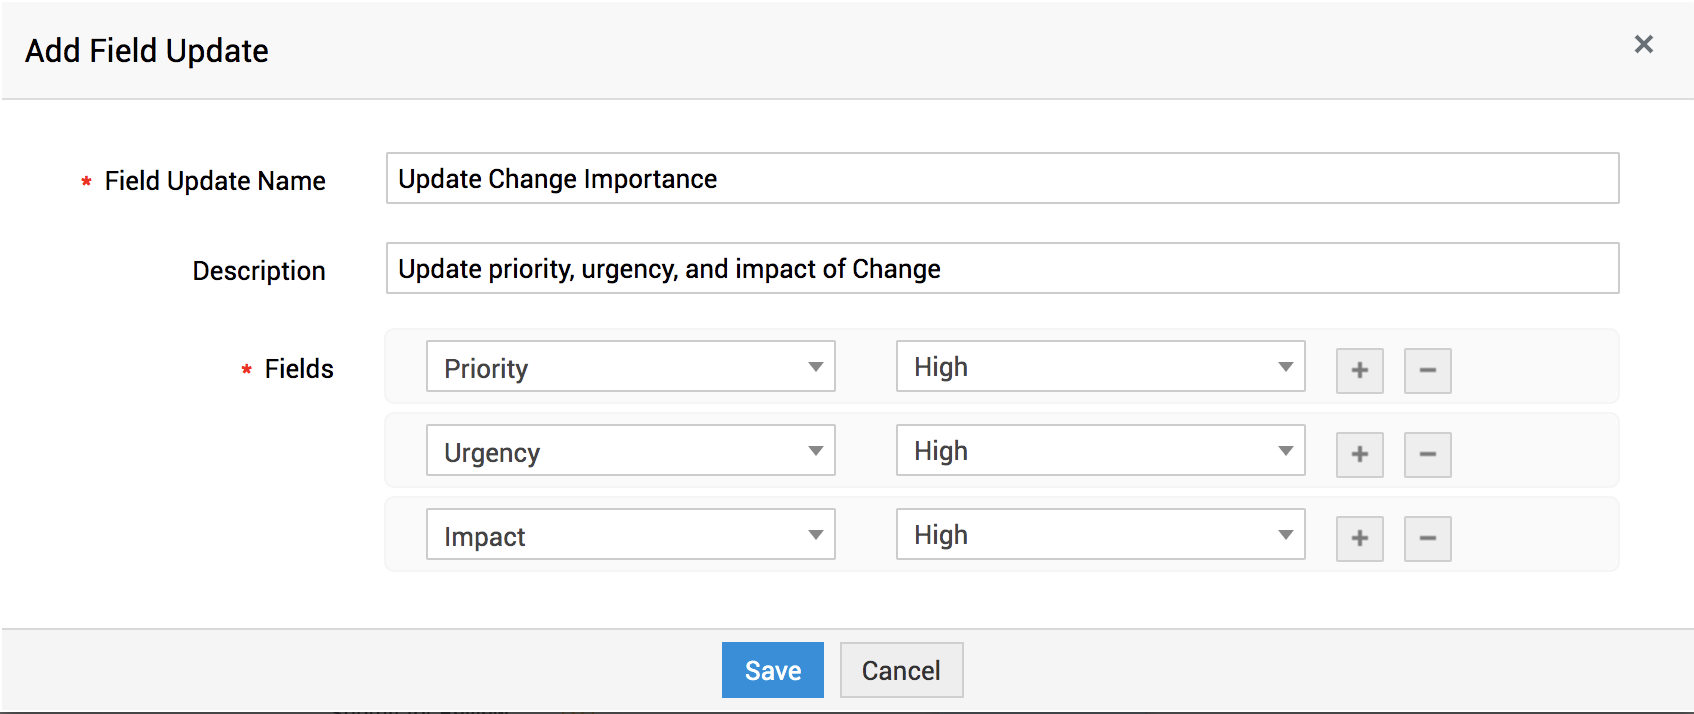
To add/edit a field configuration, enter the field update name and description.
-
Select the field and the value that must be applied during the field update. You can configure update for multiple fields using the icon.
-
Click Save.
-
After you save/select a field update, the description will be auto-updated based on the field update details. Click Choose.
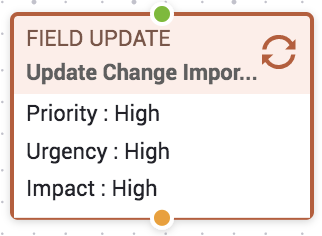
Field Update node is rendered with a single input port and output port.
Connect Nodes
To establish a connection between nodes, you must connect the output port of a node to the input port of another node.
-
Output nodes are marked in orange color.
-
Input nodes are marked in green by default. While attempting to connect an output node, the input nodes are highlighted in yellow.
Refer to the following screen video for a better understanding:
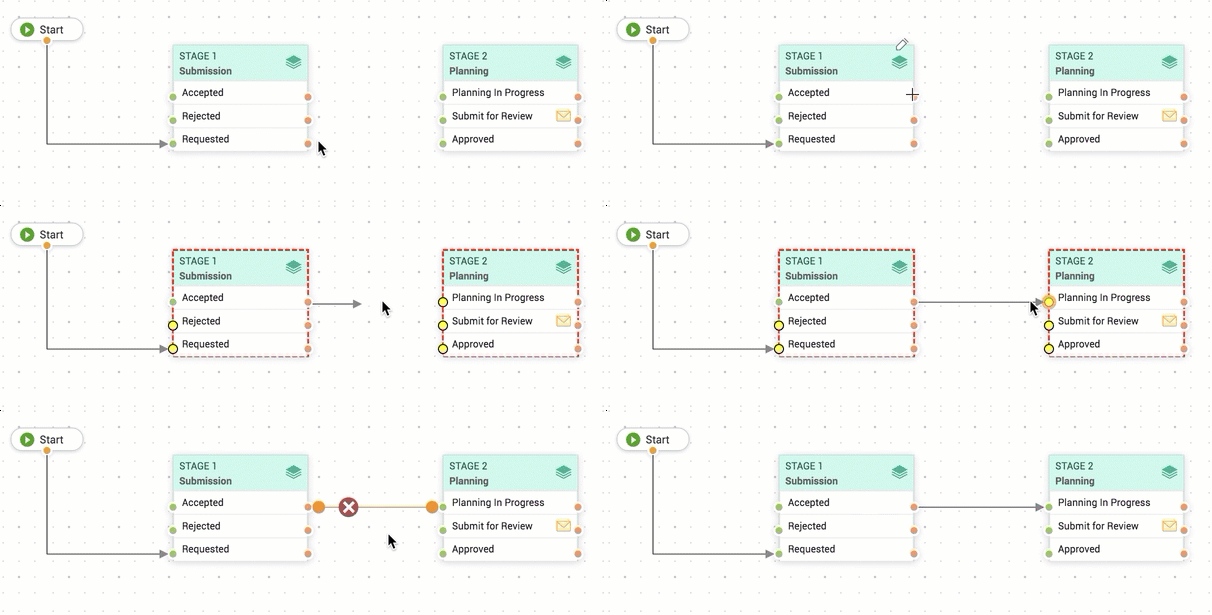
The connection arrow is referred to as Path Link.
Node Actions
You can perform the following actions on the nodes and the path links:
-
Edit/Delete a Node - Hover over a node to edit or delete it. The default stages cannot be edited or deleted.
-
Reposition Nodes/Path Link - Drag a node or path link to reposition it on the canvas as needed. The source or target node of a path link can be changed by dragging the input or output circles.
-
Add Vertexes - Hover over a path link to add vertexes by clicking on it.
-
View a Path Link's connections - Hover over a path link to view the source nodes, target nodes, and vertexes.
-
Remove Path Links/Vertexes - Hover over a path links or vertex and click the
 icon.
icon.
Use the zoom handle on the right corner of the canvas to view the graph in a large/small-scaled view. After configuring the workflow, click Save on the workflow header. ServiceDesk Plus will automatically validate your workflow before saving it. Descriptive warning messages are displayed to notify you if the workflow configuration contains errors.
On saved workflows, you can view the workflow properties, history and export the workflow graph as a PDF by clicking the  icon.
icon.
Validate Workflow
Workflows are validated based on the following rules:
-
Each node must have at least one incoming and outgoing connector/link.
-
Each link should be connected at both ends.
-
There must be a valid path from Start to End.
-
The flow should not be recursive.
-
Stage node should have at least one status.
-
Switch node should have at least one option.
-
Configuring both Yes and No options in the Condition node is not mandatory.
If a configuration used in a workflow is updated in any admin configurations, the workflow becomes invalidated. Invalidated workflows are indicated with a ![]() icon in the workflow list view. You cannot perform any operations on invalidated workflows, except edit or delete.
icon in the workflow list view. You cannot perform any operations on invalidated workflows, except edit or delete.
Note:
Only validated workflows can be saved.
A sample workflow:
