PO Cancelation Process
The Purchase Order Cancelation process lets you to cancel your PO that you have created earlier. The PO can be canceled before receiving the PO either partially or fully. Technicians with SDA Admin permission, Purchase owners and technicians with cancelation permission can cancel the Purchase Order.
Enabling Cancel PO Permission
To give Cancel PO permission,
- Click on the Admin tab in the header pane.
- Click on Roles under the Users section.
- Click on Add new role button at the top right side of the Configuration wizard page.

- Enable the Cancel Purchase Order radio button under the Purchase section.

Canceling PO
- Click the Purchase tab in the header pane to open the PO List View page.
- Click on the PO you wish to cancel.
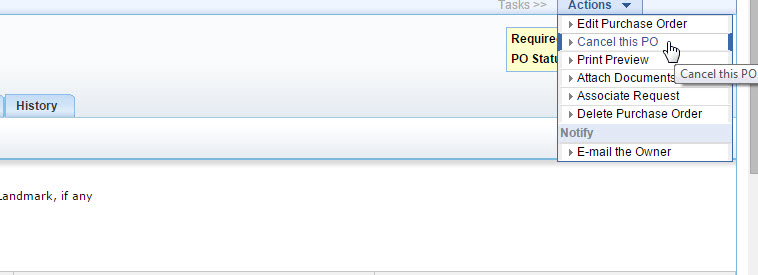
- Click on the Actions Menu on the top of the PO Details Page.
- Click on Cancel this PO from the drop-down list under Actions Menu.

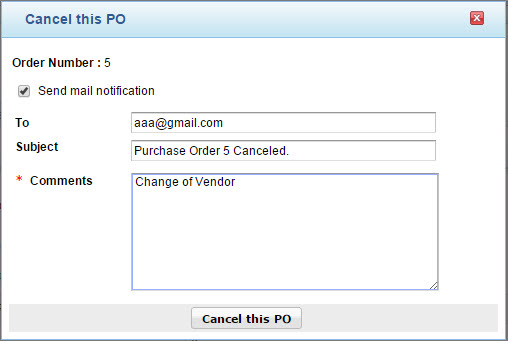
- A window will pop up where you can add comments and enable email notifications to the approvers.
- After you have added the comments or enabled email notification, click on Cancel this PO. The PO will be canceled.

|
Note
|
|
Email Notification
An automatic email notification can be enabled so that when a PO gets canceled, the owner, the approved approver and the current stage approver will be notified about the cancelation. This can be done by enabling the radio button present in the cancelation window box that pops up when you click Cancel this PO from under the Actions Menu.

|
Note
|
|
Customizing Email Notification
To Customize the email notification,
- Click on the Admin tab from the header pane.
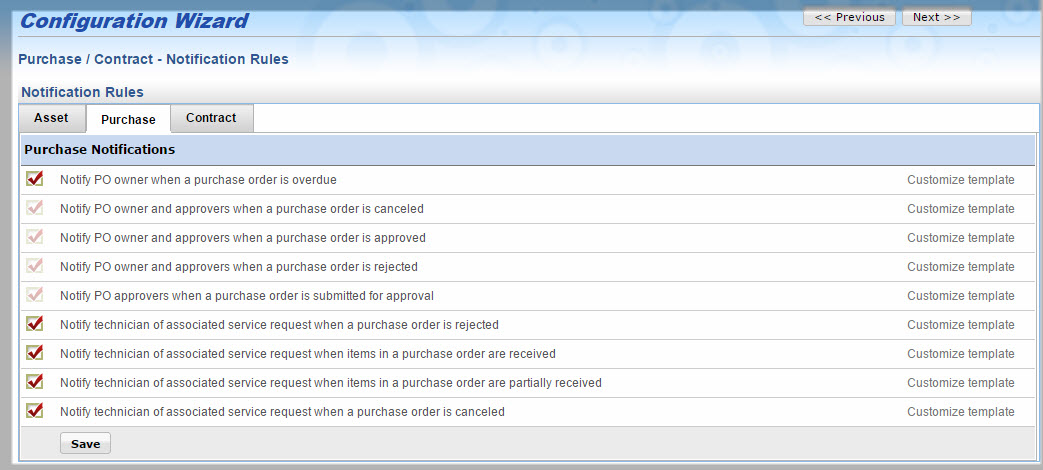
- Click on Notification rules under the section Purchase and Contract Management to go to Configuration wizard.
- Click on Purchase Menu in the Configuration wizard.
- Customize email notifications by enabling or disabling the radio buttons.
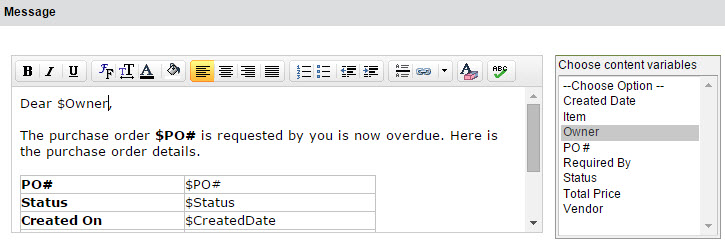
- Click on Customize template to customize the email template that will be sent for the notification.

To add subject variables,
- Select and click on a subject variable listed in the right side under Choose subject variables.
- For eg, If you want to add “Created date”, click on “Created date” from Choose subject variables it will get added to your subject.

To add Content variables,
- Select and click on a content variable listed in the right side under Choose content variables.
- For eg, If you want to add “Owner”, click on “Owner” from under the Choose content variable it will get added to your content.


