Color Settings
Color-code release requests in list view and classic view based on release attributes such as risk, stage, impact, priority, category, and urgency. This enables technicians to identify and track release requests easily.
The administrator can enforce global color settings on technicians or allow technicians to personalize their own color settings.
Configure Color Code
Role required: SDAdmin
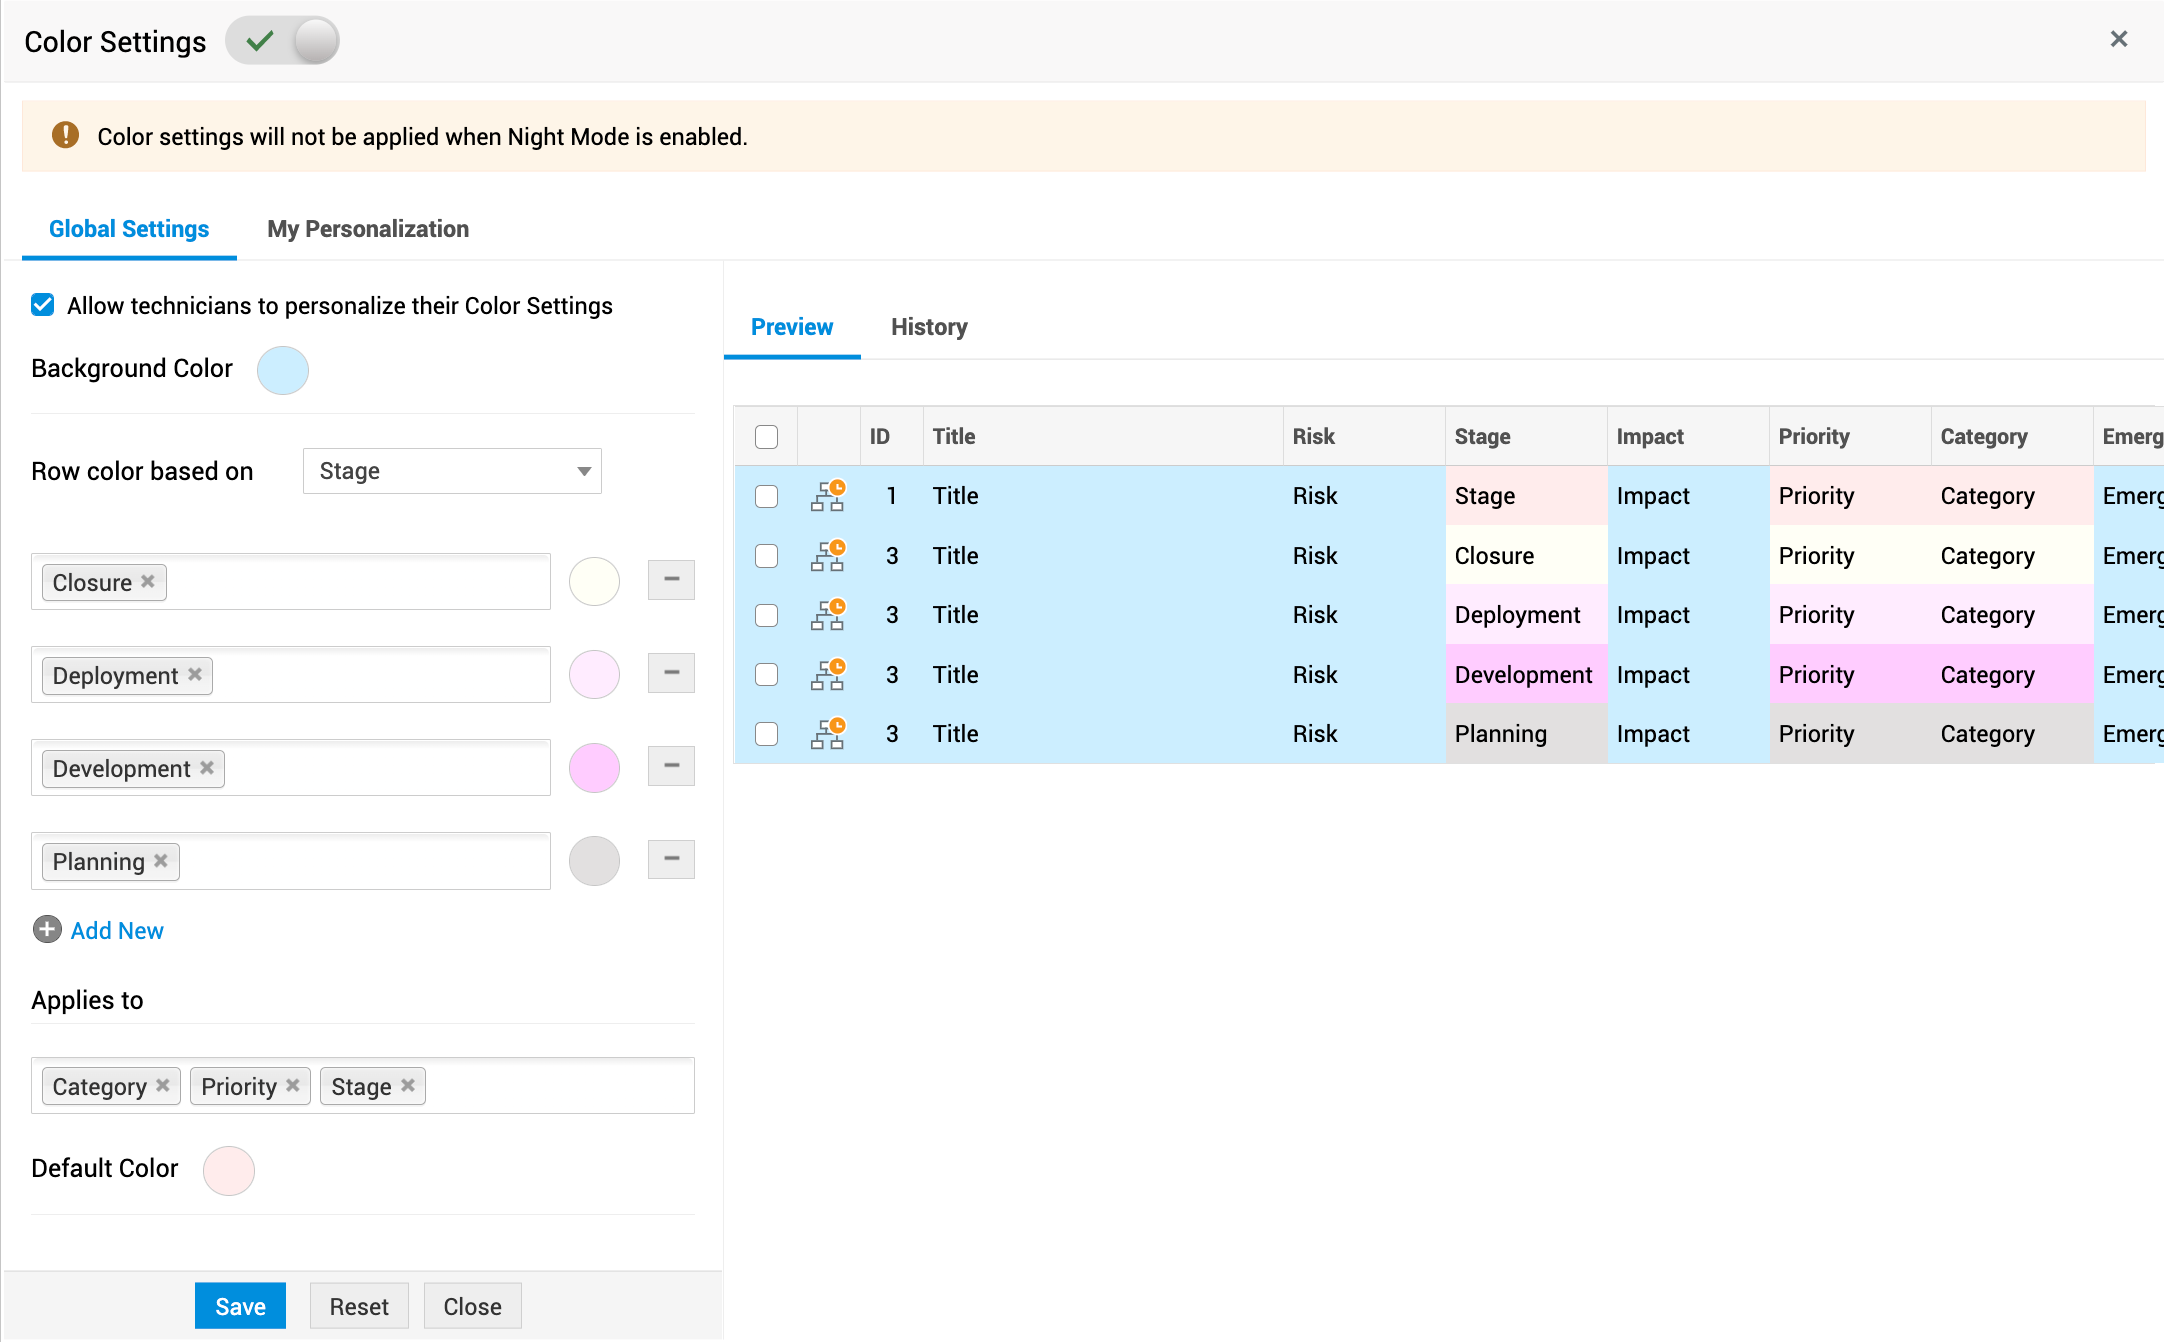
Go to release list view or classic view, click ![]() icon. In the Color Settings pop-up, the Global Settings tab will be displayed by default. The color code configured here will be enforced for all technicians. Use the following pointers to set up color settings:
icon. In the Color Settings pop-up, the Global Settings tab will be displayed by default. The color code configured here will be enforced for all technicians. Use the following pointers to set up color settings:
-
Enable/disable color settings: Use the Toggle button on the pop-up header to enable or disable color settings.
-
Allow Technicians to personalize their color setting: Select this check box to allow technicians to configure personalized color settings.
-
Background color: Choose the background color to be applied for all release requests.
-
Row color based on: Select the release attribute based on which you want to color-code release requests. Map each attribute value with a color using the color picker as explained below:
-
Click Add New.
-
Select the criteria to apply the color. The criteria are listed based on the selected attribute.
-
Use the color picker to associate a color to the selected criteria.
-
Applies to: You can apply the color settings to specific columns or all columns. This setting is not applicable to classic view.
-
Default Color: Choose the default color to be applied to release requests that do not match the color criteria. Default colors are only beneficial when the color settings are applied to selective columns.
After configuring color settings, click Save.

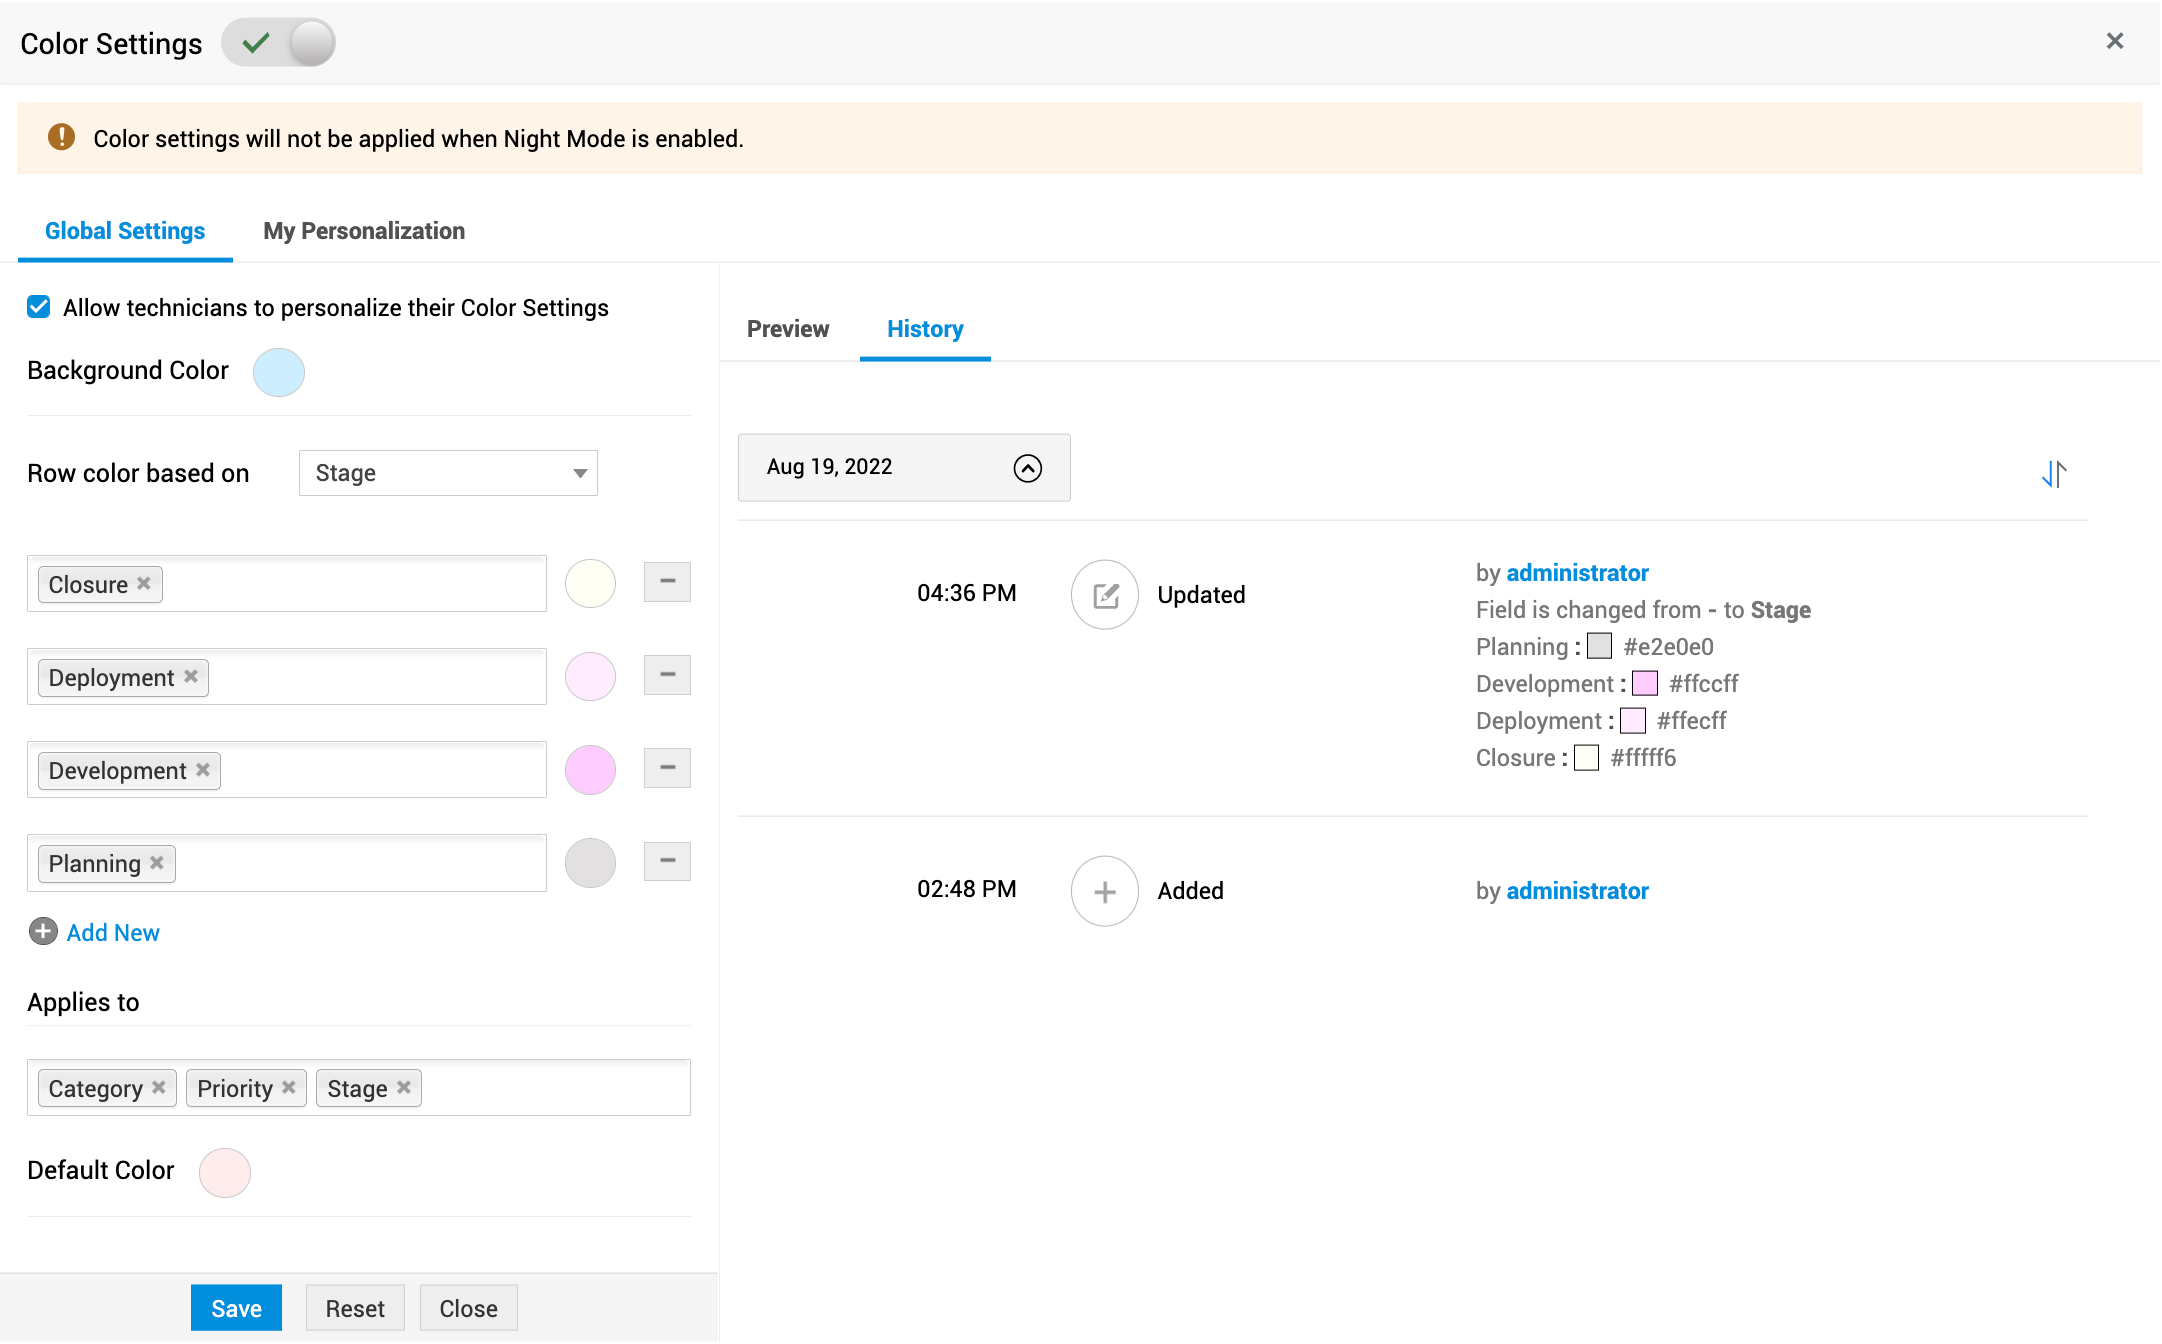
After the color settings are applied, you can click the ![]() icon on the toolbar to view the color interpretation. To modify the settings further, select Color Settings. The History tab in Color Settings pop-up captures all activities performed on color settings.
icon on the toolbar to view the color interpretation. To modify the settings further, select Color Settings. The History tab in Color Settings pop-up captures all activities performed on color settings.

Personalized Color Settings
Role required: SDAdmin and Technicians (permissions-enabled)
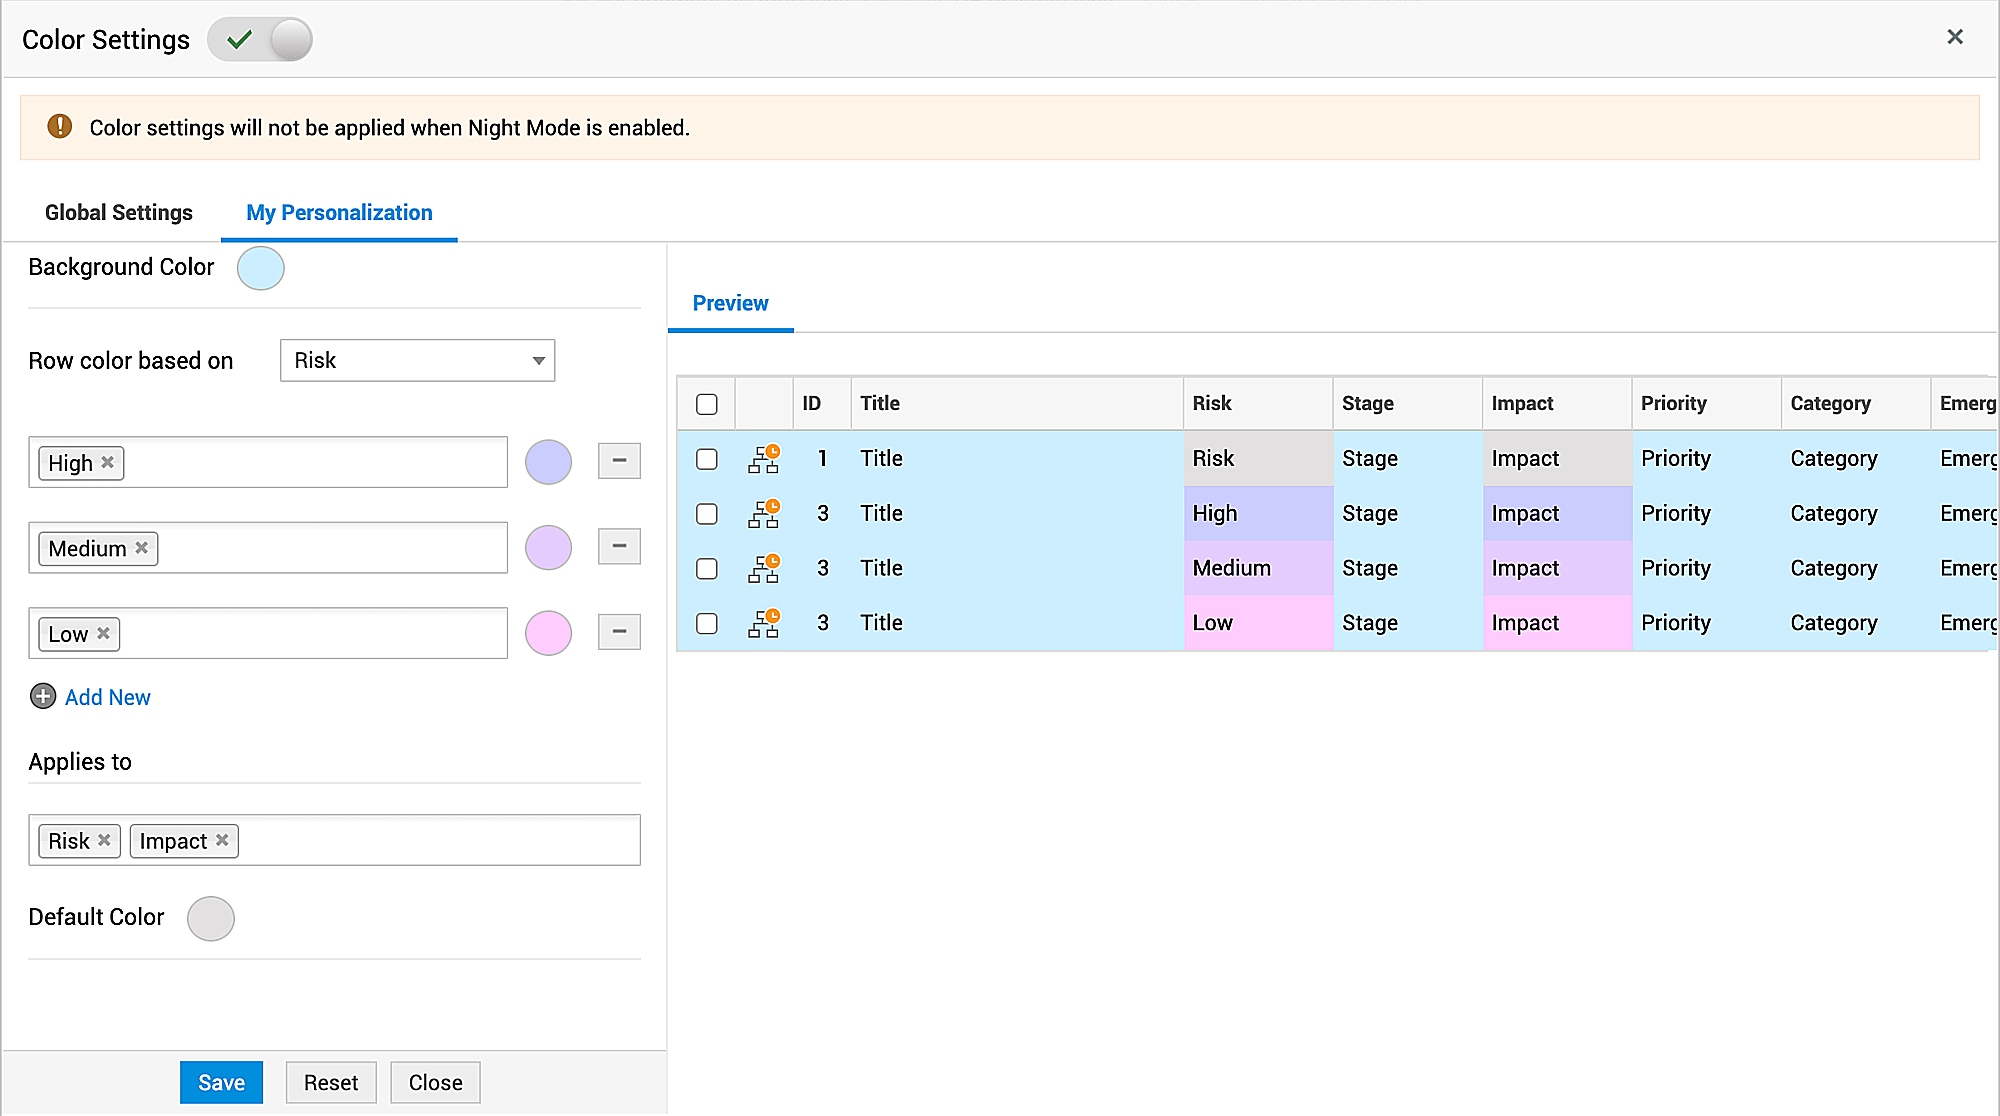
Technicians can personalize the release color settings in their login if the administrator has enabled permissions for them. The personalized color settings will override the global color settings in the release list view and classic view.
To personalize color settings, click ![]() icon on the toolbar. The Color Settings pop-up opens.
icon on the toolbar. The Color Settings pop-up opens.
-
If you are the SDAdmin, go to My Personalization tab.
-
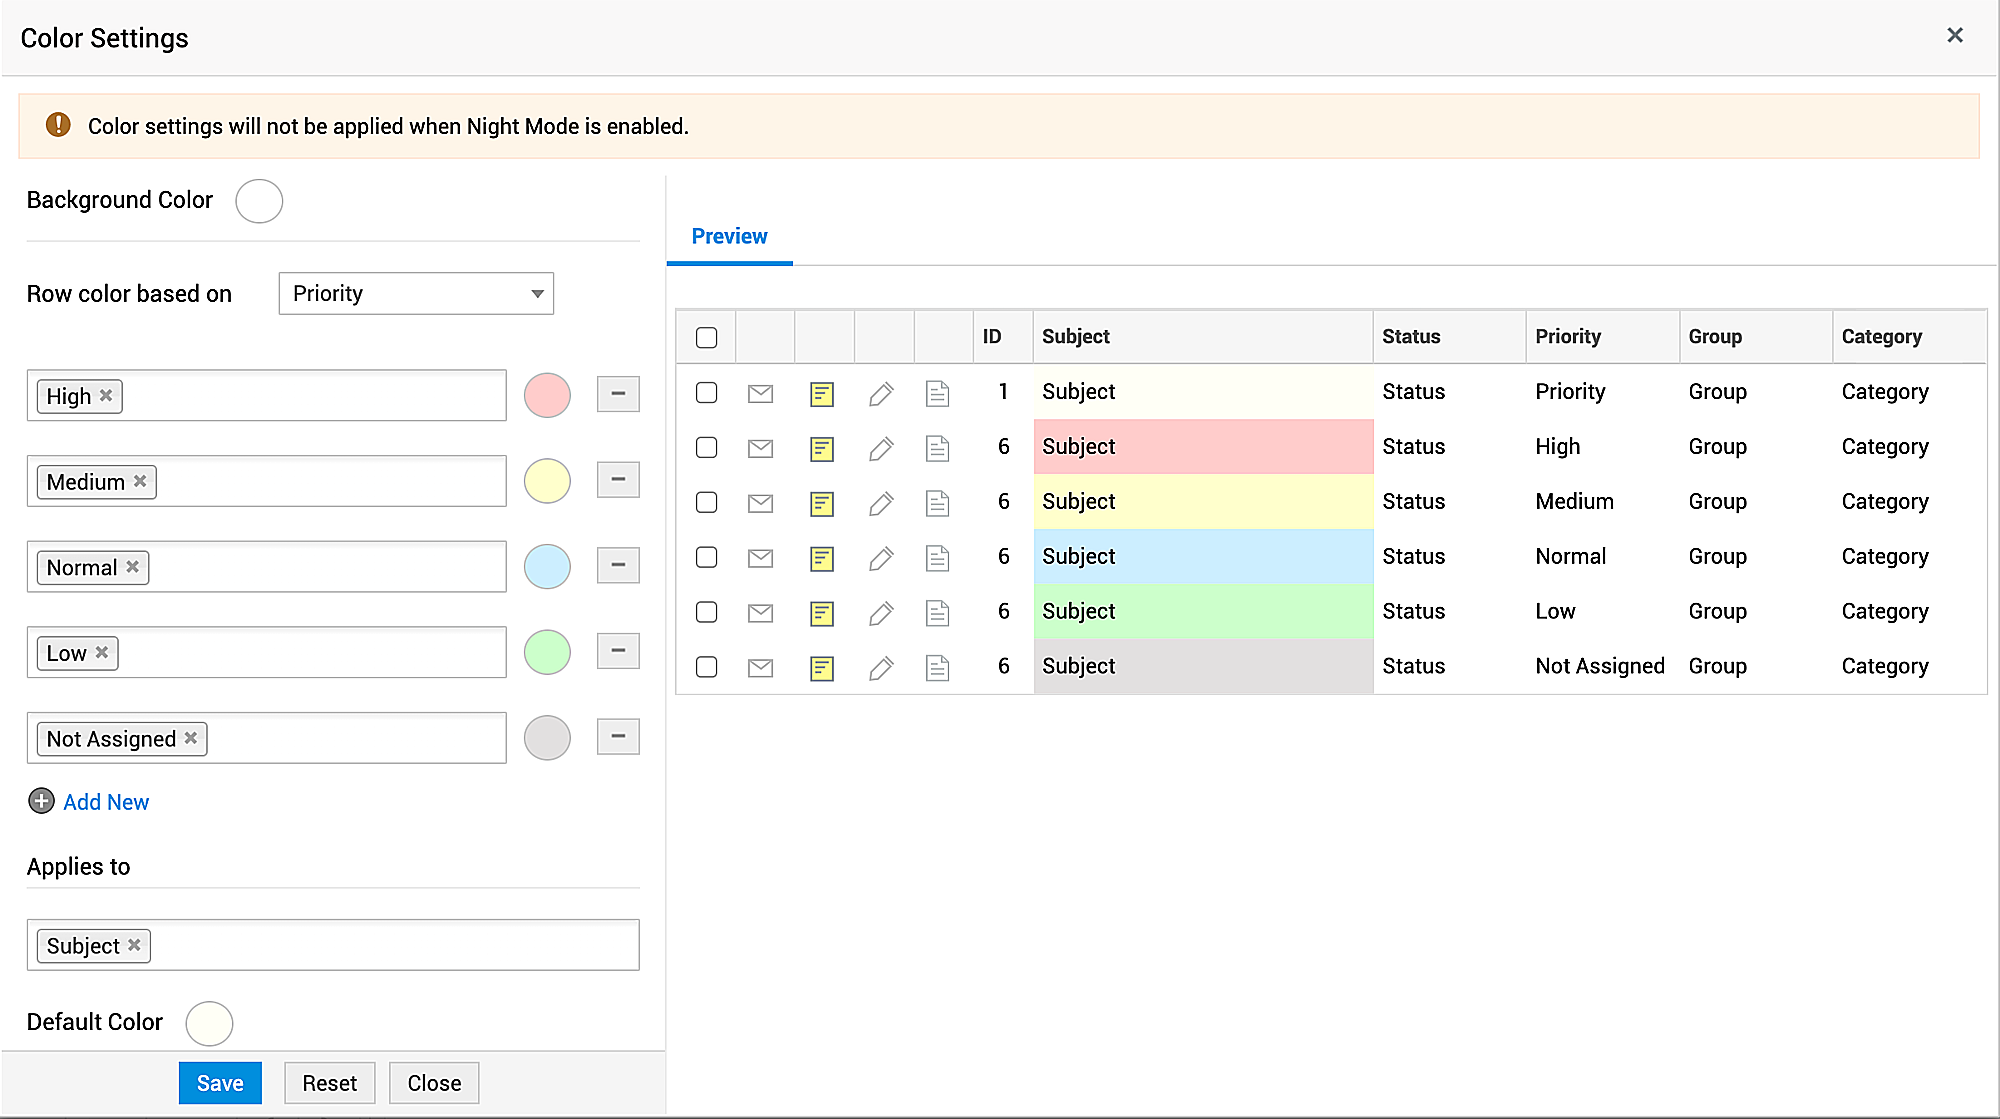
If you are a technician, you can start configuring your customized color code right away.
For SDAdmins

For Technicians (non-admin roles)

Color-coded view of Release Requests
Role Required: Technicians with View Releases permission.
Color-coding takes effect even as you configure the color settings. After the color settings are applied, the ![]() icon will be displayed for technicians under the list view and classic view pages. You can view the color interpretations by clicking it.
icon will be displayed for technicians under the list view and classic view pages. You can view the color interpretations by clicking it.
When colors are applied only for selected columns, the list view page will look as follows:

When colors are applied for all columns, the list view will look as follows:

In the release classic view, the colors are applied only to the release title, despite the columns selected in Applies to configuration.


