Release Stages
Release stages are significant events or milestones that involve a major delivery in a release life cycle. A release is built incrementally with subsequent stages to achieve a streamlined process.
ServiceDesk Plus MSP supports 9 stages that are essential to any release process:
Each stage represents a vital step in the release process and contains multiple tabs that break down the processes into manageable tasks. The following pointers encapsulate the information about the various tabs present in each release stage:
Submission
In the submission stage, the release request is assigned priority, risk, and other important parameters. The business requirements of the release are defined clearly.
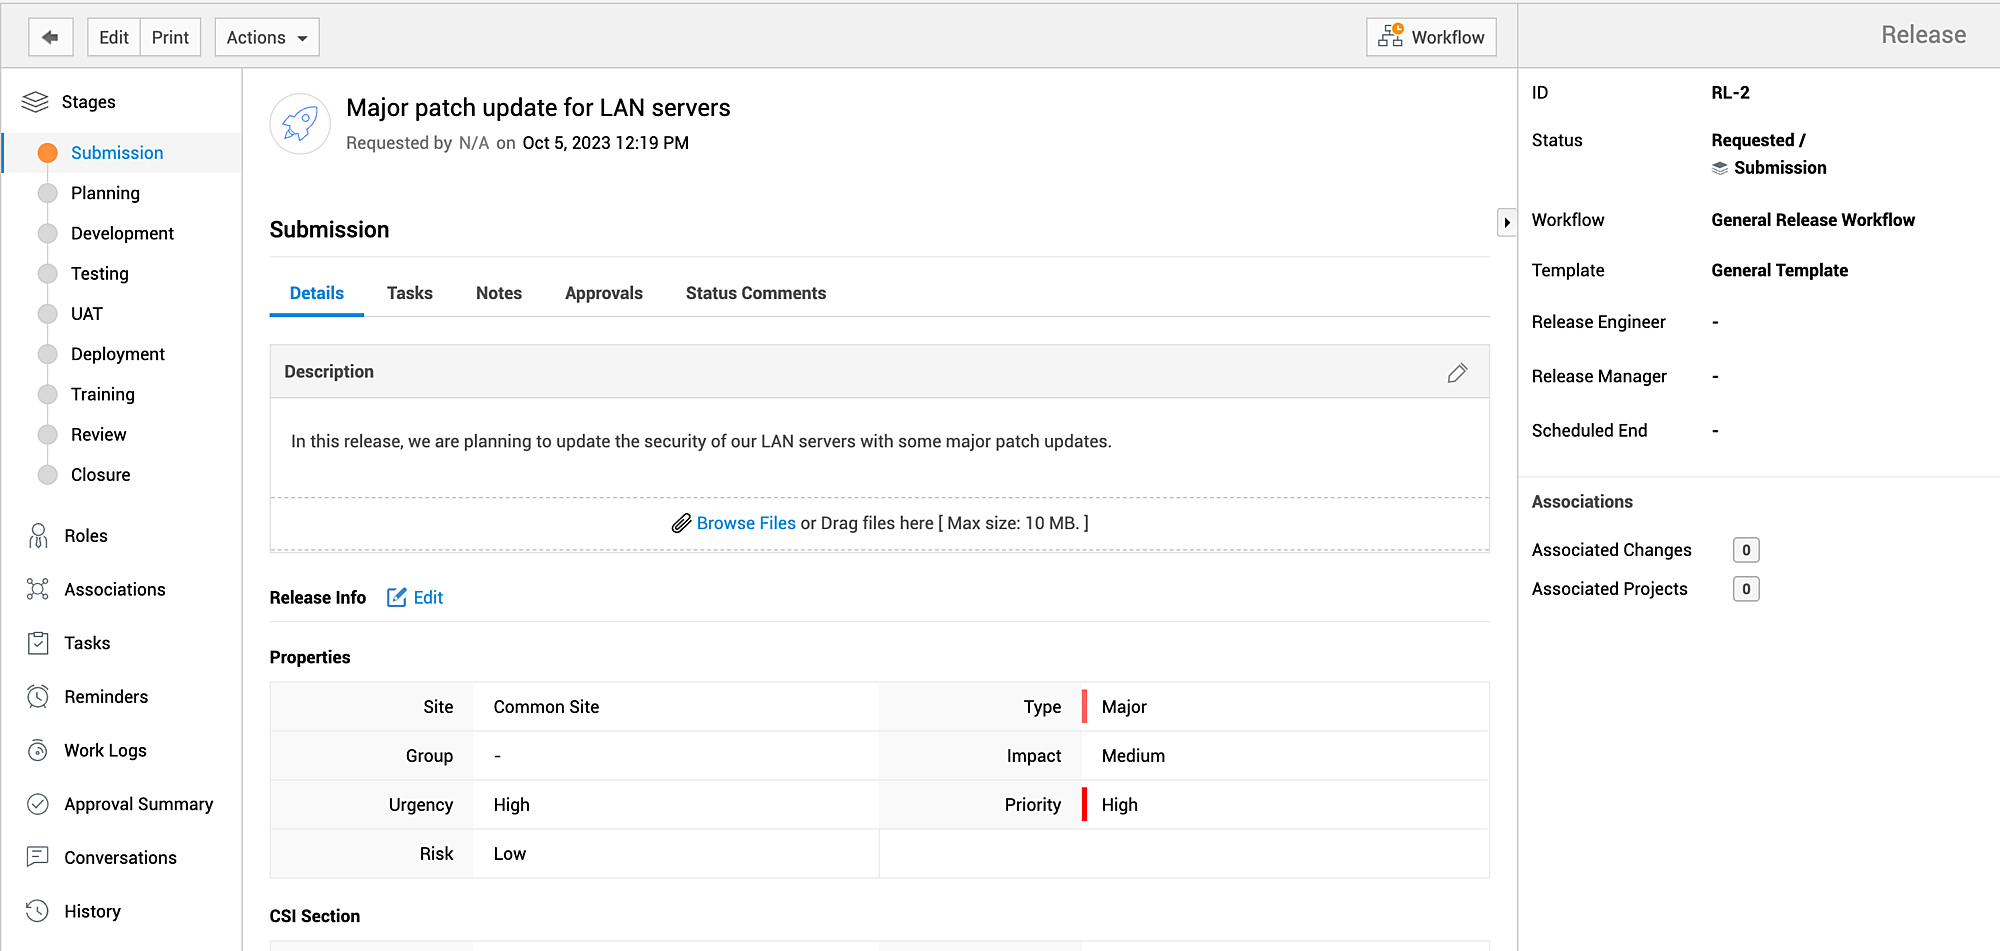
The submission stage contains the following tabs:
Details
You can record the goals and guidelines of the release as description under the Details tab. You can add attachments if needed.
The details of the release defined while creating the release request are displayed here. Depending on your release role and scope, you can spot-edit the release fields.
Tasks
You can add, trigger, edit, organize, delete, and close tasks necessary in each release stage. You can also track the task progress, filter tasks, and search for tasks in the submission stage.
Click on a task name to open the task details page. You can view the comprehensive details of the task, spot-edit the task fields, add comments or worklogs, and track history from the task details page.
Notes
Click Add Notes to add important information about the submission stage and tag users to notify them. You can edit and delete the notes.
Approvals
This tab displays the approvals configured in the workflow associated with the release request in the release stage. Depending on your permissions, you can perform approval actions on the release.
If no workflow is associated with the release, you can add approval levels for the submission stage in this tab.
-
Navigate to the Approvals tab and click Configure Level. If you have already configured levels, New Level.
-
Enter the approval Level Name. This is mandatory.
-
Select the Auto-Approval Rule (%). This denotes that if the selected percentage of approvers choose to approve the release request, the release will be automatically approved regardless of the approval action from the remainder of approvers.
For example, if you choose 50% as your auto-approval rule, the release will be approved once half of your approvers approve the release.
-
Choose your users and stakeholders to perform approval actions from the Approvers drop-down.
-
Click Add.
You can add more approvals to an approval level by clicking Add Approvals.
From the Level Actions drop-down, you can approve, reject, edit or delete approval levels based on your scope.
Status Comments
This tab captures the status transitions of the release in the submission stage. It also displays the comments added when the release status is modified.
Planning
The planning stage helps the release management team map out a detailed plan to execute the proposed release. Users can plan the release goals and guidelines, contemplate how to roll out the release, prepare for repercussions and set time frames to carry out the release stage by stage.
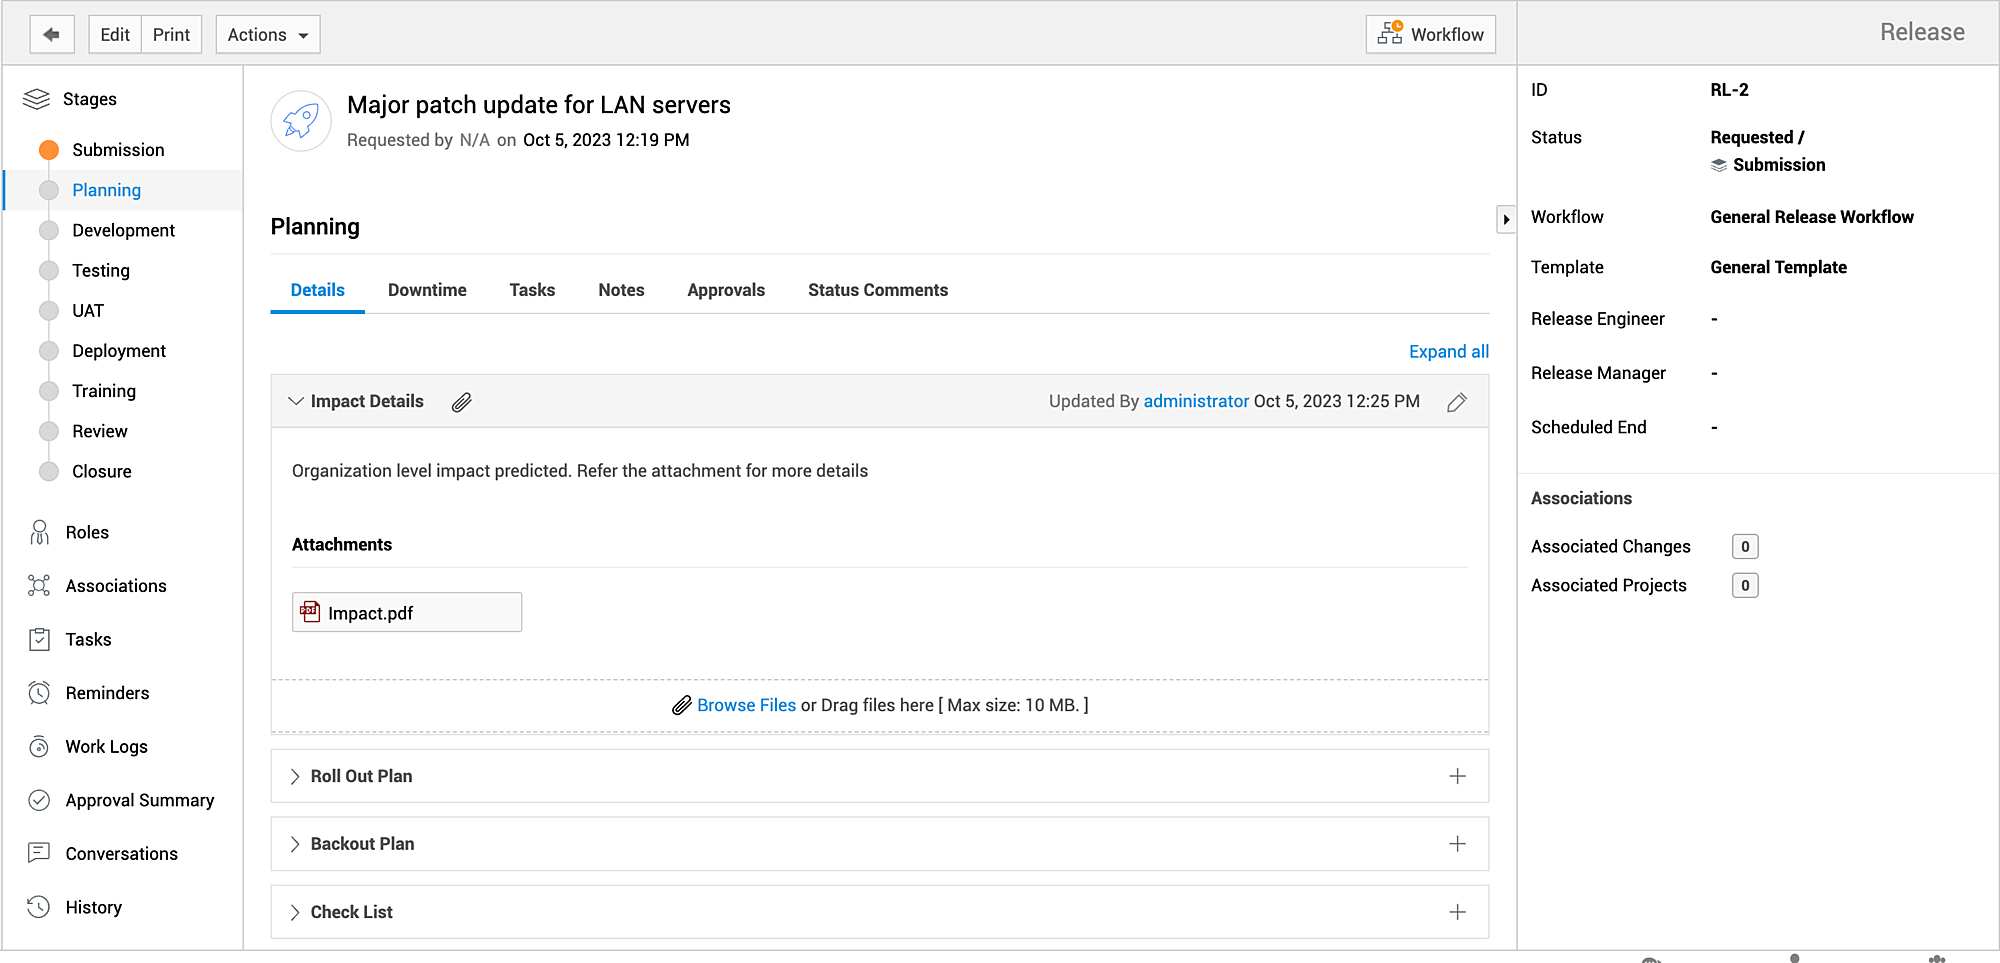
The planning stage contains the following tabs:
Details
You can add and modify all planning-related information in the details tab such as:
-
Impact Details - Record the impact the release might have on the business service and users. Decide if the customers should be informed of any downtime or connectivity issues this release might cause.
-
Roll Out Plan - Plan in detail on how the process will be implemented. Describe if the release is implemented in phases or in one shot.
-
Back Out Plan - If the release were not fall through, explain how it will be canceled. Plan how to mitigate the effects in such cases.
-
Checklist - Create a checklist including the list of activities that must be done before the release request can progress to the next stage. You can also use the checklist to verify whether you have captured all the relevant information in the release plan.
In each section, you can attach related files to the section. To modify any information added, use the ![]() icon.
icon.
Downtimes
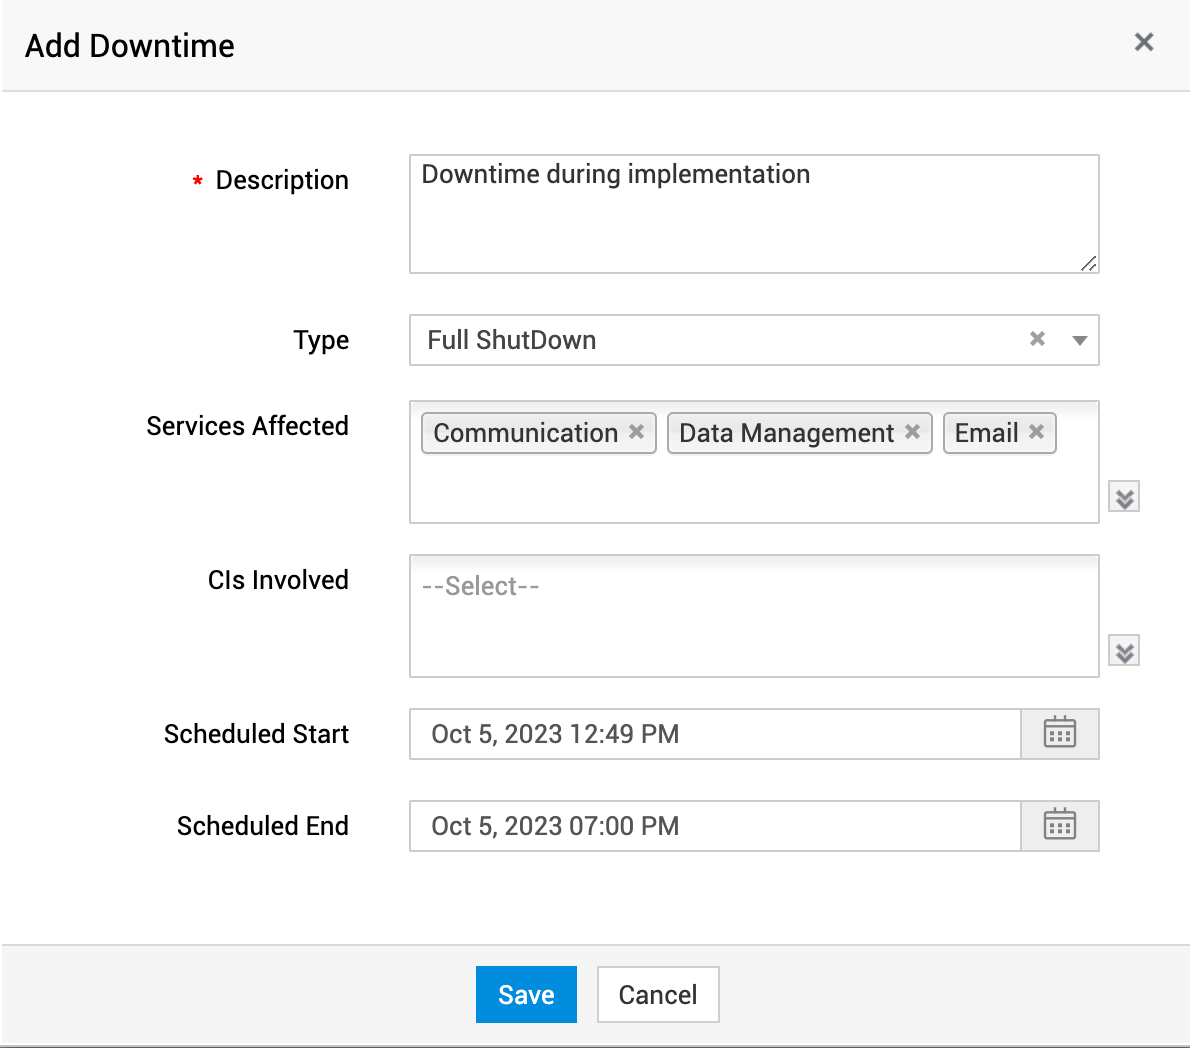
In this tab, you can schedule service downtimes that might occur when the release is underway.
-
Click Add Downtime.
-
Provide a Description for the downtime. This is mandatory.
-
Select the Downtime Type from the drop-down.
-
Select the Services Affected by the downtime.
-
Select the CIs Involved with the affected services.
-
Enter the Scheduled Start and Schedule End time.
-
Click Save.
Tasks
You can add, trigger, edit, organize, delete, and close tasks necessary for the planning stage. You can also track the task progress, filter tasks, search for tasks in the planning stage.
Click on a task name to open the task details page. You can view the comprehensive details of the task, spot-edit the task fields, add comments or worklogs, and track history from the task details page.
Notes
Click Add Notes to add important information about the planning stage and tag users to notify them. You can edit and delete the notes.
Approvals
This tab displays the approvals configured in the workflow associated with the release request in the planning stage. Depending on your permissions, you can perform approval actions on the release.
If no workflow is associated with the release, you can add approval levels for the planning stage in this tab.
-
Navigate to the Approvals tab and click Configure Level. If you have already configured levels, New Level.
-
Enter the approval Level Name. This is mandatory.
-
Select the Auto-Approval Rule (%). This denotes that if the selected percentage of approvers choose to approve the release request, the release will be automatically approved regardless of the approval action from the reminder of approvers.
For example, if you choose 50% as your auto-approval rule, the release will be approved once half of your approvers approve the release.
-
Choose your users and stakeholders to perform approval actions from the Approvers drop-down.
-
Click Add.
You can add more approvals to an approval level by clicking Add Approvals.
From the Level Actions drop-down, you can approve, reject, edit or delete approval levels based on your scope.
Status Comments
This tab captures the status transitions of the release in planning stage. It also displays the comments added when the release status is modified.
Development
The prerequisites and processes involved in the release are built. This stage prepares for the release of the product that was already built in the Change Management process.
Documentation is initiated at the beginning of the development process to set metrics and provide guidelines to the technicians developing the release. The documentation is maintained accurately throughout the development process to be used in repeating the software build generation if necessary.
The development stage mostly involves time-based work from technicians and requires them to follow strict time frames.
Details
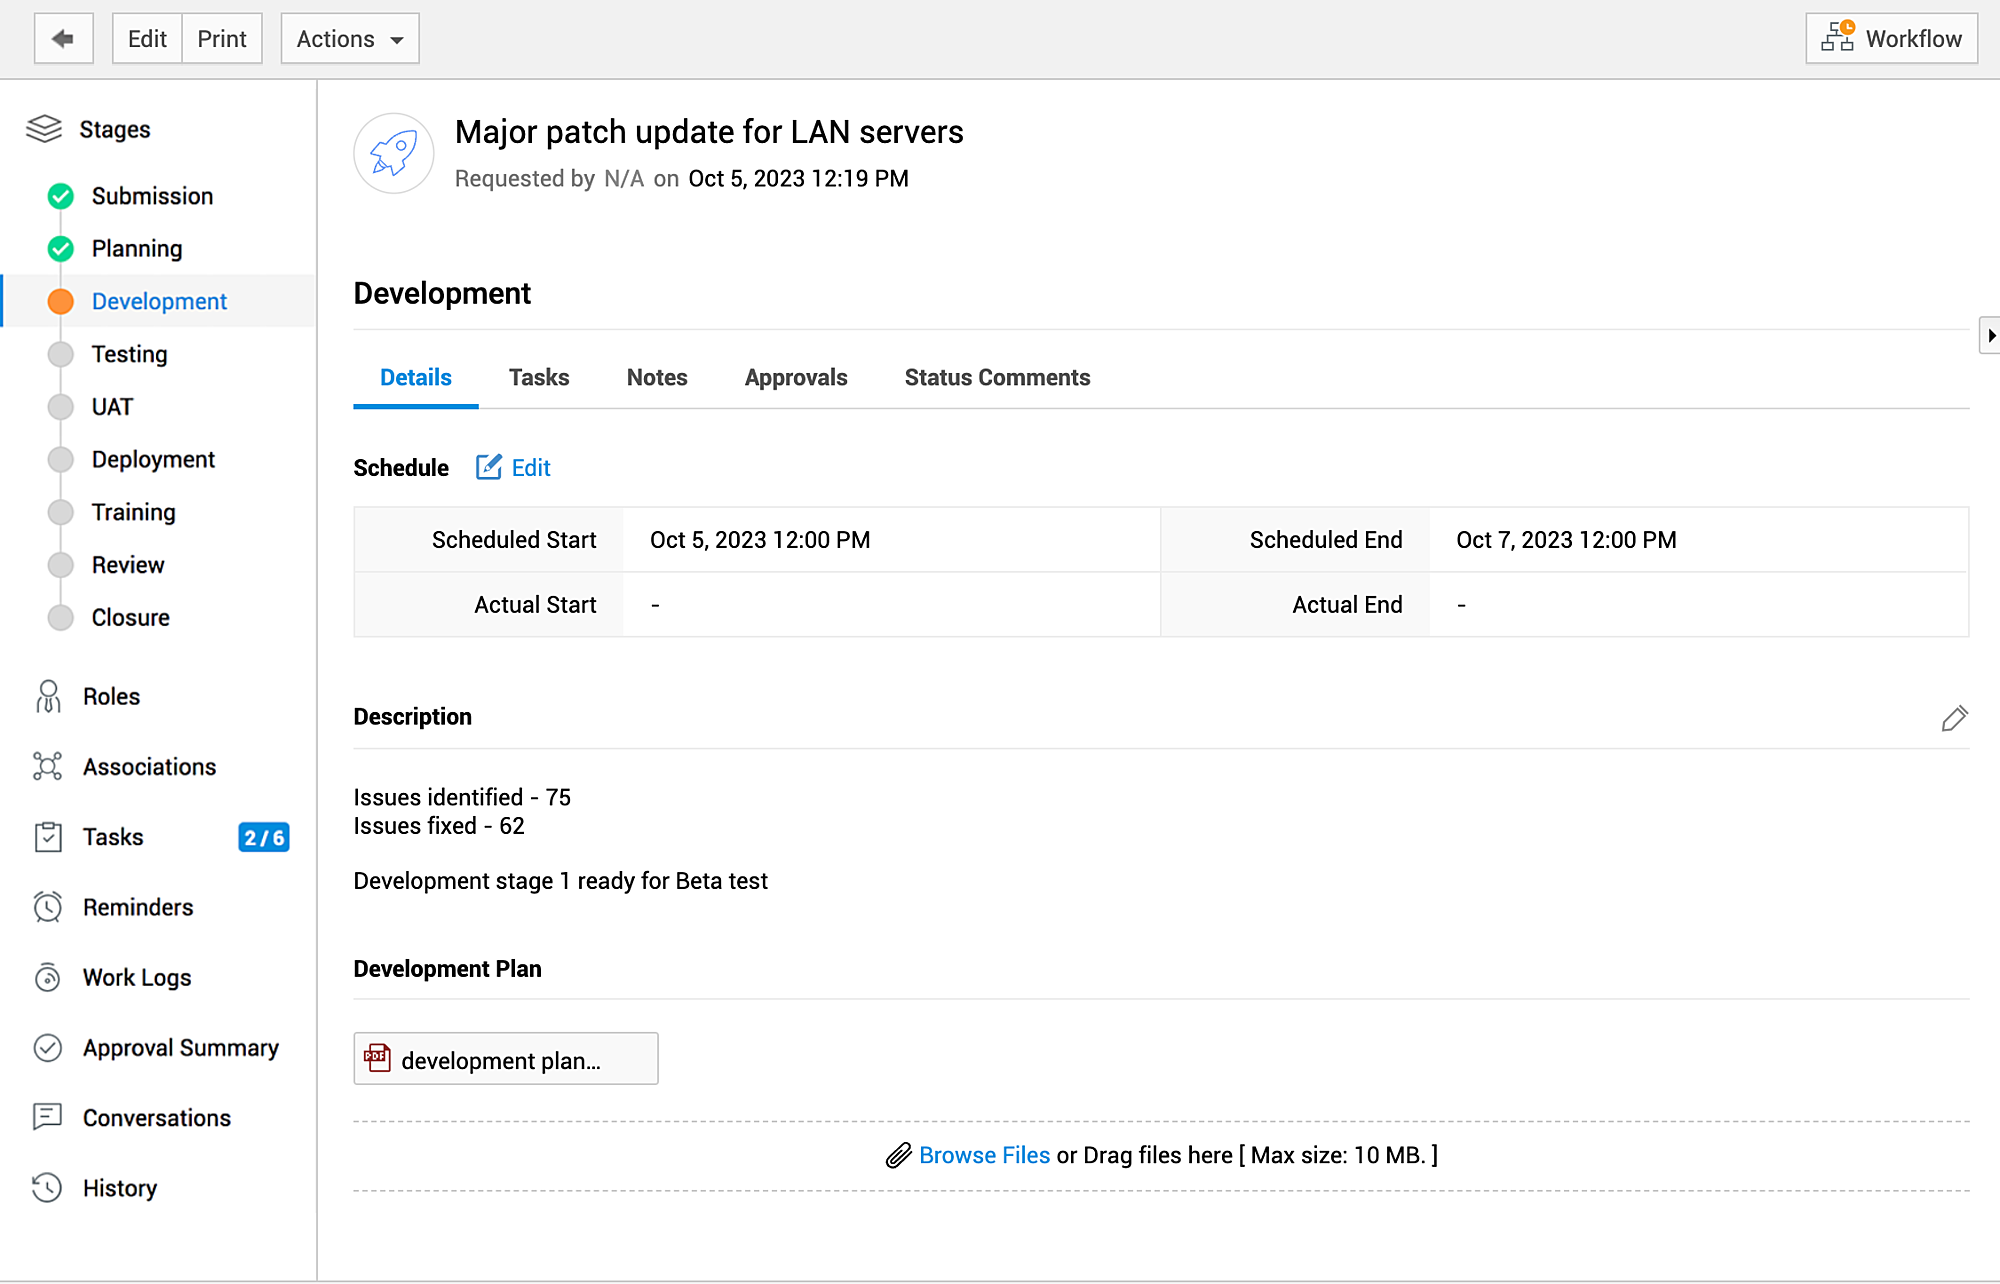
Add the scheduled start and end dates for the release development. After development, you can add the actual start and end dates.
Specify the resources involved, the support provided, or expected fringe cases in the description. Attach related files, if any.
Tasks
You can add, trigger, edit, organize, delete, and close tasks necessary in each release stage. You can also track the task progress, filter tasks, search for tasks in the development stage and spot-edit the task fields.
Notes
Click Add Notes to add important information about the development stage and tag users to notify them. You can edit and delete the notes.
Approvals
This tab displays the approvals configured in the workflow associated with the release request in the development stage. Depending on your permissions, you can perform approval actions on the release.
If no workflow is associated with the release, you can add approval levels for the development stage in this tab.
-
Navigate to Approvals tab and click Configure Level. If you have already configured levels, New Level.
-
Enter the Approval Level Name. This is mandatory.
-
Select the Auto-Approval Rule (%). This denotes that if the selected percentage of approvers choose to approve the release request, the release will be automatically approved regardless of the approval action from the reminder of approvers.
For example, if you choose 50% as your auto-approval rule, the release will be approved once half of your approvers approve the release.
-
Choose your users and stakeholders to perform approval actions from the Approvers drop-down.
-
Click Add.
You can add more approvals to an approval level by clicking Add Approvals.
From the Level Actions drop-down, you can approve, reject, edit or delete approval levels based on your scope.
Status Comments
This tab captures the status transitions of the release in development stage. It also displays the comments added when the release status is modified.
Testing
The prerequisites and processes built for the release are tested for common bugs and functionality issues by the Quality Assurance (QA) team. Testing ensures that they meet the requirements outlined in the release plan without compromising on the quality standards.
Testing could take many iterations, so it is vital the release is planned with a doable deadline. All issues found during the QA testing must be carefully documented to follow up on the resolution and resolved as follows:
-
High-priority issues are identified and the release request is sent back to the Development stage for fixing showstoppers and other high-priority issues.
-
Alternatively, you can fix these issues in the Testing stage.
The QA team approves the release after ensuring that the processes involved function as expected.

Details
Add the scheduled start and end dates for the release testing. After testing, you can add the actual start and end dates.
Provide a short description of the testing process, a link to report issues, and related information in the description. After testing, you can attach separate files for test cases and issues.
Tasks
You can add, trigger, edit, organize, delete, and close tasks necessary in the testing stage. You can also track the task progress, filter tasks, search for tasks in the submission stage and spot-edit the task fields.
Notes
Click Add Notes to add important information about the testing stage and tag users to notify them. You can edit and delete the notes.
Approvals
This tab displays the approvals configured in the workflow associated with the release request after the testing stage. Depending on your permissions, you can perform approval actions on the release.
If no workflow is associated with the release, you can add approval levels for the testing stage in this tab.
-
Navigate to Approvals tab and click Configure Level. If you have already configured levels, New Level.
-
Enter the Approval Level Name. This is mandatory.
-
Select the Auto-Approval Rule (%). This denotes that if the selected percentage of approvers choose to approve the release request, the release will be automatically approved regardless of the approval action from the reminder of approvers.
For example, if you choose 50% as your auto-approval rule, the release will be approved once half of your approvers approve the release.
-
Choose your users and stakeholders to perform approval actions from the Approvers drop-down.
-
Click Add.
You can add more approvals to an approval level by clicking Add Approvals.
From the Level Actions drop-down, you can approve, reject, edit or delete approval levels based on your scope.
Status Comments
This tab captures the status transitions of the release in testing stage. It also displays the comments added when the release status is modified.
UAT
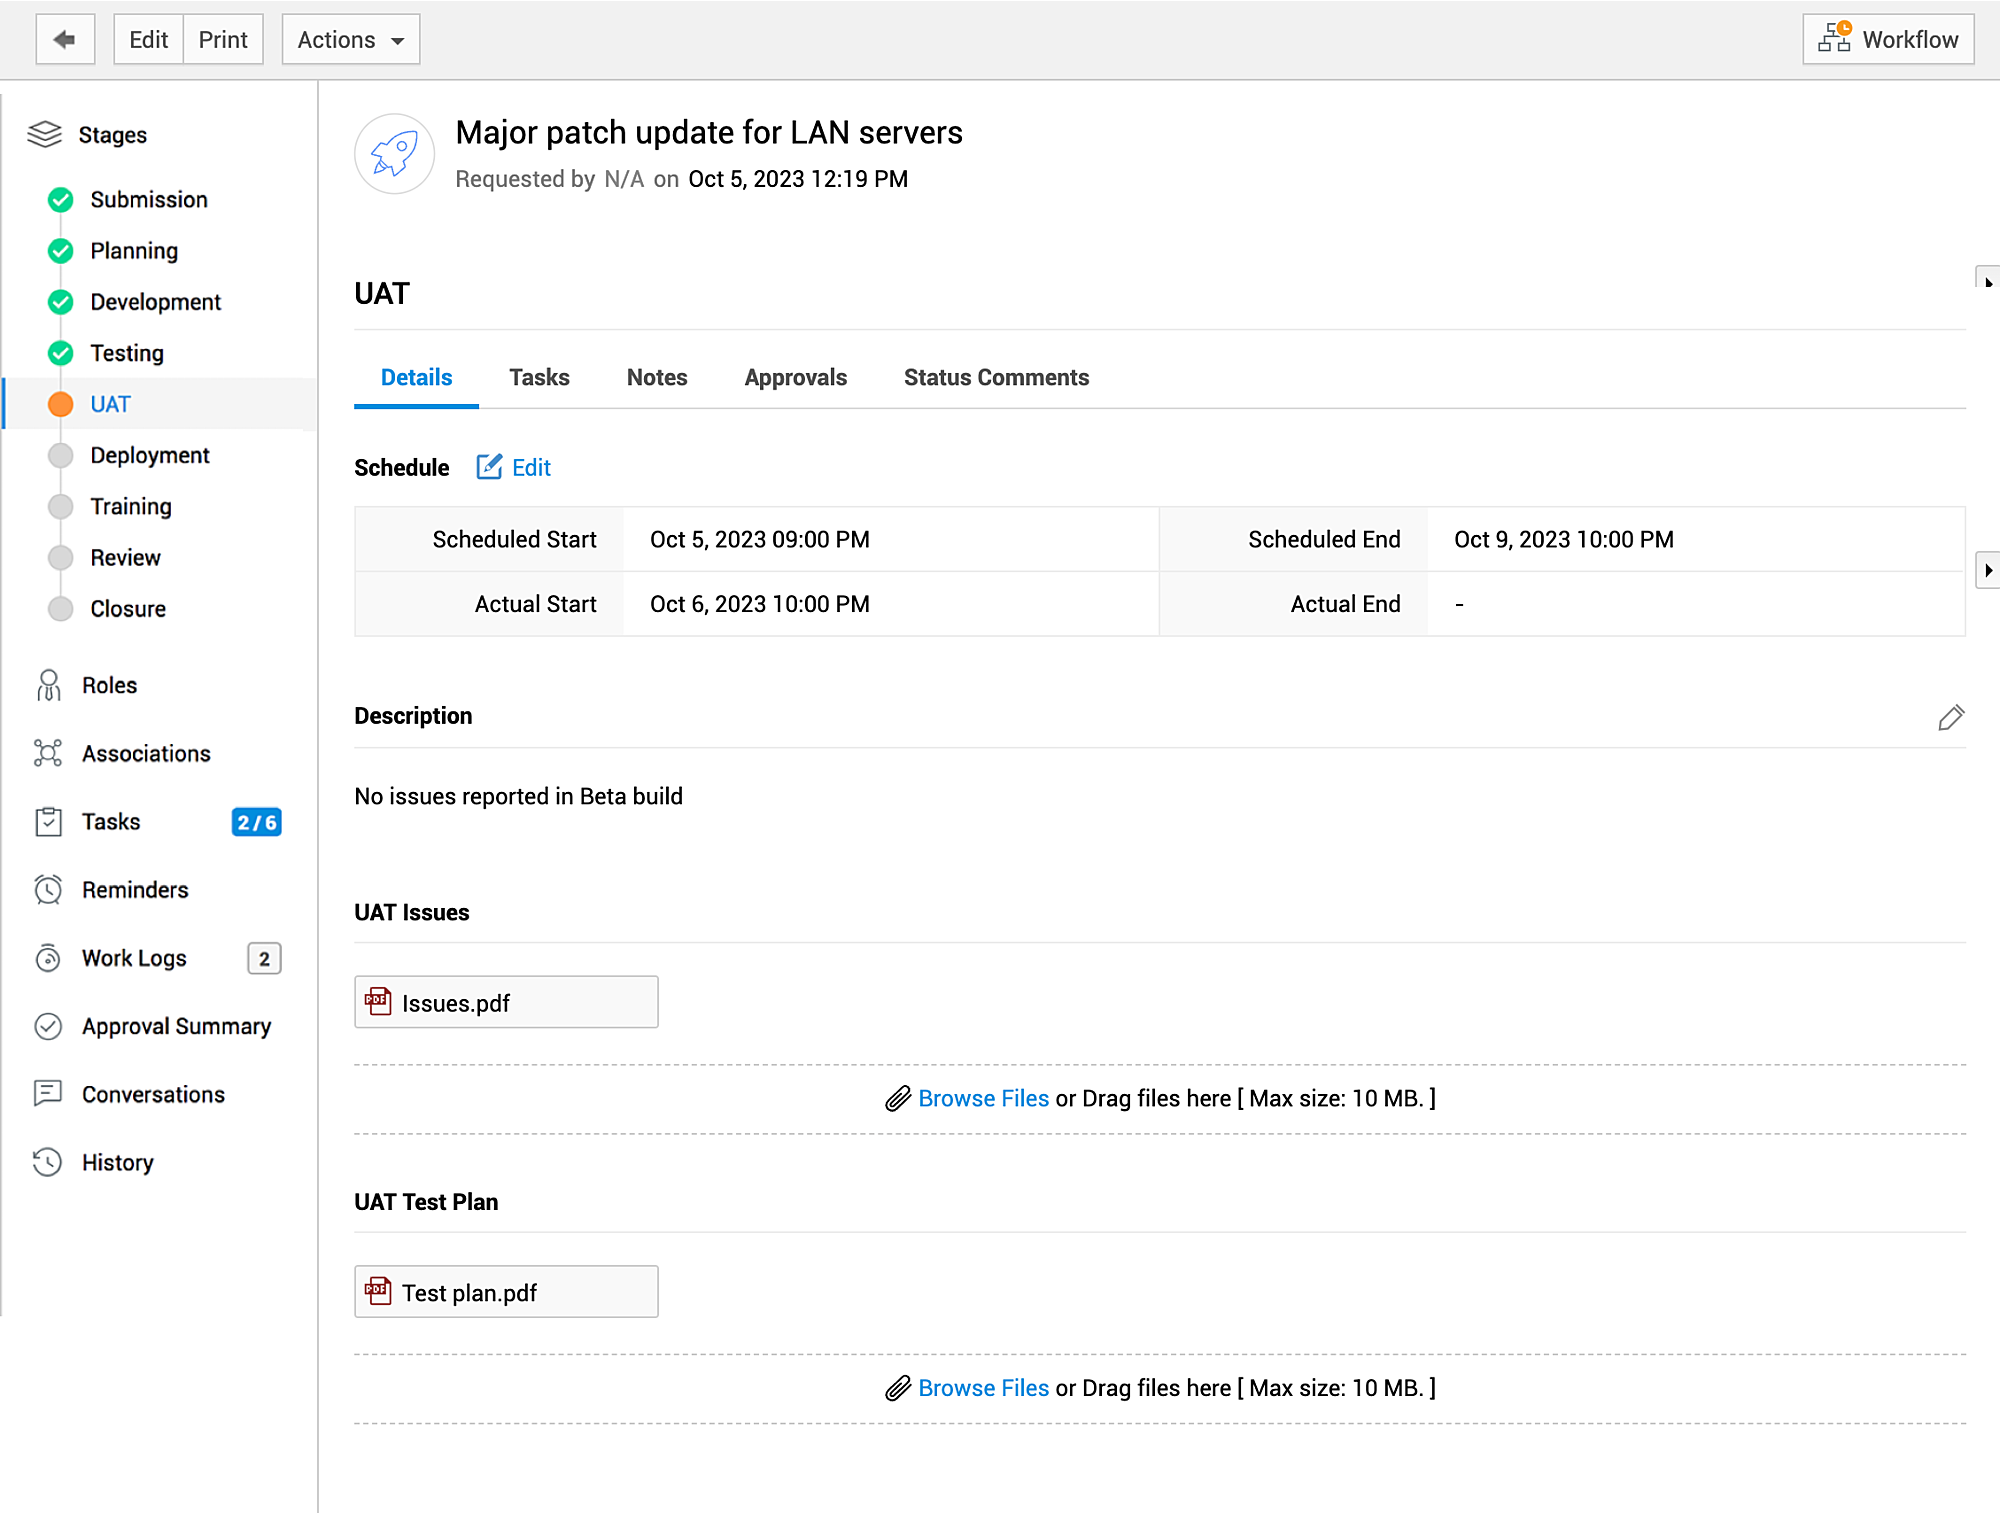
In User Acceptance Testing, the stakeholders and end users company-wide test the release processes in the 'real world' and give their feedback:
-
Map out a detailed plan and outline the business requirements & strategy.
-
Identify and create test cases that cover as many functional cases faced by users as possible.
-
Select users who can trial the release processes and provide feedback. You can offer the release package to the intended users as a beta trial or early adoption.
The users test the functionality checks of the processes involved in the release. If the processes succeed in functionality tests, then the users will test the release package against valid data in the production environment to determine if the processes meet the proposed business requirements.
All issues found during the UAT must be carefully documented to follow up on the resolution. Potential bugs and high-priority functionality issues will be immediately fixed. Other issues will be added to the pipeline of the next iteration. The UAT team approves the release after ensuring that the processes involved function as expected.
UAT is crucial for any product release because of the huge amount of 'real-world' data used for testing processes and user validation. UAT takes a holistic approach to the release, thus bringing deep insights on the release design, release execution, customer expectations and experience, and more.
Details
Add the scheduled start and end dates for the UAT testing. After UAT testing, you can add the actual start and end dates.
Specify stakeholders involved, append the beta build link (if any), and add further details in the description. After UAT, you can attach separate files for test cases and issues.
Tasks
You can add, trigger, edit, organize, delete, and close tasks necessary in each release stage. You can also track the task progress, filter tasks, search for tasks in the submission stage and spot-edit the task fields.
Notes
Click Add Notes to add important information about the UAT stage and tag users to notify them. You can edit and delete the notes.
Approvals
This tab displays the approvals configured in the workflow associated with the release request in the UAT stage. Depending on your permissions, you can perform approval actions on the release.
If no workflow is associated with the release, you can add approval levels for the UAT stage in this tab.
-
Navigate to Approvals tab and click Configure Level. If you have already configured levels, New Level.
-
Enter the Approval Level Name. This is mandatory.
-
Select the Auto-Approval Rule (%). This denotes that if the selected percentage of approvers choose to approve the release request, the UAT stage will be automatically approved regardless of the approval action from the reminder of approvers.
For example, if you choose 50% as your auto-approval rule, the release will be approved once half of your approvers approve the release.
-
Choose your users and stakeholders to perform approval actions from the Approvers drop-down.
-
Click Add.
You can add more approvals to an approval level by clicking Add Approvals.
From the Level Actions drop-down, you can approve, reject, edit or delete approval levels based on your scope.
Status Comments
This tab captures the status transitions of the release in the UAT stage. It also displays the comments added when the release status is modified.
Deployment
The release package authorized by the release management process is deployed to the production environment with exhaustive planning:
-
Ensure that the target environment is ready to admit the commissioned changes.
-
Analyze the CIs involved and mitigate any potential risk of disruption.
-
If the release involves the deployment of multiple components, the activities must be sequenced to avoid any scope for error. You can achieve this by creating and organizing tasks.
-
Start deploying the release.
-
Verify whether the deployed service works smoothly for stakeholders and end users.
At any time during deployment, you must be prepared to back out of the release with minimal or no interference in the production environment in the event of major problems.

Details
Add the scheduled start and end dates for the release deployment. After deployment, you can add the actual start and end dates.
Add a description of the deployment process and append files that contain issues.
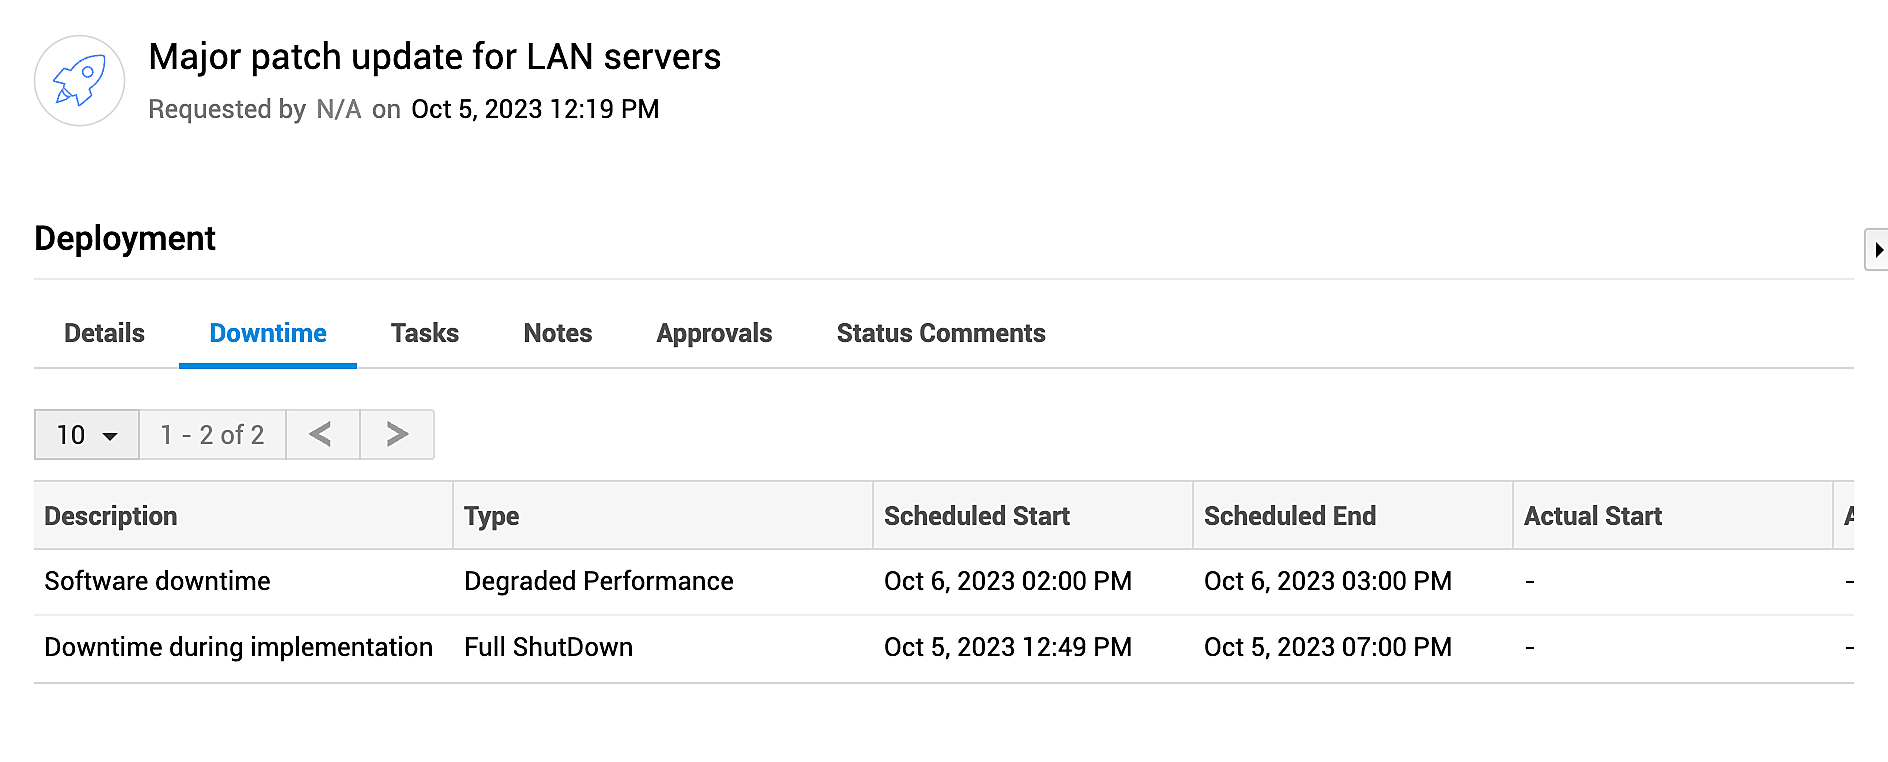
Downtimes
The downtimes added in the Planning stage and unplanned downtimes encountered when the release is underway are recorded and displayed in this tab. You cannot modify the downtimes scheduled from the deployment tab.
Tasks
You can add, trigger, edit, organize, delete, and close tasks necessary in each release stage. You can also track the task progress, filter tasks, search for tasks in the submission stage and spot-edit the task fields.
Notes
Add important information about the release stage here and tag users to notify them. You can edit and delete the notes.
Approvals
This tab displays the approvals configured in the workflow associated with the release request after the deployment stage. Depending on your permissions, you can perform approval actions on the release.
If no workflow is associated with the release, you can add approval levels for the deployment stage in this tab.
-
Navigate to Approvals tab and click Configure Level. If you have already configured levels, New Level.
-
Enter the approval Level Name. This is mandatory.
-
Select the Auto-Approval Rule (%). This denotes that if the selected percentage of approvers choose to approve the release request, the deployment stage will be automatically approved regardless of the approval action from the reminder of approvers.
For example, if you choose 50% as your auto-approval rule, the release will be approved once half of your approvers approve the release.
-
Choose your users and stakeholders to perform approval actions from the Approvers drop-down.
-
Click Add.
You can add more approvals to an approval level by clicking Add Approvals.
From the Level Actions drop-down, you can approve, reject, edit or delete approval levels based on your scope.
Status Comments
This tab captures the status transitions of the release in deployment stage. It also displays the comments added when the release status is modified.
Training
The Release Engineer educates end-users and the company at large to use the deployed service effectively. Depending on the significance of the changes deployed, you may have to provide robust ongoing training to bring your users up to speed.
User training is especially important for internal releases in your organization. Employees must be aware of the changes made to any service in use and the availability of new services to ensure better productivity.
Operational issues found during the initial period after the release deployment will be documented to be resolved in the next iteration.

Details
Add scheduled start and end dates for the release training. After training, you can add the actual start and end dates. Enter a short description of the training process and append related files, if any.
Tasks
You can add, trigger, edit, organize, delete, and close tasks necessary in each release stage. You can also track the task progress, filter tasks, search for tasks in the submission stage and spot-edit the task fields.
Notes
Add important information about the release stage here and tag users to notify them. You can edit and delete the notes.
Approvals
This tab displays the approvals configured in the workflow associated with the release request in the training stage. Depending on your permissions, you can perform approval actions on the release.
If no workflow is associated with the release, you can add approval levels for the training stage in this tab.
-
Navigate to Approvals tab and click Configure Level. If you have already configured levels, New Level.
-
Enter the approval Level Name. This is mandatory.
-
Select the Auto-Approval Rule (%). This denotes that if the selected percentage of approvers choose to approve the release request, the training stage will be automatically approved regardless of the approval action from the reminder of approvers.
For example, if you choose 50% as your auto-approval rule, the release will be approved once half of your approvers approve the release.
-
Choose your users and stakeholders to perform approval actions from the Approvers drop-down.
-
Click Add.
You can add more approvals to an approval level by clicking Add Approvals.
From the Level Actions drop-down, you can approve, reject, edit or delete approval levels based on your scope.
Status Comments
This tab captures the status transitions of the release in the training stage. It also displays the comments added when the release status is modified.
Review
The release reviewer assesses the release, including the entire release process efficiency, cost and time effectiveness, impact, intended and incidental outcomes, and more. The processes involved in each stage of the release will be thoroughly inspected. The Review Board also determines whether the release met the specified goals causing little or no disruption to the production environment.
Analysis made in the Review stage will be documented into a report in exhaustive detail, to help the release management team retrospect and act proactively in the future.

Details
Mark the next review date for the release and specify the scheduled start and end dates for the release review. After the review is completed, you can add the actual start and end dates. You can add a short description of the review process and append related files if any.
Tasks
You can add, trigger, edit, organize, delete, and close tasks necessary in each release stage. You can also track the task progress, filter tasks, search for tasks in the submission stage and spot-edit the task fields.
Notes
Add important information about the release stage here and tag users to notify them. You can edit and delete the notes.
Approvals
This tab displays the approvals configured in the workflow associated with the release request in the review stage. Depending on your permissions, you can perform approval actions on the release.
If no workflow is associated with the release, you can add approval levels for the review stage in this tab.
-
Navigate to Approvals tab and click Configure Level. If you have already configured levels, New Level.
-
Enter the approval Level Name. This is mandatory.
-
Select the Auto-Approval Rule (%). This denotes that if the selected percentage of approvers choose to approve the release request, the training stage will be automatically approved regardless of the approval action from the reminder of approvers.
For example, if you choose 50% as your auto-approval rule, the release will be approved once half of your approvers approve the release.
-
Choose your users and stakeholders to perform approval actions from the Approvers drop-down.
-
Click Add.
You can add more approvals to an approval level by clicking Add Approvals.
From the Level Actions drop-down, you can approve, reject, edit or delete approval levels based on your scope.
Status Comments
This tab captures the status transitions of the release in the review stage. It also displays the comments added when the release status is modified.
Closure
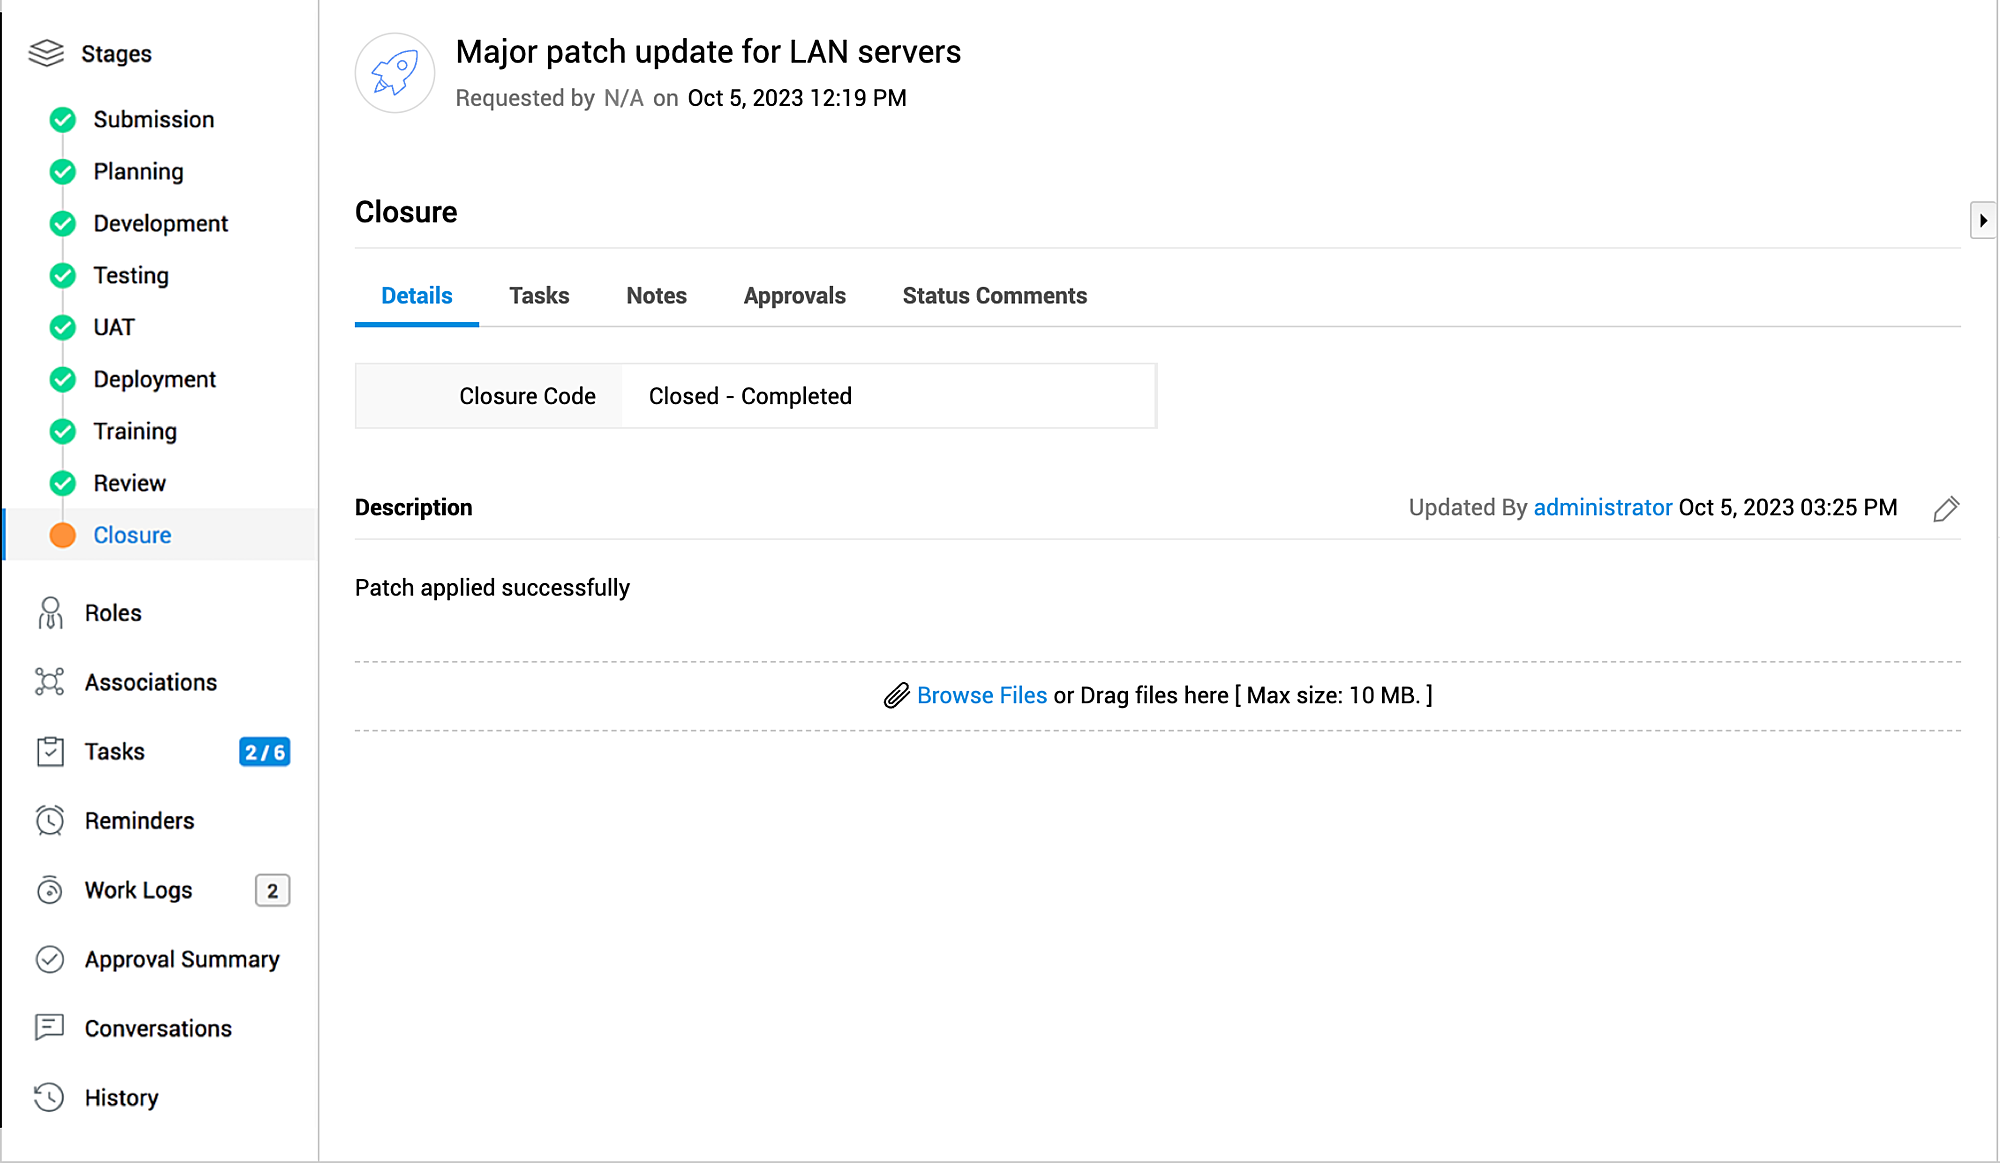
The life cycle of all release processes ends with the Closure stage. The release coordinator associates a closure code for the release. The closure code provides details on whether the release is closed due to cancellation, rejection, completion, or other reasons. This explains to the stakeholders the reason for closing a release request in a nutshell.
Details
Select the closure code from the drop-down to provide details on whether the release is closed due to cancellation, rejection, completion, or other reasons. Provide a short description of the release closure and attach files, if any.
See also: Closure Codes
Tasks
You can add, trigger, edit, organize, delete, and close tasks necessary in each release stage. You can also track the task progress, filter tasks, search for tasks in the submission stage and spot-edit the task fields.
Notes
Add important information about the release stage here and tag users to notify them. You can edit and delete the notes.
Approvals
This tab displays the approvals configured in the workflow associated with the release request in the closure stage. Depending on your permissions, you can perform approval actions on the release.
If no workflow is associated with the release, you can add approval levels for the closure stage in this tab.
-
Navigate to Approvals tab and click Configure Level. If you have already configured levels, New Level.
-
Enter the approval Level Name. This is mandatory.
-
Select the Auto-Approval Rule (%). This denotes that if the selected percentage of approvers choose to approve the release request, the training stage will be automatically approved regardless of the approval action from the reminder of approvers.
For example, if you choose 50% as your auto-approval rule, the release will be approved once half of your approvers approve the release.
-
Choose your users and stakeholders to perform approval actions from the Approvers drop-down.
-
Click Add.
You can add more approvals to an approval level by clicking Add Approvals.
From the Level Actions drop-down, you can approve, reject, edit or delete approval levels based on your scope.
Status Comments
This tab captures the status transitions of the release in the closure stage. It also displays the comments added when the release status is modified.
See also:
-
Release Stage and Status
-
Manage tasks
-
View Conversations and Add Notes

