Custom Views
You can create your own customized page to display requests using Custom View option. You can specify the criteria to filter the requests accumulated in your requests list view page. Thus helping you to sort and view requests based on your requirement.
Creating Custom View
If you want to view all the "High" priority requests in the application through Custom View.
-
Click Request tab in the header pane to open the request list view page.
-
Click  in the Views section and select Add Custom View from the drop-down list.

-
In the Add Custom View page, specify a View Name like "High Priority" requests. This field is mandatory.
-
If you are the administrator and want this custom view to be available only when you log in, select the check box beside Make this view as private custom view. The custom view is made private. By default, the custom view for an administrator is public.
If you are a support rep without administrator login privilege then by default the created custom view is private. The option to "Make this view as private custom view" is not available.
-
In the Advance Filtering block, select the criteria to be filtered from Column drop down along with its matching Criteria. For instance, select "Priority" from Column drop down and "is" from criteria.
-
Click on Choose button.
-
From Select Column Data pop up choose your option as "High". You can select options based on your selected column and criteria.
-
Click Add to Filter button to save the filter criteria details. The filter criteria is listed in Filter Set block.
-
If you wish to add more filter conditions to this view then, select the required column, criteria & conditions of the filter.
-
If there are more than two criteria, specify AND or OR conditions by enabling either of the two radio buttons.
-
Click Save. Click Save and Add New to save and add another custom view.
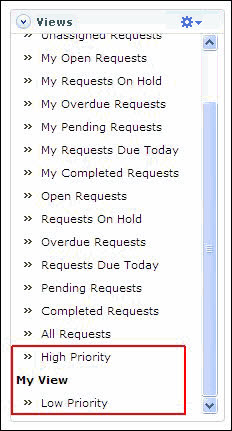
The Custom View is now displayed under Views in the request list view page. The custom view marked as private is listed under My Views and the public custom view is displayed along with the predefined filters.
Reorder Views
Reorder feature allows to set the order of view preferred in the Views section. The reorder feature in Request Module allows you to set the order of request views.
To reorder the request view:
-
Click Requests tab in the header pane to open the request list view page.
-
Click in the Views section and select Reorder Views from the drop-down list. The Reorder Views pop up window is displayed.
-
Select a view which you wish to reorder. Say, 'My Pending Requests' and click  to move the view upward or click
  to move the view downward.
-
Click Save. The selected view is reordered.
Manage Custom Views
You can view all your customized view under Manage Custom Views. From this page you can add, edit and delete a custom view.
-
Click Request tab in the header pane to open the request list view page.
-
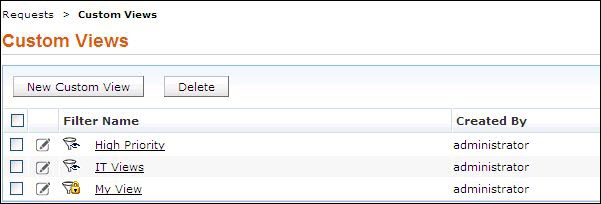
Click in the Views section and select Manage Custom View from the drop-down list. The Custom View page opens listing all the created custom views.
|
Note

|
1.If you are the administrator then you can view all your customized private and public views.
2. If you are a support rep then you can add only private custom views.
|
Edit Custom Views
To edit a custom view,
-
Click the edit icon beside the filter name you wish to edit.
-
From Edit Custom View page, edit the details.
-
Click Save. You can also add a new custom view by clicking Save and Add New button.
Delete Custom Views
To delete custom views,
-
Select the check box beside the custom views to be deleted. The administrator has the privilege to create and delete public views.
-
Click Delete button. A pop up window confirming the delete operation appears.
-
Click Ok to proceed. The Custom View is deleted from the list.
 - indicates the custom view is public and can be viewed by all users.
  - indicates the custom view is private and can be viewed only by the creator of the custom view.