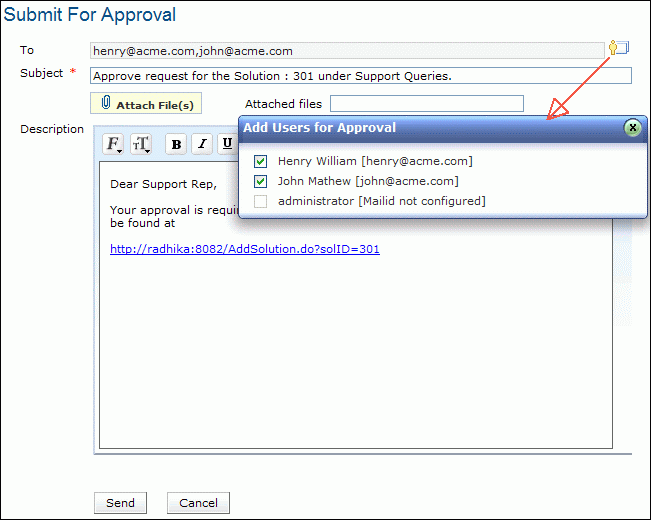
Submit for Approval
In order to view the solution in customer portal, the solution needs to be sent for approval to the support reps with the permission to approve solutions [Refer Configuring Roles].
To submit solutions for approval,
-
Click on the Solutions tab in the header pane to open the solution list view page.
-
From the solution filter, select Solution-Draft to view the list of solutions that need to be sent for approval.
-
Click on the Subject link of the solution to be submitted for approval.
-
From the solutions details page, click on Approval Actions -> select Submit for Approval option. The Submit for Approval form pops up.

-
Invoke the icon  to specify the To address. The Add Users for Approval pop up listing the name and email address of the support reps with the role to approve solutions.
-
Enable the check box beside support rep whom you want to submit the solution for approval.
-
The To text field gets filled with the email address of the corresponding administrator. If the email address is not specified for a support rep,the check box beside that support rep cannot be enabled.
-
The Subject and Description is entered as given in Notification Rules email template. If required, you can modify the subject and description content manually, else you can change the same from the Notification Rules email template.
-
You can attach relevant files by selecting Attach File button.
-
Click Send to submit the solution for approval.
The mail notification is sent to the person addressed in the To field of the notification. The mail contains the link to the specific solution which needs approval. On clicking the link, it leads you to the login screen, where on providing proper credentials, the solution awaiting approval opens. To approve/reject solutions refer Approve/Reject Solutions.


 to specify the