Installing SSL Certificate
SupportCenter Plus can run as a HTTPS service. But it requires a SSL (Secure Socket Layer) Certificate signed by a valid Certificate Authority (CA).
By default, on first time start-up, it creates a self-signed certificate. This self-signed certificate will not be trusted by the user browsers. Thus, while connecting to SupportCenter Plus, you need to manually verify the certificate information and the hostname of SupportCenter Plus server carefully and should force the browser to accept the certificate.
To make SupportCenter Plus server identify itself correctly to the web browser and the user, you need to obtain a new signed certificate from a CA for the SupportCenter Plus host. You can use keytool (bundled with Java) to create your certificates, get them signed by a CA and use them with SupportCenter Plus.
Steps to install SSL in SupportCenter Plus
The steps involved in configuring SupportCenter Plus to use the SSL are as given below.
NOTE: In all the images, replace the highlighted text with the alias name you want to use for the SupportCenter Plus.
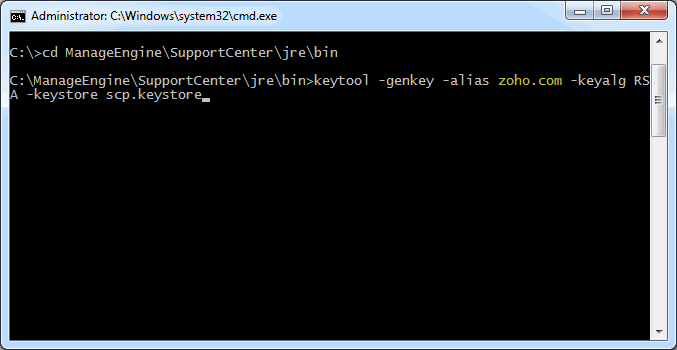
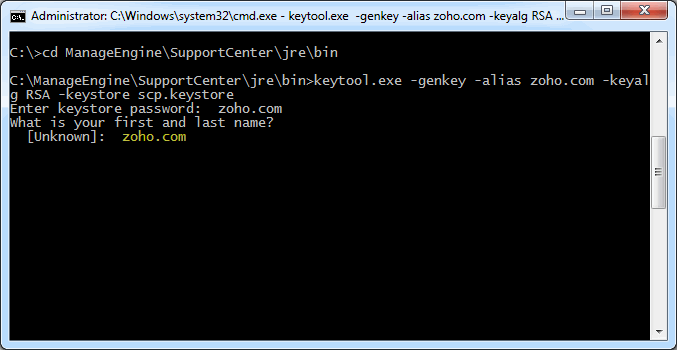
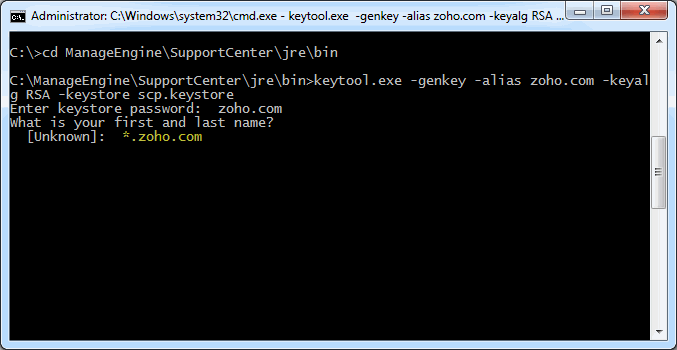
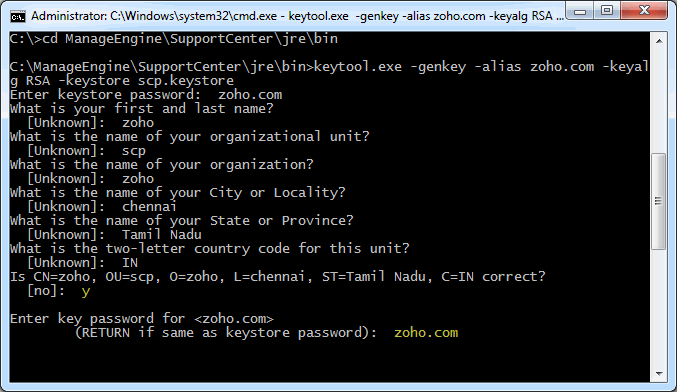
Step 1: Create a Keystore file
Before requesting for a certificate from a CA, you need to create tomcat specific ".keystore" file and ".csr" file. The .keystore file and .csr file will include information provided by the individual who creates the .keystore and .csr files.
To create the .keystore file follow the below steps,
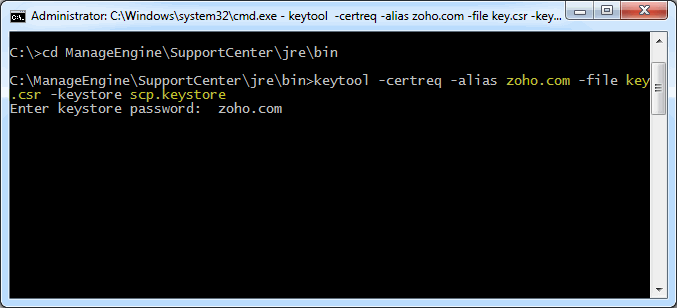
Step 2: Creating .CSR (Certificate Signing Request) file
The .CSR (Certificate Signing Request) file is temporary and should be submitted to a CA to receive CA-Signed Certificate files.
Please follow the steps given below to create the CSR file.
Step 3: Install your SSL Certificate
Download the Certificate files received from the CA via e-mail to the directory where your keystore (scp.keystore) was saved during the CSR creation process. The certificates must be installed to this exact keystore. If you try to install it to a different keystore it will not work.
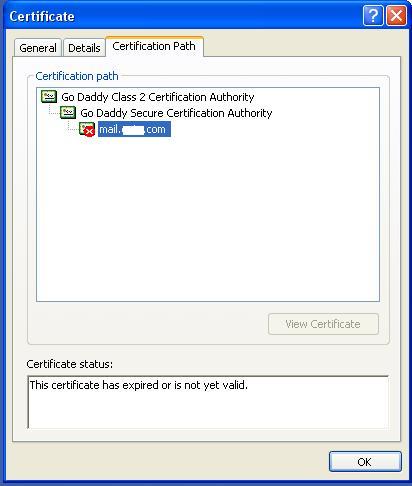
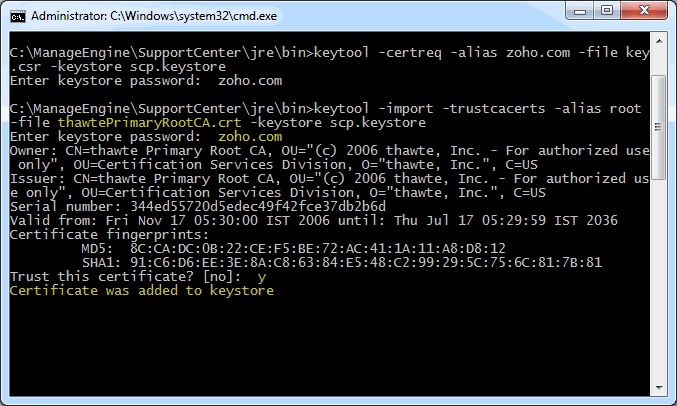
The certificates you had downloaded must be installed to your keystore in the correct order for your certificate to be trusted. If the certificates are not installed in the correct order, then the certificate will not authenticate properly. To find the correct order, double click on the domain certificate and then go to ‘Certification Path’. These certificates are usually in the format .cer or .crt. If your certificate is with the extension .p7b please follow the instructions given in Installing a .P7b Certificate to export the certs to a .cer or .crt format. Looking at the above certification path we can infer that we need to import two other certificates before the domain certificate. First is the Root, next the Intermediate and finally the Domain Certificate. Some CAs may also use another certificate called Cross Intermediate. These certificates can be downloaded from the Vendor’s website. keytool -import -trustcacerts -alias root -file <File_Name>.crt -keystore scp.keystore
You will get a confirmation stating that the "Certificate was added to keystore".
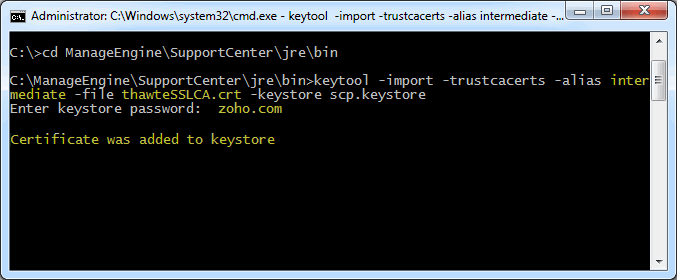
Install the Intermediate Certificates and Cross Intermediate Certificates (if any).
Follow the instructions provided by the CA. keytool -import -trustcacerts –alias intermediate -file <File_Name>.crt -keystore scp.keystore keytool -import -trustcacerts –alias cross -file <File_Name>.crt -keystore scp.keystore You will get a confirmation stating that the "Certificate was added to keystore".
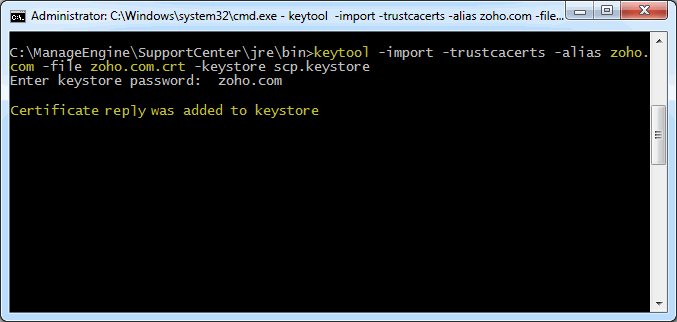
Install the Primary or the Domain Certificate file keytool -import -trustcacerts -alias <your_alias_name or [Domain Name]> -file your_domain_name.crt -keystore scp.keystore Please note that <your_alias_name or [Domain Name]> should be replaced with the alias name provided when creating the keystore (as discussed in Step 1). This time you will get a different confirmation stating that the "Certificate reply was installed in keystore”. If you want to trust the certificate, then choose y or yes. Your Certificates are now installed to your keystore file (scp.keystore).
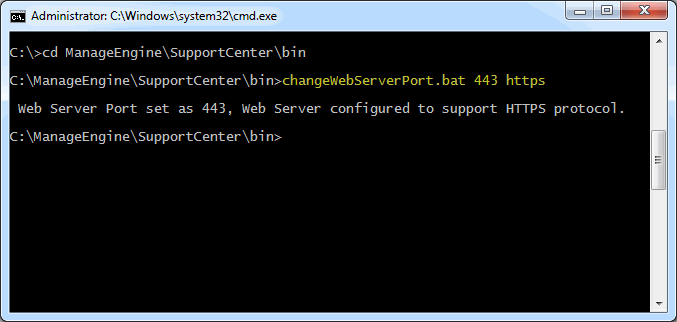
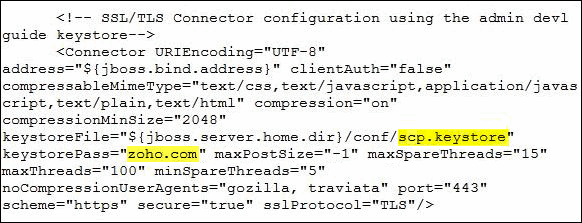
Step 4: Configuring the Server
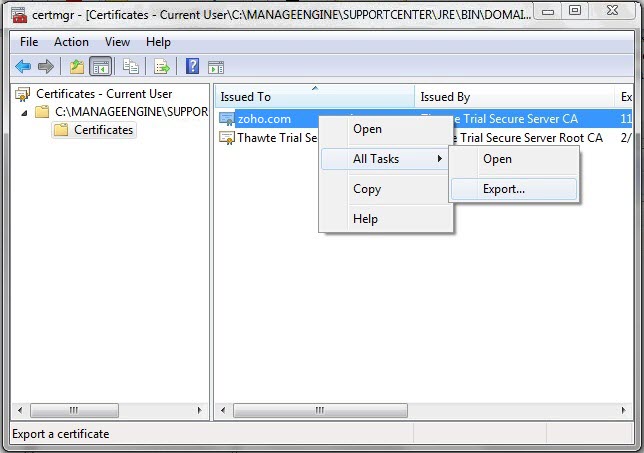
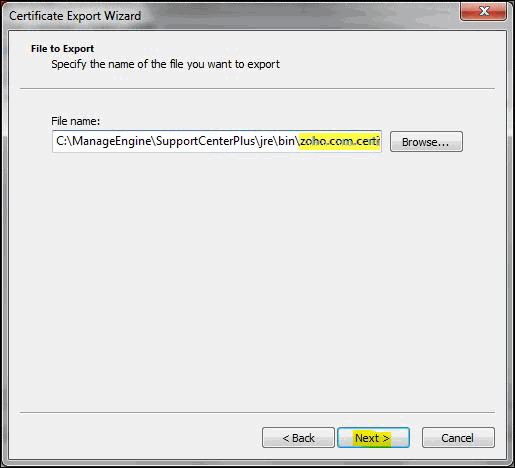
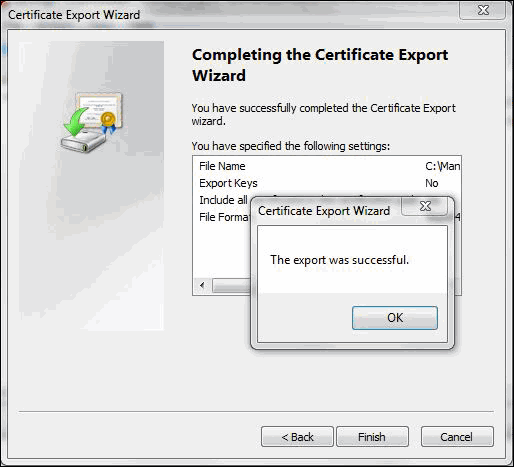
Some CA will provide the certificates with an extension .p7b. In such a case you can double click on this file to open a console which will list all the required certificates. You can export these certificates to Base-64 encoded X.509 (.cer) files. (Please refer to the Screenshots given below).
These certs can then be installed onto the keystore file using the instructions given in Step 3.
To export the certificate,
Commands to install certificates of some common vendors
Please find below the commands you need to use to install certificates of some common vendors. NOTE: These instructions might change depending on the Certificates issued by the CA.
GoDaddy If your CA is "GoDaddy", then the steps to follow will be:
keytool -import -alias root -keystore <Keystore_Name>.keystore -trustcacerts -file gd_bundle.crt keytool -import -alias cross -keystore <Keystore_Name>.keystore -trustcacerts -file gd_cross_intermediate.crt keytool -import -alias intermediate -keystore <Keystore_Name>.keystore -trustcacerts -file gd_intermediate.crt keytool -import -alias <Alias Specified when creating the Keystore> -keystore <Keystore_Name>.keystore -trustcacerts -file <CertificateName>.crt
Verisign If your CA is "Verisign", then the steps to follow will be:
keytool -import -alias intermediateCA -keystore <Keystore_Name>.keystore -trustcacerts -file <your_intermediate_certificate_name>.cer keytool -import -alias <Alias Specified when creating the Keystore> -keystore < Keystore_Name>.keystore -trustcacerts -file <CertificateName>.cer
Comodo If your CA is "Comodo", then the steps to follow will be:
keytool -import -trustcacerts -alias root -file AddTrustExternalCARoot.crt -keystore <Keystore_Name>.keystore keytool -import -trustcacerts -alias addtrust -file UTNAddTrustServerCA.crt -keystore <Keystore_Name>.keystore keytool -import -trustcacerts -alias ComodoUTNServer -file ComodoUTNServerCA.crt -keystore <Keystore_Name>.keystore keytool -import -trustcacerts -alias essentialSSL -file essentialSSLCA.crt -keystore <Keystore_Name>.keystore keytool -import -trustcacerts -alias <Alias Specified when creating the Keystore> -file <Certificate-Name>.crt -keystore <Keystore_Name>.keystore |