Help Desk Roles
Create Help Desk Roles
SharePoint Manager Plus offers two predefined help desk roles. You can also create new customized roles to meet your specific requirements. These can be assigned to the desired users to empower them to perform SharePoint tasks, within the specified administrative boundaries.
To create a new help desk role, follow the steps below:
- Navigate to the Delegation tab → Help Desk Delegation → Help Desk Roles.
- Click the Create New Role button located at the top-right corner to create a new role from scratch. You can also create a new role by copying an existing role. To copy a role, follow these steps.
- Enter the Role Name and Description.
- From the list of tasks listed under Reports, Audits, Management, Monitoring, Migration, Backup, and Others, select the tasks that you wish to include in this role.
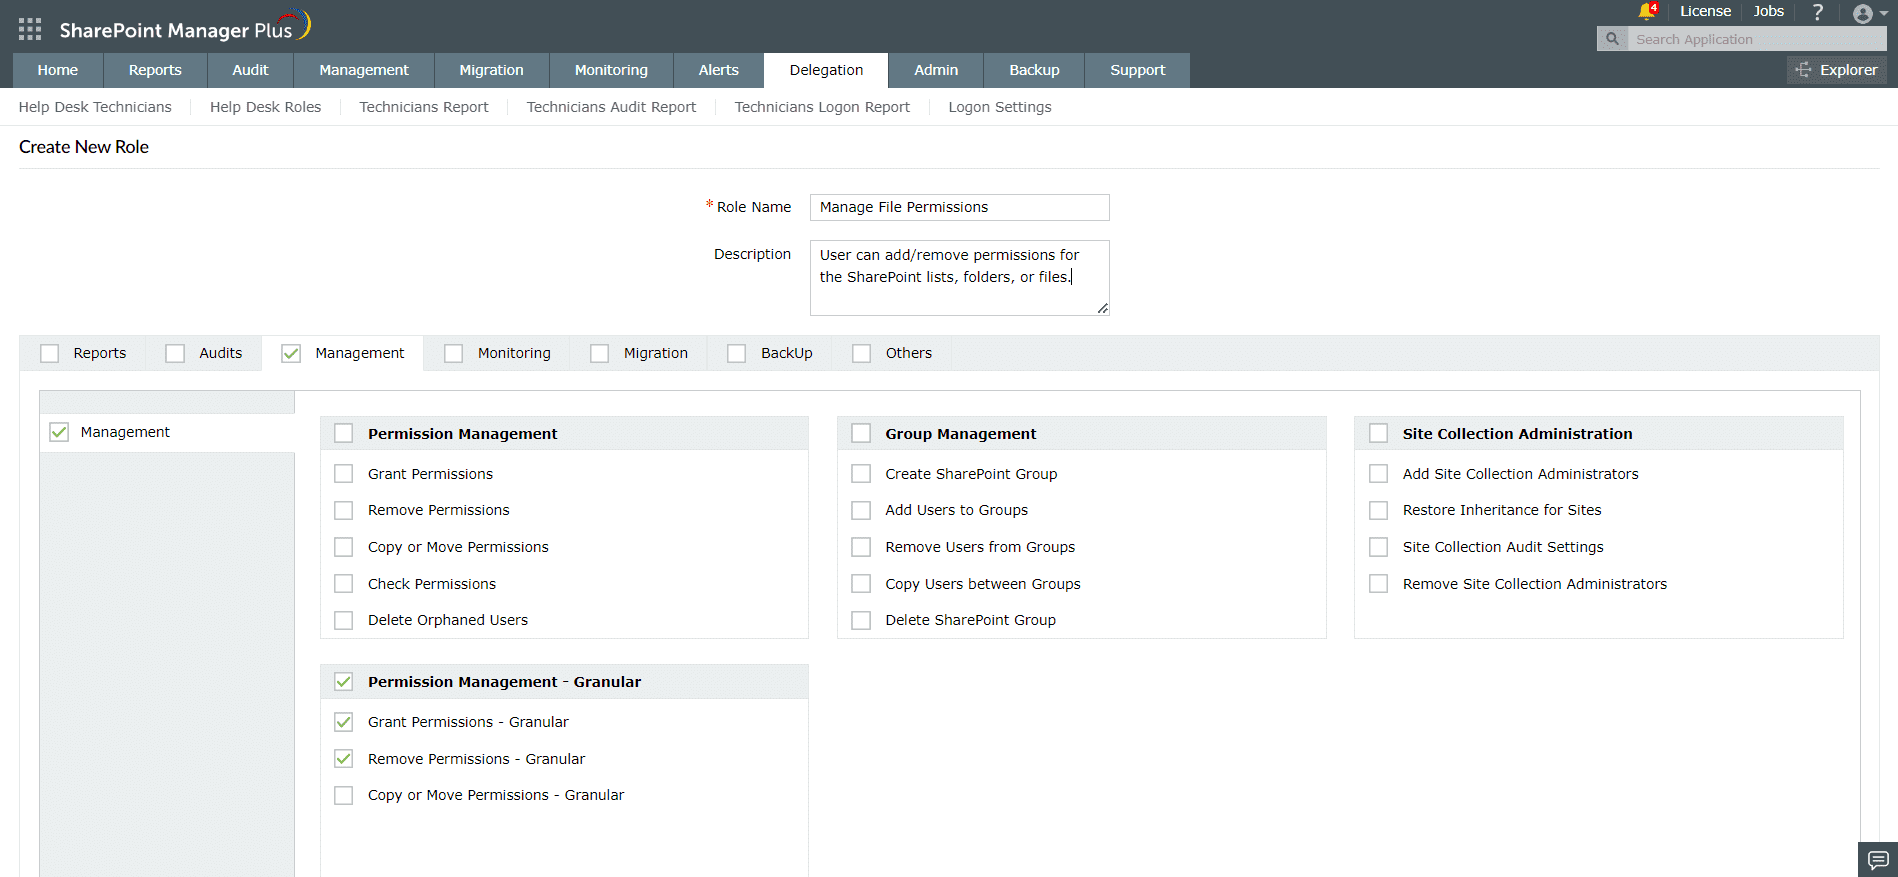
- You can select all the tasks in a tab using the check-box next to the tab's name.
- If you wish to limit the role to either online or on-premises environments, you can do so by selecting the respective check-boxes on the side bar.
- Click Create.
Modify Help Desk Roles
You can perform the following modification operations to help desk roles:
Copy a help desk role
This feature helps you to create a new role just by copying the privileges or tasks from an existing role.
For example, say you wish to create a new role that will allow a technician to create SharePoint groups and also generate user-based reports. Instead of creating a new role from scratch, you can just copy the existing Operator role and edit it to add the relevant permissions for generating the desired user reports. This makes creating new help desk roles quick and simple.
Follow these steps to copy a help desk role:
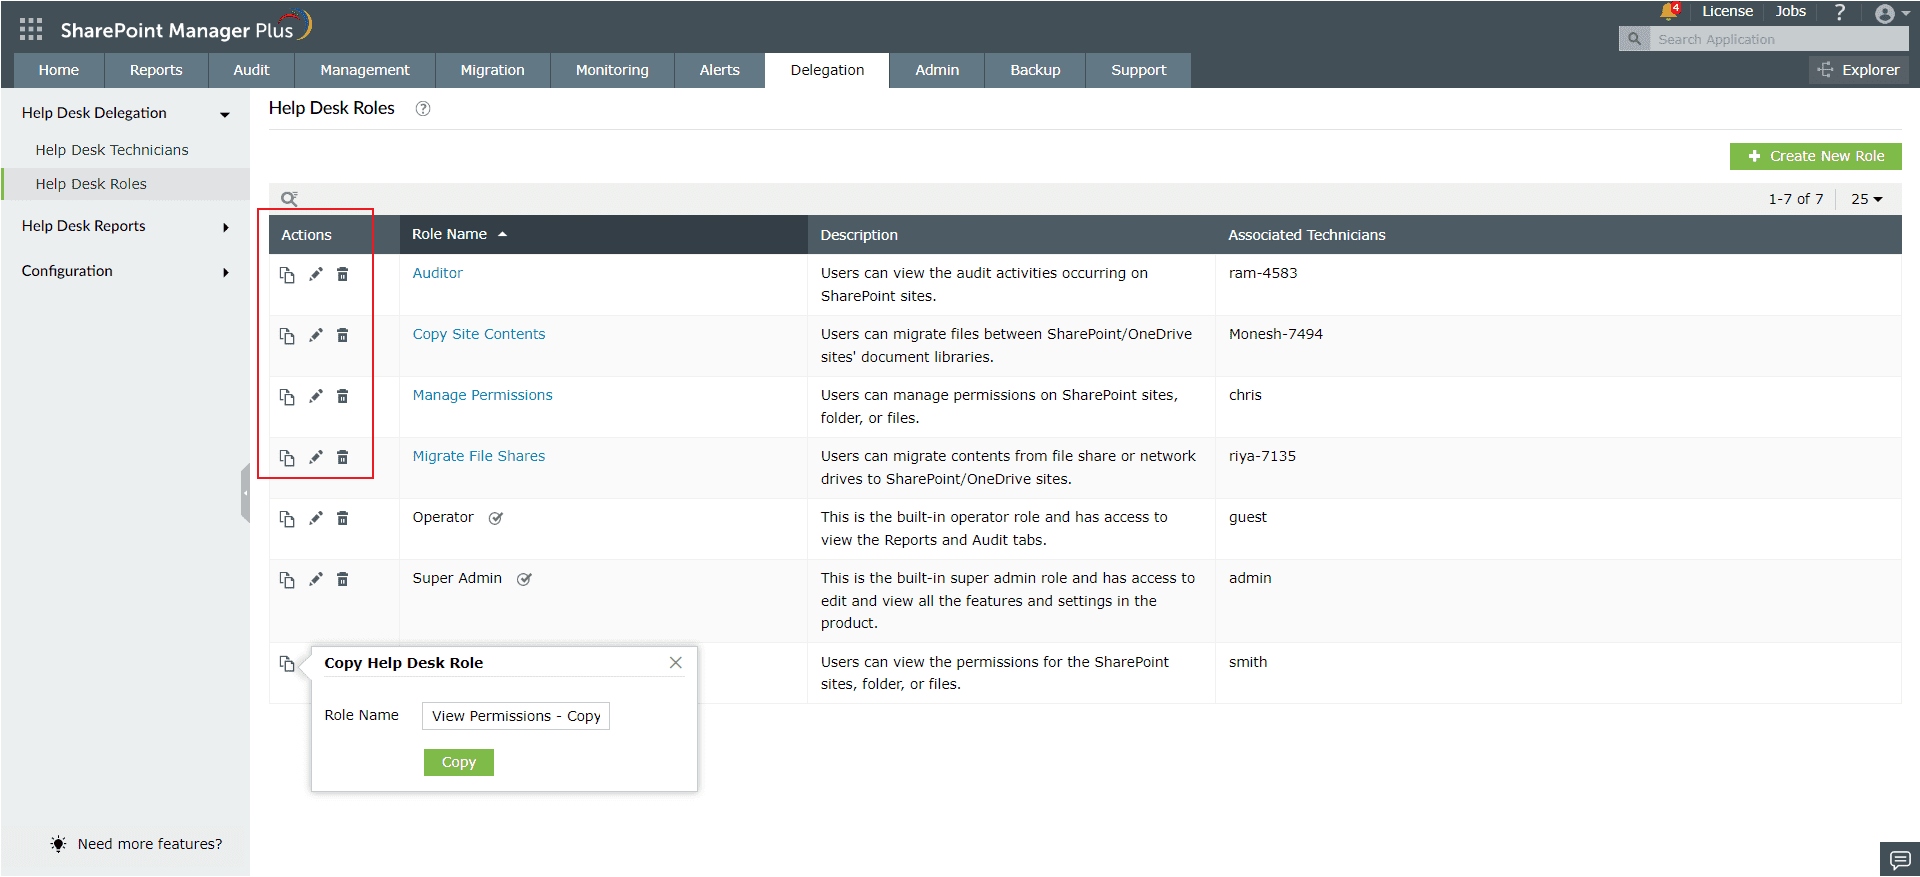
- Navigate to the Delegation tab → Help Desk Delegation → Help Desk Roles.
- From the list of available help desk roles, locate the one you wish to copy.
- Click the
 icon located in the Actions column of the required help desk role.
- In the Copy Help Desk Role pop-up that opens, enter a name for the new role and click Copy. You can now find the new role in the list of available help desk roles.
- To add or remove permissions to the new role (created by copying an existing role), click the
 icon under the Actions column of the role.
- From the list of tasks listed under Reports, Audits, Management, Monitoring, Migration, Backup, and Others, select the tasks that you wish to include in this role.
- Click Update.
Edit a help desk role
- Navigate to the Delegation tab → Help Desk Delegation → Help Desk Roles.
- Locate the role that you would like to modify and click the icon under the Actions column.
- Edit the properties of the role and click Update.
Delete a help desk role
- Navigate to the Delegation tab → Help Desk Delegation → Help Desk Roles.
- Locate the role that you would like to delete and click the
 icon under the Actions column.
- In the confirmation pop-up, click OK.
 ADManager Plus
 ADAudit Plus
 ADSelfService Plus
 SharePoint Manager Plus